-

Win a Free Custom Engraved Brass Coin!!!
As a way to introduce our brass coins to the community, we will raffle off a free coin during the month of August. Follow link ABOVE for instructions for entering.
-

PRE-ORDER SHIPS IN SCALE TODAY!
The beloved Ships in Scale Magazine is back and charting a new course for 2026!
Discover new skills, new techniques, and new inspirations in every issue.
NOTE THAT OUR FIRST ISSUE WILL BE JAN/FEB 2026
You are using an out of date browser. It may not display this or other websites correctly.
You should upgrade or use an alternative browser.
You should upgrade or use an alternative browser.
Welcome aboard!
Welcome aboard, there are many build logs of the Dory available, there are also a few you tube videos that may be worth looking at.
I think this forum is helpful also
I think this forum is helpful also
New Year's Greetings
I am attaching some pics I took of my Lowell Dory build. I started the project before finding this group so have partially completed the work. I just finished the false stem and will now move to the next steps. I've been working on the oars, but they are not finished enough to share with the group.
I've learned a lot already from comments on other Build Projects; sometimes the instructions give you room to make your own decisions. It's good to see how others have approached the same issues.
This is my first attempt to upload pics of my progress. Fingers crossed. Thanks for your encouragement.
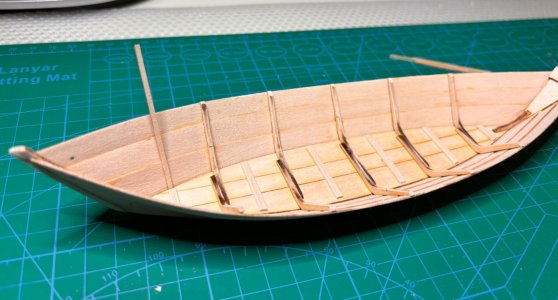
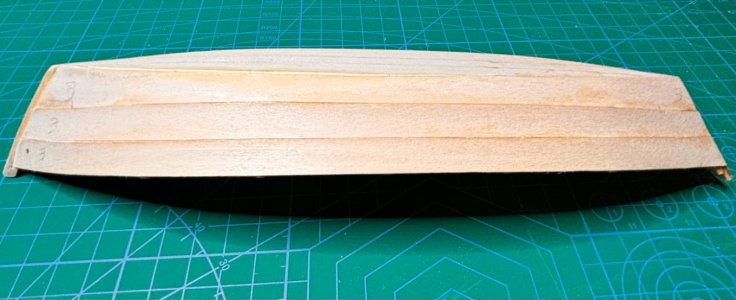
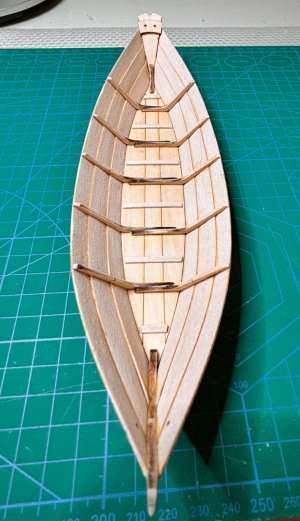


Looks much better than my Dory! Nice and neat!
Hello
Making progress. The dory seems to be nearly ready to paint but I have a question for the group. It appears to me that the transom and stern cleat are too high relative to the planking; the upper sheer plank, bands and gunwales are in place awaiting the cap rail, yet the planks don't appear to join the stern cleat and transom at the level indicated in the pictures included in the assembly instructions. I'm pretty careful. the garboard plank was added flush to the bottom. All other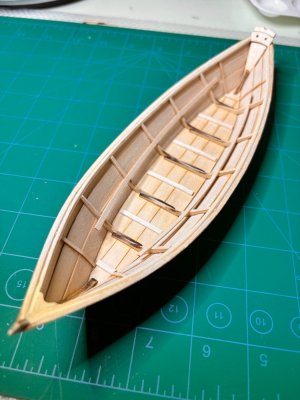
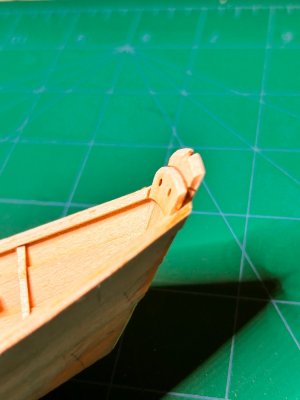
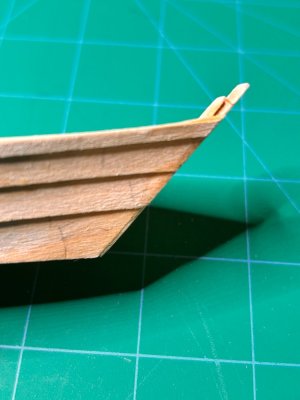 planks were added to the edge of the bevel on the previous plank (the marked line), yet I seem to come up 'short' at the transom. It won't be so far off from the photos when the cap rail is added, but it doesn't seem right. Please see attached photos. Any and all advice and comments are welcomed even if this cannot be fixed on this build. I'm eager to learn.
Thanks.
Making progress. The dory seems to be nearly ready to paint but I have a question for the group. It appears to me that the transom and stern cleat are too high relative to the planking; the upper sheer plank, bands and gunwales are in place awaiting the cap rail, yet the planks don't appear to join the stern cleat and transom at the level indicated in the pictures included in the assembly instructions. I'm pretty careful. the garboard plank was added flush to the bottom. All other


 planks were added to the edge of the bevel on the previous plank (the marked line), yet I seem to come up 'short' at the transom. It won't be so far off from the photos when the cap rail is added, but it doesn't seem right. Please see attached photos. Any and all advice and comments are welcomed even if this cannot be fixed on this build. I'm eager to learn.
Thanks.
I believe I had the same problem. If I remember correctly I cut down the stern transom so it was not protruding as much. The boat looks great!
Rob
Rob
Update:
Laying on a thin, first coat of Ochre to the inside of the dory with a brush after priming the entire boat with gray spray primer. I'm now experiencing the many, many crannies that others in the build forum have reported. Not terrible but tedious.
I'm curious how many of y'all use bristle brushes to do this work and how many use Air Brushes to do the painting. I don't have one but am curious which y'all might recommend for a guy on a modest budget and a shared hobby room (not too much noise, please).
Will send pictures when it looks better.
BTW, I decided to not trim the transom. Going with it as is.
Thanks.
I use a Brush for my Dory, but I have a airbrush also. I find the airbrush much more useful for plastic models. There are many many you tube videos about airbrushes. You can buy a fairly quiet compressor (it should have a tank for the air don't get a tank-less one IMHO), remember if you use an airbrush, you will most likely need to get a spraybooth unless you use it outside. You can always build one of those also. There are many examples on You tube.
Rob
Rob
Howdy; Been offline for a while but busy.
Here is my Completed Lowell Grand Banks Dory (1:24). Had a blast making this and profited a lot from comments here and elsewhere. I look forward to starting the Norwegian Sailing Pram, also from Model Shipways, and expanding my building skills. Thanks to all for help and encouragment.
Larry
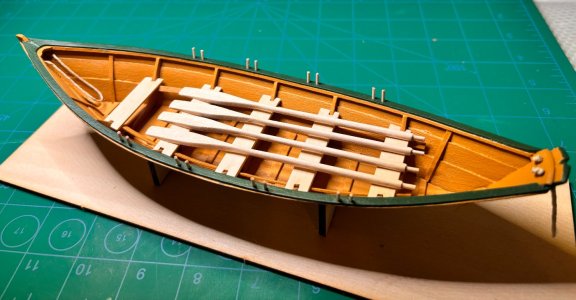
Here is my Completed Lowell Grand Banks Dory (1:24). Had a blast making this and profited a lot from comments here and elsewhere. I look forward to starting the Norwegian Sailing Pram, also from Model Shipways, and expanding my building skills. Thanks to all for help and encouragment.
Larry

Congratulations! It is a beautiful boat!
Nice Job. Congrats
Larry, I have a question about the cap rail. I have just completed painting the Dory and I am getting ready to fit and attach cap rails. Am I correct in assuming the cap rail is glued only to the sheer plank and band and there is a gap between the gunwale and cap rail. Looking at your finished Dory, I don't see that gap.
Very nice looking Dory by the way.
Roger
Very nice looking Dory by the way.
Roger
You have sharp eyes. My build does not have a gap between the cap rail and the gunwale. This is, in part, due to over sanding of the sheer edge after the gunwales were installed, although I still had a small 'ledge' between the sheer and the gunwale. And even though I only applied glue to the top edges of the sheer planks, some glue must have oozed and my clamping caused them to fuse. I started the installation using finger pressure to hold the cap rail in place (as instructed) but fatigued of this and used 2 inch clamps instead. The greater pressure provided by the clamps probably sealed the cap rail to the gunwale as well.
My advice, then, is to glue 2 inch sections (as instructed) using finger pressure and sit still until the glue sets before moving on.
That was a good 'catch' on your part.
My advice, then, is to glue 2 inch sections (as instructed) using finger pressure and sit still until the glue sets before moving on.
That was a good 'catch' on your part.
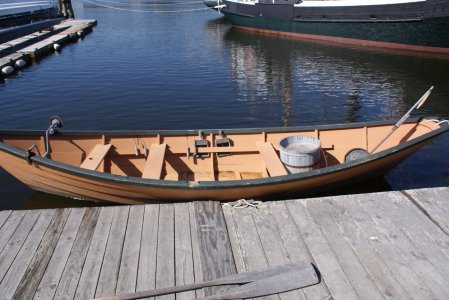
My curiosity is piqued. I would like to do things as historically accurate as possible so have done a very short web search about the 'gap' between cap rail and gunwale. I have no answer, but pictures of other modelers outcomes and pictures of authentic Lowell Dories from Nova Scotia and Lowell boat works seem to indicate no gap. One modeler, Jacques Cousteau at Model Ship World (2023), who seems to be very careful appears to have a small gap. But, like the instruction manual, his comments omit any info regarding the 'gap'. Is there a gap? I imagine it will vary but the authentic dories do not seem to have a gap, as indicated by Allan. One lovely boat (last picture) actually appears to omit the cap rail altogether! I'm no help, but this was fun.
First image from Mark M (Model Ship World 2022)
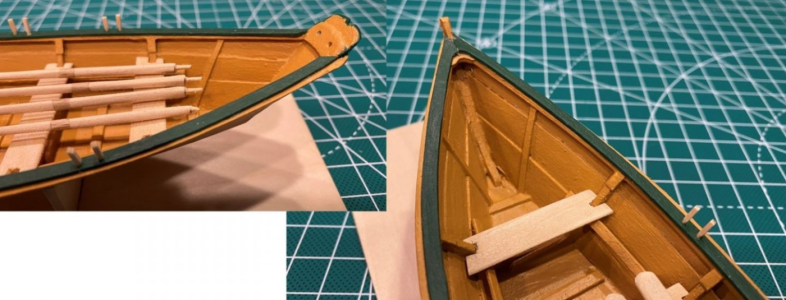
Second image from Lowell Boat Works
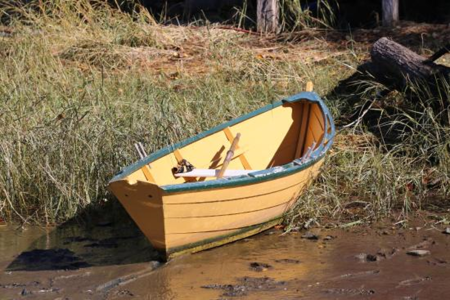
Third image from Mark M, Nova Scotia
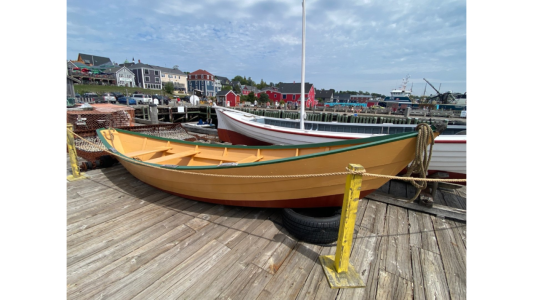
Last image
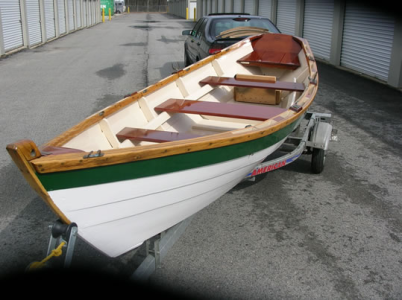
First image from Mark M (Model Ship World 2022)

Second image from Lowell Boat Works

Third image from Mark M, Nova Scotia

Last image

I too looked at pictures of real dories and what I noticed was that the cap rails not only covered the sheer planks, bands and gunwales but also the tops of the frames. I completed adding my cap rails this evening trying to keep the inside edges even with the inside edges of the gunwales and leaving a very small portion of the band edges showing. I felt like I was gluing it to a very narrow surface and think it would have been better to sand sheer planks bands and gunwales level and having cap rail cover it all. Should have mine finished tomorrow.
- Joined
- Nov 16, 2023
- Messages
- 172
- Points
- 113

If you do a search on this site, you can find reference info on Dory construction. Here's a link to a post containing photo's, https://shipsofscale.com/sosforums/threads/grand-banks-dory-reference.13178/
Nice job with the build!
Nice job with the build!


