-

Win a Free Custom Engraved Brass Coin!!!
As a way to introduce our brass coins to the community, we will raffle off a free coin during the month of August. Follow link ABOVE for instructions for entering.
-

PRE-ORDER SHIPS IN SCALE TODAY!
The beloved Ships in Scale Magazine is back and charting a new course for 2026!
Discover new skills, new techniques, and new inspirations in every issue.
NOTE THAT OUR FIRST ISSUE WILL BE JAN/FEB 2026
You are using an out of date browser. It may not display this or other websites correctly.
You should upgrade or use an alternative browser.
You should upgrade or use an alternative browser.
- Joined
- Sep 8, 2024
- Messages
- 206
- Points
- 88

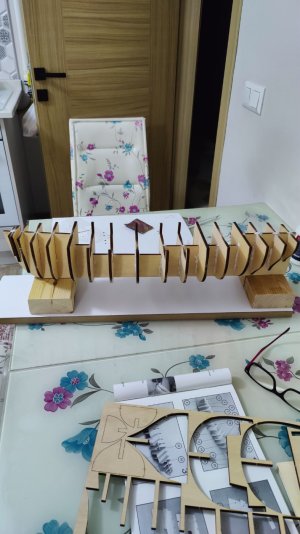
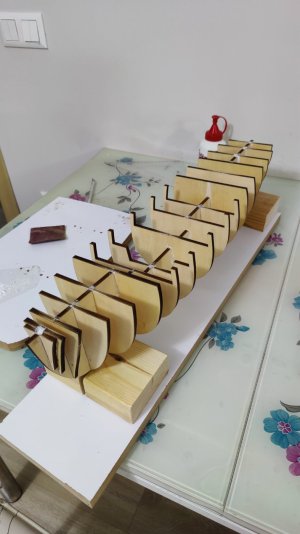
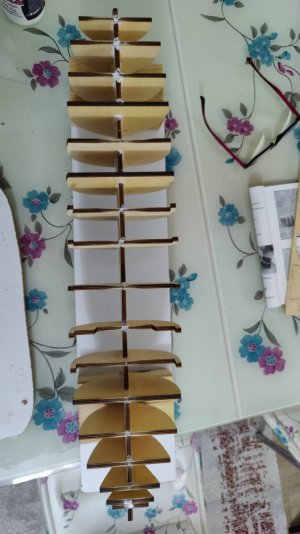
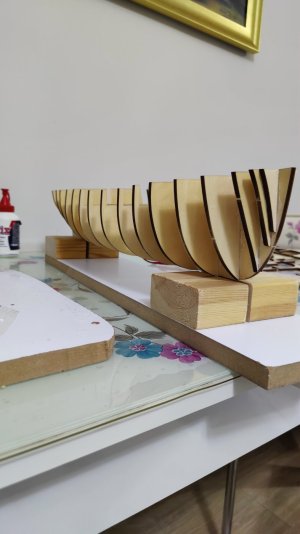
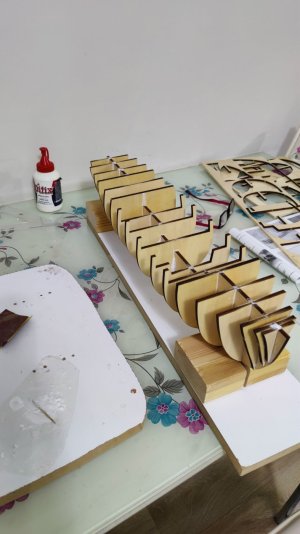
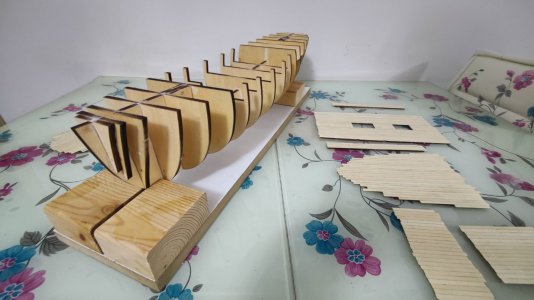
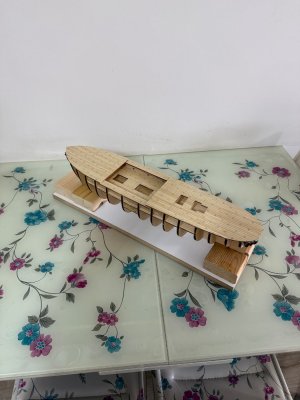
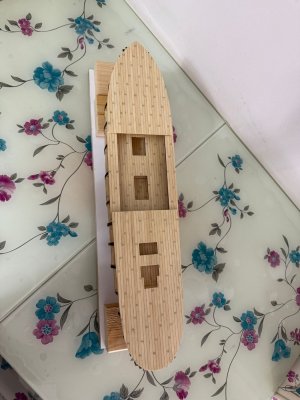
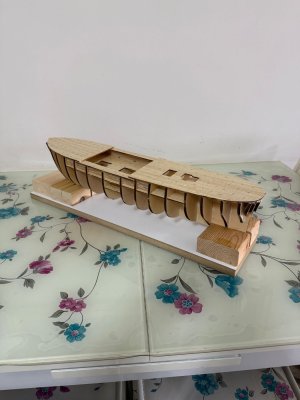
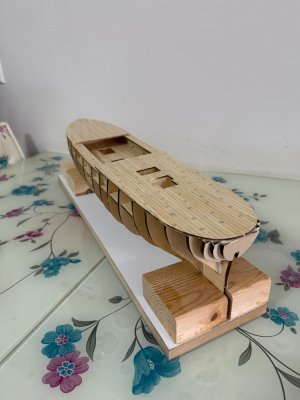
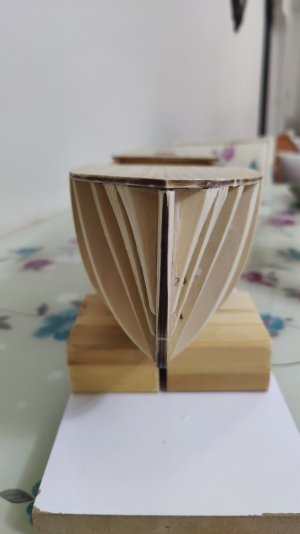
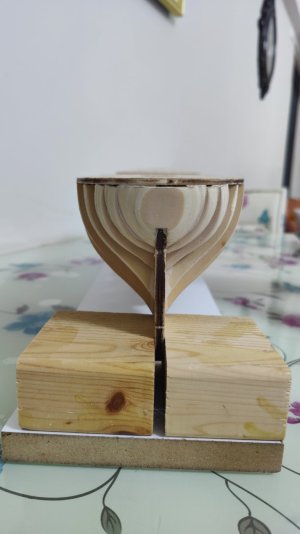
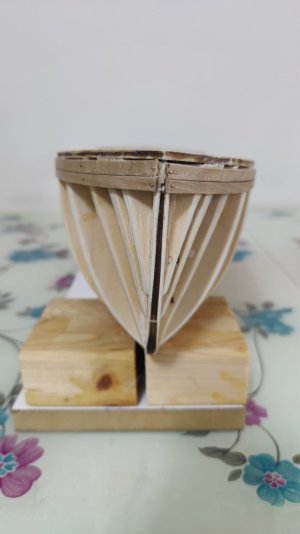
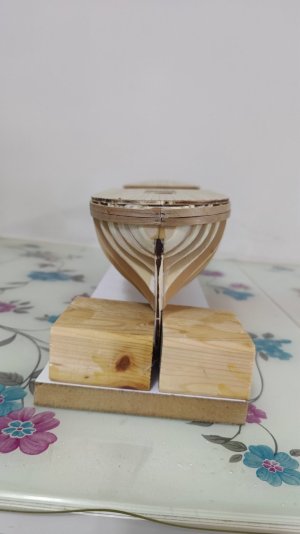
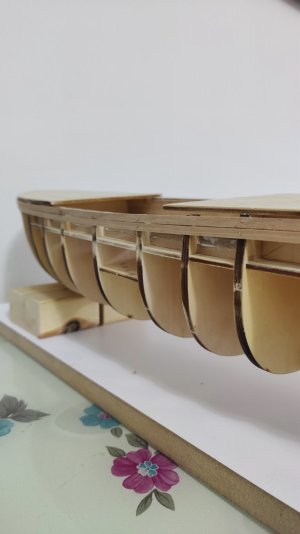
As to the spaces, it seems to me that the b bulkheads are not trimmed back far enough. On a full size ship, the entire width of a frame is used to seat the plank. You seem to have only removed about half the width as a chamfer. Equally, the stem would be rebated to take the end of the planks, with the effect that the planks seat further inboard than your photo shows.
I qualify this by saying that I haven't built a plank on bulkhead model for over a decade, and once was enough. I'm sure more proficient but builders will weigh in with better analyses
J
I qualify this by saying that I haven't built a plank on bulkhead model for over a decade, and once was enough. I'm sure more proficient but builders will weigh in with better analyses
J
Thank you for the information Jim. What do you suggest? Should I remove the slats? Also, can you tell me what I need to do and what I need to fix by going through the pictures I sent?I am new to ship modeling. Can you explain what I need to do by marking on the pictures?
Last edited:
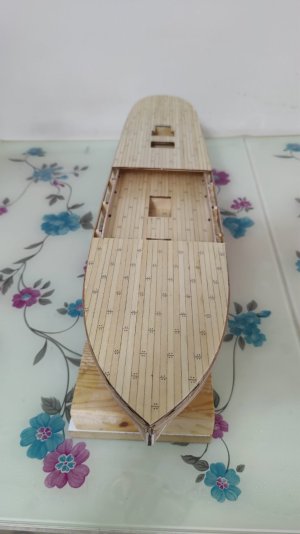
@KAYA61 Sorry, I’m just catching up to your log else I would have replied to your question sooner. I agree with Jim. I think more shaping and sanding on the first four bulkheads is needed. In the photos above, it looks like your first two runs of planking are standing out a bit from the line of the deck planking, which is another indication that more needs to be removed to get to the correct shape. I think it will be easier to get the whole thing in proper shape if you remove the planks, as you suggested.
Last edited:
- Joined
- Sep 8, 2024
- Messages
- 206
- Points
- 88

I see Namabiiru has already suggested removing the planks, and I would agree with that.
I'm reminded of why I've avoided bulkhead kits when I look more closely. The absence of cant frames leaves builders with an unnecessarily tricky problem to manage the turn of the bow. A cant frame is set at 90 degrees to the run of planking, and the bevel to accomplish this is on its inner end, joining the keel, (centreline) whereas a square frame sits at 90 degrees to the keel, and the bevel to match the lines of the hull is at the outboard end, against the planks. You have square bulkheads, so the outer faces adjoining the planks should be bevelled across their entire face to allow the planking to abut the bulkhead across the entire bulkhead width.
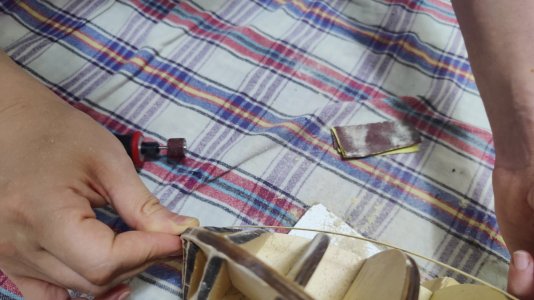
All of that really comes down to 'sand off some more'. But take care that you are doing so in a controlled manner. Your aim is to allow the planks to seat accurately, but more importantly, for the run of the ship to be smooth.
Everything you do is interconnected - work on the bulkheads is intimately connected with what will happen when yo reach the planking stage, so you need to be thinking ahead all the time.
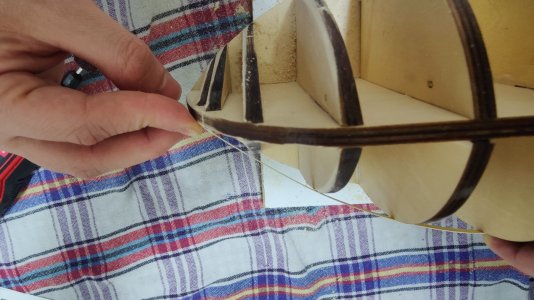
In this case, I suggest you adopt what Underhill refers to as 'planking battens' - select some suitable timber, and try them along the length of the ship. I've looked out a photo from Underhill Vol 1, which shows the idea
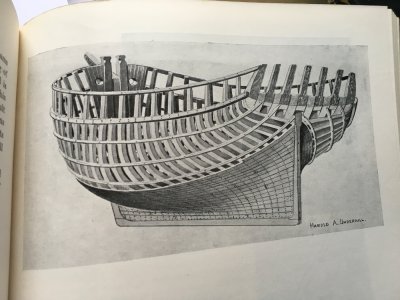
In that case, because he is using frames, he is able to tie the battens in place using a bit of cord - or a clamp hooked around the back of the frame, with a wedge, just as in full size practice. The battens let the builder check on the fit of the planks, and, in the photo, they are arranged so that each section is for, say 5 planks, and they are fitted exactly, and better yet, the builder knows what he is doing and can check progress simply and effectively.
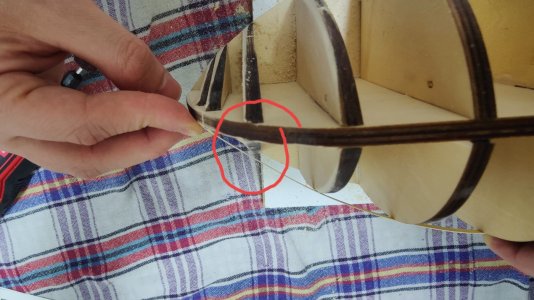
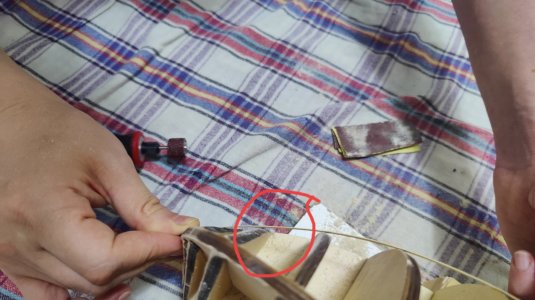
The other area yo can look at is providing the rabbets / rebates for the planks to sit into. You have sanded off some of the stem to provide a seat for the planks, but not provided a rabbet, so all of the plank thickness is exposed.
Again, full size practice is to angle the stem to the run of planks, and, depending on the ship, to rabbet the stem to allow the end of the plank to sit tight up, with the entire thickness sunk into the stem so that the end of the plank is protected by the stem. This is not exactly true for all ships, but for this discussion it gets the idea across. The net of all this is that in the photo with the red circle, the planks will all move inwards, and hopefully the gap will vanish.
I have added another drawing from Underhill illustrating a stem with its rabbets. This is very much like your own ship, using square frames.
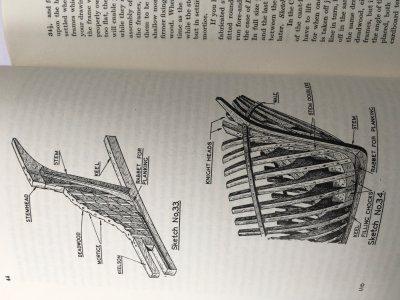
I hope all that makes some sort of sense.
Bonne Chance
J
I'm reminded of why I've avoided bulkhead kits when I look more closely. The absence of cant frames leaves builders with an unnecessarily tricky problem to manage the turn of the bow. A cant frame is set at 90 degrees to the run of planking, and the bevel to accomplish this is on its inner end, joining the keel, (centreline) whereas a square frame sits at 90 degrees to the keel, and the bevel to match the lines of the hull is at the outboard end, against the planks. You have square bulkheads, so the outer faces adjoining the planks should be bevelled across their entire face to allow the planking to abut the bulkhead across the entire bulkhead width.
All of that really comes down to 'sand off some more'. But take care that you are doing so in a controlled manner. Your aim is to allow the planks to seat accurately, but more importantly, for the run of the ship to be smooth.
Everything you do is interconnected - work on the bulkheads is intimately connected with what will happen when yo reach the planking stage, so you need to be thinking ahead all the time.
In this case, I suggest you adopt what Underhill refers to as 'planking battens' - select some suitable timber, and try them along the length of the ship. I've looked out a photo from Underhill Vol 1, which shows the idea

In that case, because he is using frames, he is able to tie the battens in place using a bit of cord - or a clamp hooked around the back of the frame, with a wedge, just as in full size practice. The battens let the builder check on the fit of the planks, and, in the photo, they are arranged so that each section is for, say 5 planks, and they are fitted exactly, and better yet, the builder knows what he is doing and can check progress simply and effectively.
The other area yo can look at is providing the rabbets / rebates for the planks to sit into. You have sanded off some of the stem to provide a seat for the planks, but not provided a rabbet, so all of the plank thickness is exposed.
Again, full size practice is to angle the stem to the run of planks, and, depending on the ship, to rabbet the stem to allow the end of the plank to sit tight up, with the entire thickness sunk into the stem so that the end of the plank is protected by the stem. This is not exactly true for all ships, but for this discussion it gets the idea across. The net of all this is that in the photo with the red circle, the planks will all move inwards, and hopefully the gap will vanish.
I have added another drawing from Underhill illustrating a stem with its rabbets. This is very much like your own ship, using square frames.

I hope all that makes some sort of sense.
Bonne Chance
J
- Joined
- Jan 26, 2017
- Messages
- 1,339
- Points
- 493

Since you're new to model ship building, the document linked below will be very helpful for you. I also agree with the previous commenters, the bulkheads behind the third one weren’t sanded enough. The document explains how they should be. Additionally, you can learn many terms commonly used in ship modeling from this resource.
I have some experience in ship modeling, so feel free to ask me any questions. I'd be happy to help.
Kolay gelsin
I have some experience in ship modeling, so feel free to ask me any questions. I'd be happy to help.
Kolay gelsin
Last edited:
Probably the simplest thing to do in order to get the correct shape of the bulkheads at this point in your construction is to insert filler blocks of soft wood, like balsa, in all the spaces in front of bulkhead 5. This will really help you visualize the shape of the hull as you sand it to shape. It will also provide better support for the planks where they curve the most.Thank you very much Sir.I will follow your advice.
Thank you very much Master... I am glad to have you.Since you're new to model ship building, the document linked below will be very helpful for you. I also agree with the previous commenters, the bulkheads behind the third one weren’t sanded enough. The document explains how they should be. Additionally, you can learn many terms commonly used in ship modeling from this resource.
I have some experience in ship modeling, so feel free to ask me any questions. I'd be happy to help.
Kolay gelsin
I downloaded the pdf file you gave me and I will translate it into Turkish.
Thank you very much for sharing the information...I see Namabiiru has already suggested removing the planks, and I would agree with that.
I'm reminded of why I've avoided bulkhead kits when I look more closely. The absence of cant frames leaves builders with an unnecessarily tricky problem to manage the turn of the bow. A cant frame is set at 90 degrees to the run of planking, and the bevel to accomplish this is on its inner end, joining the keel, (centreline) whereas a square frame sits at 90 degrees to the keel, and the bevel to match the lines of the hull is at the outboard end, against the planks. You have square bulkheads, so the outer faces adjoining the planks should be bevelled across their entire face to allow the planking to abut the bulkhead across the entire bulkhead width.
All of that really comes down to 'sand off some more'. But take care that you are doing so in a controlled manner. Your aim is to allow the planks to seat accurately, but more importantly, for the run of the ship to be smooth.
Everything you do is interconnected - work on the bulkheads is intimately connected with what will happen when yo reach the planking stage, so you need to be thinking ahead all the time.
In this case, I suggest you adopt what Underhill refers to as 'planking battens' - select some suitable timber, and try them along the length of the ship. I've looked out a photo from Underhill Vol 1, which shows the idea
View attachment 520611
In that case, because he is using frames, he is able to tie the battens in place using a bit of cord - or a clamp hooked around the back of the frame, with a wedge, just as in full size practice. The battens let the builder check on the fit of the planks, and, in the photo, they are arranged so that each section is for, say 5 planks, and they are fitted exactly, and better yet, the builder knows what he is doing and can check progress simply and effectively.
The other area yo can look at is providing the rabbets / rebates for the planks to sit into. You have sanded off some of the stem to provide a seat for the planks, but not provided a rabbet, so all of the plank thickness is exposed.
Again, full size practice is to angle the stem to the run of planks, and, depending on the ship, to rabbet the stem to allow the end of the plank to sit tight up, with the entire thickness sunk into the stem so that the end of the plank is protected by the stem. This is not exactly true for all ships, but for this discussion it gets the idea across. The net of all this is that in the photo with the red circle, the planks will all move inwards, and hopefully the gap will vanish.
I have added another drawing from Underhill illustrating a stem with its rabbets. This is very much like your own ship, using square frames.
View attachment 520614
I hope all that makes some sort of sense.
Bonne Chance
J
Dear Master. I translated the pdf file you sent into Turkish with the help of artificial intelligence and started reading it immediately... In the 5th article, you mentioned the balsa filler block, what is its equivalent in our country? What exactly should be used? and the source file is excellent... thank you for sending itSince you're new to model ship building, the document linked below will be very helpful for you. I also agree with the previous commenters, the bulkheads behind the third one weren’t sanded enough. The document explains how they should be. Additionally, you can learn many terms commonly used in ship modeling from this resource.
I have some experience in ship modeling, so feel free to ask me any questions. I'd be happy to help.
Kolay gelsin


