• LUCZORAMA SHIPWRECK SCAVENGER HUNT GIVEAWAY. 4 Weeks of Fun • 1 Legendary Prize ((OcCre’s Fram Ship)) • Global Crew Welcome!
    **VIEW THREAD HERE**

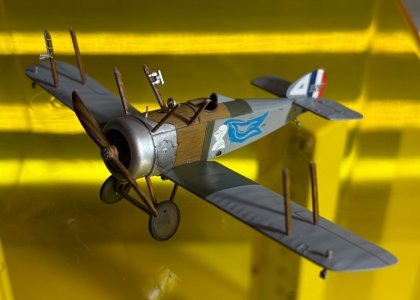
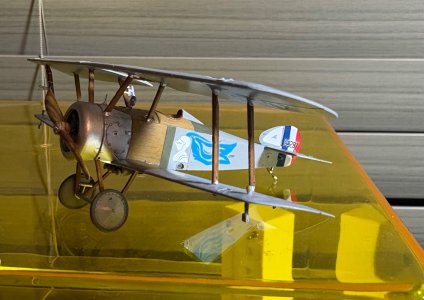
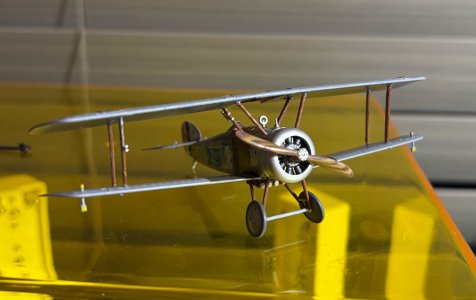
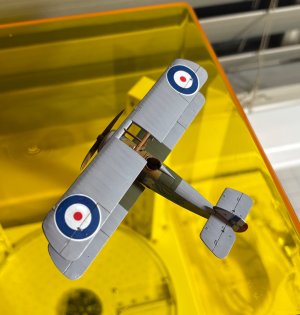
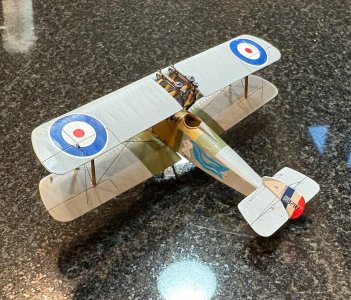
My 1/72 scale aircraft

When I read your last post Dean, I paused for a moment and thought, "Nav lights? On a WWI aircraft?? But there is no electrical system on those!"

So, I had to go down the rabbit hole and look it up. Reading the Wiki page, I discovered that the Comic variation was specifically designed for night fighting with the incendiary-ammo firing Lewis machine guns mounted over the upper wing and the cockpit moved rearward to allow the pilot to reload the guns. (Moving the C.G. back like that must have made an already squirrely, tail-heavy airplane even more-so.)

So, close your eyes for a moment and imagine this: It's 20 deg. F on a winter's night. You're in the cockpit of a Comic behind a mass of whirling iron (remember, the whole crankcase of a rotary engine spun with the propeller). There's no throttle control, the engine is either on (producing full power) or off - that's your only speed control. Using your handy scarf, you wipe the constant spray of castor oil from your goggles to better see your enemy. Realizing that your last encounter left your Lewis machine guns empty, you take your feet off the rudder pedals and your hands off the stick, and you stand up to to reload your guns - in the freezing cold - in the dark - all while the Red Baron was bearing down on you!

They were better men than I, my friends!
Yes, I’m not sure how the navigation lights were powered, but they were there.
When I built my first WW1 airplane, the 1/16 scale Camel by Model Airways, I did a lot of research and reading. And I even bought a few books, one was by the US Ace Eddie Rickenbacher. Reading about how crude the airplanes were and how their survival rate was measured in weeks and months gives you a whole new appreciation for the pilots back then. Definitely real heroes! He described having the canvas on his upper wing rip off in a steep dive! He was able to limp it back to the hanger flying on the lower wing! Engine mishaps, guns jamming, freezing cold altitudes, running out of gas behind enemy lines, getting lost, etc. …you name it, those guys had the odds against them! Oh yeah, he spoke of drinking alcohol to help with the ingestion of the castor oil after a flight…probably needed a drink just to calm down! ;) And that’s because the rotary motors were lubricated with castor oil and it came out of the exhaust, thus the need for an oil tank…and goggles and a scarf!
 
Last edited:
I find it amazing that these pilots could fly these aircraft, I have seen many flights on YouTube of these things flying and they surely have to be one of the most difficult aircraft to fly. All that oil constantly being thrown into your face and with the on/off throttle.
Don’t know how the pilots got their experience before they took one of these to the skies.
I remember my days of flying when I converted from a nose wheel three axis aircraft to a single seater tail wheel aircraft ( no instructor to correct your mistakes ), I lined up and gave it some throttle, the tail wheel came up as I gathered speed then before I knew it I had lifted off and was climbing way too steep, corrected that then got to grips with a totally different aircraft.
After a few circuits I had to land it but a cross wind had developed which I could see on the wind sock and feel on the controls. Came down nicely up to the last few feet when it looked wrong so decided to go around again. A good decision I felt. I went round for one more circuit, as I was almost down I could feel the cross wind and was inputting lots of rudder to counter it. Planted the plane down and as I was rolling out the crosswind proved too much and I ended up doing a loop. Fast learning experience for me. Every flight thereafter got easier.
I take my hat off to these guys as they had the guns to operate and the enemy aircraft to contend with. Wow.
Correct, all valid points…and the angle the aircraft sit when they landed, they could not see forward and had to sway back and forth to see where they were going while taxiing. Typical tail dragger woes.
And the Fokker Dr1 with three wings blocked the pilots view of the ground when landing because they were close together like blinds. The mid wing was the one that was in the way the most.
 
Last edited:
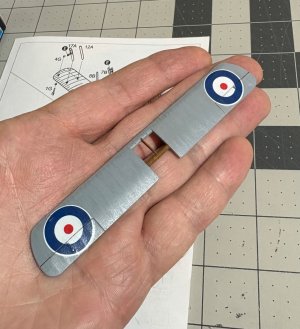
I painted the upper wing and added the decals and clear coat…
IMG_8912.jpeg
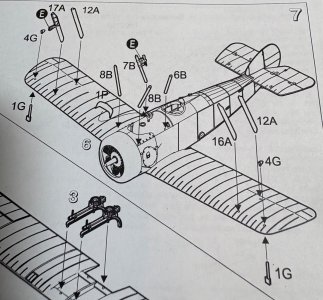
Now it’s down to the 8 struts…they will need to have holes drilled top and bottom for EZline, and then paint. Then I will drill all holes required on the fuselage, lower wing and empennage assembly for the cables.
At that point final assembly of the wings and rigging will begin. And I have to put the guns and their rack on the upper wings last. Geez! Still a lot of work ahead.
See ya next time…
 
Last edited:
If you ever get the chance to travel to just north of New York City, you must visit The Old Rhinebeck Aerodrome where you will have the opportunity to actually see these WWI aircraft fly. You'll gain a whole new appreciation of what it takes to control a plane with a rotary engine.
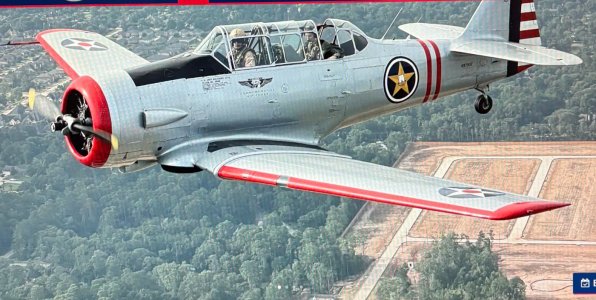
I am not too far from a local flying club that is named the Commemorative Air Force that has WW2 aircraft and a few biplanes that fly in the local air shows. They have a museum as well. I am going to schedule a flight in a biplane next month. You have to pay around $300 for a 1hr experience with about 30 minutes flying time). I will be flying in a N3N naval aircraft (biplane). So I’m excited about that. I could have picked a WW2 aircraft, but I want to experience the open cockpit, wind in my face! ;)
IMG_8925.jpeg
 
I am not too far from a local flying club that is named the Commemorative Air Force that has WW2 aircraft and a few biplanes that fly in the local air shows. They have a museum as well. I am going to schedule a flight in a biplane next month. You have to pay around $300 for a 1hr experience with about 30 minutes flying time). I will be flying in a N3N naval aircraft (biplane). So I’m excited about that. I could have picked a WW2 aircraft, but I want to experience the open cockpit, wind in my face! ;)
View attachment 535420

A few years ago, my son gave me a birthday present of a 1 hour aerobatic ride in an AT-6 Texan. I hold a single engine license and as such, he let me do most of the flying. No takeoffs or landings, but I got to do loops, barrel rolls and Immelmanns. What a rush!
 
A few years ago, my son gave me a birthday present of a 1 hour aerobatic ride in an AT-6 Texan. I hold a single engine license and as such, he let me do most of the flying. No takeoffs or landings, but I got to do loops, barrel rolls and Immelmanns. What a rush!
Nice! I can fly in the same plane here, they offer rides in a AT-6 and a BT-13, and the N3N. I chose the biplane experience, because to me it’s like riding a motorcycle verses a car. You’re in the open with the wind on you, and I feel like that experience will be more rewarding imo. But I may still do a WW2 aircraft as well.
I will take pictures.
 
Last edited:
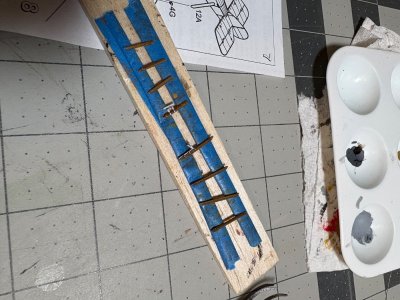
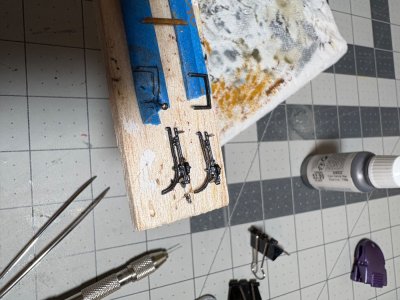
Well…holes drilled in the struts and they are painted. The machine gun assemblies are painted.
IMG_8944.jpeg

IMG_8948.jpeg
Next is the hard part…

IMG_8946.jpeg
These struts are smaller than toothpicks and glued with tiny pins in the end into tiny holes in the wing. Problems? Little to no surface area for a glue bond and they are not positively located. In fact they are free to be oriented just about any way you want them to be. This makes orienting them, and locating the upper and lower wings together with no less than 16 interfaces of holes and pins, a bit daunting. A strategy will need to be used…wish me luck.
I see a WW2 airplane build in my near future! ;)
Until next time…
 
Last edited:
This is where I’m at now, struts glued into the lower wings and fuselage. I have to let them cure overnight before trying to put on the upper wing.
I’ve learned you don’t put glue on the pins of the struts or it will get smeared onto the upper wing when trying to line up all 8 holes. Instead, you have to put glue in the holes in the upper wing. That way if you move the struts to line them up with the holes (inevitable) and drag them along the surface of the wing you don’t make a mess with the glue. You still have to work fast and need 4 hands! ROTF

IMG_8950.jpeg
See you next time…
 
Well, the upper wing has been glued on. I do not like how difficult this is, they really should improve the model to locate the struts better with more than a tiny pin to locate and hold them.
The first attempt ended in disaster after half the struts were broke off. The second time I added some clear PVA (Weldbond) around the struts in addition to the model glue on the pin to help hold them on. I also measured the location of the holes in the upper wing and made sure the struts were the same distance.
In addition, I thought it would be good to use painters tape to hold the upper wing on since the struts would never be able to withstand the clamping force of a rubber band. Hindsight proved that was a bad decision when it stuck to one of my decals and ripped it apart. Which I then had to hand paint to repair and then clear coat. Still not sure how that happened when it was clear coated.
Pics…

IMG_8955.jpegIMG_8956.jpegIMG_8958.jpeg
Having survived that, I now am faced with the rigging…and there is so much on the camel. Fun stuff!

My next WW1 airplane build…

IMG_8952.jpeg
No upper wing and struts… and no rigging! ;)

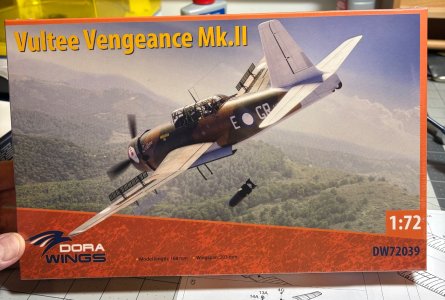
Also I wanted to share a WW2 model I found recently…

IMG_8953.jpeg
This will be another nice addition to my WW2 collection.
Time for rigging…see ya next time!
 
Last edited:
Nice job! The casual observer would never be able to tell where you touched up the decal. You matched the color perfectly!
 
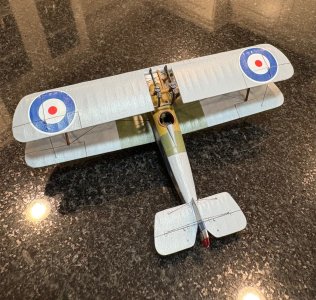
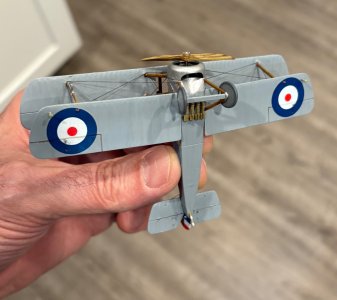
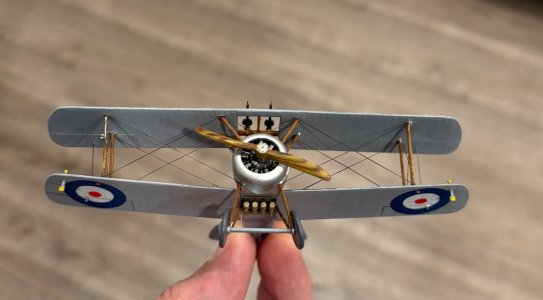
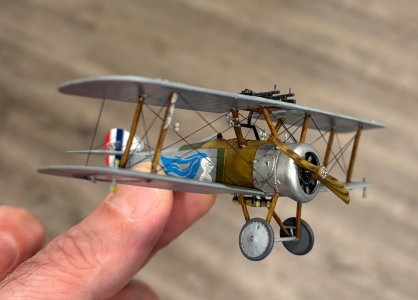
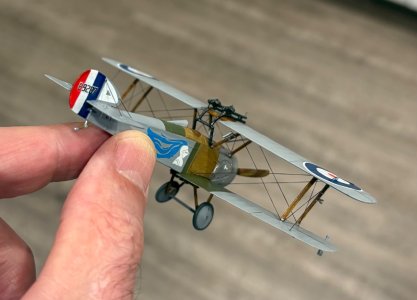
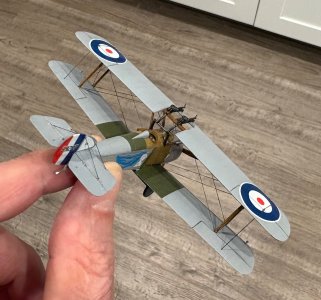
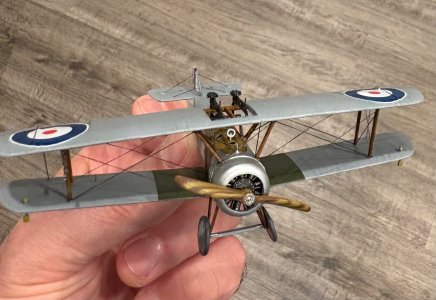
I’m happy to say the Camel F1.3 Comic is finally finished! I added the EZline cables and the machine guns. Then I did some final touch up.
Pics…
IMG_8969.jpeg
IMG_8970.jpegIMG_8963.jpegIMG_8974.jpegIMG_8973.jpegIMG_8972.jpegIMG_8976.jpegIMG_8975.jpeg
She was a challenge for many reasons, but I’m happy with how it turned out.

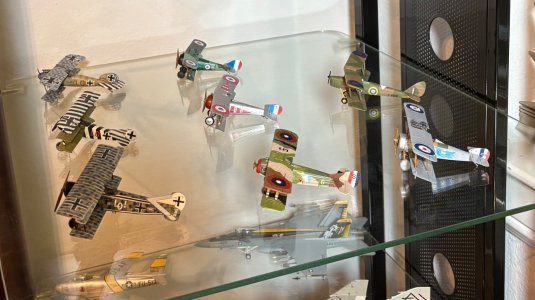
The WW1 shelf is starting to fill up! ;)
IMG_8962.jpeg

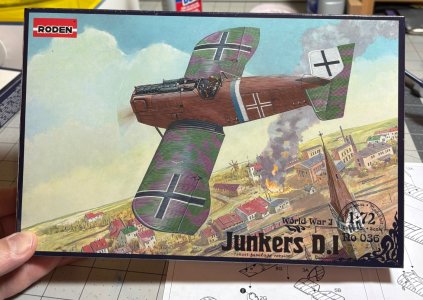
Next will be the Junkers D1. I need a break from struts and cables. ROTF
See ya next time!
 
I’m happy to say the Camel F1.3 Comic is finally finished! I added the EZline cables and the machine guns. Then I did some final touch up.
Pics…
View attachment 536098
View attachment 536099View attachment 536100View attachment 536101View attachment 536102View attachment 536103View attachment 536104View attachment 536105
She was a challenge for many reasons, but I’m happy with how it turned out.

The WW1 shelf is starting to fill up! ;)
View attachment 536106

Next will be the Junkers D1. I need a break from struts and cables. ROTF
See ya next time!
Very well done ! :)
 
I’m happy to say the Camel F1.3 Comic is finally finished! I added the EZline cables and the machine guns. Then I did some final touch up.
Pics…
View attachment 536098
View attachment 536099View attachment 536100View attachment 536101View attachment 536102View attachment 536103View attachment 536104View attachment 536105
She was a challenge for many reasons, but I’m happy with how it turned out.

The WW1 shelf is starting to fill up! ;)
View attachment 536106

Next will be the Junkers D1. I need a break from struts and cables. ROTF
See ya next time!
A very nice outcome again of the EZlines and matching in scale. The overall look with the wood parts is great, Dean.
Regards, Peter
 
Back
Top