Constructo 1799 Enterprise help

Hallo again,
Something is strange and in moment I do not know exactly where is the mistake, or why this difference is coming from.
Before you start cutting the gun ports too low, and it looks for me so......check once more the video Zoltán shared in your log with post #9. from second 35 or so they show this working step......also later on with the guns.......check everything 3 or 4 times, before you do it.....maybe you did it already 10 times, but if you do it wrong it will be a huge work to repair
 
Hi Uwe,

I’ve watched the video several times. From the plans It looks to me like the gun port top should be about 7mm down from the top rail. I think a mistake I made was to glue on the wales before cutting out the gun ports.

I’ve just ordered a digital caliper so I can get a more accurate measurements.

I’ll wait until I can accurately mark the gun port locations before I do any cutting.

My “I won’t do it this way again” journal is growing. I’ve been noting all my mistakes and what it took fix them.

Thank you for your help.
 
Did you take this into account?
The guns have to be horizontal to the Horizont or slightly higher, so that they could reach an anemy and not parallel to the deck. I guess the deck has a curve, in the center of the ship the deck is higher. This fact has also an impact to your center of the gunports....

Indeed, I did put a small wedge under two of the gun carriages to allow for the slant/camber/bow in the deck. I had assembled all fourteen guns and used a small level to find two that were slightly higher than horizontal by about 1.5 mm. At the time I thought that would compensate for the deck slant.

I’ve checked the height of the build from the deck up and it’s four planks high as per the build instructions.

Other than the Wales I don’t see any error in that part of the build.

I’m going to put the rigging plan and build plan on our large table and try to figure out any other mistake I might have made.
 
Good to see, that you are realy checking everything to come to the best solution.
BTW it is a very good way to compare the drawings, thanks for sharing this.
So to make a Resümee of your last post......the drawings showing the gun port locations are slightly different. As a consequence out of this info, and due to the fact, that you do not know which one is correct, you have to decide, based on the necessities of the other ship equipment and rigging. F.e. Two guns are located in the area of the masts, means the gun has to fit between the standing rigging of the mast. So here is one fix point.....
Just one thought: did you compare also in the same way the drawing of the deck (top or bird view) with the other drawings. Maybe the top view is fitting with one of them.

Nevertheless the correct height of the gunports, the vertical alignment is still under question .
 
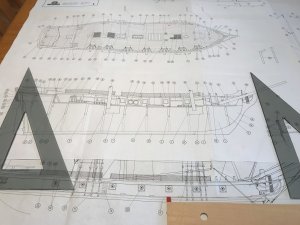
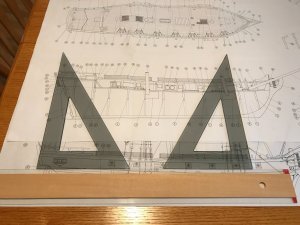
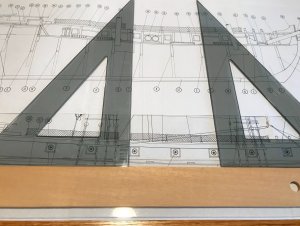
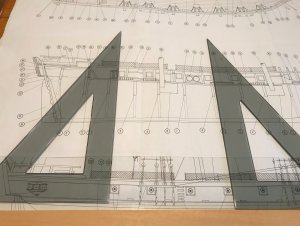
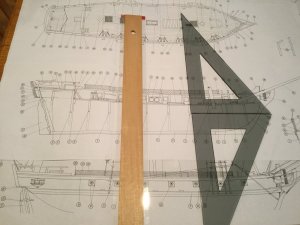
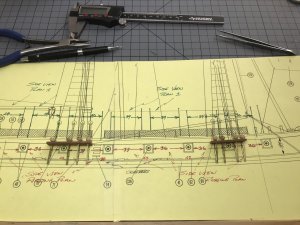
Alignment check of the top down, cut away view and the rigging view of the plans.

C0E48AFB-0322-4684-9322-4A7B2FD2A70D.jpeg


Side view seems to be in error, but I can’t compensate for the stem to stern curvature of the deck.

I think the measurements will have to taken from the hull view on the rigging plan. Staring with the gun ports in the standing rigging and working outward.
 
Hi Uwe,
.........I’ve just ordered a digital caliper so I can get a more accurate measurements.

I’ll wait until I can accurately mark the gun port locations before I do any cutting.
....................
Thank you for your help.

A digital caliper will be of a very good help and you will see, that you will use this measurement tool in future very often......somehow it is a must have in a workshop.

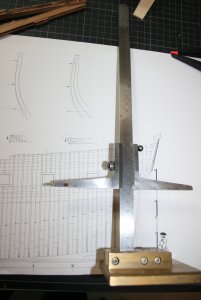
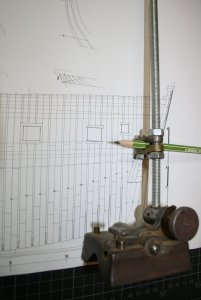
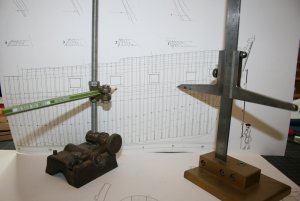
In addition to this, for marking heights at a hull I have two additional, somehow specialist tools, which are helping to have a correct height around a hull, for example also to mark something on both sides of the hull in the correct height. Take a look at these photos

IMG_1849.JPG
On one side there is a needle, the other side you can measure the top height f.e. of a frame

or
IMG_1850.JPG
Here with a pencil to mark a height on the wood with a line

IMG_1851.JPG

Like I told before, these are more specialist tools which can be usefull. Theoretical you can use also something out of wood, or even a bigger book standing and fixing a pencil with some tape, so you have from the bottom a fixed defined distance......This way you can be sure, if your hull is correctly horizontal, to mark on both sides the same height.
 
Hi Uwe,

Interesting tools that you use. I was thinking of creating something similar. But while I was “shopping and ordering” the caliper I saw this.

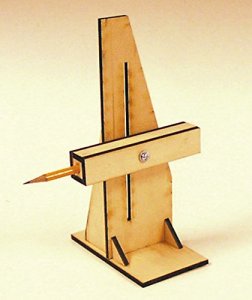
DB9361CA-43DB-49CA-9D17-4EAB78E442DD.jpeg

I ordered one to try out. It’s a waterline marker by Model Shipways.
 
Hi Uwe,

Interesting tools that you use. I was thinking of creating something similar. But while I was “shopping and ordering” the caliper I saw this.

I ordered one to try out. It’s a waterline marker by Model Shipways.

Yes exactly...... such a Tool will work definitely......the only thing which will be important -> the pencil should be realy fixed in the tool, so that he can not move up and down.
Very good addition to your workshop !
 
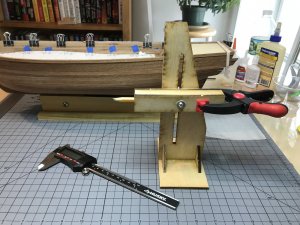
765D5EC7-3935-44A6-B056-F9981792A1D1.jpeg

New tools arrived this morning. The caliper will be fine. It measures inches, millimeters and fractions. The waterline marker is “iffy”. Without some support like a clamp there is a good chance of the horizontal part with the pencil moving. I found the bolt and the wing nut aren’t sufficient to hold the piece at different angles.
 
Ok, not as good as expected, but with some care and several checks it will work.....and thanks for sharing this experience with this tool. Also negative things should be shared. Mistakes can happen, but should be done only one time
 
Gun Port Location:


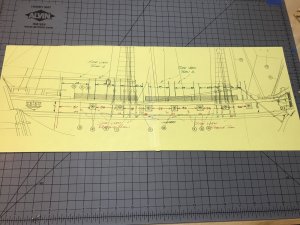
oUiQoiSUTemwhZs67v5DjA.jpg

The photo shows my interpretation of the tree ship profiles, the side view on plan 1, the top down view on plan 1 and the side view of the hull on the rigging plan. The red numbers are the measurements for the gun ports scaled off the rigging plan. The green numbers are the measurement for the gun port location scaled off the side view build plan 1.

The best fit appears to be the measurements scaled from plan 2, since that also provides the location for the gun port under the Foremast and Mainmast channels.
 
This I call „research“...... you are coming close to a decision for your next working step. Great work
 
Gunport's:

I've decided that this will be my method for locating the gun ports.

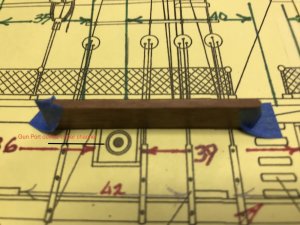
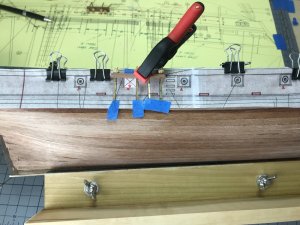
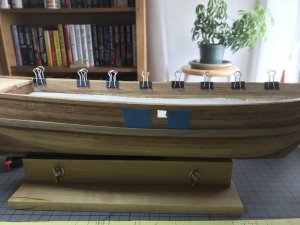
Measure and cut the channels, mark and drill holes for the deadeyes in the channels using the template as a guide, check the channels with deadeyes against the template and place the channels on the hull, drill a hole in the center of the hull gunport under the template with the channels clamped in place, use the gun ports under the the channels a reference to mark the other gun port locations.

fullsizeoutput_af.jpegkIQsTwXVT++cfH%50v+eqQ.jpgfullsizeoutput_b1.jpeg
 
The 1st Gun Port:

17C24466-CB73-4B78-AF34-29F54112981D.jpeg

First of the fourteen gun ports drilled out but not squared with a file. Found I didn’t have the “right” tool for that.

I’m finding that not only is the build a lot of fun, but I’m adding the “right tools” to my “boat works”. Next set of “right tools” will arrive Monday afternoon.
 
The 1st Gun Port:

First of the fourteen gun ports drilled out but not squared with a file. Found I didn’t have the “right” tool for that.

I’m finding that not only is the build a lot of fun, but I’m adding the “right tools” to my “boat works”. Next set of “right tools” will arrive Monday afternoon.

Well, you are correct, when you say : the gun port you are showing is realy not finished!
Now we are looking forward, which tool you ordered: needle files, sanding paper ?
BTW: sometimes it is already enough to take a peace of scrap wood, wooden strip, glue on the flat side some sanding paper and use it like a needle file.... let us see on Monday what is your new solution.
You will see, with the time and with the models your workbench will be full of tools and machines....it is going fast
 
I’m finding that not only is the build a lot of fun, but I’m adding the “right tools” to my “boat works”. Next set of “right tools” will arrive Monday afternoon.

G'day Pathfinder
This is the fun part of this hobby, as my wife would say,
'more toys for the boy!'
Do you know something... I've got a lot of 'toys' but I want more!
Happymodeling and havagoodone mate.
Gteg
 
Well, you are correct, when you say : the gun port you are showing is realy not finished!
Now we are looking forward, which tool you ordered: needle files, sanding paper ?
BTW: sometimes it is already enough to take a peace of scrap wood, wooden strip, glue on the flat side some sanding paper and use it like a needle file.... let us see on Monday what is your new solution.
You will see, with the time and with the models your workbench will be full of tools and machines....it is going fast

Hi Uwe,

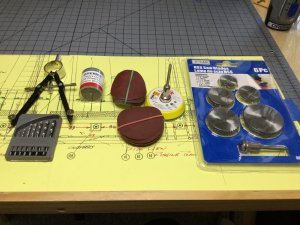
I’ve ordered, files, sandpaper, 3/8” (9.5mm) square dowels, a Dremel attachment for carving and Carbide Router file bits, a digital T-bevel gauge and protractor, a USB 3 external CD DVD drive (my iMac doesn’t have one), some ship building CDs and a copy of “Historic Ship Models” by Wolfram zu Monfeld.

There are several othe “I need items ” arriving in a week or so.

What do you think?
 
Back
Top