Santa Maria - Mantua - scale 1:50 modified kit semi scratch and diorama

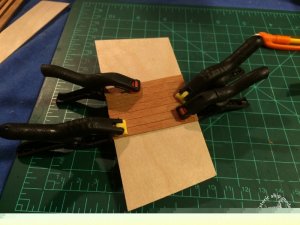
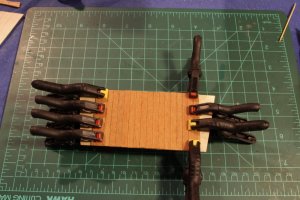
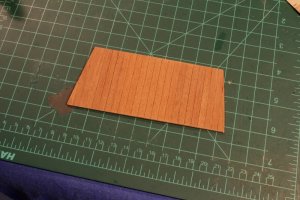
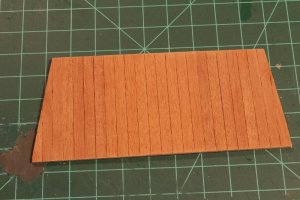
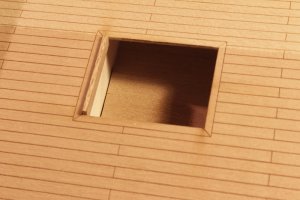
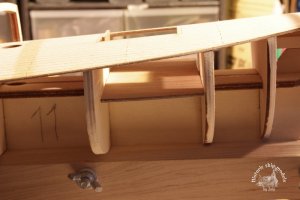
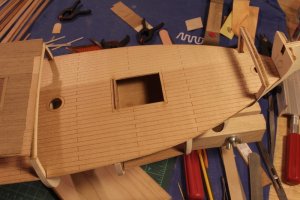
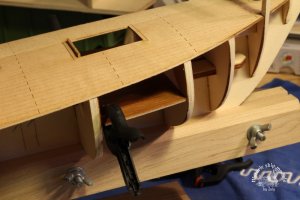
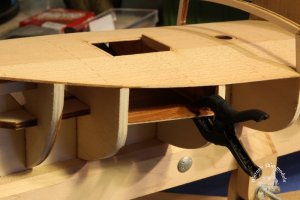
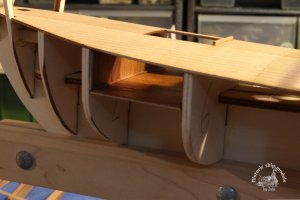
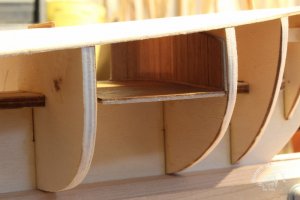
A little more update, I installed the main deck and the poop deck, I used carpenter glue and CA to secure them and wrapped them with rubber bands.The decks have simulated planking on them but I am going to use them as false deck and plank them with real wood .

Main deck

IMG_5257 (1920x1280) (900x600) (800x533).jpgIMG_5258 (1920x1280) (900x600) (800x533).jpgIMG_5260 (800x533).jpgIMG_5263 (800x533).jpg2016-01-10 12.01.12_wm (800x450).jpg2016-01-10 12.01.12_wm (800x450).jpg2016-01-16 12.58.36 (800x450).jpg


Poop deck

2016-01-16 12.58.24_wm (900x506).jpg


Zoltan
 
Last edited:
As I mentioned earlier for the deck planking, first modification, planking the simulated planking on the poop deck with 5 mm wide walnut strips.The edge part left open is for the railing base/ moulding will be installed later when I construct the railings.

IMG_5771_wm (800x533).jpgIMG_5775 (800x533).jpgIMG_5777_wm_000 (800x533).jpg


Zoltan
 
Last edited:
Continuing the planking, next is the quarter deck, same as the poop deck 5 mm wide walnut strips and following the false deck planking patterns.

IMG_5776 (800x533).jpg2016-06-12 20.39.20 (800x600).jpg2016-06-12 20.40.35 (600x800).jpg2016-06-25 13.01.23 (800x450).jpg2016-06-26 21.09.40 (800x600).jpg2016-07-03 11.07.23 (800x600).jpg


Zoltan
 
Last edited:
Very impressive building sequence. I like the way you use the triangle to keep things square. Simple and effective.
I admire those that modify kits. I am not up to that skill set of knowledge and know-how.
Donnie
 
Thanks, Donnie.I will make a lot of modification on this build.

Planking continued with the forecastle deck planking.

IMG_5818_wm (800x533).jpg2016-06-25 12.55.42 (506x900).jpg

A little note about my deck planking, probably everyone noticed that I didn't use caulking between the planks, for me looks much more natural. I have the same feeling about tree nailing, but as I said I will do a test run with treenails with different shades and colours and then deciding about adding them or not.

IMG_6636 (800x533).jpg

My next modification on the ship is adding planks to the cabin wall just right below the quarter-deck, following the original instructions the cabin wall would not be visible because the galley hatch is closed with doors but not on this build, I decided to leave it open and add a ladder.

2016-07-03 11.12.26 (900x506) (2).jpg

Main deck cabin wall before planking, the planks are 5 mm wide walnut, a little different shade than the deck planks

2016-07-03 11.45.42 (800x450).jpg2016-07-03 15.02.11 (900x675) (800x600).jpg2016-07-03 21.59.09 (900x675) (800x600).jpg


Zoltan
 
Last edited:
The poop deck captain's cabin also having a makeover, the next three pictures show the original plan from the instruction book.

The laser cut Captain's cabin wall with two windows and the door in the middle.Changing plan,moving the door to starboard side and adding one window in the middle,but first I had to cut the window opening and the door opening in the bulkhead, using my rotary tool and drilling holes side by side on the marked line of the door and window, then using a flat file to shape them smooth.And the same thing on the laser cut fake planked captain's cabin wall.also planked with 5 mm wide walnut planks.

IMG_5846 (800x533).jpgIMG_5820 (800x533).jpgIMG_5821 (800x533).jpg

Zoltan
 
Last edited:
Thanks,Denis.I am a little behind with the build log compare to where my acctual build is.
 
So continuing with more modification.

1. Installing deck beams to hold a false deck in the poop deck cabin
2. Adding mahogany 1 mm thick sheet to have a brown background glued to the back of the cabin bulkhead, the reason the cabin door is going to be open so just for the nice visual.
3. Creating a planked false deck
4. Finished with two coats of poly.

IMG_5854 (800x533).jpgIMG_5856 (800x533).jpgIMG_5843 (800x533).jpgIMG_5844 (800x533).jpg

The false deck is 1 mm birch plywood

IMG_5833 (800x533).jpg
IMG_5829 (800x533).jpg


Zoltan
 
Last edited:
After the poop deck modification, I moved to main deck galley hatch and below, just like below the poop deck I built a false deck planked with walnut end the two bulkheads enclosing that section and finished with two coats of poly,

False deck cut out from birch plywood


Planking the false deck with 5 mm wide walnut


Bulkhead below the main deck also getting planked


Dry fit the the false deck


Gluing in the false deck and a molding


For the bulkhead on the opposite side, I had to cut a plywood shaped to fit in because the lack of room I had a hard time to plank it, instead I planked the plywood and glued it in.


Zoltan
 

Attachments

  • 2016-07-09 10.45.45 (900x675) (2) (800x600).jpg
    2016-07-09 10.45.45 (900x675) (2) (800x600).jpg
    240.4 KB · Views: 116
  • IMG_5837 (800x533).jpg
    IMG_5837 (800x533).jpg
    271.7 KB · Views: 116
  • IMG_5839 (800x533).jpg
    IMG_5839 (800x533).jpg
    272.6 KB · Views: 115
  • IMG_5840 (800x533).jpg
    IMG_5840 (800x533).jpg
    264.1 KB · Views: 120
  • 2016-07-10 19.44.38 (800x600).jpg
    2016-07-10 19.44.38 (800x600).jpg
    233.4 KB · Views: 120
  • IMG_5850 (800x533).jpg
    IMG_5850 (800x533).jpg
    200 KB · Views: 120
  • IMG_5851 (800x533).jpg
    IMG_5851 (800x533).jpg
    188.9 KB · Views: 119
  • IMG_5853 (800x533).jpg
    IMG_5853 (800x533).jpg
    249.8 KB · Views: 120
  • IMG_6611 (800x533).jpg
    IMG_6611 (800x533).jpg
    221 KB · Views: 120
  • IMG_6612 (800x533).jpg
    IMG_6612 (800x533).jpg
    211.1 KB · Views: 120
  • IMG_6615 (800x533).jpg
    IMG_6615 (800x533).jpg
    188.1 KB · Views: 118
  • IMG_6617 (800x533).jpg
    IMG_6617 (800x533).jpg
    167.3 KB · Views: 117
  • IMG_5834 (800x533).jpg
    IMG_5834 (800x533).jpg
    236.2 KB · Views: 115
  • IMG_5833 (800x533).jpg
    IMG_5833 (800x533).jpg
    266.3 KB · Views: 114
Very clever to plank that inside cabin floor! I would never have tought of that. But that is a nice move!
And amazing buildlog here! Almost looking scratch built! Will your next build be scratchbuilt!? It certainly looks like your up to the task
 
Very nice start. Mantua kits make nice display models. I just wish that when revised the kits with deck planking, they would have used the four deck stagger system. Nobody builds decks with only 2 stagger system. Typical Mantua research.
 
Hello Zoltan,

Your Santa Maria is shaping very nicely. And the planking is very good! Modification you are going to make will definitely improve your model.

Best regards,

Stoyne
 
I greatly admire taking something that exists and making it better by kitbashing. Been known to do some of that myself.

You are doing a fine job of it! Very nicely done...more to come later as your progress extends to completion. :)

Dave
Seattle
 
Very Nice...really liked the pics in the mall in the beginning of your log, I remember a replica of the SM in Barcelona harbor back in the mid 70s...she was no where near as fancy as the one shown, really kind of drab. I like your rendition
 
Hello everybody, thanks to everyone who visited my build log.Not much to show just started to mark and drill holes for tree nails on the quarter deck.

IMG_6642 (1920x1280) (800x533).jpg


Zoltan
 
Last edited:
when I started drilling holes for the tree-nails on the poop deck I made a big mistake,instead of drilling holes only on the planks with butt joints I just kept drilling holes on each row of the planks, totally lack focusing due to a headache on that morning when I woke up.I did not feel ok that day at all but I kept pushing myself to work on the ship.So I ended up to rip all the planking not just on the poop deck but all the other decks too. I decided to re-plank again with a different wood, probably teak as my wood shipment arrived, currently testing walnut wood filler for tree-nails.

Walnut on the left and teak on the right.

IMG_6656 (800x533).jpg


Teak on the bottom.

IMG_6657 (800x533).jpg


Zoltan
 
Last edited:
A little caulking trial, I used black marking pen.

2016-08-14 04.59.20 (1080x1920) (506x900).jpg


and I liked it and continued planking ;)

poopdeck almost done


2016-08-14 15.14.57_000 (600x800).jpgIMG_6658 (800x533).jpg2016-08-15 23.52.33_000 (450x800).jpgIMG_6661 (800x533).jpg


Zoltan
 
Last edited:
Frankberge said:
Very clever to plank that inside cabin floor! I would never have tought of that. But that is a nice move!
And amazing buildlog here! Almost looking scratch built! Will your next build be scratchbuilt!? It certainly looks like your up to the task

Thanks for your kind words,yes I have plans for scratchbuilding.

Zoltan
 
Back
Top