They are soooo "perfect" - Very good work my friendAside from machining and fitting the Sheaves,the Catheads are now complete.I was pleased that my handmade nails were a snug fit in the holes I drilled.A firm push with the handle of some tweezers got them in place but no need for glue.I have given the Catheads a 50% thinned coat of pure Tung Oil for now.
Kind Regards
Nigel
View attachment 153408View attachment 153409View attachment 153410View attachment 153411
You are using an out of date browser. It may not display this or other websites correctly.
You should upgrade or use an alternative browser.
You should upgrade or use an alternative browser.
Saint-Philippe 1693-POF to the Monograph by Jean-Claude Lemineur by NMBrook-1/36
- Thread starter NMBROOK
- Start date
- Watchers 79
-
- Tags
- ancre saint-philippe 1693
200 more nail nights to go, luckily we cant go on holidays this year.Thanks Maarten.I now have "nail nights".When not in the mood for anything else,I sit in the kitchen listening to music and making nailsI make and blacken a batch of about 200 in one sitting.I reckon on about 40,000 fixings on this model so they certainly won't go to waste
Kind Regards
Nigel
LOL Maarten,just had a thought,I only need my A4 size cutting mat,adapted knife,snips and brass wire,I could take those on holiday with me Not sure what my wife would say though


Kind Regards
Nigel
 Not sure what my wife would say though


Kind Regards
Nigel
Kurt Konrath
Kurt Konrath
You would not be the first to take hobbies with you on holiday or with you on work travels!
I also do model railroads, and there have been several articles on very famous rock music star that brings his building and train kits on the road when he tours, and has second room in hotel just to work on hobbies to relax between shows!
I also do model railroads, and there have been several articles on very famous rock music star that brings his building and train kits on the road when he tours, and has second room in hotel just to work on hobbies to relax between shows!
Not an update,but a question instead.There is a series of ladder rungs on the rear of the bulkhead but are only shown in this view.There is no indication of their shape or indeed of what material they are made from.I looked at the pictures of the two completed models but this area is not shown in the photographs
Before I come up with a best guess,does anyone have any ideas?
I have trolled images of other French ships,but this detail appears to be unique to this vessel
Kind Regards
Nigel
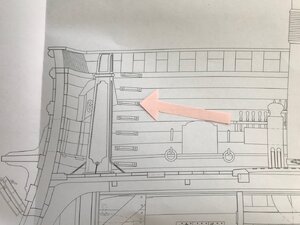
Before I come up with a best guess,does anyone have any ideas?
I have trolled images of other French ships,but this detail appears to be unique to this vessel
Kind Regards
Nigel

Thanks Michel,looking at the pictures are they really that simple a design?Frolich shows them as smooth on top,but surely there must be a relief or rebate to enable you to grip with your hands.
As an example,the boarding steps on Fleuron have two cutouts for rope to be threaded through for the sailor to grab.
Kind Regards
Nigel
As an example,the boarding steps on Fleuron have two cutouts for rope to be threaded through for the sailor to grab.
Kind Regards
Nigel
On doit pouvoir les usiner comme les taquets des échelles hors le bord avec une encoche au centre.
We must be able to machine them like the tabs on ladders outside the edge with a notch in the center.
Yes Michel,I think this will be the direction I head in,more of a ladder rung than solid block and in timber
Kind Regards
Nigel
Hello Nigel, what about the Idea of these ladders goint the the resting seats? As you I wasn't able to get any further details on them in the decksplans or the hull's cuts.
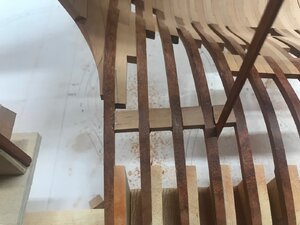
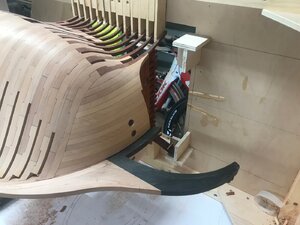
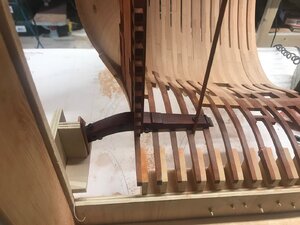
I have added parts to my jig to position the outboard end of the Catheads and a temporary strip across the bow section to set the height of the Catheads at their aft end.I have elected to add additional timbers to enable the cathead to be secured to the framing using blind brass dowels later in the build.I have also added a Pear futtock to support the ceiling planking on the hull sides otherwise the ends would fall in a void between two frames.This is not possibly would not be there on the full size vessel but it will be completely enclosed and I have to consider the strength of this large model.I am concerned that without a proper gluing face this area could be a point for crack propagation over time given the lack of a Forecastle deck on this vessel.
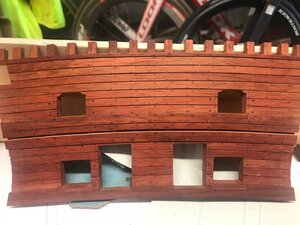
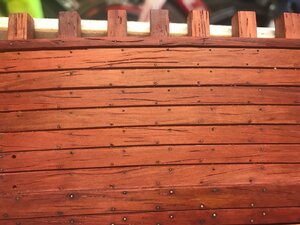
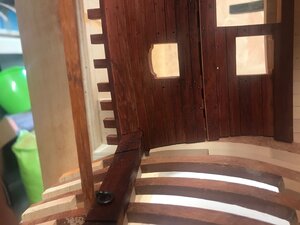
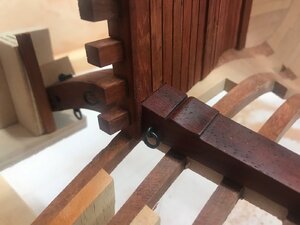
My photos illustrate firstly the completed nailing on the inside of the beakhead bulkhead.Some of the brass has the blackening rubbed off in places but I feel this adds to the "aged" look so am not overly concerned.The drillings for the eyebolts,hooks and lid ropes have also been added.
With many trial fits,templates etc I have one side of the Bulkhead notched to take the Cathead.This is a slowly catchy monkey,measure fifty times cut once job as any mistakes will result in unsightly gaps and major rework to resolve.The catheads will not be bonded to the bulkhead until both sides are notched and all three pieces can be glued together in one hit.
Kind Regards
Nigel


Great progress, Nigel. Thanks for sharing.
Great progress, Nigel. Thanks for sharing.
Thanks Chris
I assume in your last post you mean the steps infront of this bulkhead.Details are a little sketchy in the Monograph but I believe I have worked out how they go.I don't quite agree with how they interact with the Heads on the model illustrated in the booklet.The outer hull planking wraps around these steps so the heads should be sat on the grated area.
Kind Regards
Nigel
Hello Nigel,
since you have commenced down the path of full scratch building, you might perhaps loose interest in finishing your kits. It's very addictive when you scratch build, and I will probably not buy another kit again.
since you have commenced down the path of full scratch building, you might perhaps loose interest in finishing your kits. It's very addictive when you scratch build, and I will probably not buy another kit again.
Hi Brian,Yes it is and the thought has crossed my mind.I do revert to doing a little on other projects as a break,but now I am thinking"I need a break,shall I make a Capstan for the model?".This project is one of Gargantuan proportions and it has me hooked.I keep looking at Jaques Malliere's Fleuron build in 1/24 and he has been at it 18years and has just started the masting and rigging.Scary thing is am thinking mmm,I doubt I will live long enough to complete another project like this,shall I rig her??


I remember when GaryM posted his builds,he used to keep a tally of parts used and hours taken.I am not disciplined enough for that and to be honest I would rather not know because I know both will be something stratospheric.I started keeping receipts in an attempt to cost the build on completion,I have stopped doing that now,all I will say,it won't be cheap and please don't anyone ask how much do you think?
Kind Regards
Nigel
KNOW THE FEELING NIGEL IN A VERY , VERY TINY WAY, I KNOW I HAVE SPENT ABOUT $150.00 ON JUST THE FRAMES ONLY, THIS IS DUE TO SOME MAYBE 3 DO OVERS ON AT LEAST HALF THE FRAMES, ASKED IF IT WAS OK I WILL SAY HELL YES, WOULD DO IT OVER AGAIN, AND YES I DO NEED SOME BREAKS FROM THE LE ROCHEFORT MAY BE A WEEK OR SO ON SMALL PROJECTS MOSTLY KITS. GOD BLESS AND STAY SAFE Don
OOPS THIS IS JUST FOR EXTRA PRINTS FOR THE FRAMES ONLY. GOD BLESS STAY SAFE Don
- Joined
- Apr 10, 2020
- Messages
- 484
- Points
- 278

Great work, Nigel!
feast for the eyes
Hat off!
Daniel
feast for the eyes
Hat off!
Daniel
Thanks Daniel and Knut and thankyou for the likes.
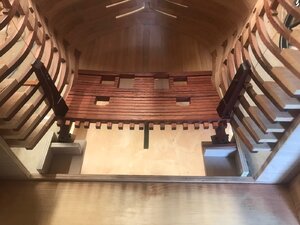
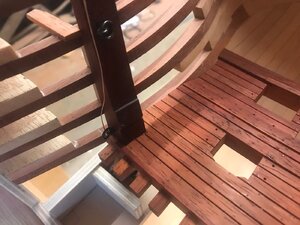
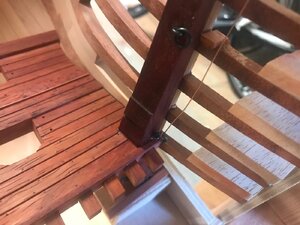
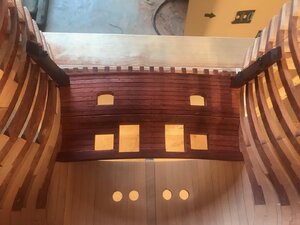
With both sides notched I have set everything up in the bow section.I then put a very fine bead of 30minute Epoxy around the joints on the inside face of the bulkhead to the Catheads.The jig is stood on end and I used fine copper wire to apply the glue.I will leave this overnight to fully harden then remove the assembly for further work on the joints from the outside face.I will probably have to remove all the jig parts for the Catheads to allow the assembly to come out.BTW,everything looks dark due to the lighting in the shop and it appears summer is now over in Yorkshire as well
Kind Regards
Nigel


