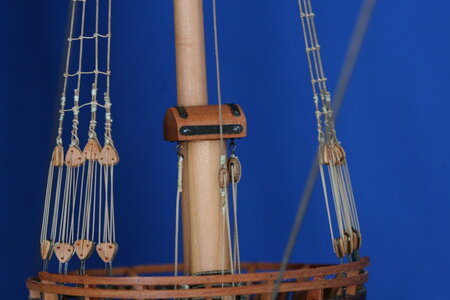
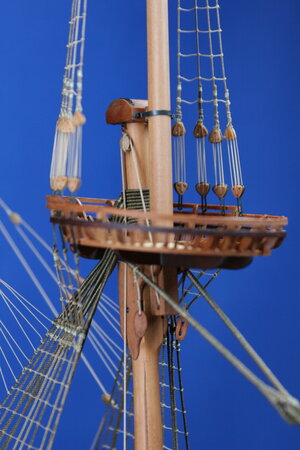
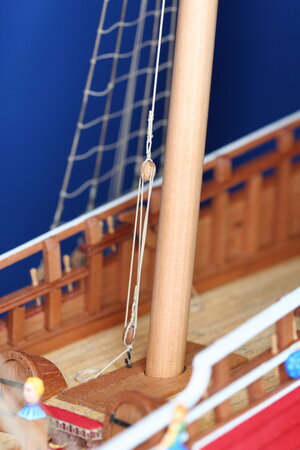
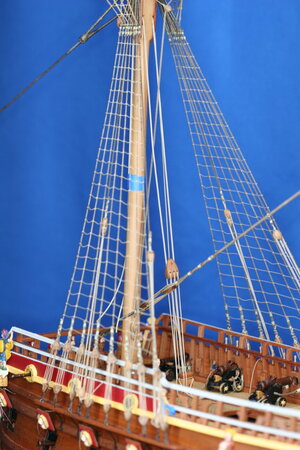
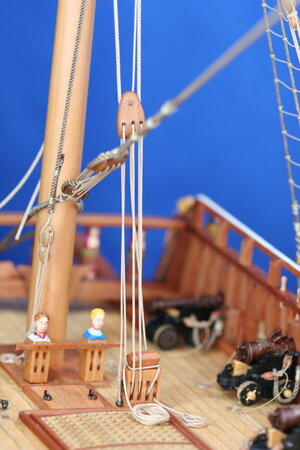
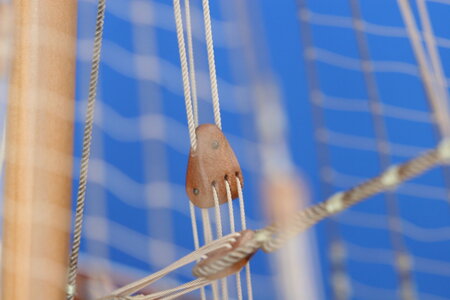
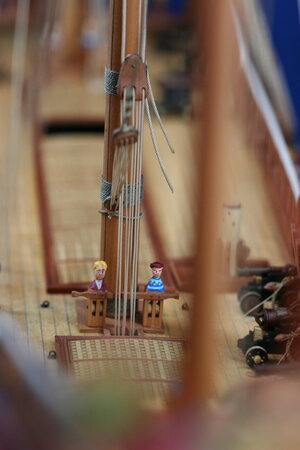
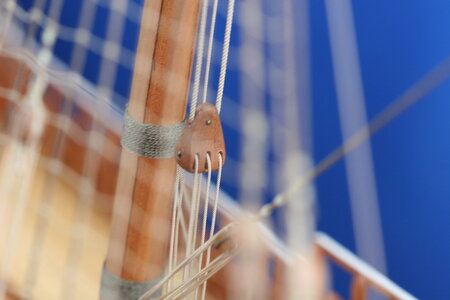
Vasa - 1:65 DeAgostini [COMPLETED BUILD]

I want to begin by thanking all of you for your continued interest in my build and for the active participation of many as I struggle to work out the details. While I have to accept that every question I would like answered can't be answered - and that I will make errors in judgement and execution along the way - neither do I want to be dismissive of the simple fact that I am building a model of a real ship with real history.

Over the past several weeks I have come near to completing the standing rigging. I have made some decisions along the way that not everyone will support but that's OK - it wasn't for lack of time spent trying to figure things out.

My customary blue background didn't cut it for pictures of rigging, so I cobbled together a few pieces art board that my kids had lying around... and now that I see the photos I regret not taking the time to set up proper lighting...

The overall view:

View attachment 308543

Mizzen:

View attachment 308544

Main:

View attachment 308545

Fore:

View attachment 308546

Sprit:

View attachment 308547

And I chose to rig the top ropes just for fun. Obviously these lines would have been taken down once the masts were raised but I think they make a nice addition to a model and could create a worthwhile talking point. I only did these for the top masts not the topgallants...

View attachment 308549

I'm confident, given the attention they have received on this log, that you didn't miss the fact that backstays are not rigged. Research continues with the hope that more can be learned.

Fun fact: I have now used nearly 60 meters of the smallest rope (roughly 0.24 mm) I can make from my chosen source threads. Most of this went to ratlines but also lanyards in a few spots. While there is great satisfaction in rope fabrication - I'm no longer sold on the (time) cost to value ratio.

Thanks for stopping by! It's a joy to share this journey with you!
This is supremely excellent work, Paul. So CLEAN and tidy, with detail that can capture you for hours, looking at all the parts.
Don't let it fall off the table.
 
I want to begin by thanking all of you for your continued interest in my build and for the active participation of many as I struggle to work out the details. While I have to accept that every question I would like answered can't be answered - and that I will make errors in judgement and execution along the way - neither do I want to be dismissive of the simple fact that I am building a model of a real ship with real history.

Over the past several weeks I have come near to completing the standing rigging. I have made some decisions along the way that not everyone will support but that's OK - it wasn't for lack of time spent trying to figure things out.

My customary blue background didn't cut it for pictures of rigging, so I cobbled together a few pieces art board that my kids had lying around... and now that I see the photos I regret not taking the time to set up proper lighting...

The overall view:

View attachment 308543

Mizzen:

View attachment 308544

Main:

View attachment 308545

Fore:

View attachment 308546

Sprit:

View attachment 308547

And I chose to rig the top ropes just for fun. Obviously these lines would have been taken down once the masts were raised but I think they make a nice addition to a model and could create a worthwhile talking point. I only did these for the top masts not the topgallants...

View attachment 308549

I'm confident, given the attention they have received on this log, that you didn't miss the fact that backstays are not rigged. Research continues with the hope that more can be learned.

Fun fact: I have now used nearly 60 meters of the smallest rope (roughly 0.24 mm) I can make from my chosen source threads. Most of this went to ratlines but also lanyards in a few spots. While there is great satisfaction in rope fabrication - I'm no longer sold on the (time) cost to value ratio.

Thanks for stopping by! It's a joy to share this journey with you!
Good morning Paul. No comment....... Redface . Too freaking good my friend.
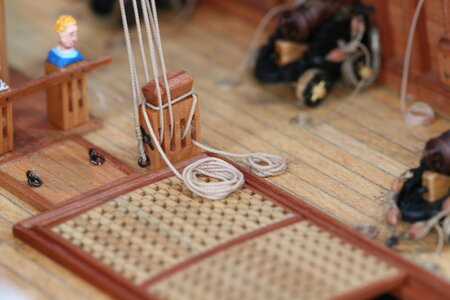
 
Thank you everyone for the likes and kind comments. The photos could be better but you get the idea of what I am doing. Sorry I forgot to show how I belayed the top ropes. I'll show that in a future post.

@PeterG: Yes, sails is the big question everyone seems to have when it comes to these big square sailed ships. I think you made a good choice by way of compromise when you decided to show her as she appeared on that fateful day.

I don't think I will build my version in full sail - while those models look magnificent the Vasa has a lot of interesting bits and baubles that have been PAINSTAKINGLY painted and I would like to honor that work by allowing it to stand on its own stage. I'll never do that painting on another ship so I'm thinking restraint might be the order of the day when it comes to sails.

I need to try my hand at sail-making and my success or failure in that regard may inform how many sails I end up doing. Perhaps a few full sails but hanging fairly limp - a few more furled - and a few stowed away (that is, bare yards lowered)? When I was at the Rijksmuseum there is a room full of ship models and I had the opportunity to see different sail configurations side by side. The ships without sails just looked incomplete to my eye but the fully rigged ships looked to be all about the sails so I guess I will end up somewhere in the middle of all that...

You would think I would have made some decisions already.
It is something of a dilemma I think, sails, no sails, or something in between. I tried to find guidance on this subject with my Bluenose schooner a short while ago and, given my then fear of sails, I guess I was hoping for someone to tell me not to bother. Further reading however led me to believe that the general consensus was sails for fore-and-aft-rigged ships, no sails for square-rigged ships, while furled sails, done properly (whatever that means), is a nice addition either side of the equation.

In the end I added sails to my schooner and was not sorry that I did as it may have looked quite bare otherwise, like the woodlands of the Catskill Mountains along the I87 in mid-winter. There is the danger of course that sails obscure the rigging you worked so hard to achieve, and a blank white sail might not provide as much joy to the finished product as a complex network of lines, blocks and tackle, even if it is just to remind you of the blood, sweat and tears your model reduced you to. Ultimately, however, I think you need to do what you think is best, whatever that might be. Good luck Paul :)

- Mark
Thank you, Mark. Your thoughts align precisely with mine.
 
Thank you, Mark. Your thoughts align precisely with mine.
Good afternoon Paul....I think you should most definitely do sails... you will always have that nagging, unanswered question every time you look at your beautiful Vasa??? No doubt.

Of course You will,in your detailed and concise manner, post (and have a 100 debating fellow members guiding and questioning) an exact guide how to make lovely sails for my reference should I choose sails;);)ROTFROTF. Cheers Grant
Anything for you Grant...
 
Yes, definitely sails, Kurt gets sails too, but keep them below deck so you can look at them when you use a laparoscope.
:rolleyes: Ahh, here we go again... schade.

All the sails on the Sovereign except the royals will be rigged, but the main sail will be furled to allow better view of the deck, just like Doris' model. Paul will probably choose a sail arrangement that allows a good view of all the details also.
 
:rolleyes: Ahh, here we go again... schade.

All the sails on the Sovereign except the royals will be rigged, but the main sail will be furled to allow better view of the deck, just like Doris' model. Paul will probably choose a sail arrangement that allows a good view of all the details also.
Just joking :) :)
 
Just joking :) :)
Of course!
Me too!

But seriously, the conflict between rigging full sails and not being able to see all the deck details remains a constant issue. My first ship had fully deployed sails, and although there was some loss of viewing access to the deck, rotating the yardarms as if the wind was from the port quarter did allow view of different parts of the deck from one side of the ship or the other. It also had the advantage of showing how all the running rigging functioned. When you take the sails off the yards and stow them below, the sheets, clewlines and bowlines are stored in a configuration that does not reveal what the lines are supposed to do, and they look confusing.
 
Last edited:
If you ask this question ten modelers, you will get 12 opinion. and the answers are very subjective, based on everybody experience.
I am personally using on 99% of the cases water based wood glue. Here in Germany / Austria the standard is Ponal Express, which is drying in 5 minutes (really strong after 15 minutes - my experience)
View attachment 178107
but also Tidebond is offering different types with different periods of drying
I think Tidebond I Classic is often used
View attachment 178108

FULLY AGREE. THE SAME HERE IN SPAIN.
500-years in Navy Reserve
50 years
 
Hi Paul,

Well what to say. I am so impressed with your Vasa build, the incredible attention to detail and fine workmanship. I’ve also noticed the ease with which you now use the terminology of yesteryear for the various parts of the ship, rigging etc. Your expanding knowledge of the seafarers vocabulary is equally impressive.

I’ll not ask about the seafarers use of common profanities though ROTF.
 
I don't think I will build my version in full sail - while those models look magnificent the Vasa has a lot of interesting bits and baubles that have been PAINSTAKINGLY painted and I would like to honor that work by allowing it to stand on its own stage. I'll never do that painting on another ship so I'm thinking restraint might be the order of the day when it comes to sails.

I need to try my hand at sail-making and my success or failure in that regard may inform how many sails I end up doing. Perhaps a few full sails but hanging fairly limp - a few more furled - and a few stowed away (that is, bare yards lowered)?

I like your line of thinking, here. I also like the presentation of a ship under partial sail because of all of the reasons you cite, and also because a ship wore numerous conditions of sail and partial sail calls attention to that fact much more clearly than full-sail.

Your paint work is truly extraordinary, and it deserves to have the highest level of attention paid to it.
 
Hey Ken,

Thank you for noticing. On both the hull and on the rigging I have been trying to either be fastidious about scale or make changes that de-emphasize when I am out of scale. For example, on the hull there should be more trunnels but mine are too large so I made fewer of them. On the rigging I am following several tables that inform rope and block sizes. In general I'm about 10% larger than I should be and that's because my thinnest rope could only be made so thin. I've chosen to adjust all the other ropes accordingly. It actually looks surprisingly realistic (at least to this novice's eyes) when looking at the whole thing in total.

Our club president, Dan Pariser, discusses the overall quality of a model in terms of the collective effort at scale and attention to correct detail; in summary - it won't always be exactly right, but an honest effort to strike upon the correctness of scale and detail will amalgamate into an overall presentation of correctness. More briefly - sometimes, in the absence of irrefutable sources - the best educated guess is right, if it looks right.

You are performing well-above that standard, Paul. Your ship doesn't resemble a kit in any way.
 
Thank you for your kind comments, Steve. Yes, I intend to build a case. Though when my wife asks, "where's it going" I confess I haven't come up with an answer yet. The ship is bigger than I had in my mind when I ordered it.

Might I suggest my apartment ;) Sorry for the joke, if it's already redundant; just catching up, here. But seriously - my apartment! You and your family can visit any time, naturally.
 
Last edited:
I want to begin by thanking all of you for your continued interest in my build and for the active participation of many as I struggle to work out the details. While I have to accept that every question I would like answered can't be answered - and that I will make errors in judgement and execution along the way - neither do I want to be dismissive of the simple fact that I am building a model of a real ship with real history.

Over the past several weeks I have come near to completing the standing rigging. I have made some decisions along the way that not everyone will support but that's OK - it wasn't for lack of time spent trying to figure things out.

My customary blue background didn't cut it for pictures of rigging, so I cobbled together a few pieces art board that my kids had lying around... and now that I see the photos I regret not taking the time to set up proper lighting...

The overall view:

View attachment 308543

Mizzen:

View attachment 308544

Main:

View attachment 308545

Fore:

View attachment 308546

Sprit:

View attachment 308547

And I chose to rig the top ropes just for fun. Obviously these lines would have been taken down once the masts were raised but I think they make a nice addition to a model and could create a worthwhile talking point. I only did these for the top masts not the topgallants...

View attachment 308549

I'm confident, given the attention they have received on this log, that you didn't miss the fact that backstays are not rigged. Research continues with the hope that more can be learned.

Fun fact: I have now used nearly 60 meters of the smallest rope (roughly 0.24 mm) I can make from my chosen source threads. Most of this went to ratlines but also lanyards in a few spots. While there is great satisfaction in rope fabrication - I'm no longer sold on the (time) cost to value ratio.

Thanks for stopping by! It's a joy to share this journey with you!
Looking so good Paul, now I have an impossible standard to follow, in fact do you wanna come and do my rigging once your done (oh bring your ropes too)ROTFROTF
 
Hello Friends,

Having temporarily set aside the installation of backstays, rigging work continued on the ties and halyards.

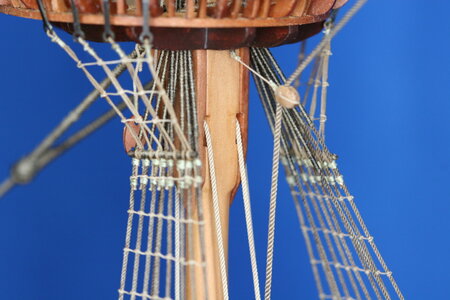
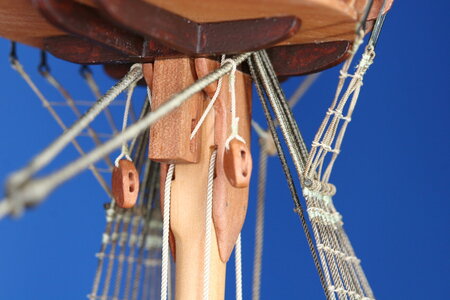
But first, I was asked via PM to provide a bit more detail on what I have been calling top ropes. As I understand it, these ropes were used to raise the upper mast segments. I chose to rig them as entirely removable once the topmast (or topgallant) was raised, and as a fairly simple affair (my research uncovered all kinds of increasingly complicated configurations...).

Two eyebolts are attached to the underside of the mast cap. I added a hook to the end of the rope - ran the rope down and through a sheave at the foot of the mast - back up through a block on the other side - and then down to the deck. Here are a few images:

IMG_8070.JPG

IMG_8067.JPG

On the foremast the top rope runs through the knighthead at the base of the mast and then would have been run to the capstan on the weather deck (and in my interpretation taken down after the mast was hauled into position). On the main mast the top rope passed through the weather deck to a lower deck where it would also have been run to a capstan. I'll show some of that in a moment.

On the mizzen, since the topmast is lighter, I simply rigged a tackle to an eyebolt on the deck at the foot of the mast. I have also seen this rigged to an eyebolt mounted on the mast itself (as well as to a cleat on the mast). The mizzenmast of the Vasa was never recovered so it's all just conjecture.

Here is the working end of the mizzen top rope:

IMG_8085.JPG

Now on to ties and halyards. First of all, I should have rigged these before I did shrouds. Access was quite limited making what should have been an easy task very challenging (no yards have been attached - this is just roughed in at this point).

Here is the overall view at the foremast:

IMG_8083.JPG

And now a few images of how I did the halyard at the foremast:

IMG_8071.JPG

IMG_8072.JPG

IMG_8073.JPG

In the image above, the four sheaved knighthead should actually have a carved head on it like the others. Sadly, the head that belongs here disappeared in my garage months and months ago when I was cutting it off the unusable casting that came with the kit...

The line running through the fourth sheave (on the far right) is the top rope. It would have run to the capstan, but I just left it laying there.

And now at the main:

IMG_8077.JPG

Notice how the stay has been offset on the mast - this is actually correct, not sloppy work on my part. You can see how the halyards simply pass through an opening in the deck. The seventh rope is the top rope.

IMG_8078.JPG

And finally, here are a few images of what is happening up top with the ties (tyes?)...

IMG_8082.JPG

IMG_8081.JPG

Thank you very much for stopping by! I'm so happy I found this forum and all of you. This would be lonely business without a few folks walking alongside me...
 
Back
Top