- Home
- Forums
- Welcome to Ships of Scale Forum
- Beginners Corner - How to Get Started
- Build Logs and Documenting / Photography
You are using an out of date browser. It may not display this or other websites correctly.
You should upgrade or use an alternative browser.
You should upgrade or use an alternative browser.
Building a small sailing ship
- Thread starter shipbuilder
- Start date
- Watchers 13
- Joined
- Jun 17, 2021
- Messages
- 2,520
- Points
- 538

Good to see you back in good form and humor. Four fingers of Glenlivet and a plate o' kippers on me!Is it fine wines and single malts matured for 50 years in kegs of oak, or a regular plate of oak smoked kippers? The list goes on....as does my role of Devils advocate!

Pete
- Joined
- Apr 21, 2018
- Messages
- 621
- Points
- 308

Hi Peter.Good to see you back in good form and humor. Four fingers of Glenlivet and a plate o' kippers on me!
Pete
I'm t-total and gag at the thought of a plate of kippers.
But if it would make the world that bit more cheerful, I'd wolf the lot down, to leave the bony remains on the greasy plate.
- Joined
- Jun 30, 2012
- Messages
- 1,225
- Points
- 433

Scratchbuildinga small sailing ship
Friday, 14th February,205
I was laid low yesterday having to go off to hospital (planned) for some laser eye surgery - No big deal really, had to wait for drops to work before surgery (about 30 minutes) procedure itself about 10 to 15 minutes,then wait for an hour to be checked to see if it worked. It did work, but all the walking and sitting around all afternoon laid me low,followed by a half-hour wait for the taxi to collect me. Horribly uncomfortable seats to wait around in!
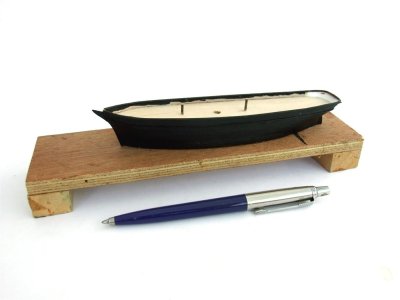
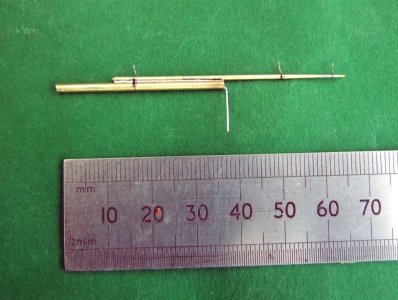
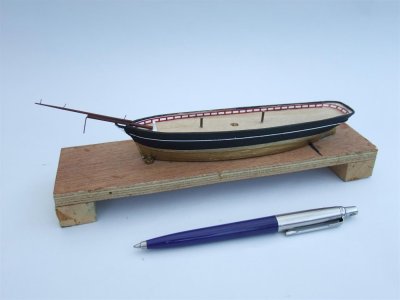
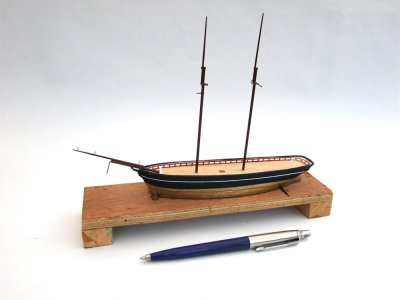
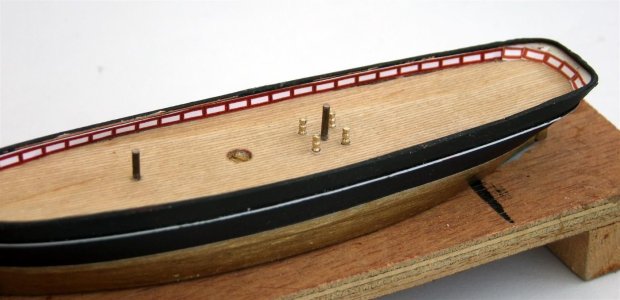
Latest on model. Hull painting complete, bowsprit assembly made from soldered brass rod,painted and fitted. Inside of bulwarks lined with a strip of paper panels printed in a normal word processing font (Boxes, lines,squares). A close up of the scored deck is also shown. The coppersheathing was just painted on with copper paint. The white line was a strip of white polystyrene rod stuck around the hull. This was painted over with the black. After dry, scrape the top of it off with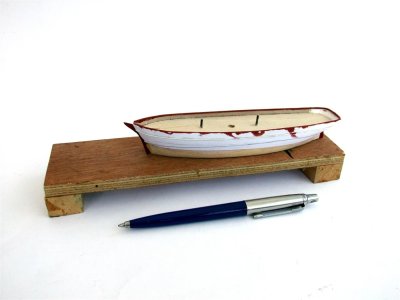 the edge of a scalpel. This leaves a very and narrow white line.
Friday, 14th February,205
I was laid low yesterday having to go off to hospital (planned) for some laser eye surgery - No big deal really, had to wait for drops to work before surgery (about 30 minutes) procedure itself about 10 to 15 minutes,then wait for an hour to be checked to see if it worked. It did work, but all the walking and sitting around all afternoon laid me low,followed by a half-hour wait for the taxi to collect me. Horribly uncomfortable seats to wait around in!
Latest on model. Hull painting complete, bowsprit assembly made from soldered brass rod,painted and fitted. Inside of bulwarks lined with a strip of paper panels printed in a normal word processing font (Boxes, lines,squares). A close up of the scored deck is also shown. The coppersheathing was just painted on with copper paint. The white line was a strip of white polystyrene rod stuck around the hull. This was painted over with the black. After dry, scrape the top of it off with
 the edge of a scalpel. This leaves a very and narrow white line.


Loved your miniature models for years now, Robert. Thanks for sharing your techniques.
I've just got one question. Is it just the one classic Parker tee-ball jotter pen that you always include for scale in your photographs, or do you have a whole collection of them?
I've just got one question. Is it just the one classic Parker tee-ball jotter pen that you always include for scale in your photographs, or do you have a whole collection of them?
- Joined
- Jun 30, 2012
- Messages
- 1,225
- Points
- 433

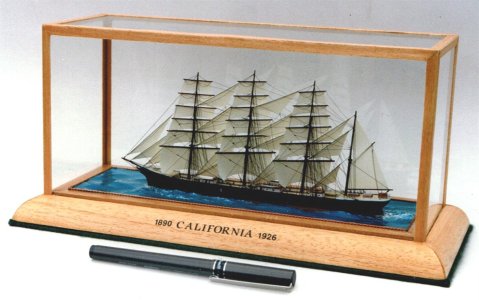
Thank you - I have used a number of pens over the years as an international size indication, but found the Parker was the most photogenic. I have three left, a black one, blue one and a red one, and it depends which comes to hand when taking the photographs. My techniques can be used for warship models as well, but I stick to merchant ships that have the advantage of being unpopular amongst model shipbuilders. That meant not very many kits of them, that made them more popular with collectors who seemed to prefer obscure and rare types of scratchbuilt model. Of course I am no longer building them, but took hundreds and hundreds of photographs of the 250 plus models that I built over the past 30 years as well as building photographs. They are certainly easier and quicker to build, and I have never had the required patience, space or skill to assemble a good quality kit - to say nothing of the cost. This is one of my earlier pens, not very photogenic at all. I have always sold them, causing me on a few occasions to be labelled as "someone who knows the cost of everything, and the value of nothing!" But if someone offered me the choice of one of two gifts, on condition that I didn't sell them, such as - a Rolls Royce automobile or a set of Shipbuilding & Shipping Record books, (An obsolete publication, full of merchant ship plans.) I wouldn't even hesitate, and would take the books!Loved your miniature models for years now, Robert. Thanks for sharing your techniques.
I've just got one question. Is it just the one classic Parker tee-ball jotter pen that you always include for scale in your photographs, or do you have a whole collection of them?
- Joined
- Jun 30, 2012
- Messages
- 1,225
- Points
- 433

Scratchbuildinga small sailing ship
Friday,18th February, 2025
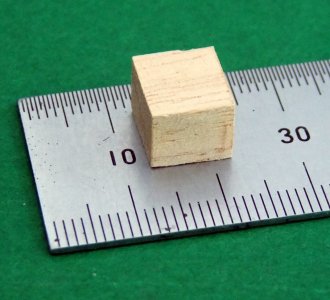
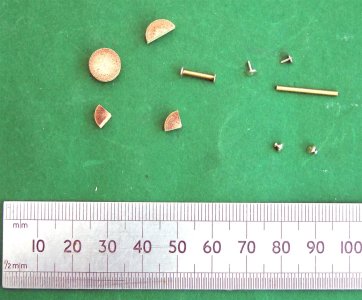
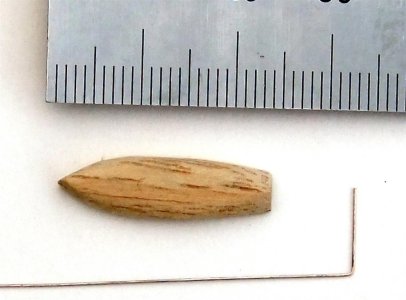
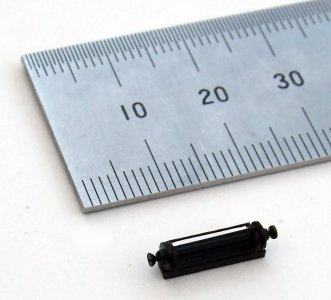
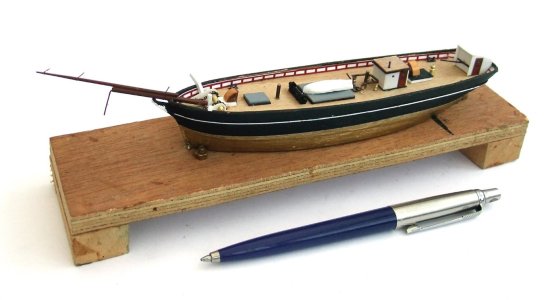
Fitting out the hull doesn't need much explanation, the deckhouse is just a wood cube faced with white styrene sheet. The door was made on the computer, printed on paper, cut out and stuck on. The winch and supports to the rail round the mainmast were made from brass, but could equally have been made from plastic rod. Slices of round wood dowel, quartered, provided curved top companionways. Boat carved from solid, with wire keel fitted, and spray-painted white,was mounted upside down on the hatch. Hatches, thin pieces of styrenesheet, spray painted. No wheel, just a simple tiller steering. All ready for rigging now -
- Joined
- May 25, 2020
- Messages
- 610
- Points
- 353

Dear Shipbuilder,
Scratchbuildinga small sailing ship
Friday,18th February, 2025
Fitting out the hull doesn't need much explanation, the deckhouse is just a wood cube faced with white styrene sheet. The door was made on the computer, printed on paper, cut out and stuck on. The winch and supports to the rail round the mainmast were made from brass, but could equally have been made from plastic rod. Slices of round wood dowel, quartered, provided curved top companionways. Boat carved from solid, with wire keel fitted, and spray-painted white,was mounted upside down on the hatch. Hatches, thin pieces of styrenesheet, spray painted. No wheel, just a simple tiller steering. All ready for rigging now -
View attachment 502057
View attachment 502058
View attachment 502059
View attachment 502060
View attachment 502061
View attachment 502062
Thank you for the magic! I trolled the forum and found pictures of your wonderful work. Superlative!
Blessings. Peace. Gratitude.
Chuck
- Joined
- Jun 30, 2012
- Messages
- 1,225
- Points
- 433

Thanks Chuck -
- Joined
- Jun 30, 2012
- Messages
- 1,225
- Points
- 433

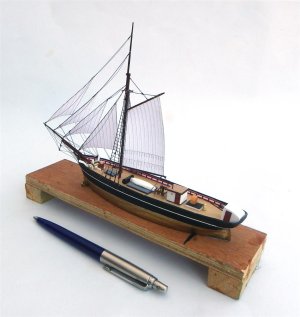
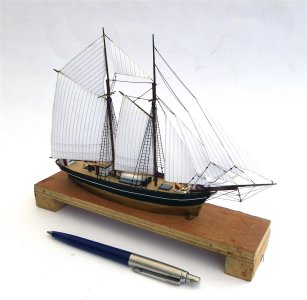
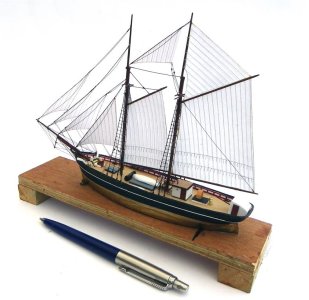
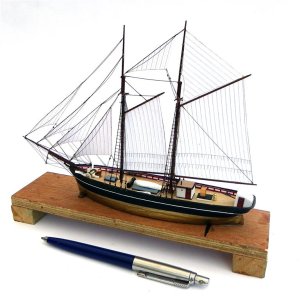
Scratchbuildinga small sailing ship
Thursday,20th February, 2025
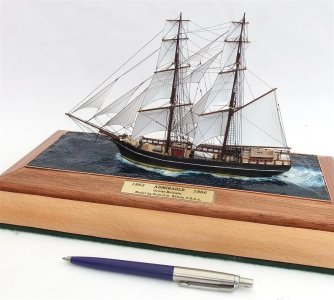
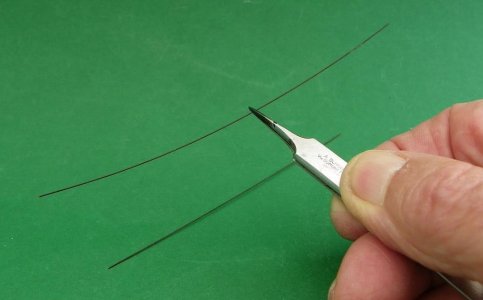
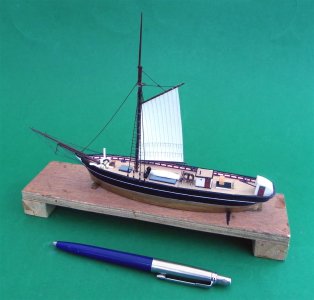
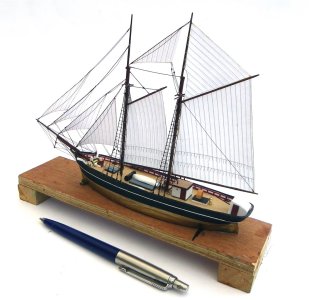
The rigging is a lot easier than building the hull if you use special techniques. I use fine copper wire, stretched sightly with two small pairs of pliers. When you put it down, it does not spring back like an elastic band, but remains straight. If you wish to put a curve in it, pick it up at one end with tweezers, and draw thumb and forefinger lightly down it. The greater the pressure, theg reater the curve.
Measure the length you want with dividers, and cut it off with a scalpel. Pick it up with tweezers, dip each end in glue, and place in position on the model – no knots anywhere!
I solder the ratlines on, but if you do not feel up to it (bit fiddly) just leave them off – it is not really noticable in miniatures.
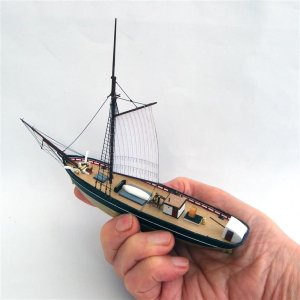
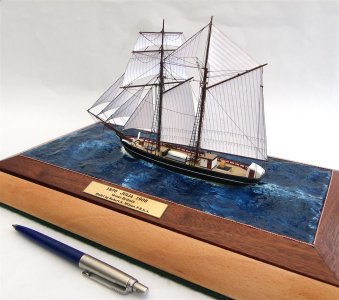
The spars were made from brass rod, but you could make them from split bamboo. The sails were white airmail paper, with seams printed on with the computer printer before cutting them out, and moulded round an ostrich egg whilst wet, and dried with a small heat gun. The sail is held on the surface of the egg by a large handkerchief placed over it, and held tightly at the back.
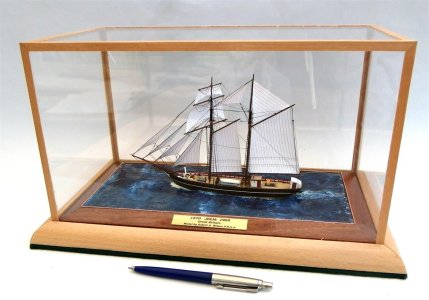
The model was placed in a sinulated sea, and a home made display case.
The biggest obstacle to building something like this is to decide that you could never do it, without even trying!
But the cost of tools and materials are minimal when compared to the cost of a good kit.


- Joined
- Jun 17, 2021
- Messages
- 2,520
- Points
- 538

Thanks for the wonderful practicum! 


- Joined
- Jun 29, 2024
- Messages
- 534
- Points
- 258

“cost is minimal” Or even a bad kit!
- Joined
- Jun 30, 2012
- Messages
- 1,225
- Points
- 433

The full unabridged practicum, complete with plans, may be obtained by download here for £1.99.
https://payhip.com/b/nrhc7
https://payhip.com/b/nrhc7
- Joined
- May 25, 2020
- Messages
- 610
- Points
- 353

WOW!!!! Shipbuilder, you've convinced me. Now all in need to do is get an ostrich egg!Scratchbuildinga small sailing ship
Thursday,20th February, 2025
The rigging is a lot easier than building the hull if you use special techniques. I use fine copper wire, stretched sightly with two small pairs of pliers. When you put it down, it does not spring back like an elastic band, but remains straight. If you wish to put a curve in it, pick it up at one end with tweezers, and draw thumb and forefinger lightly down it. The greater the pressure, theg reater the curve.
Measure the length you want with dividers, and cut it off with a scalpel. Pick it up with tweezers, dip each end in glue, and place in position on the model – no knots anywhere!
I solder the ratlines on, but if you do not feel up to it (bit fiddly) just leave them off – it is not really noticable in miniatures.
The spars were made from brass rod, but you could make them from split bamboo. The sails were white airmail paper, with seams printed on with the computer printer before cutting them out, and moulded round an ostrich egg whilst wet, and dried with a small heat gun. The sail is held on the surface of the egg by a large handkerchief placed over it, and held tightly at the back.
The model was placed in a sinulated sea, and a home made display case.
The biggest obstacle to building something like this is to decide that you could never do it, without even trying!
But the cost of tools and materials are minimal when compared to the cost of a good kit.
View attachment 502415
View attachment 502416
View attachment 502417
View attachment 502418
View attachment 502419
View attachment 502420
View attachment 502421
View attachment 502422
View attachment 502423
View attachment 502424
 In all seriousness, you have definitely made what seems otherworldly into the realm of something mere mortals (like me) could achieve with some application and willingness to develop new but attainable skills. Thank you!
LOVE IT!
Blessings!
Chuck
- Joined
- Jun 30, 2012
- Messages
- 1,225
- Points
- 433

Thank you Chuck. You are correct, no-one has the skill at first, but it can be learned. I could not drive a car until someone showed me how. The secret is "special techniques," except that they are not really secret!
I forgot to mention above, that the running blocks are small blobs of wood glue, painted the appropriate colour when dry.
Bob
I forgot to mention above, that the running blocks are small blobs of wood glue, painted the appropriate colour when dry.
Bob
- Joined
- Jun 30, 2012
- Messages
- 1,225
- Points
- 433

Here is a short video of the brig Admirable, during construction. I know that merchant ships are not very popular with ship modellers, but I find them far more intersting than warships (one sea battle is pretty much like another to me), Merchant ships hold far more interest to me, after having served in them for more than thirty years.
- Joined
- Jun 30, 2012
- Messages
- 1,225
- Points
- 433

I find your water effects at least as impressive as the ships themselves, and the ships are outrageously impressive!
- Joined
- Jun 30, 2012
- Messages
- 1,225
- Points
- 433

Thanks - My wife paints the seas. She used to accompany me on long voyages, so had plenty of time to observe the sea. I don't build them anymore, and can't say that I miss it, as the constant demand for them was getting too much for me! Our local model shipwrights society has recently dropped the word "shipwrights" from the title, so I guess model shipbuilding is generally in a decline across the world - all computers and smartphones these days.I find your water effects at least as impressive as the ships themselves, and the ships are outrageously impressive!


