• Win a Free Custom Engraved Brass Coin!!!
    As a way to introduce our brass coins to the community, we will raffle off a free coin during the month of August. Follow link ABOVE for instructions for entering.

Sovereign of the Seas - Sergal - Vintage kit (1974)

Hi--I just finished this ship in May and wish you lots of fun and interesting challenges. Just be aware that the plan book is totally useless and if you follow it you will have huge issues. I ignored it. Also, the plans are pretty bad and inconsistent from sheet to sheet so you really have to do some out of the box thinking and planning (which clearly you are doing with the cool lighting work).

A couple of other thoughts:

1. Yes, definitely do your own stern windows and the lighting will make things amazing.
2. When you do the mast work, be aware that the lubber hole openings in the little discs they provide are way too small and unless you enlarge them you can't get lines through them.
3. The kinds of things you have to check that you never thought you did--the flags are bigger than the dimensions of the top masts they provide so check all that before you make the masts.
4. I'm sure I'll think of other things and let you know!

Overall warning--I've done the Mantua Sergal Victory, Soleiel Royal and Sovereign of the Seas and thought the SoS was the worst in terms of plans, materials and concept, so it definitely deserves a good bashing because there are lots of ways you can make it better!

View attachment 528896
Thomas, you're SOS build is very nice. Did you post a build log here or elsewhere? I'd like to go review how things went. It's really helpful for me to see and read how others have resolved some of the issues I'm sure I'll be facing.
 
I'm enjoying your build very much Ron and I love the idea of the coins on display! You never explained who signed the frames and why you posted scripture on the interior frames? I look forward to following your progress all the way to the end. Magic Mike
Mike, if Father Mark is watching this thread, I'll let him comment on signatures and Scripture verses on the frames. I took over his build after all that "extra content" was already added to the frames. I know he's got a great story behind all that.
 
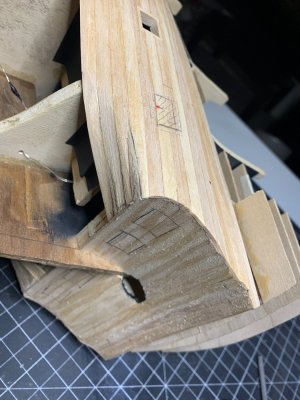
Hi again--As I mentioned, I went back to have a look and came up with a few more caveats about things to be aware of when you tackle the kit. I've also attached some pictures of some of the things I'm referring to. Let me know if you need any clarifications. Here goes:

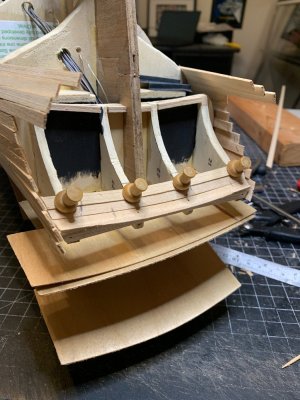
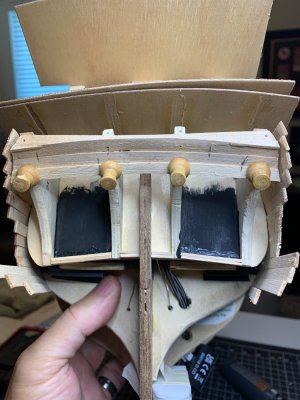
  • For the curved bulkheads the kit provides little cutouts to put down on the deck to secure the lower part of the bulkhead walls. Unfortunately, they don’t correspond to the curves of the plywood decking, so before you secure anything, make a template from the deck edge and make your own cutouts or guides. Otherwise you will have a huge problem getting the walls straight and even.
  • Be creative with the front of the fo’c’sle. The plans just have an opening but you could build steps down to the platform over the bowsprit or some other arrangement. I made a little door inside the opening as well.
  • Unlike the newer kits, this one provides nothing for the tops of the curved bulkheads other than the brass strips. I found them impossible to bend and miter in order to position them the way I wanted to and ended up making them out of quarter round timber that I could bend.
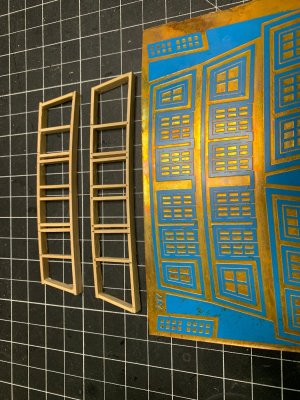
  • I didn’t like the Jacobs ladder the plans showed so I made mine using smaller timber. I also made a door that looked sort of 16th century. I also glued some netting inside the plywood stern windows to make it look like diamond window panes. Not sure how historically accurate that is, but I think it dresses things up.
  • Because the ship has royals as well as topgallants and the crows nests are not to scale (too large) the masts can look as if they are pitched forward, especially when the upper shrouds are in place. You might want to rake the masts back a bit more than usual to compensate for this or tilt the top masts back a bit when you assemble them.
  • Because you are doing sails it may not be as important, but there is no logic to the running rigging plan. Especially for the bowsprit and foremast where they have most of the lines going to one belaying pin and some going only to one. Also, if you try to run them to where the plan says you’ll get some illogical line crossings. Plan the whole thing out and make your fife rails a bit bigger than normal to take all the lines and to have a bit more room to work.
  • Good luck!

View attachment 529190

View attachment 529191


View attachment 529193
Thomas, thanks for the tips. I think making the fife rails longer will help. I didn't have enough of the belaying pins in certain areas when I did the rigging on Victory. There's so many things I'll have to work out, that I'll come back to these posts again and again and probably ask more questions.
 
In the Sovereign, much of the running rigging was tied to cleats that were attached to the shrouds by lashing.
View attachment 529333

Here is one person's belaying plan interpretation. It seems consistent and proper. With it, you can figure out the running rigging.
View attachment 529335

Below is an attached article which points out many important and unique details on how HMS Sovereign of the Seas was rigged.
Kurt, thank you very much for this info. It will be hugely helpful. And the sooner I have the info, the sooner I start thinking and planning.
 
Planking
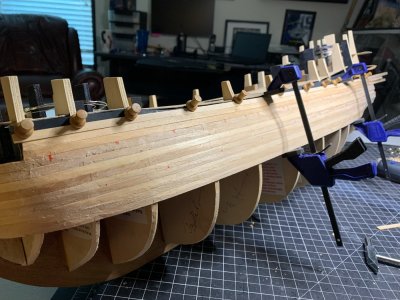
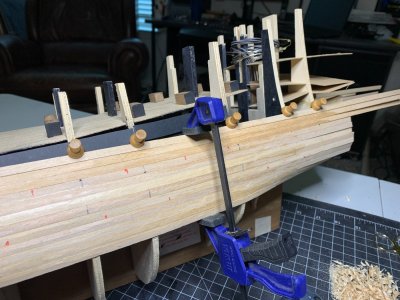
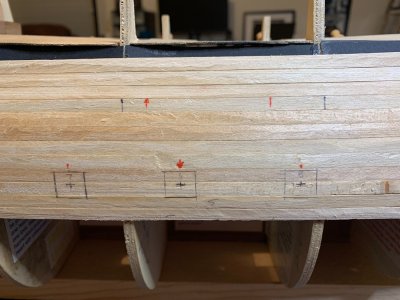
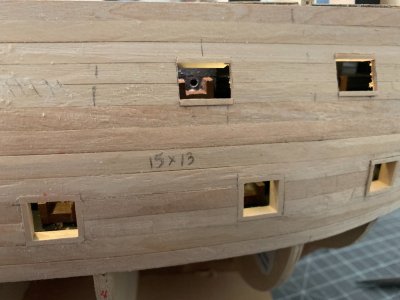
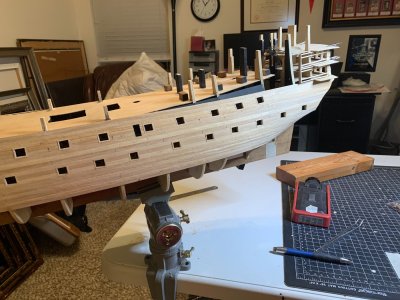
Started the first layer of planking. Got far enough to put in the gunports for the lower gun deck and the 2nd gun deck.

Gunports/Cannons
The gunport positions were all taken from the plans. And since the plans are at a 1:1 scale with the model, it made it a lot easier. All the gunports are framed which will eventually be painted red. You can see that I added false gun carriages on both gun decks. I think these will provide a little bit of detail when lit up.

I've started looking at some of the cannons themselves. Although they are all brass, they are going to need a fair amount of cleanup. That's going to likely be the case for all the ornamentation.

One point I struggled with was test fitting the cannons on the 2 decks. The false back that each cannon plugs into are at different lengths from the planking. Some of the guns stick way too far out (my opinion). My probable solution is to shorten any cannon barrel that sticks out too far by cutting out a mid-section by the needed amount and then using epoxy to glue the remaining front barrel to the back-end portion that plugs into the false back. I tried this technique on one cannon that looked unsalvageable and the epoxy was very strong, so I think that's the way forward.

IMG_4353.JPEG

IMG_4354.JPEG

IMG_4357.JPEG

IMG_4361.JPEG

IMG_4382.JPEG
 
Lower Stern
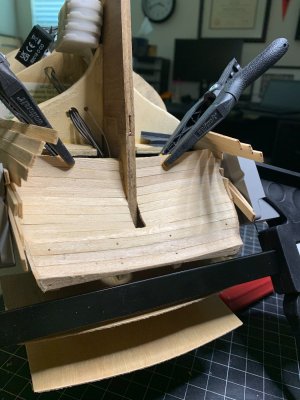
Nothing too difficult here. Decided to not have the squared off lower stern as that's not how I've seen most SotS pictures show her. Using the plank bender really helps with these bits. Also need to sometimes twist the planks.

Still have to decide details about the 2nd layer of planking. I'll use the mahagony strips provided with the kit. All the wood with the kit has held up very good so far given that they are 50+ years old.

IMG_4370.JPEG

IMG_4371.JPEG

IMG_4373.JPEG

IMG_4374.JPEG
 
Last edited:
One last post for the day....

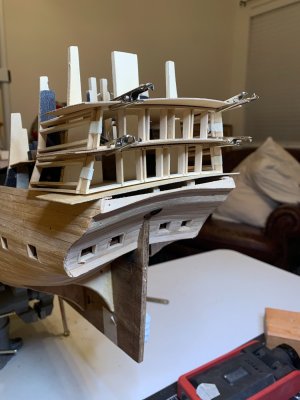
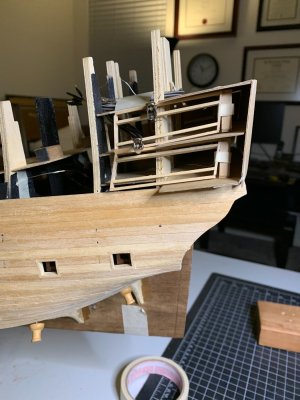
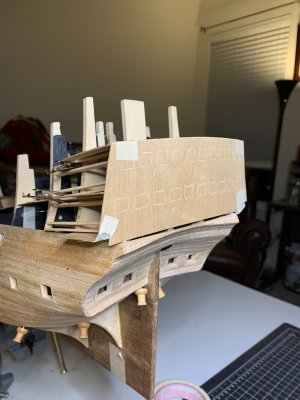
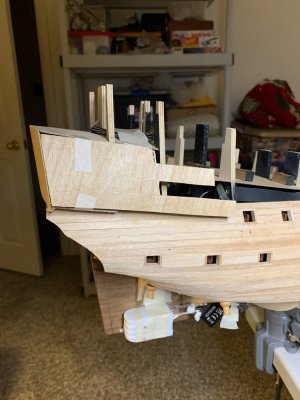
Upper Stern
I decided to pause on the planking for a while and focus on the upper stern. I had a lot of questions about how the infrastructure of the upper stern should be built based on deciphering the kit plans/sheets and what I've seen others do. And I'd like to get that infrastructure in place before continuing the plank upwards.

I decide to use the kit's layout of inner windows and doors and build frames. I need to be sure that everything is open enough to see the light coming from inside.

So far, my test fitting looks like the pre-cut pieces from the kit are pretty accurate.

IMG_4376.JPEG

IMG_4385.JPEG

IMG_4388.JPEG

IMG_4389.JPEG

IMG_4390.JPEG
 
Thomas, you're SOS build is very nice. Did you post a build log here or elsewhere? I'd like to go review how things went. It's really helpful for me to see and read how others have resolved some of the issues I'm sure I'll be facing.
Hi--I confess I didn't do a build log, but if you come up against anything you want to discuss let me know.
 
Back
Top