1:20 Scale Victory & Constitution Gun Models by Signet [COMPLETED BUILD]

Joined
Nov 17, 2021
Messages
833
Points
318

Location
Columbia, SC
While waiting to hear more about Pavel's 1/64 scale San Bartolome, I needed something else to work on, so I decided to start this build of a Victory 32-Pounder.

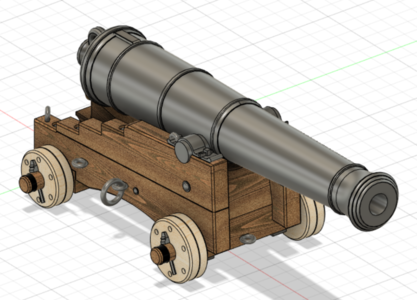
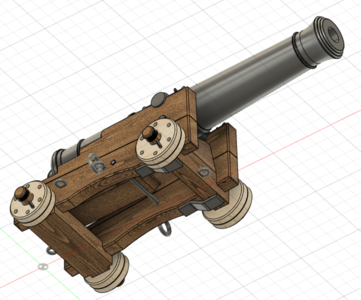
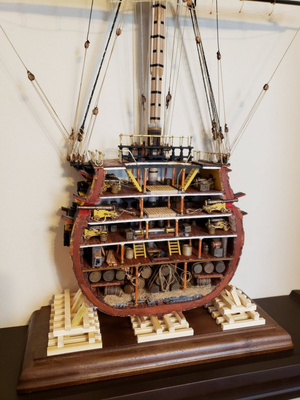
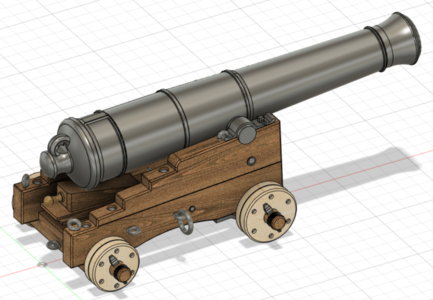
A bit of background: When building my Corel HMS Victory cross section kit, I felt the guns included were not to scale. Especially since the 24- and 12-pounder guns were the same size. So I did quite a bit of research at the time, working with two great members of the ModelShipWorld forums, and drew up properly sized and configured guns using Fusion 360. My son then made me 1/98 scale guns with his 3D printer (along with MANY problems along the way). Here are some screen shots of the resultant 32-pounder Blomefield gun with carriage:

1666906748313.png
1666906770825.png

1666906799199.png

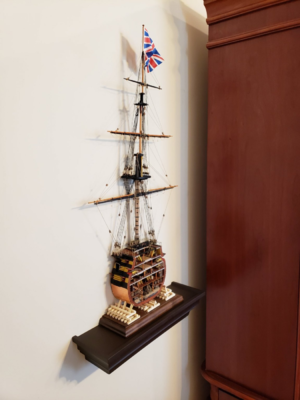
Here is a couple pics of my HMS Victory model before adding the plexi case:
1666907670364.png
1666907710938.png

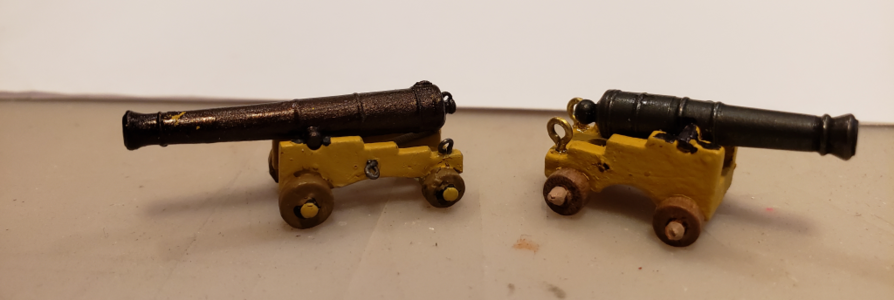
And here are pics of my 3D 32-pounder gun (left) beside the kit gun (right):
1666907953761.png
And of the 12-pound gun:
1666907976598.png

I'll continue this in a bit; wifey is calling me to dinner. Actually, to /make/ dinner tonight. :)
 
Dinner's done! Frozen pizza tonight, hot dogs last night. I'm a chef! lol!

Before continuing on this project, I felt that I needed a small table saw of some kind, in order to make accurate cuts. I wanted a Proxxon FET, despite the price, but they just aren't available right now. And I thought I could do without the tilt arbor, so ordered and received the Proxxon Circular Saw KS 115. It took me 10 minutes to read the instructions and search for the way of raising and lowering the saw blade for me to realize that the saw blade doesn't raise or lower! So, a cut-off saw only. Worthless to me. I needed to make notches and such. So, the KS was sent back to Proxxon, with my bank account having $20 less in it due to postage. (Note to self: READ ALL the freakin' information and manual the next time!)

So, I ordered the Micro-Make™ Tilt Arbor Saw Super Value Package Mini Table Saw Multifunction from Amazon, which I'm afraid is no Proxxon, but a decent price considering it includes the "super value package" which included some things I wanted. Not to do a review, but I generally like the saw. It cuts fine, although even the 40-tooth carbide blade doesn't cut as smoothly as I expected (about the same as my 10" miter saw, in fact, which does a good job). But at least it tilts and goes up and down and generally works well for a project like this.

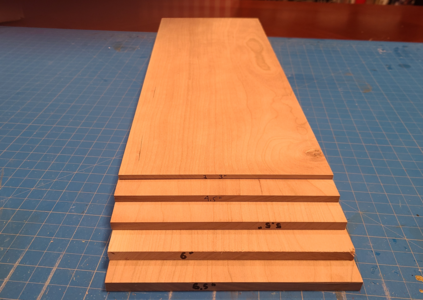
In preparation for this project, I had reached out to a woodworker friend with a commercial workshop to make me some cherry sheet, in the scale sizes 3", 4.5", 5.5", 6" and 6.5" thickness I would need:
1666924143467.png

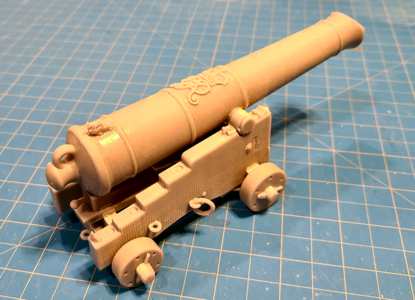
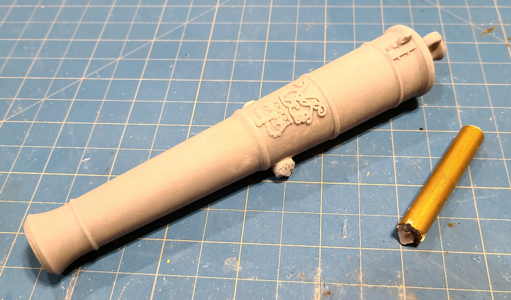
Some time ago I had my son make the 32-pounder barrel and carriage using his 3D resin printer, expecting just to paint it up and be done:
1666924541761.png
I wasn't sure what angle the barrel would end up in, so I came up with an idea of including part of the capsquares and brackets with the barrel trunnion, which I could then adjust slightly and fill in the space. Oh, and the above barrel was the first try, where insufficient height was available, and the print didn't complete.

Anyhow, while the barrel can be made to look acceptable, I knew I'd never be happy with the carriage. Just too many unwanted lines that were too difficult to get rid of. But then to use the barrel with a scratch-built wood carriage I'd have to have a standard trunnion. I came up with a piece of tubing the right size for the ID to match the trunnion, turned it into a cutter, and for half the exposed trunnion length, had good luck cutting it down. The second half of each side killed it:
1666924762431.png

So, I continue on my cherry wood carriage, hoping my son will eventually make me a new barrel with the revised trunnion.

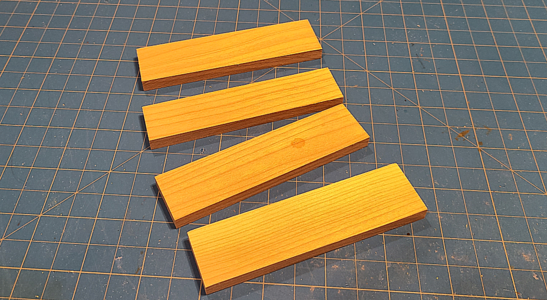
It appears that the Victory's 32-pounder carriages (and 24-pounder for that matter - they were the same) had the brackets made of 2 separate pieces, bolted (and probably keyed/mortised as well) together. While that may not show on a painted carriage, it would on my cherry-grained carriage, so I started out with 4 pieces of scale 5.5" thick cherry for the brackets:
1666925178695.png

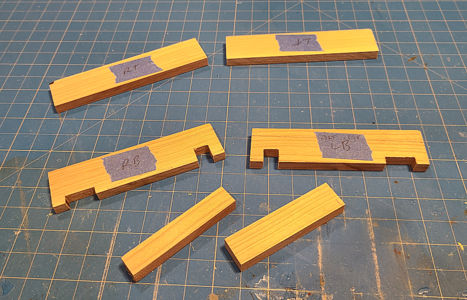
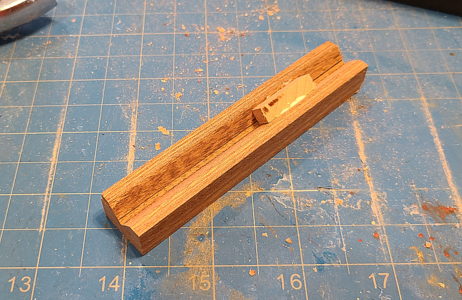
Next I made the front and rear axtrees. I'd decided previously that I would be unable to make the axtrees complete with axle at the trucks without a lathe, so will be cutting them short and boring 1/4" holes for cherry dowel axles to be added. Then I slotted the lower bracket halves using the table saw, making sure the slots were at the required 2.3 degrees due to the angle of the brackets to the barrel bore:
1666925379781.png

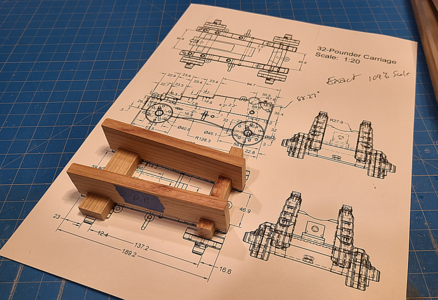
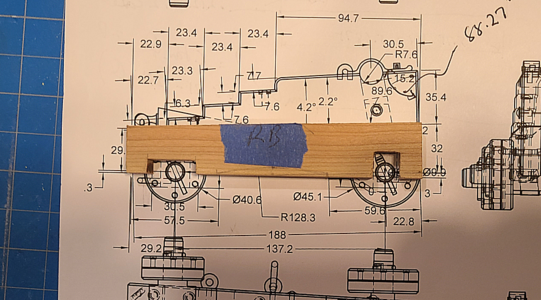
I trial fit of the four pieces so far over a full size drawing of the 1:20 scale carriage, to keep things going the right way:
1666925448449.png
BTW, dimensions on the above drawing are in scale centimeters, as I had a 1:20 metric scale. Seemed like a good idea at the time. I've since opted for more decimal inches, and measured using dial calipers.

This is a good place to stop this post. I'm always afraid of losing the whole thing if I screw up somewhere.
 
Last edited:
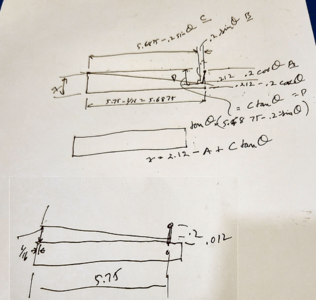
Continuing, the top of the bottom half of the brackets is not parallel with the bottom, but is about 2 degrees slanted backward. I needed an accurate way of making this cut of the right height and angle. The included adjustable miter gauge is not accurate enough for that: it's hard to set within a degree or so, and the miter gauge slot is on the sloppy side. Luckily, the Super Value Package included with the saw from Amazon included a Taper Jig. But I had to first figure out how to set that 2 degree angle accurately with it. So, I took pen to paper, along with my geometry knowledge (retired Engineer here - who said high school geometry would never be useful!), and sketched out my problem:
1666927003316.png

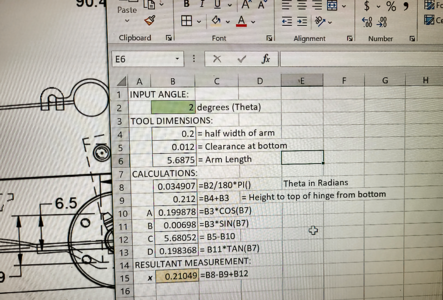
This I then translated this into a spreadsheet, as I figured I'd need to do this with other angles:
1666926949638.png

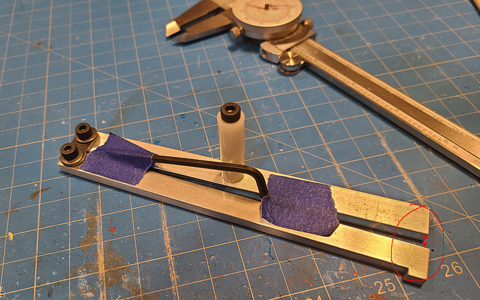
This told me that if I measured the distance indicated in the picture below with my dial caliper as 0.210", that would set the tool to 2 degrees:
1666927085601.png
I quickly determined that even with the screws QUITE tight, with the only secured area being the pivot, the angle could move a little under force (like when sawing). So I quickly came up with a makeshift way of locking it to that dimension: placing the allen wrench end tightly between the two sides, and taping it in place. Not elegant, but it worked. (Of course I have now lost the allen wrench, after it fell out somewhere in between my den/workshop and my garage/powertools. :-(

Anyhow, the result was a nice straight cut and angle:
1666927320750.png
which in turn matched the dimensions and drawings required:
1666927378380.png
(Camera closeness makes the cut piece look bigger than it should be, but it actually came out quite close.)

BTW, this work actually started on receipt of the saw, which was 4 days ago, so I'm playing catch-up with the log a bit.

To be continued (it's late).
 
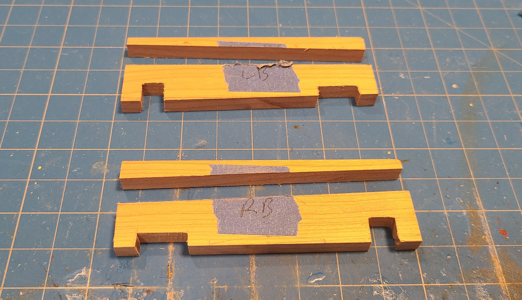
Next I cut the upper portion of the brackets to the proper angle too. There is a 2.8 degree difference between the top and bottom of them. This gives me the four pieces used for the brackets, with the scrap of the last cut at the top, to be used next:
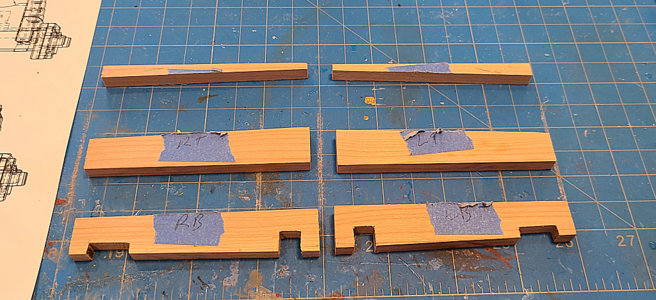
1666967670753.png

I originally intended to drill the semicircular holes for the barrel trunnion before making the top cut by drilling a hole, and then bisecting it. But I was concerned with getting exactly the right height. So I decided to cut the hole after splitting the top piece. Adding the cutoff gave me a total piece that was square to mount in the vise, and with both top pieces identical, I could use the split between them to locate the hole center:
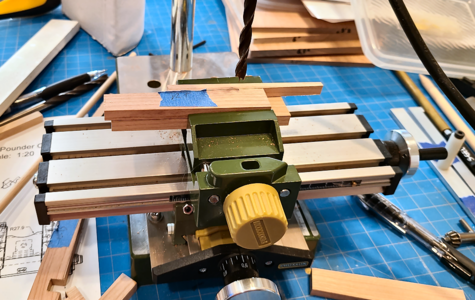
1666967820462.png

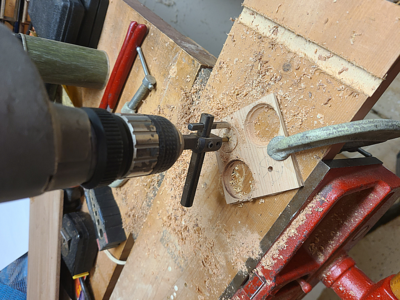
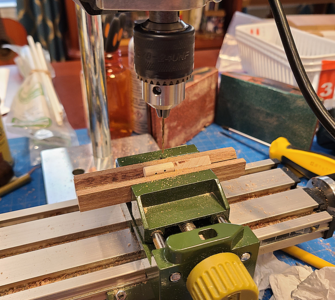
Since the brackets slope horizontally outward toward the back of the carriage, but the trunnion does not, I had to drill the hole for the trunnion at a 2.3 degree angle. I accomplished this by using my cell phone and Samsung's BubbleLevel, zeroing the reading on the movable bed of the drill press, then setting the angle using the phone on the wood to be drilled. Since I can't take a picture of my phone, I removed the case to show where it goes:
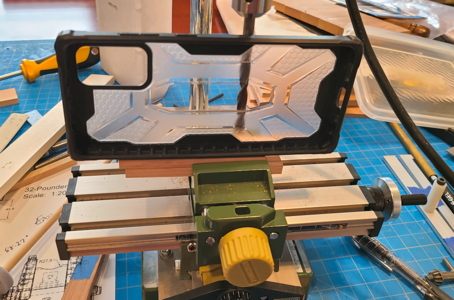
1666967991859.png

The reading in the Samsung app looks like this, for those unfamiliar:

1666968072734.png

Using a brad point drill bit, the holes were drilled cleanly and accurately:
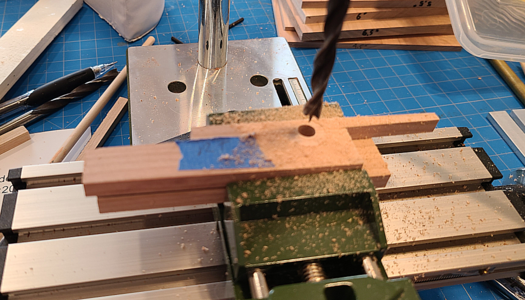
1666968207782.png

Which resulted in a good fit of my test dowel at the required 2.3 degree angle:
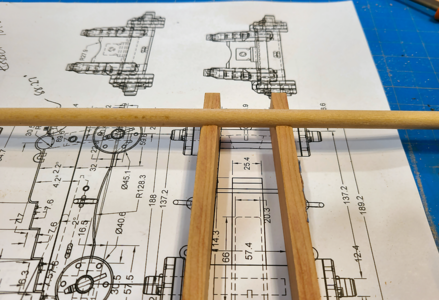
1666968248969.png

Unfortunately, after completion I realized I'd grabbed the wrong brad point drill bit, and the hole was undersize. Worse yet, I realized that the larger, correct bit would not fit into the chuck of my Proxxon drill. Worse yet, I did not have any larger drill bits on hand (5/16" was required) because I'd left all my drills at my son's new house, doing work over there. So, I borrowed a set from a neighbor, hoping to increase the hole size by drilling by hand and increasing the size in 1/64" increments. Unfortunately (a theme in this task) again, his set went from 1/4" to 5/16", so I had no choice other than to hand-hold the material, and drill it at once up to the required diameter. Nowhere near as clean and true as my setup above, but I think it will work. (Note to self: Double-check drill size next time, and if necessary get a brad point drill with a reduced size shank.)

After laying out the steps in the top half of the brackets, and using a dial caliper to measure their depth, I set the miter gauge to 2.3 degrees (okay, somewhere between 2 and 3 degrees), and cut the steps:
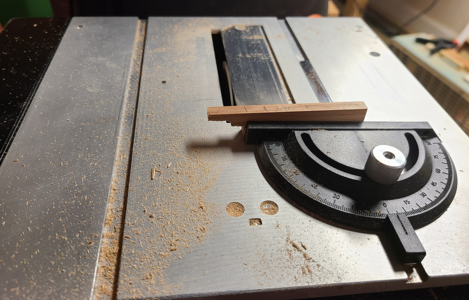
1666968882360.png

After doing both sides, I'm left with the four bracket pieces mostly shaped:
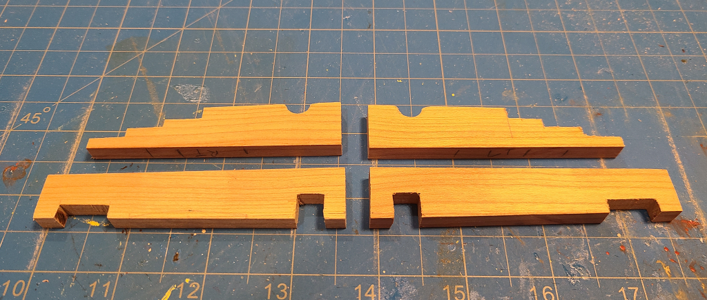
1666968931982.png

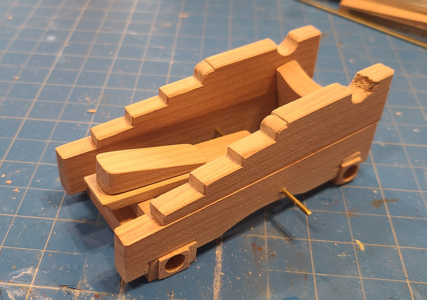
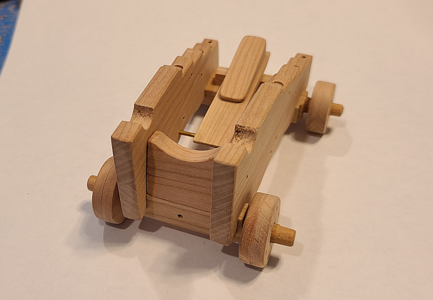
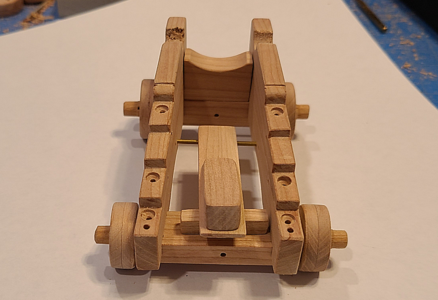
Once assembled with the axtrees, the assembly starts to look like a carriage. Here it is compared to the 3D printed one:
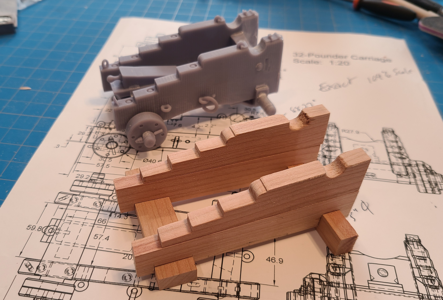
1666968991364.png

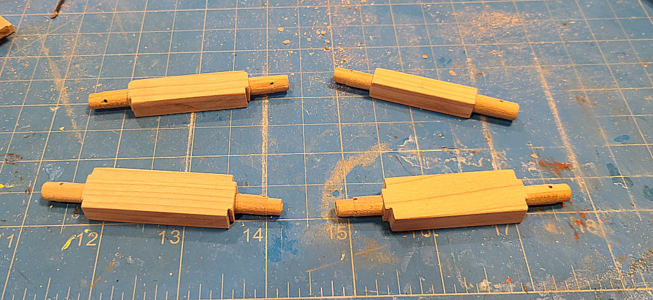
The next step is to cut the axtrees to the proper length and drill holes for the axle extensions:
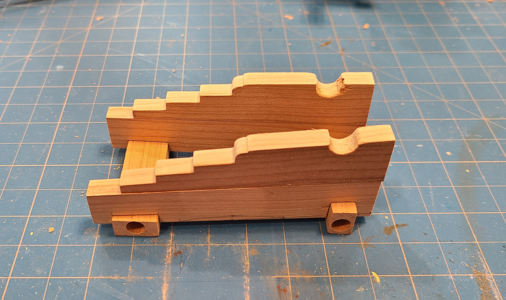
1666969437943.png
As you can see, the trunnion semi-circles don't look so good, but hopefully the trunnion and capsquares will cover up most of that. And after all, these things would wear after years of firing, right? Right?

Here I've drilled the holes for and inserted the bed bolt rod, and trimmed areas at the end of the axtree that will contact the trucks:
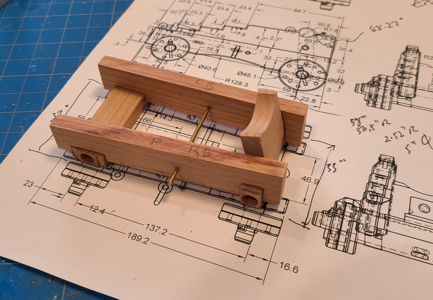
1666969582993.png
I've also added the Transom in the above pic. A more complex cut, leaning back at an angle, while slanting outward horizontally, it went easier than expected.

Next comes the boster, which is cut and positioned in place (all this is loose at this time, of course):
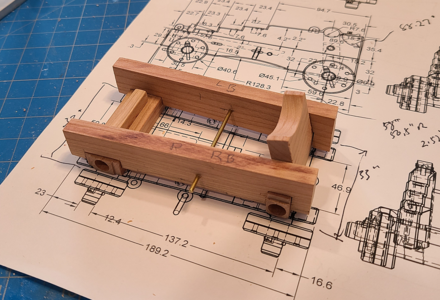
1666969835533.png

Then the Stool Bed, with a cut to locate it on the bed bolt:
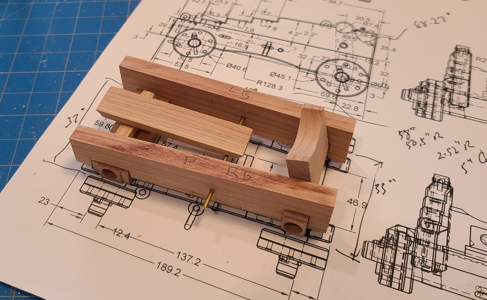
1666969880426.png

And then the Depression Chock (knob to be added later):
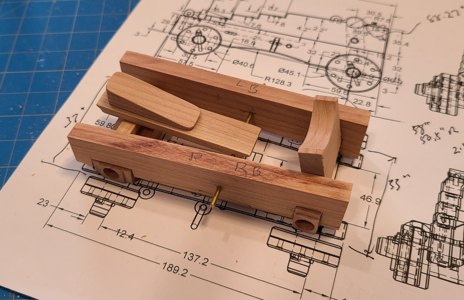
1666969972820.png

And finally, I place the upper portions of the Brackets in place:
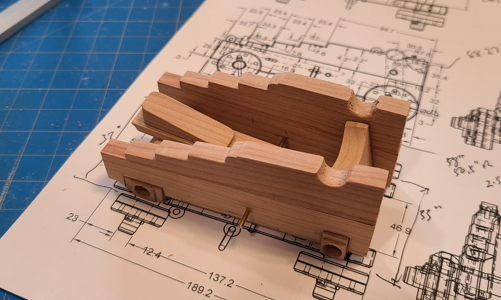
1666970042717.png

Then I contoured the bottom of the brackets: the muzzle end is sloped upward on this area, and cut the traditional radiused portion at the bottom.

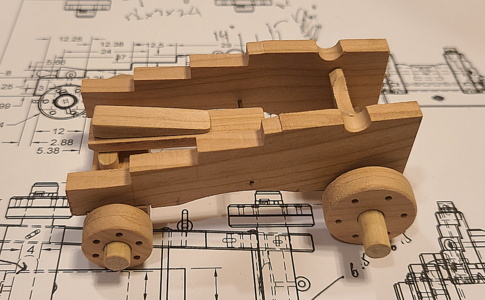
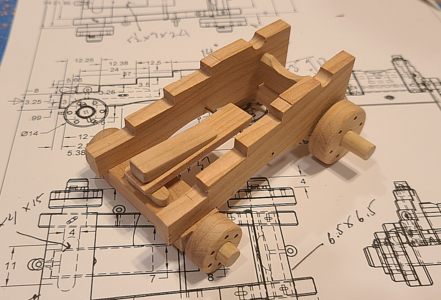
So, this is where the model stands (sits) at this point:
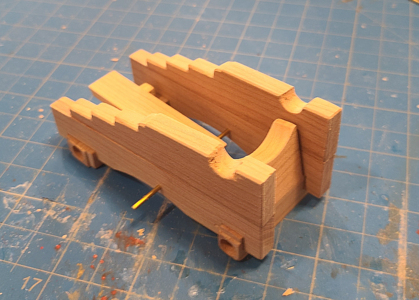
1666970188988.png
1666970202173.png

Since then, I've done additional sanding and contouring, adding the chamfers on the brackets' edges, etc. I have bolts and washers on order and will wait until I receive them to bore the holes for the various bolts going horizontally and vertically through the brackets.

It is my intention to stain all of the pieces before assembly (except the brackets, which will be glued together, top to bottom, before staining, so I will keep most of the pieces separate for now. Also have to do some experimentation with stain colors, and decide if some parts, like the trucks, should be stained differently.

Next I have to figure out how best to make the Trucks (wheels) and do them, and purchase some cherry dowel for the axtree extensions and depression chock knob. There may be a delay until I have anything more to post, but will as soon as it's available.
 
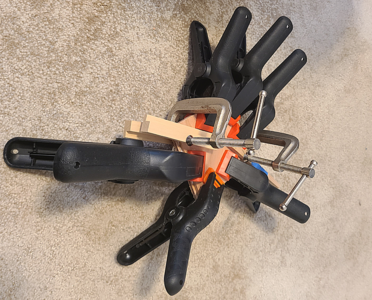
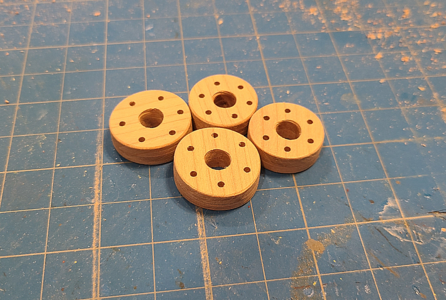
I decided to make the trucks for the carriage using a hole-cutter and then sanded in a drill, as I don't have a lathe. First, I took 2 pieces of scale 3" thick cherry, each about 3" square, and glued them together at right angle, for strength (and as I'm sure the originals were made). I placed about 5 pounds of weight on the glued pieces, and left them for several minutes, and upon my return, found that the whole assembly had shifted about a half inch! I couldn't believe it! So, I pried it apart, and this time used clamps to keep the pieces roughly in alignment. That wasn't going to happen to me again!
1667147304555.png

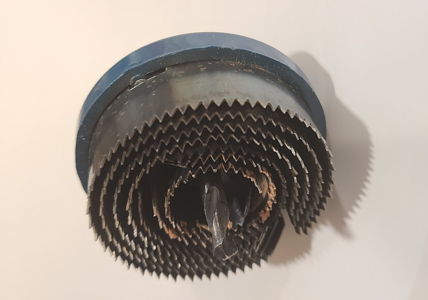
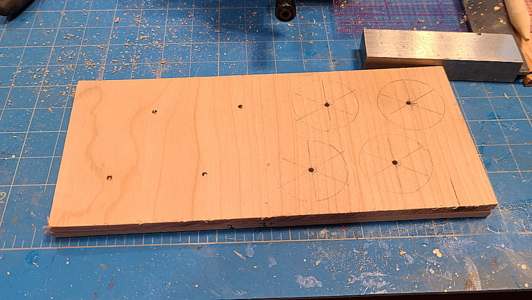
I then laid out the the four trucks spaced out on the blank, marked and center-punched the centers, and marked radial lines at 60 degrees apart to mark the location of the bolts used to hold the two halves together, as I felt they would be more difficult to locate later. I then used a hole-cutter I had on hand to make oversize blanks for the trucks:
1667147421059.png

I took care to make sure the blanks were oversize, but after finishing them, next time I'll take greater care to make sure they aren't that much oversize; they took forever to shape.
1667147514788.png

Using the time-honored poor-man's-lathe, I first used a coarse rasp, files and then coarse to finer sandpaper to shape the trucks to the proper diameter:
1667147637964.png

Unfortunately, since this was taking so long, I think I applied uneven pressure with the rasp, and the trucks ended up kind of oval shaped. Oh for want of a lathe! (Wish I hadn't sold my Unimat and all its accessories 2 years ago, but had waited a bit longer. I wonder if the $50 imported "lathes" you see on Amazon would work?)
1667147783549.png

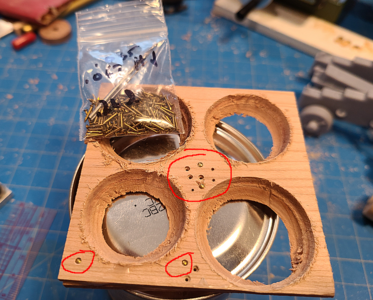
I next bored the center holes out to the correct axle size. I had to use a smaller hole initially to match my hole cutter. I then experimented a bit to determine the right size bolt holes. I'm using 1/4" long round-headed escutcheon nails to simulate them, and wanted to drill a clearance hole for the head, then a smaller hole for the shank, so they would recess properly:
1667147966913.png
I'll have to figure out a way to recess them a bit more, consistently, without harming the finish, especially if I blacken them.

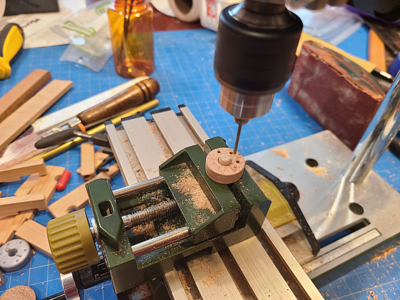
Using my penciled radial marks, and mounting each truck on a temporary axle, I set up the drill press and rotated the truck before drilling each clearance hole then centered hole for each "bolt" location. Worked out quite well, I think.
1667148083609.png

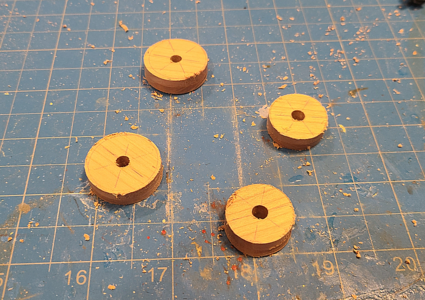
The resultant finished trucks, not exactly round, but better than square at least:
1667148130401.png

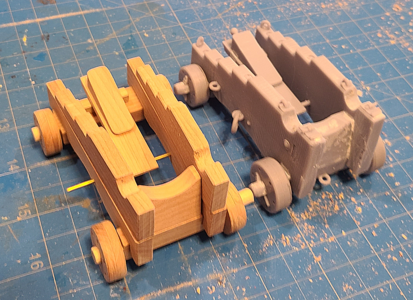
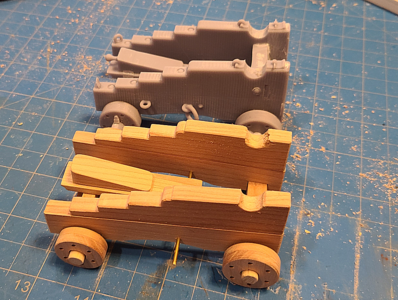
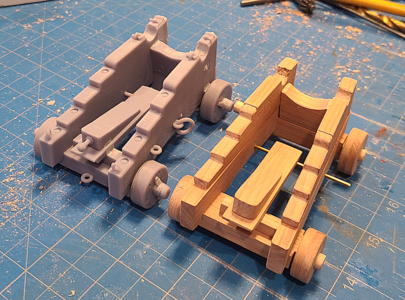
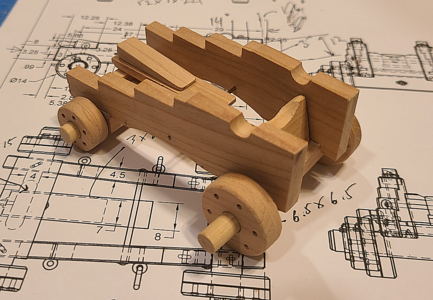
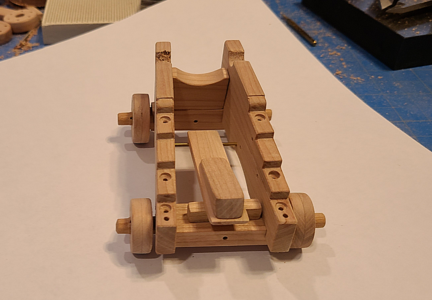
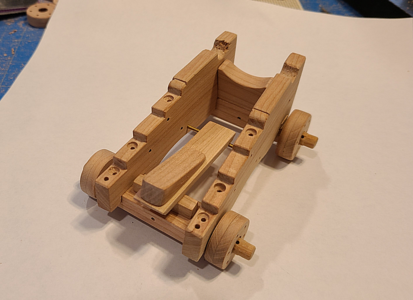
I haven't yet gotten the cherry dowel for the axle ends of the axtrees, so substitute short pieces of standard dowel to assemble the pieces of the carriage to get an idea what the end result will look like. Here it is compared to the resin 3D printed version:
1667148237909.png
1667148279301.png
1667148296705.png

I have to now wait until I receive the last of the washers to use under the carriage bolts to determine the drilling and counterboring in the individual pieces of the carriage.

While I'm waiting, I went ahead and printed out 1:20 scale drawings of the 12-pounder carriage; might as well continue on with it, as this has been fun, and I don't want to start another project at this time.
 
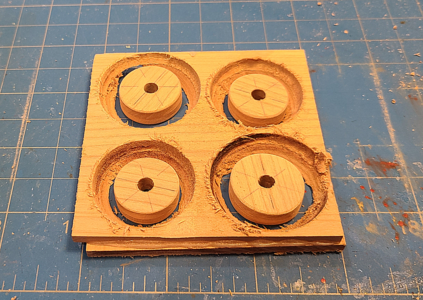
I decided to re-do the trucks. Some were as much as 0.05" out of round, and while not TOO noticeable, they just weren't right. I also used a different hole cutter:
1667444862180.png
The advantage of this type (only the smallest cutter was used, giving a diameter of just slightly over the largest scale 18" trucks) was that it cut more concentric circles. Also, I pre-drilled all the holes in the truck stock as a guide for the center drill in the cutter.

Layout of the trucks (I was already starting on the 12-pounder carriage, so now I had 8 wheels to do) went like this:
1667445014047.png
I was running low on scale 3" thick lumber, so put the finer grained side toward the outside, as the more spread-out grain would be on the inside of the trucks which can't easily be seen.

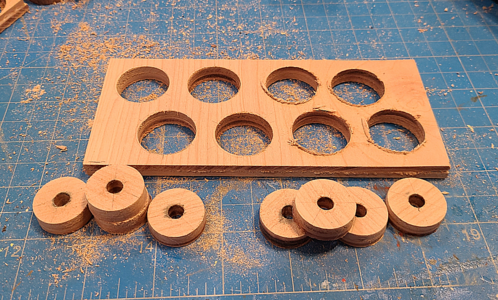
After cutting the blanks, they all came out pretty well:
1667445104457.png
Here I'd already increased the bore size of the trucks to the proper diameter for the truck portion of the axtrees in the above picture.

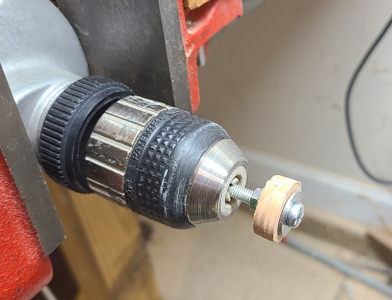
I chucked the wheels (I'll call them here) up in my power drill using a fine-thread bolt, nut and washers. I only had to dress the largest ones up smooth and square, as they were close to the required diameter. But when I started taking off 0.1" of material or more for smaller ones, it started to be a problem again. While they started pretty round, using a rasp especially started bouncing and causing out-of-roundness. And sandpaper was taking off too little. I tried a sharp turning tool, but without a fixture to hold the electric drill in place, it was tough to do.

After experimenting, I came up with the perfect solution (for me, at least). With the wheel still chucked up in the electric drill, I then held the shaft parallel to the face of my 1" wide vertical sander, turning the sander on. By holding the drill in position, at first not touching the sander surface, then slowly moving it in, I was able to easily take off any out-of-roundness, and remove material very quickly. Despite being a real jury-rig of a method, it worked perfect. I just had to watch to prevent taking off too much material.

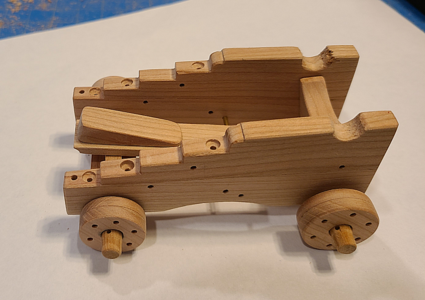
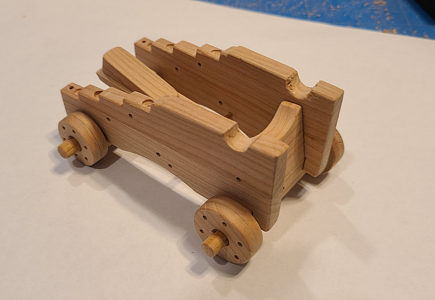
I went through the same building process on the carriage for the 12-pounder as outlined above for the 32-pounder, and have set the pieces into position for the following in-progress photos:
1667445655904.png
1667445678104.png
1667445693694.png
Again, the axles are temporary; I pick up my cherry dowel tomorrow. And I've got no edge finishing or rounding and such done at this point, but it starts to look like a real carriage. It should look good beside its larger brother.

Until next time.
 
Last edited:
OK, now for the big question, for those of us who love the battle stations and cross section builds, any thought of making and selling a basic kit with barrel and carriage sides so we can also build a nice large scale cannon for display.
 
OK, now for the big question, for those of us who love the battle stations and cross section builds, any thought of making and selling a basic kit with barrel and carriage sides so we can also build a nice large scale cannon for display.
Not really. I need new barrels myself, and having been shopping for same. As to the carriage, if the pieces are cut, then the kit would just need assembled. These are one-offs for me.

I am, halfway, considering making a cross section build of this, that is just one side of a full cross section, with the guns on different decks, with nice structure detail. But then I'd have to use a 24-pounder barrel with the 12 above it, or have 3 decks, with 32, 24 and 12-pounders. And that starts to get large. Plus my kit is in a funny scale 1:20. It worked out to be the largest size barrel my son could print. But now he doesn't want to print them for me. Too busy and all. And I know enough about the messes of resin printing to not want it in the house.
 
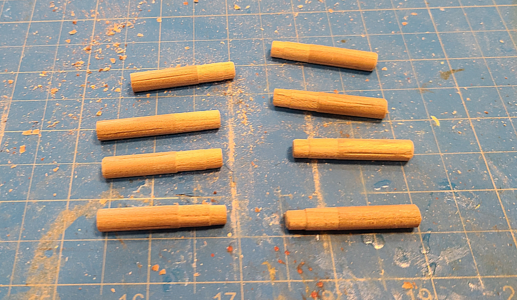
I got the cherry dowel stock and worked on the axle ends of the axtrees today. Before trimming to length, this is what the axle shafts ended up looking like:
1667598929061.png
They are basically 1/4" cherry dowel sections, which have been turned down slightly to allow the wheels to fit on and rotate freely, then turned down to a slightly smaller diameter towards the end.

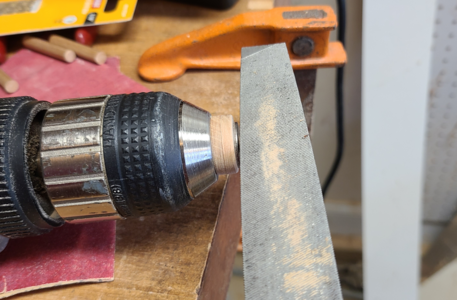
I used the traditional "hand drill as lathe" method, using a file. The file hid the axles in my first pic, but here is a second pic showing a truck in place to space its thickness as well as a washer to allow room for the truck retaining pins:
1667599104117.png

To drill the holes for the truck retaining pins consistently, I made a quick jig to hold the shafts centered and to drill at the correct location:
1667599359766.png

I forgot to take a picture while drilling the shafts, but a piece of test dowel shows how the pieces were drilled:
1667599416858.png

Since my drilled holes in the center portion of the axtrees weren't consistently deep, I had to measure each shaft separately and cut them. After cutting them, and gluing them in place, the 4 axtrees look like this:
1667599215846.png

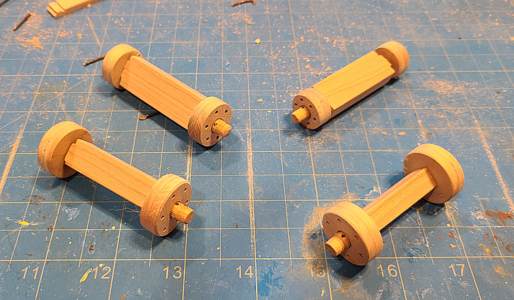
And after placing the wheels in place, like this:
1667599253153.png

That's it for now. Dinnertime! :cool:
 
Next I selected my hardware, wire size for loops and such, and drilled the holes and counterbores for the various hardware that mounts to the carriage. I'm holding off drilling holes for capsquares and lower reinforcing iron, because I haven't made the pieces yet (will once I have the cannon barrels with trunnions), and my bent and soldered metal may not match the holes I would predrill.

I only glued the transom to the front axtree at this point, to help locate some holes and to make it easier to dry fit to take pictures, the latest of which are here:
1667684335396.png1667684346983.png1667684358679.png1667684371620.png1667684386777.png1667684401824.png

I have yet to shape out the eyebolt holes to allow the eyebolts to recess partly into the wood, as is done on the originals. After that, a final sanding, and it's time to stain, assemble and add hardware. In the meantime, I'm continuing to do all of the above to the 12-pounder carriage.

I'm also looking for a source for making the 3D barrels using a resin 3D printer. In 1:20 scale the 32-pounder barrel with trunnion is 156.5mm long 6.17" or 156.8mm long. I'll attach an STL here. Is anyone here interested in making them for me (for a price, of course)? Lacking that, can anyone recommend a reasonably priced and good quality vendor? Here's the STL:

Okay, I guess STL files cannot be uploaded. If anyone is interested, please PM me an email to send it to, okay?
Now back to work on the 12-pounder carriage.
 
Looking great, wood carriage will look good with a touch of weathering to show age.
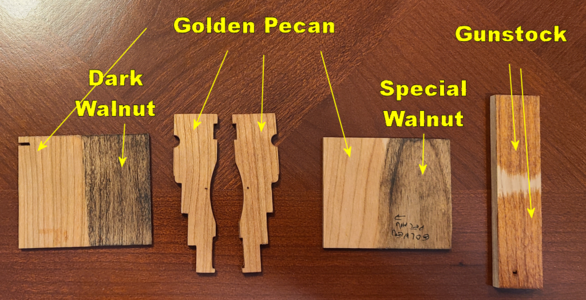
Thanks for your comment. I'm just thinking about that now. When you say weathering, are you referring to physical weathering (markings, rounding, wear and such) or stained/painted weathering? I hadn't planned on physical weathering (other than my mistakes and imperfect finish), but have been thinking a lot about stains. My initial thought was Minwax Gunstock, my favorite color. But it I put in on my cherry wood desk, it won't show up as much. I tried Minwax Dark Walnut, but feel it's too dark and comes out a bit blotchy. Minwax Golden Pecan is nice and light, but maybe shows the grain too much? I bought Minwax Special Walnut, and it's pretty nice, but I don't know.

My intention is to stain the trucks a grayish, driftwood color, as they actually were. I don't want to paint the carriage, because that would cover up the nice grain. Before making a final decision, I'll have to get some gray stain to try on trucks to compare to the main carriage color. I considered leaving hardware in brass, which isn't authentic of course, but does look nice. However, my metal mixture of brasses of differing colors, copper and solder helped me decide to blacken it all.

I mentioned what might look nice on my cherry desk, but if I ever make a base (or ship section) for them, that would change. I can't see making another large cross section, but a base made using weathered light-colored planking in a nice 1-3-5-4-2 pattern might highlight them well.

Here are some pics of test stains:
1667843138120.png
Anyone/everyone please let me know what you think.

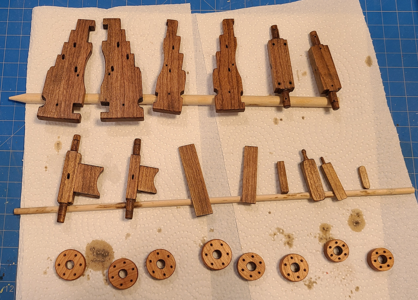
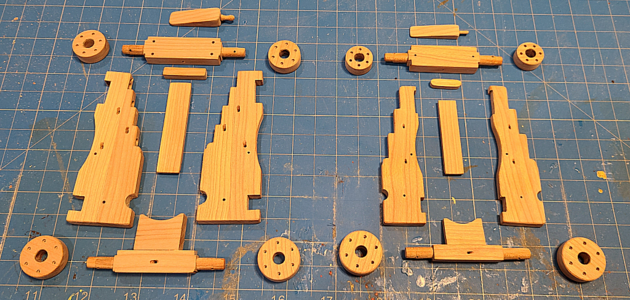
Here are the final pieces for each carriage awaiting a stain decision:
1667843189633.png
 
Thanks for your comment. I'm just thinking about that now. When you say weathering, are you referring to physical weathering (markings, rounding, wear and such) or stained/painted weathering? I hadn't planned on physical weathering (other than my mistakes and imperfect finish), but have been thinking a lot about stains. My initial thought was Minwax Gunstock, my favorite color. But it I put in on my cherry wood desk, it won't show up as much. I tried Minwax Dark Walnut, but feel it's too dark and comes out a bit blotchy. Minwax Golden Pecan is nice and light, but maybe shows the grain too much? I bought Minwax Special Walnut, and it's pretty nice, but I don't know.

My intention is to stain the trucks a grayish, driftwood color, as they actually were. I don't want to paint the carriage, because that would cover up the nice grain. Before making a final decision, I'll have to get some gray stain to try on trucks to compare to the main carriage color. I considered leaving hardware in brass, which isn't authentic of course, but does look nice. However, my metal mixture of brasses of differing colors, copper and solder helped me decide to blacken it all.

I mentioned what might look nice on my cherry desk, but if I ever make a base (or ship section) for them, that would change. I can't see making another large cross section, but a base made using weathered light-colored planking in a nice 1-3-5-4-2 pattern might highlight them well.

Here are some pics of test stains:
View attachment 339209
Anyone/everyone please let me know what you think.

Here are the final pieces for each carriage awaiting a stain decision:
View attachment 339210
Stains and streaks, maybe rust runs from metal parts or wear marks where ropes rub paint off, the larger the scale the more you see such minor details.
 
I like the Special Walnut, for its darker color and flat finish, consider how well these guns were used and maintained and the effects of aging has on wood.

I suspect the below deck guns didn't see as much sun and water fading as top deck guns did.

Kurt
 
All true. Of course the originals were painted yellow ochre, so this won't be an accurate representation of the original appearance so much as a (hopefully) good-looking model and desk decoration.

My wife had suggested the lighter Golden Pecan because she felt it looked most like the yellow ochre, in fact. But while it contrasts well with the cherry desk, the grain is so pronounced with it I almost think it's distracting.

I'm actually a bit surprised that the trucks in all the photos are a gray, driftwood color. I would have expected at least the sides to have been painted, and wouldn't think it would all be allowed to weather. Nor would I think that much weathering would occur on the lower gun decks. But most guns seem to be that way.
 
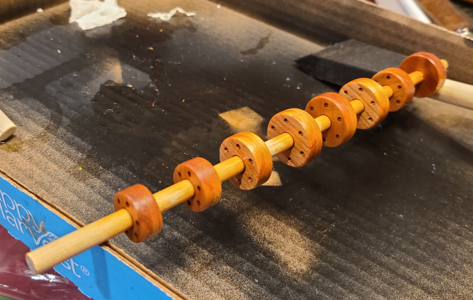
I decided to go ahead and stain the trucks (wheels) because I wanted them a bit lighter, to then choose the main color. I also decided against spending another $8 or so for gray stain that probably wouldn't be gray anyhow, and I think on this presentation-style model (i.e. not painted exactly like the original but meant for display) the gray made sense. So I went with Golden Pecan, the lightest of the stains I had, with 2 coats. This is the result:
1667878336874.png
The grain does cause color variations, although they seem less in person than they do in the above picture. In any event, I'll try to match the trucks to be similar on the same carriage and/or bracket as much as I can.

I'm leaning toward a couple coats of Gunstock stain for the rest of the carriage, as it seems that the darker Walnut comes out blotchier, but will probably do another test or so first.
 
As the old saying goes with model ship building and construction and painting, "It's your build, so build it the way you like it to look"

Kurt
 
I ended up staining all of the carriage, except for the trucks, Minwax Special Walnut. That gives me good contrast between it and the trucks, where were stained Golden Pecan. On the carriage I kept applying thin coats of stain, then wiping off, until I got the right shade and the pieces looked close in color. Then they were all coated with multiple coats of Minwax Wipe-On Poly, brushed on thinly, then wiped off and buffed after a couple minutes. I applied 4 or so coats, stopping when a part had the right satin sheen, and not too glossy.

The photo below is of all the cherry wood pieces for both the 32-pounder and 12-pounder carriages:1668113323347.png

I will now continue making the required brass connectors and hardware and blacken them all, before continuing assembly.
 
Back
Top