

Hello everyone, and thanks for stopping in and checking out this build. I got this kit about a week ago and have gotten a bit done already. This is a kit that I had bought for my son, however he is not as interested in ships as he is in tanks, so I will be picking up where he left off.
This is the I Love Kit 1/700 HMS Hood Top Grade Detail kit. Damn that's a mouthful.
The first thing I noticed about this kit, is the box that it comes in... It's heavy. Even when its empty. It feels more like wood than cardboard. Well done on the packaging.
As for what's inside the box- I won't lie.. not as many sprues as I had expected. There are however a lot of photo etch parts for this model and other detail up parts such as wood deck, upgraded gun barrels (both primary and secondary batteries), masts, and an anchor chain!
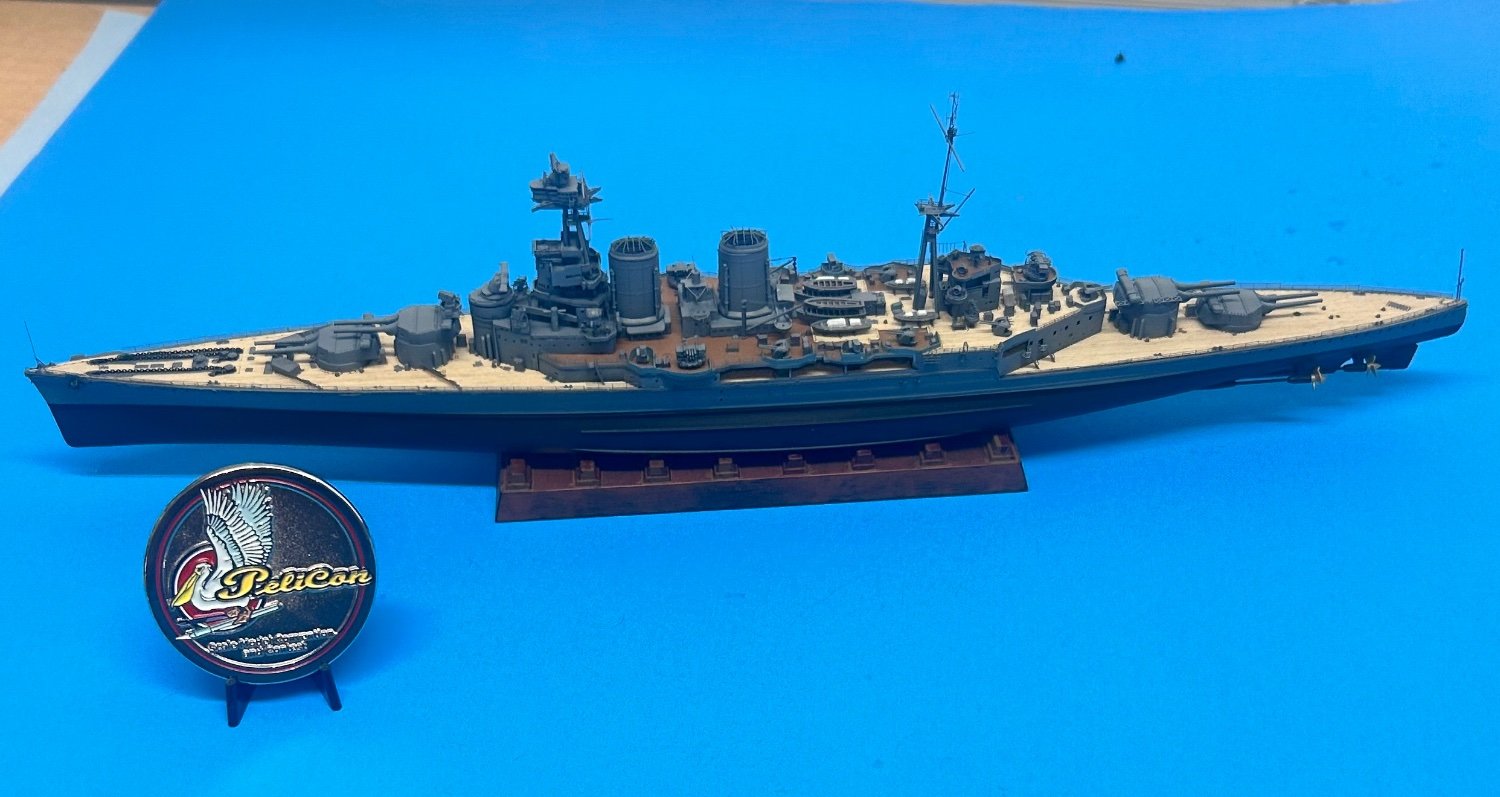
I'll post some photos of the work done up to this point. you will see an oopsie in one of the pics where my son was going a bit too quick cutting a piece from the sprue. That is in the process of being fixed with some epoxy putty. So far the hull is painted, the deck is on ( the bow section is not perfect, as my son did it- please understand he's 10 lol ), I have put the turrets together, installed the guns, and clipped them off at the blast bags. I drilled and installed the new barrels on one turret, and they look good. On the other three turrets, the blast bags were still a bit wiggly so I left them to dry and called it a night. I'll drill them tomorrow when the glue is nice and hard.
More to follow.


This is the I Love Kit 1/700 HMS Hood Top Grade Detail kit. Damn that's a mouthful.
The first thing I noticed about this kit, is the box that it comes in... It's heavy. Even when its empty. It feels more like wood than cardboard. Well done on the packaging.
As for what's inside the box- I won't lie.. not as many sprues as I had expected. There are however a lot of photo etch parts for this model and other detail up parts such as wood deck, upgraded gun barrels (both primary and secondary batteries), masts, and an anchor chain!
I'll post some photos of the work done up to this point. you will see an oopsie in one of the pics where my son was going a bit too quick cutting a piece from the sprue. That is in the process of being fixed with some epoxy putty. So far the hull is painted, the deck is on ( the bow section is not perfect, as my son did it- please understand he's 10 lol ), I have put the turrets together, installed the guns, and clipped them off at the blast bags. I drilled and installed the new barrels on one turret, and they look good. On the other three turrets, the blast bags were still a bit wiggly so I left them to dry and called it a night. I'll drill them tomorrow when the glue is nice and hard.
More to follow.
Last edited:


")


 Love kit, the 80’ Elco PT boat. When I get to work on it, I enjoy it. It’s my first kit from this company and I’d have to agree with you about the packaging. My only issue, a minor one, is that there are no metal guns which I think would add a little umph! Oops not my only issue…the instruction diagrams are a bit visually confusing and it’s taking some time between steps to be sure that I’m on the correct path. Some other points: no instructions for decal placement, painting instructions are vague. Having said that, my last two points have actually turned out to be good things because I’ve had to do research on both. “Learn something new everyday” keeps my brain engaged.
