Thank you for the warm greetings,
I know my question seems dumb but I would ask anyway, hehe
How do you prevent this planking(see photo below) in the future?
Also sorry for the excess wood glue and the tissue
View attachment 450522
There are no dumb questions here. Working with wood has a learning curve.
Here is what you currently have.
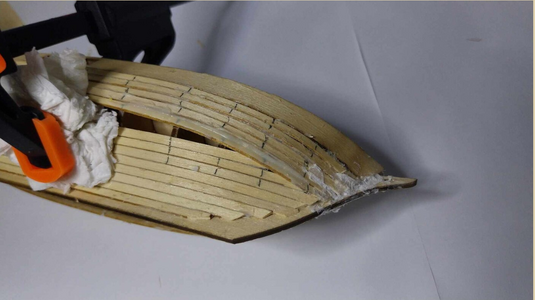
Here are some simple tips on improving your planking.
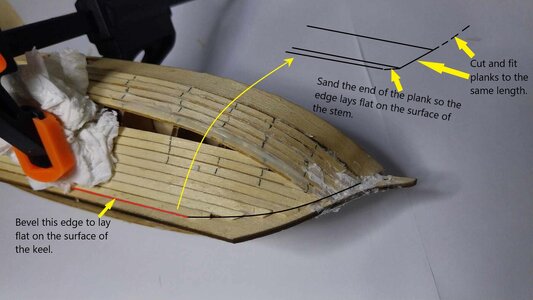
Start each plank at the bow. The forward end of the plank curves sharply, so soak the front 5" of the plank in hot water, and bend it to the curve of the bow and allow it to dry. This pre-curves the plank so you are not forcing it around the curve of the bow. Otherwise, you could break the plank or fight he springy plank to glue it to the frames. Bevel the long edges so they are flush from plank to plank, and from the garboard strake (plank nearest the keel) to the keel. There should be no gaps between planks. Draw a pencil line on your stem to serve as a guide so the plank ends line up nicely.
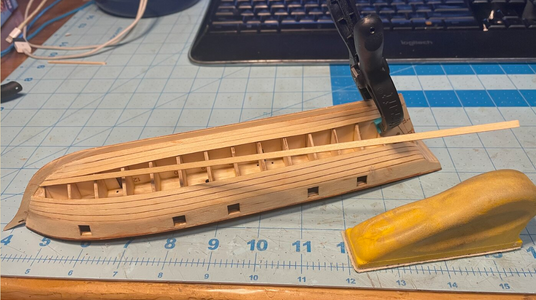
Bevel planks with a sanding block as shown below to prevent gaps at the joints.
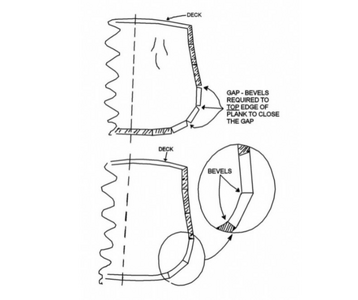
Fit the planks along the hull and trim the ends to length, bevel the edges so the plank ends are flush with the transom. FIT PLANKS one at a time BEFORE gluing them in place on the hull.
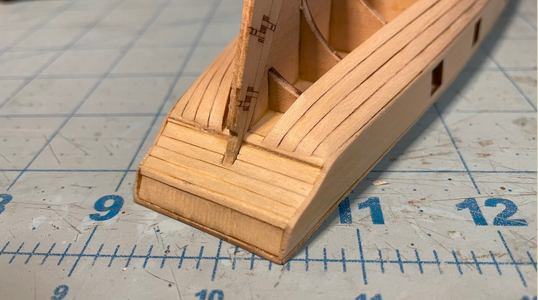
Add planks starting from the gunwale at the top and from keel at the bottom and narrow the gap by adding more planks. TAPER THE PLANKS at the bow to make sure that gap at the stem does not close shut quickly. A plank should never be tapered thinner than half the width of a full plank.
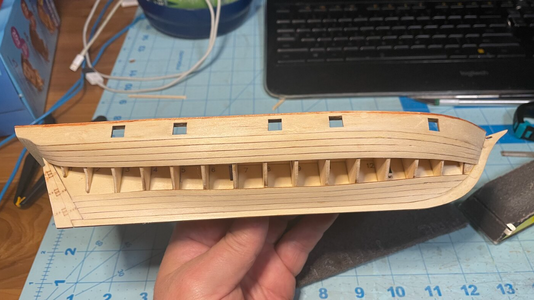
The gap at the bow will want to close first, so learn how to make drop planks, which end before they reach the stem. See below. This is an example of how real ship planking is shaped. LIGHTLY sand the hull and this is close to what you should get.
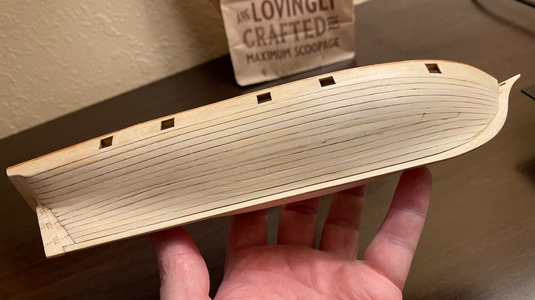
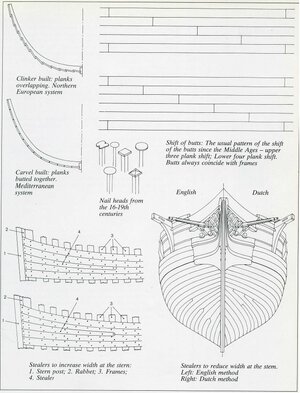
Look at how drop planks and stealers allow you to narrow or expand the planking.
Read my build log for this model
HERE and if you have any questions and all, ASK. Post your questions on your build log! If you feel your model has gone too far in the wrong direction, buy another one and start over! These Chinese models are CHEAP. That's why they are good to practice with.
Below is a useful tutorial on planking a hull.


