#7 Support: Installation of the decks

Making the decks ... including a few extras detailing.

The size of these decks is more or less a matter of choice on the part of the builder. They can be made as long or as short as the builder wants them to be: keeping in mind that traditionally, they will be on the short side also they are an integral structural part of the canoe.
Traditional and as such, they were made out of hard wood (along with the gunwale).
They can be made out of one piece. They can be laminated. They can be simply made or the can be cut into a more elaborate shape / form: from a short flat or curved, beveled, etc... board.
The possibilities are pretty much endless....

Step 1:
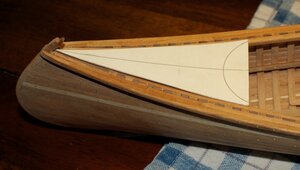
Trace and cut a triangular template out of card stock.

_DSC1235 aa.jpg

G.
 
Last edited:
Step 2:
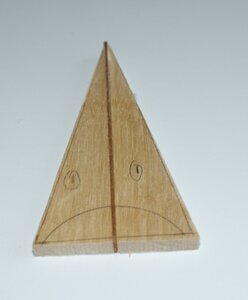
- Transfer pattern from template to the deck lumber.
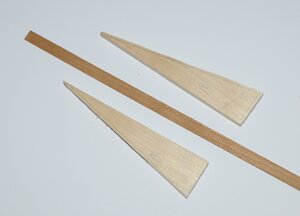
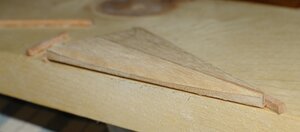
- Cut - either in one or several pieces: depending on to what you want the deck to look like. In my case, I decided to add some detailing to the final look of my decks so parts are to be laminated. The deck will be made out of Birch (for contrast with the rest of the canoe) and include a thin strip of cherry running right through the center.

_DSC1238 aa.jpg

_DSC1242 aa.jpg

Step 3:
The edges are then sanded down to nicely fit between the sides of the vessel: dry fitting is required to figure that out as it will be slightly different on every canoe.
The deck is then fitted in place (dry fitted). At this point is may be kept more or less flat or you can add some detailing into the shape.
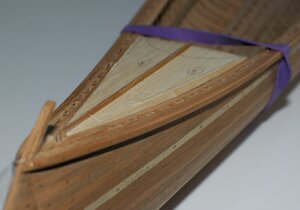
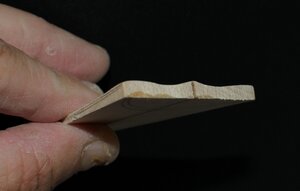
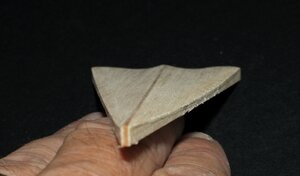
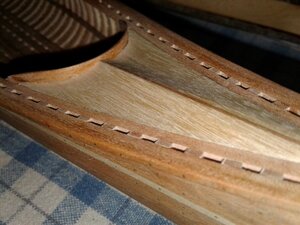
In this case, the decks will follow the shape of the sheer (slight curve). The curve will be compounded with a slight angle from the center to the outside edge (sort of bevel) forming a crest following the center line. The tip of the crest being the thin cherry strip.
In order to achieve this, the deck is set in place and the sheer curved line is transferred to the deck thickness.

_DSC1243 aa.jpg

_DSC1245 aa.jpg

To be continued...
 
Step 4:
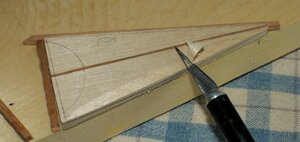
Shaping the deck profile.
Tools used, sharp blade, scraper and sand paper.

Preliminary reduction of the thickness near the edge.

_DSC1248 aa.jpg

Then working with a scraper and sand paper to roughly shape the curve to end up with an approximate form.
The operation will be repeated on the other side.
The goal is to eventually create a slight crest / ridge running through the center of the deck.

_DSC1250 aa.jpg

_DSC1251 aa.jpg

To be continued....
 
Step 5:
Now that the basic profile has been shaped, it is time to concentrate of working the center line detailing of the deck still using a scraper and sand paper.

The basic shape and detailing of the upper face.

_DSC1252 aa.jpg

_DSC1257 aa.jpg

Step 6:
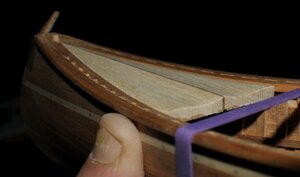
Now that this preliminary work, basic shape has been achieved, time to dry fit the deck on the canoe to make sure everything fit properly, including a clean joint with the inner gunwale.

_DSC1263 aa.jpg

_DSC1259 aa.jpg

The fit is pretty good, but the depressions along the center line need to be a bit deeper, the ridge or crest should be more pronounced: so back to sanding.

To be continued....
 
Step 7:
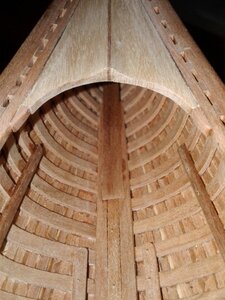
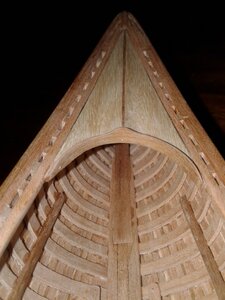
The deck now has its final shape. One last dry fitting after having made a round cut at the wide end.
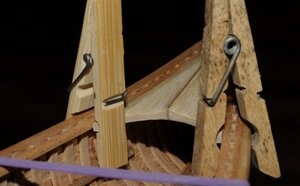
"Clamped" in place to make sure all is well...

_DSC1271 aa.jpg

Through the photos shown here, you will have noticed that the deck is much longer than what is traditionally seen in canoes: that is just a matter of preference on my part.
The deck can of course be made much shorter .... and much more simple.

At this point some may see the need to apply a coat of varnish in the area located under the decks as permanent instillation will make access difficult.

The next step (8) will be to permanently install these pieces (decks). Then a final sanding will be applied to ensure the joints with the sides of the vessels are seamless. A trim will also be added to the edge to finish this part of the canoe.

So I will just end this post with "to be continued"....
 
This is an excellent presentation of how this deck style was crafted and may be modified to choice. PT-2
 
Step 8:
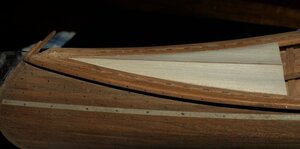
The decks is permanently installed (glued in place).
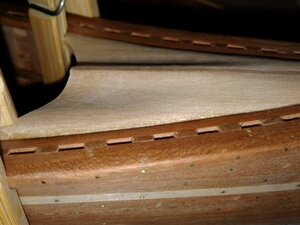
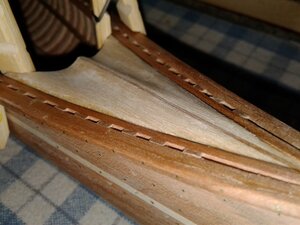
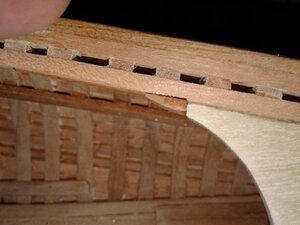
Although dry fitted did show that the outside edge followed the sheer line, the deck will still need to be sanded down to offer a smooth joint with the gunwales.

The deck "clamped" in place...

20200807_143244 aa.jpg

20200807_143325 aa.jpg

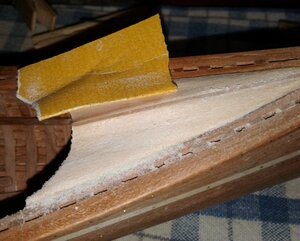
In the photos above, you will note some sanding is required along the upper face of the deck to achieve a nice smooth / level joint with the gunwale.

20200807_144800 aa.jpg

The joint...


20200807_142940 aa.jpg

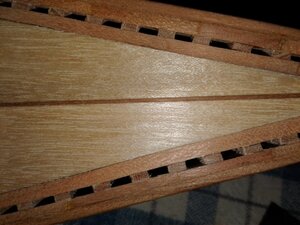
Then, installing the "rail" at the edge of the deck.
Installation of a filling piece to extend the corner of the deck. I do not normally do this as I just shape the corner of the deck into a point, but as sometimes break off, some builders may not want to take a chance, so this is an alternative.

The filling piece needs to be shaped into a "wedge" use as an extension to the deck.

20200807_154312 aa.jpg


20200807_154656 aa.jpg

Then the "rail can be installed.

20200807_143343 aa.jpg

This concludes the installation of the deck.

Again, the length, shape, detailing offer flexibility: what is shown here is just an example, so you can let your imagination and creativity take over.

G.
 
Step 8:
The decks is permanently installed (glued in place).
Although dry fitted did show that the outside edge followed the sheer line, the deck will still need to be sanded down to offer a smooth joint with the gunwales.

The deck "clamped" in place...

View attachment 171316

View attachment 171317

In the photos above, you will note some sanding is required along the upper face of the deck to achieve a nice smooth / level joint with the gunwale.

View attachment 171325

The joint...


View attachment 171328

Then, installing the "rail" at the edge of the deck.
Installation of a filling piece to extend the corner of the deck. I do not normally do this as I just shape the corner of the deck into a point, but as sometimes break off, some builders may not want to take a chance, so this is an alternative.

The filling piece needs to be shaped into a "wedge" use as an extension to the deck.

View attachment 171333


View attachment 171334

Then the "rail can be installed.

View attachment 171336

This concludes the installation of the deck.

Again, the length, shape, detailing offer flexibility: what is shown here is just an example, so you can let your imagination and creativity take over.

G.
Good "point" about the narrow ends of the decks. LOL PT-2
 
Back
Top