OK, not a total newby. I have finished the hull of Mamoli Constitution, and am starting the rigging. But that is my first kit build, and I have struggled with inaccurately cut parts from the 1980's, and often difficult to understand plans. Plus some idiosyncratic design decisions on my part. (or should that be idiotic?)
Elsewhere on this site I have posted details of a 4 axis CNC mini mill which I built, and a CNC seizing/serving machine which I designed and built from scratch. Before those I made a rope run with 2 motors using information from other SOS posts, and YouTube.
I have played around with the rope run, but felt the need to standardise the procedures, so today I made notes for my own future use. They relate to my rope run, but I am including them here, in case they might be of use to someone else.
Making Model Rope on my Homemade Ropewalk
As I am starting into rigging the USS Constitution, I decided to take a slightly more scientific approach to my ropemaking.
I have a cheap electronic microscope, with a screen, which I photographed with my phone.
I am making rope for the shrouds. It has 3 strands, with 2 threads per strand, and finishes 0.65-0.70mm diameter. Using Gutermann thread. I have experimented with several other brands, but they are just too fluffy.
To complicate the issue, the Gutermann thread itself has 2 threads, twisted with a right hand, Z, twist.
I have decided that the initial twisting process of joining the 2 threads should definitely also be a Z twist, otherwise the Gutermann threads untwist and unravel. (guess how I know.)
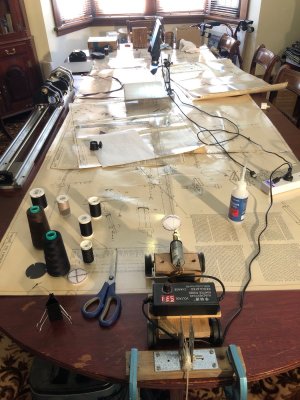
Photo 1 Is our dining table, 3.1m long, which I made from Honduras mahogany 50 years ago. The Constitution plans are protecting the surface to an extent, and provide a white backdrop for the photos. At the distant end is the looper, with 4 powered hooks and one non powered central ring (for making cable). The looper twists the threads into strands. At the near end is the twister (my name for it. Can’t remember the technical term), which finally twists the rope. In the middle is the microscope. Just visible are 6 threads, grouped into 3 strands, not yet twisted. On the left is my rope seizing/serving machine. Spools of thread, scissors, CA glue, jeweller’s eyepiece are all essential bits and pieces.
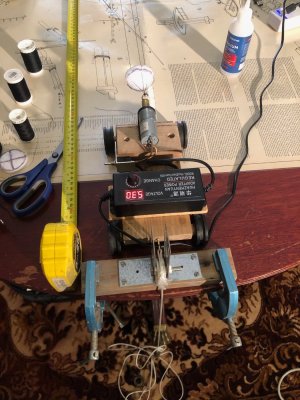
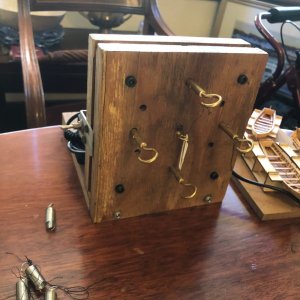
Photo 2 Is the looper. (Plus some of Constitution’s boats). It is powered by a 24V motor, via a voltage regulated speed controller. I usually run it at 10v for consistency. It runs quite fast. Via a central gear it turns 4 hooks, clockwise or anticlockwise. It could have been less powerful, but that is what I had available.
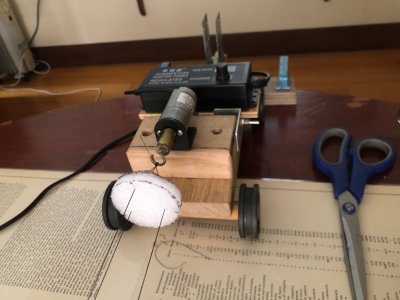
Photo 3 Is the twister, attaching 6 threads to the single hook. The white foam disk separates the threads into 3 pairs, so the threads do not become entangled with each other during the initial twisting (looping) process. The disk is removed after the looping, before the final rope making twisting process. I run this 24v motor at about 5-10v.
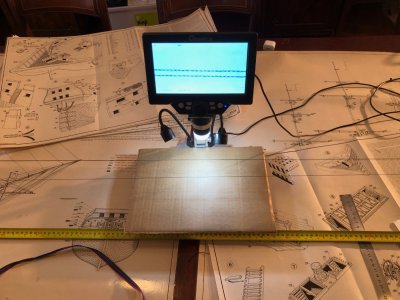
Photo 4 is the microscope showing 2 threads about to be made into one strand. If you look carefully under the lamp, you might be able to see all 6 threads.
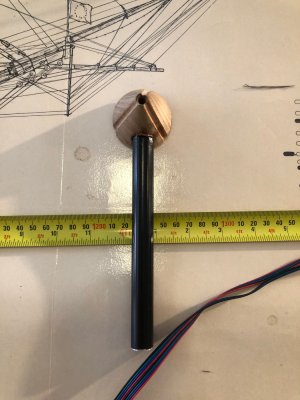
Photo 5 is a topper which I made, copying many other rope makers. I have stopped using it. I imagine that it would be important to use a topper in a longer rope walk, to ensure that the final rope twisting is regular and neat, but in my 3 meter rope walk I have concluded that it is not necessary.
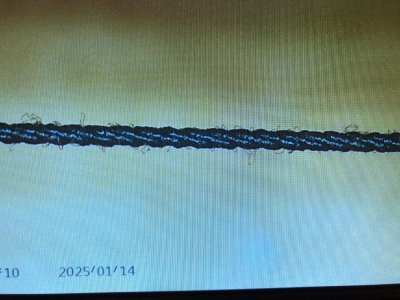
Photo 6 is a finished rope. (magnified) When I cut it from the looper and twister it showed no tendency to unwind. It is 0.66mm diameter
The steps. (using Gutermann polyester thread)
The photos split my text. Don't know why.
Elsewhere on this site I have posted details of a 4 axis CNC mini mill which I built, and a CNC seizing/serving machine which I designed and built from scratch. Before those I made a rope run with 2 motors using information from other SOS posts, and YouTube.
I have played around with the rope run, but felt the need to standardise the procedures, so today I made notes for my own future use. They relate to my rope run, but I am including them here, in case they might be of use to someone else.
Making Model Rope on my Homemade Ropewalk
As I am starting into rigging the USS Constitution, I decided to take a slightly more scientific approach to my ropemaking.
I have a cheap electronic microscope, with a screen, which I photographed with my phone.
I am making rope for the shrouds. It has 3 strands, with 2 threads per strand, and finishes 0.65-0.70mm diameter. Using Gutermann thread. I have experimented with several other brands, but they are just too fluffy.
To complicate the issue, the Gutermann thread itself has 2 threads, twisted with a right hand, Z, twist.
I have decided that the initial twisting process of joining the 2 threads should definitely also be a Z twist, otherwise the Gutermann threads untwist and unravel. (guess how I know.)
Photo 1 Is our dining table, 3.1m long, which I made from Honduras mahogany 50 years ago. The Constitution plans are protecting the surface to an extent, and provide a white backdrop for the photos. At the distant end is the looper, with 4 powered hooks and one non powered central ring (for making cable). The looper twists the threads into strands. At the near end is the twister (my name for it. Can’t remember the technical term), which finally twists the rope. In the middle is the microscope. Just visible are 6 threads, grouped into 3 strands, not yet twisted. On the left is my rope seizing/serving machine. Spools of thread, scissors, CA glue, jeweller’s eyepiece are all essential bits and pieces.
Photo 2 Is the looper. (Plus some of Constitution’s boats). It is powered by a 24V motor, via a voltage regulated speed controller. I usually run it at 10v for consistency. It runs quite fast. Via a central gear it turns 4 hooks, clockwise or anticlockwise. It could have been less powerful, but that is what I had available.
Photo 3 Is the twister, attaching 6 threads to the single hook. The white foam disk separates the threads into 3 pairs, so the threads do not become entangled with each other during the initial twisting (looping) process. The disk is removed after the looping, before the final rope making twisting process. I run this 24v motor at about 5-10v.
Photo 4 is the microscope showing 2 threads about to be made into one strand. If you look carefully under the lamp, you might be able to see all 6 threads.
Photo 5 is a topper which I made, copying many other rope makers. I have stopped using it. I imagine that it would be important to use a topper in a longer rope walk, to ensure that the final rope twisting is regular and neat, but in my 3 meter rope walk I have concluded that it is not necessary.
Photo 6 is a finished rope. (magnified) When I cut it from the looper and twister it showed no tendency to unwind. It is 0.66mm diameter
The steps. (using Gutermann polyester thread)
- Connect the looper and the twister motors to power. Check that the weight on the twister is appropriate (350g in this instance) and correctly located
- For 3 strand times 2 thread rope, tie at the twister and thread around a looper hook, back to the twister, back to another looper hook, back to the twister, and back to looper then finally the twister where it is tied off with 3 half hitches (must not slip).
- Check the thread tensions and adjust so that they are all roughly equal. None overly loose or tight.
- Install the circular spreader (cardboard or foam) to keep the 3 sets of threads separate, as in photo 3.
- Looking at the looper as in photo 6, start the looper motor slowly (3v) to make the hooks rotate clockwise. (switch UP on my machine). This will twist the threads into 3 strands with a right hand Z twist. The twister will gradually be advanced towards the looper as the strands shorten and the weight will be pulled up.
- The voltage of the looper can be increased to 10v to speed up the process. When the twister trolley has advanced about 10% of the rope length, stop the motor and check the threads. The angle of the twist should be approx. 45 degrees.
- (optional). Pull on the twister trolley to stretch the threads about 40mm a few times. I think that this might even out the twists along the length of the rope.
- Remove the spacer.
- Install a constrictor at the looper (a paper clip, around the 3 strands, and secured to the central loop). This will increase the length of useable rope a little.
- Turn on the twister (switch UP) so the hook rotates ANTICLOCKWISE as viewed in photo3
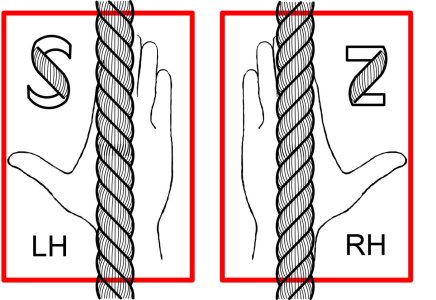 . Adjust voltage up to 10v. (can be slower). The rope will form with a left hand S twist.
- Stop the twister every minute or so until the angle of the rope twist is 45 degrees.
- Ideally, record the voltages and times, so future ropes can be copied exactly.
- Harden the rope. Push on the twister trolley to stretch the rope repeatedly, by about 40-50mm. This makes the threads and strands bite into each other, helping to maintain the rope shape.
- A drop of CA glue at each end to stop fraying.
- You can test the balance of the twists by relaxing the twister trolley tension and seeing if the rope tries to spontaneously coil and twist. If it doesn't, congratulations.
- Cut the rope free, wind onto a cylinder, measure 10 winds, divide by 10 and record details. This should produce about 2.2 meters of rope. Takes about 5 minutes altogether.
The photos split my text. Don't know why.


