Looking great Ken!Hello everyone. With being in lockdown and not being able to go out I’ve plenty of time on my hands with not a great deal of interest to do other than to build this kit, so I imagine it will progress fairly quickly.
Although this kit is designed to take RC. I’m not going down that route but building it for static display. I’ll follow the plans for RC. though, putting in the motor/servo mounts and the three access hatches shown in the picture because they are in the plan. I’m using my favourite glue Titebond, not the waterproof stuff and I’m not sealing it so it will have to stay static and never see the water.
There is a day cabin with couches bellow the front deck, access is via the well in the floor, unless you’re determined you can’t really see into this cabin but there is the material to kit it out. The sides are lined in mahogany; the couches have cushions made from ply covered with the white vinyl supplied. I varnished the sides before fitting as once in it would have been difficult. I used this opportunity to try different varnishes and methods to see what finishes I could get, I found that after sealing them, yacht varnish was best, it gave the best depth look. It was a bit too hard and shiny a gloss for this scale so I found that by buffing it with TCUT, a buffing liquid for rubbing down car paint gave it just the amount of gloss that I wanted and at the same time removed dust marks from the surface.
There is a ready made grating for the floor well, it was recommended that the well itself be stained, it didn’t look good so I made up from scrap mahogany a full lining.
I made up and fitted the rest of the floor pieces.
I made up and covered with vinyl the bases for the seats and all the fitted floor coverings.
The top outer edges of the bulkheads are not well supported; this is where the side planking will join the deck meaning that it would be just an edge to edge join, not good so I put lengths of balsa at their edge for good measure. Probably not needed but a belt and braces approach. I think that I’m now almost up to the start of the planking so watch this space and thanks for dropping in.
View attachment 203896
View attachment 203897
View attachment 203898
View attachment 203901
View attachment 203899
View attachment 203900
View attachment 203902
You are using an out of date browser. It may not display this or other websites correctly.
You should upgrade or use an alternative browser.
You should upgrade or use an alternative browser.
- Joined
- Dec 16, 2016
- Messages
- 984
- Points
- 453

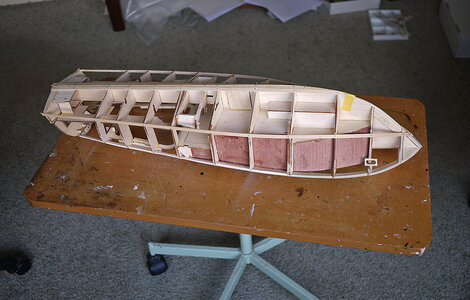
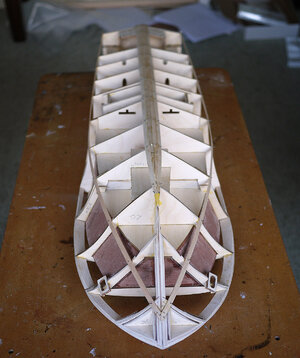
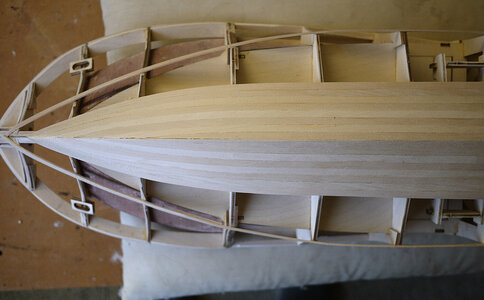
Hi all. Well lockdown and modelling go together quite well, plenty of time to myself and no chores, so I’m forging ahead. I’ve put in the motor and servo mounts the rudder and prop shaft guide and some other strengthening gussets.
I’ve worked out my plan for planking the hull, everyone loves a plan! Where the floor meets the sides of the hull there is a distinct angle which is a feature of the boats design, so that it’s shows prominent I’ve decided to put my first plank along that line and let it run naturally to the bow. I will then plank from the keel up to this plank in the normal way, just slightly tapering the front. When that section is done I will start again from that plank up to the deck level letting the planks find their natural line. The front splays out significantly to a point that it will need a full plank width stealer every second plank for about four planks, it’s not realistic to try to measure and be all technical, it will just be a suck it and see approach, as it’s the first planking I’ll use it as practice for the second planking, I think that with my previous experience I’ll be able to muddle through.
The planks are .7mm x 1.5, I think that they are lime, they are very fine grained and are quite hard, so much so that I can’t use my pin pusher, the nails just bend or go in at funny angles so I’m having to drill pilot holes and tap them in with a hammer. It’s a bit slower but it gives me thinking time and it seems more precise, having used a pin pusher for years I now find that I prefer this method. I usually sand the edges of my hull planks so that I’m sure of a snug fit but these are so well cut and perfectly even that I couldn’t improve on them, again, quality.


Looking like a great start on the planking! I agree with splitting into sections or panels.Hi all. Well lockdown and modelling go together quite well, plenty of time to myself and no chores, so I’m forging ahead. I’ve put in the motor and servo mounts the rudder and prop shaft guide and some other strengthening gussets.
I’ve worked out my plan for planking the hull, everyone loves a plan! Where the floor meets the sides of the hull there is a distinct angle which is a feature of the boats design, so that it’s shows prominent I’ve decided to put my first plank along that line and let it run naturally to the bow. I will then plank from the keel up to this plank in the normal way, just slightly tapering the front. When that section is done I will start again from that plank up to the deck level letting the planks find their natural line. The front splays out significantly to a point that it will need a full plank width stealer every second plank for about four planks, it’s not realistic to try to measure and be all technical, it will just be a suck it and see approach, as it’s the first planking I’ll use it as practice for the second planking, I think that with my previous experience I’ll be able to muddle through.
The planks are .7mm x 1.5, I think that they are lime, they are very fine grained and are quite hard, so much so that I can’t use my pin pusher, the nails just bend or go in at funny angles so I’m having to drill pilot holes and tap them in with a hammer. It’s a bit slower but it gives me thinking time and it seems more precise, having used a pin pusher for years I now find that I prefer this method. I usually sand the edges of my hull planks so that I’m sure of a snug fit but these are so well cut and perfectly even that I couldn’t improve on them, again, quality.
View attachment 204175
View attachment 204176
View attachment 204177
Looking good Ken 

- Joined
- Dec 16, 2016
- Messages
- 984
- Points
- 453

Hello Everyone. Thanks for your kind comments and likes, sharing makes building more enjoyable.
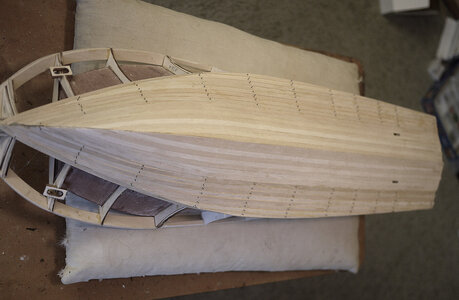
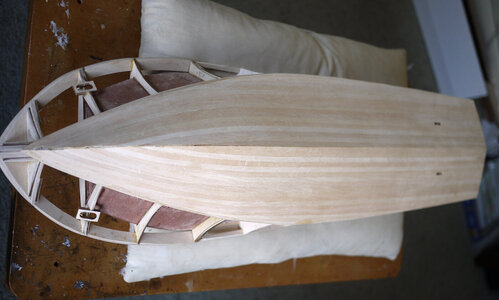
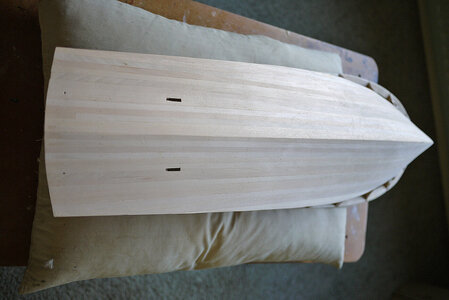
Here's an update on the planking. I've completed my first objective of planking up to my guide plank, all went well with no issues and I'm liking using pilot holes and hammer, I find that I can press the planks more firmly against its neighbour with the pre drilling. I worked quite late on it yesterday and removed
the nails and sanded today, I think with good results.


Very nice Ken! Looking great! Now for the sides...Hello Everyone. Thanks for your kind comments and likes, sharing makes building more enjoyable.
Here's an update on the planking. I've completed my first objective of planking up to my guide plank, all went well with no issues and I'm liking using pilot holes and hammer, I find that I can press the planks more firmly against its neighbour with the pre drilling. I worked quite late on it yesterday and removed
the nails and sanded today, I think with good results.
View attachment 204354View attachment 204355View attachment 204356
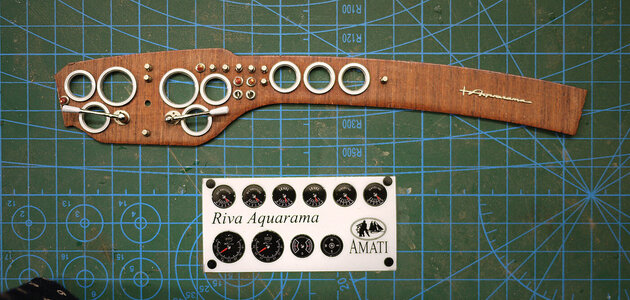
I just love that instrument panel! It really makes the kit look nice. Great job!Hello, Just a very small update. The planking is coming together nicely but just for a bit of fun I made up the dashboard. It was just to get that feel good factor, a bit of detail relieves the mundane planking.
View attachment 205173
Hi Ken,Hello, Just a very small update. The planking is coming together nicely but just for a bit of fun I made up the dashboard. It was just to get that feel good factor, a bit of detail relieves the mundane planking.
View attachment 205173
Nice to see the building of the dashboard. And nicely details grafics for the meters!
Regards, Peter
Ken,Hello Everyone. Thanks for your kind comments and likes, sharing makes building more enjoyable.
Here's an update on the planking. I've completed my first objective of planking up to my guide plank, all went well with no issues and I'm liking using pilot holes and hammer, I find that I can press the planks more firmly against its neighbour with the pre drilling. I worked quite late on it yesterday and removed
the nails and sanded today, I think with good results.
View attachment 204354View attachment 204355View attachment 204356
I thought I would mention that when I put in nails on my ship, when using the nail pusher it was harder to center the nail due the the ID of the pusher being the size of the nail head. Especially holding it at an angle. So you’re not really sure where the nail head is. I suppose with practice you can get better at guessing.
Prior to owning the nailer, I would just use a pair of needle nose pliers to hold the nail and push in enough to come back with a punch and small hammer. Then I sunk the nail head below the surface of the board with the punch, once all nails were in. That way I was able to leave them in, because it was double planked. The instructions actually said to sand or file the heads off! That’s crazy! No need if you use a punch. Also I felt it gave the hull more structural integrity to leave the nails in.
I am in love with this boat - a dream would be to have a real one (or also the model of it)
Many Thanks for sharing with us
Many Thanks for sharing with us
- Joined
- Dec 16, 2016
- Messages
- 984
- Points
- 453

Hi, Again many thanks for you kind comments and likes. A like a day keeps Ken at play.
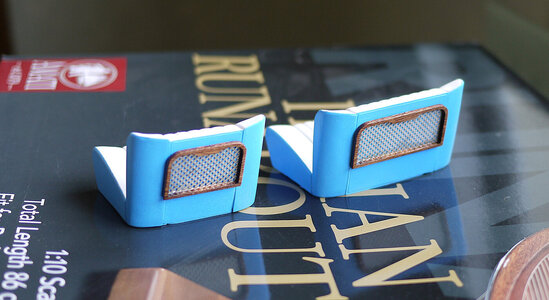
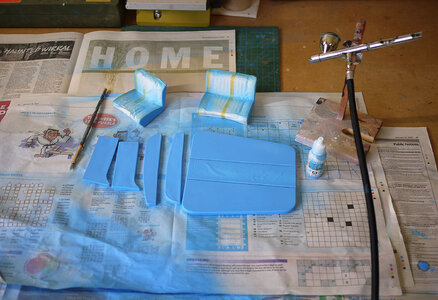
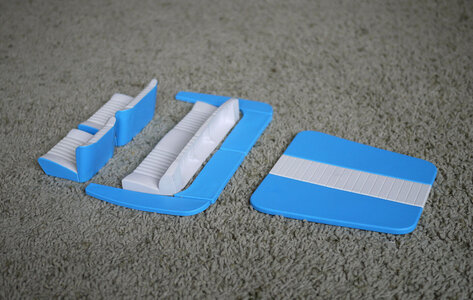
Well although it's nearly done I got side tracked away from the planking again. I decided to go through my paint stash and see if I could make up the colour needed for the seats and sun loungers or if I needed to buy some. I had some Vallejo which is my favourite for spraying, a blue and white mix gave me a colour that I was happy with. I thought that I also needed to check out my airbrush as it's been over a year since I last used it, it worked ok but one thing led to another and before I knew it I had the seats masked up and sprayed. They came out as good as I'd hoped, now back to the planking.
On another note I have just bought another kit off ebay, I thought that it was a very good price and I couldn't stop myself. It is an untouched Euromodel kit of the frigate HMS Ajax, it cost me including postage £160 so not bad. After building the Royal William I know what Euromodel kits are like, they need building, approaching something like scratch models, input effort is needed rather than just assembling. I'm now looking forward to the parcel arriving.


Looking great Ken! I used to have an airbrush, I may need to invest in one again. Nothing beats the finish you can get with one.Hi, Again many thanks for you kind comments and likes. A like a day keeps Ken at play.
Well although it's nearly done I got side tracked away from the planking again. I decided to go through my paint stash and see if I could make up the colour needed for the seats and sun loungers or if I needed to buy some. I had some Vallejo which is my favourite for spraying, a blue and white mix gave me a colour that I was happy with. I thought that I also needed to check out my airbrush as it's been over a year since I last used it, it worked ok but one thing led to another and before I knew it I had the seats masked up and sprayed. They came out as good as I'd hoped, now back to the planking.
On another note I have just bought another kit off ebay, I thought that it was a very good price and I couldn't stop myself. It is an untouched Euromodel kit of the frigate HMS Ajax, it cost me including postage £160 so not bad. After building the Royal William I know what Euromodel kits are like, they need building, approaching something like scratch models, input effort is needed rather than just assembling. I'm now looking forward to the parcel arriving.
View attachment 205550
View attachment 205551
Congrats on the kit. I look at kits all the time, there is so much I want to build. Like this boat!
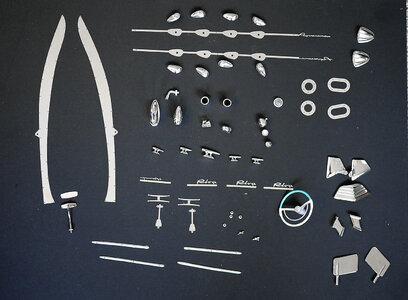
Wow! Nice work Ken! This is such a beautiful boat and nice kit. I think I have to buy it!Hi, Again just a short update. I finished off the seats by adding the folding tray on their backs. To give this post more substance I have shown a picture of the chromed castings and the photo etch parts, can't wait to add all these.
View attachment 205762
View attachment 205761
- Joined
- Dec 16, 2016
- Messages
- 984
- Points
- 453

Hello, Once more thank you for your likes and comments, I do take notice and appreciate them even though I don’t reply to them every time.
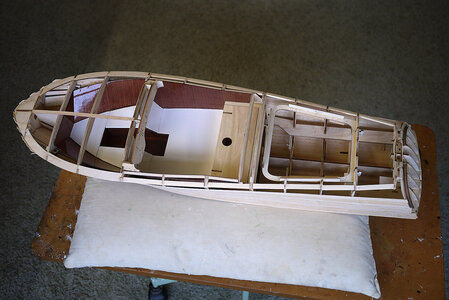
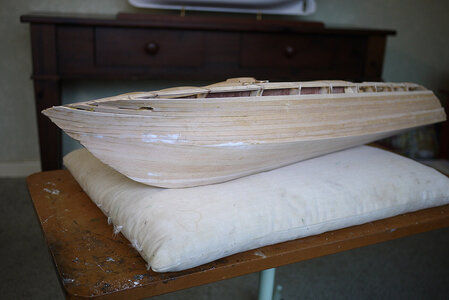
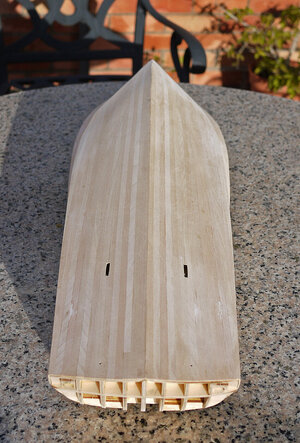
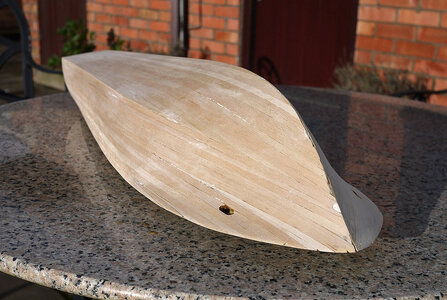
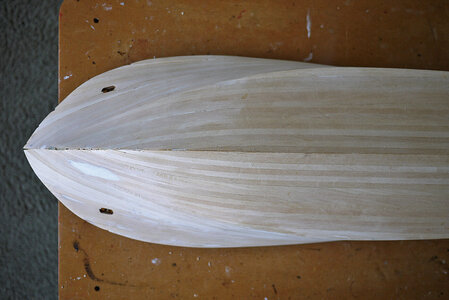
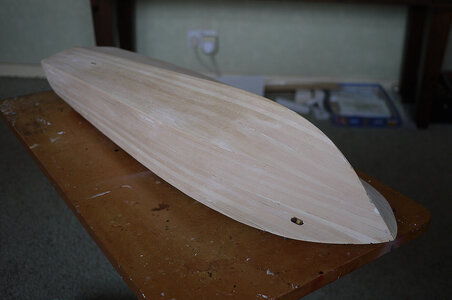
The first planking is now complete even after my distractions. It was an unusual flow of planks but it wasn’t as difficult as I had imagined it would be. When the bow started to sweep upwards I put two stealers in first to get the planks onto their natural line after that I planked normally and then when complete I only needed to add three more stealers. The only tricky part was when the hull went from a convex curve to a concave one at this point the planks also needed an outward twist, and sods law made that twist between frames so there was no solid support underneath. Very little filler was needed, and then only on one side where I had made that twist a slight hollow had formed. I gave it a good sanding to level the planks off. I thought that this would be a good trial run to see what adjustments would be needed for when I did the second planking but I think that the result was so good that I’ll just follow the pattern of the first planking.
Next will be the upper decking, unless that is I get further distracted.


- Joined
- Dec 16, 2016
- Messages
- 984
- Points
- 453

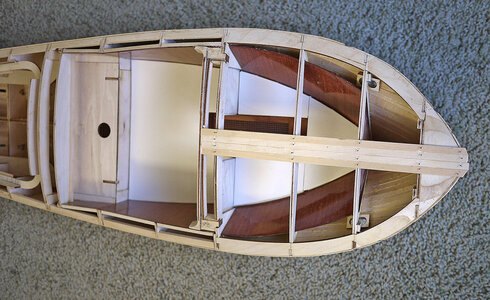
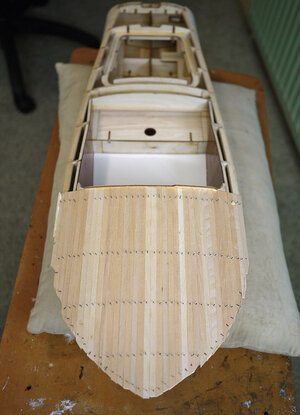
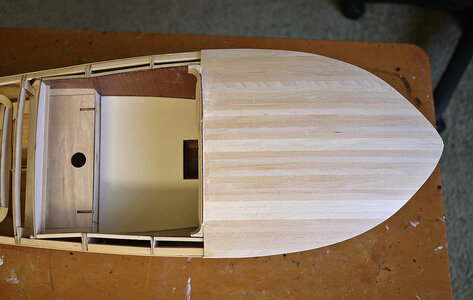
Hello again. The build is moving forward quite quickly as they do when things fit and no extra work needs doing. I replaced the balsa strips that I’d added to the top edges of the frames as they weren’t strong enough, I’d forget that they had no lateral strength and each time that I gripped them they snapped so now they are hardwood.
I have finished the first layer of planks on the fore deck with the 1.5mm lime planks and after a good sand it came out quite good. So far so good.
I've taken a picture of it against my Amerigo Vespucci to give you an idea of its size, it's quite a large hull so lots of planking.
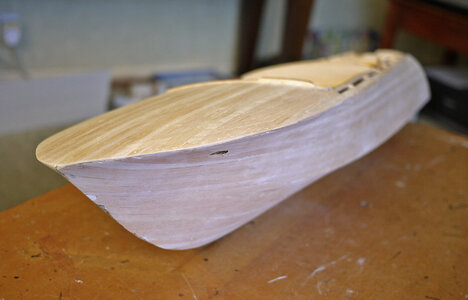
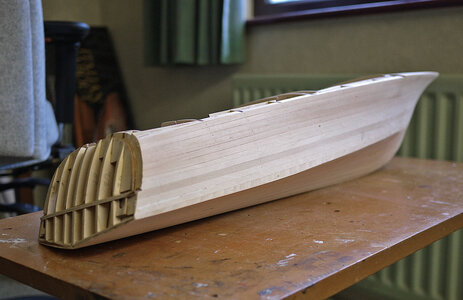
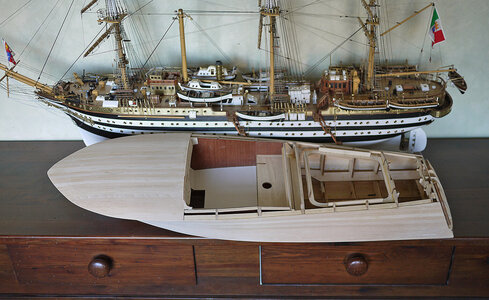
I have finished the first layer of planks on the fore deck with the 1.5mm lime planks and after a good sand it came out quite good. So far so good.
I've taken a picture of it against my Amerigo Vespucci to give you an idea of its size, it's quite a large hull so lots of planking.


She certainly has some beautiful lines. What type of wood is the final planking?
- Joined
- Dec 16, 2016
- Messages
- 984
- Points
- 453

Hi Don, Yes I agree, I think that the actual boat is almost like sex on water. The second planking is mahogany and very good tight grained stuff at that. Most of the boat is finished in mahogany and there are a lot of sheet parts of it, I’ll need to get a high gloss finish on it and keep my sticky fingers away from the surface for it to look good.She certainly has some beautiful lines. What type of wood is the final planking?


