Another Hayling 1760 build

Joined
May 31, 2021
Messages
76
Points
88

As requested by Jim, here's my build log of the Model Dockyard POF Hayling 1760 (I will try my best to keep it updated... honest).

First off, the quality of the kit contents is excellent - and I really mean that. The wood and etched sheets are the best I've ever seen. I've never used pear wood before so it's a new experience for me and found it to be very close grained, a wonderful colour but a bit hard unlike good old bass wood which is really easy to carve.
But...
The instructions are very minimal and the 3D renderings sometimes don't match the model which means you have to do some head scratching to work out what should be happening. All in all, though, a good value kit.

So to my build...... First off the center frames on the jig:
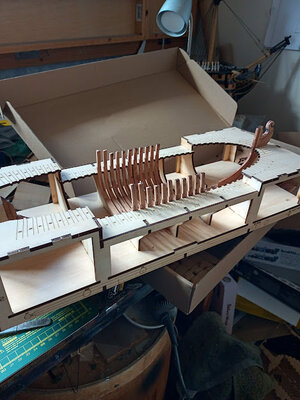
IMG_20220918_115403_485.jpg

The bow frames are next... you can see the frames with the extensions which are not shown in the drawings...
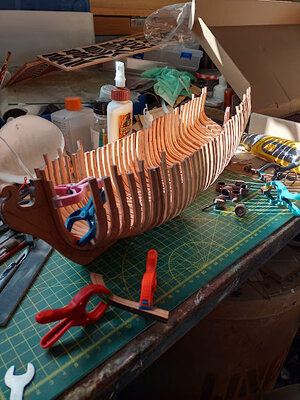
IMG_20221001_135317_203.jpg

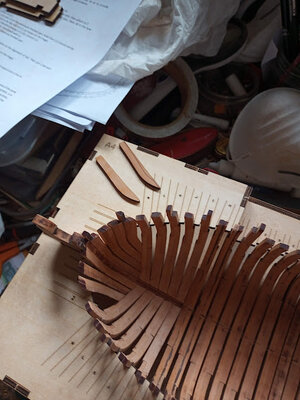
This is where it gets interesting.. the slots are labelled F1 to F4 but the instructions say there is an F5 but the jig markings don't have an F5 slot although it look like there should be a gap between F4 and F5... most confusing...
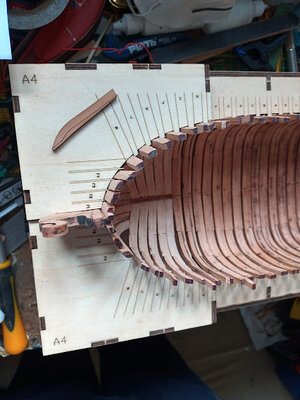
IMG_20221003_094902_754.jpg

And when F4 is slotted in, there appears to be no space for F5 pieces...
IMG_20221003_095241_030.jpg

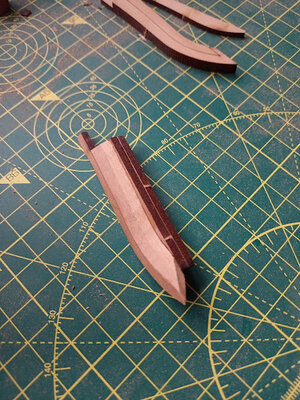
As the drawings show F4 and F5 as being one piece so I've decided to glue both F5 parts to F4 and carve the complete assembly to fit the gap. Which I think is what the instructions meant.
IMG_20221003_100744_315.jpg

Wish me luck. I'll update when (if) I manage to get it to look right.

Cheers
 
Yes - very good start on the model and also with your building log - this will be interesting to follow
 
Hi Tom,
I also have this model. So far have built the jig and keel. Right now it is frames, frames, and more frames. About half way there. Possibly I will start a build log. Meanwhile I am not quite as far along as you and will be following with great interest.
Best of luck. Phil
 
WOW, you dont hang about. Thanks for the heads up the F4/F5 frames.
Did you glue the top deck of the jig in?
Watching with interest, you may well save me some splinters in my fingers from head scratching!
Colin, fellow Hayling builder.
 
xWOW, you dont hang about. Thanks for the heads up the F4/F5 frames.
Did you glue the top deck of the jig in?
Watching with interest, you may well save me some splinters in my fingers from head scratching!
Colin, fellow Hayling builder.
I am fortunate in that having retired, I've got loads of spare time to build stuff Colin :).

I only tack glued parts A7 to A2 because the fit for the rest was sooo tight, I didn't need any more glue.

It's a wonderful model..... soon you'll be saying 'I wonder where that bit's meant to go exactly? and 'I wonder how I'm meant to fit that part?'.:p
Cheers
 
Привет, я присоединяюсь к вашей компании.Я внимательно слежу за работой ассамблеи.Я тоже купила такой набор.Я жду прихода посылки с AliExpress.
 
Привет, я присоединяюсь к вашей компании.Я внимательно слежу за работой ассамблеи.Я тоже купила такой набор.Я жду прихода посылки с AliExpress.
Привет, я надеюсь, вам понравится строить его, когда он прибудет.
Том
 
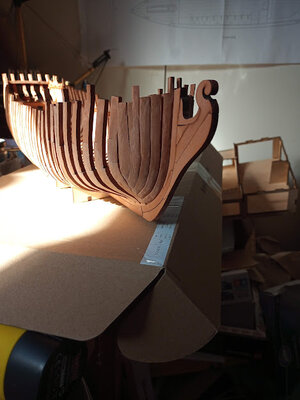
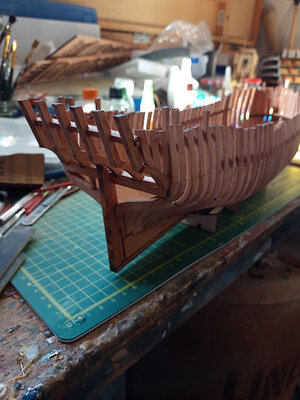
As promised, a few shots of bow and stern. The model, at this stage, is not rigid enough to handle while doing a final sanding so I'll leave that until it has more inner supports.

Yes, gluing F4 and F5 together gives a good 'block of wood' to carve and fit:

Bow.jpg

The stern is a bit problematical because there are no real indicators as to how it all goes together. I just used a fairly slow setting PVA glue to assemble everything quickly and to then adjust until it all went together and ended up looking about right:

Stern.jpg

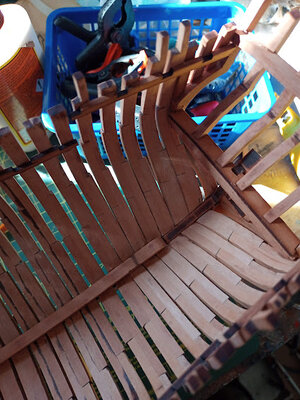
Adding the deck beam supports also gave problems with exact locations. Only the main deck support was given it's exact location using the templates that are provided:
Stern deck supports.jpg

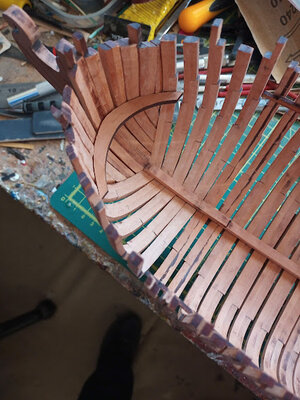
The same goes for the bow support. My view is that the final location is not really important for all these as long as the beams end up being on the level and parallel to each other.
Oh, and both the written instructions and rendered drawings don't mention part F1 which sits underneath the bow support (F1 not yet fitted in this photo)

Bow interior.jpg

That's all for now.
Cheers everyone
Tom
 
very nice start on the model, I will continue to follow with interesting :) Thumbs-Up
 
By the time Trident Model quitted and Alert is sadly no further available, it takes to consider this kit as the entry level for newbies like me.
 
Help!
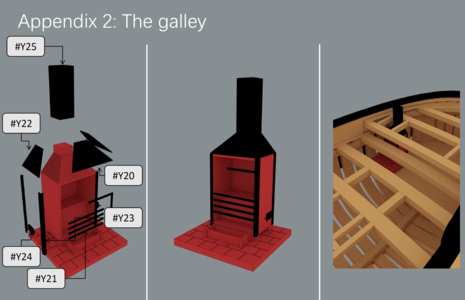
I'm at step 39 which says 'put the galley in at this step, see appendix 2' - I can't find any appendices at all either paper or on the memory stick. Has anyone who has got this kit have them and can help? I've emailed Victor at Modelship Dockyard but no reply yet.
Cheers
 
Warning! the deck supports N1 -N7 are labeled back to front on the rendered instructions. N1 is the FORWARD one down to N7 at the stern. I realised too late and chopped some of them to fit. I'll now be making a deck to hide the front supports because I'll have to make new ones from bass wood which is a lot lighter in colour. It's OK though because the appendix that Dubs sent shows the galley stove sitting on a deck which as far as I can see, doesn't come with the kit and just having the stove perched on a deck support would look rather odd.
A fun model to build - I don't think :mad: .
Hi Tom, sorry for that error and thank you so much for noticing that, I have made updates to the instructions.
1665410919392.png
For the deck of the lower platform, it was not included in the kit. The image of the instruction was only a demenstration showing where the galley should be.

Again I sincerely apologise for the error on the instruction.
 
Back
Top