Bluenose 1/64 MS2130 by TechTrek (Chris) [COMPLETED BUILD]

How did you get the glue to release without bending the brass strips? I understand that you glued the hardwood strips perpendicular to the brass strips, locating those between the 3/16" o.c. hole spacing, right? I do have some Buginga from Africa that is in thin widths that I can cut and may try it in the manner that you describe. Clamping the "mat" down will still require getting it parallel to the inverted T grooves in my XY table on the drill press. I have receive several recommendations/suggestions from other members so I have a spectrum to work from. Thanks for your reply. Rich
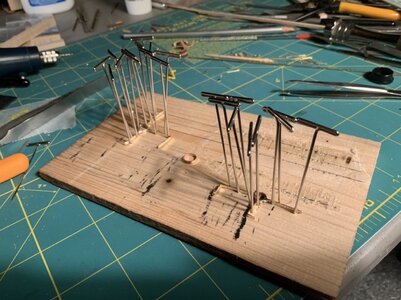
I used a very small dab at the top and bottom just to hold them in place. The cross pieces were just waste wood from the bluenose bulkhead pieces. Again just a drop between the strips and clamp down the cross pieces. I think I was able to do 8 - 10 strips at a time. I just found this pic of the piece I used to hold my strips. Ignore the stuff on it and you can see the lines for the holes and the glue from the strips at the top and bottom. You can see the 2 different sizes and the hole at the top of the chain plate for the deadeye to be attached. (Line below is top of chain plate)
3A5FFE49-ECCA-4A71-AF30-42A16EB77577.jpeg
 
I used a very small dab at the top and bottom just to hold them in place. The cross pieces were just waste wood from the bluenose bulkhead pieces. Again just a drop between the strips and clamp down the cross pieces. I think I was able to do 8 - 10 strips at a time. I just found this pic of the piece I used to hold my strips. Ignore the stuff on it and you can see the lines for the holes and the glue from the strips at the top and bottom. You can see the 2 different sizes and the hole at the top of the chain plate for the deadeye to be attached. (Line below is top of chain plate)
View attachment 203596
I am not sure of what I am seeing as there is a brass strip on its edge with holes and bent 90 degrees twice with a long and short leg between the pins. I am having a brass plate milled out for the strips prior to drilling, that will sit on the XY table of my drill press with the table clamps securing that and the small brass strips under step clamps at the ends as well. With so many hole between the chain plates and all of the other spar fittings requiring drilling using the same strip stock I thought it would be worth the cost and save my sanity down the road. Thanks for sharing your method. Rich
 
I am not sure of what I am seeing as there is a brass strip on its edge with holes and bent 90 degrees twice with a long and short leg between the pins. I am having a brass plate milled out for the strips prior to drilling, that will sit on the XY table of my drill press with the table clamps securing that and the small brass strips under step clamps at the ends as well. With so many hole between the chain plates and all of the other spar fittings requiring drilling using the same strip stock I thought it would be worth the cost and save my sanity down the road. Thanks for sharing your method. Rich
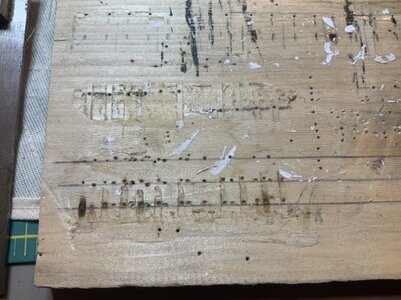
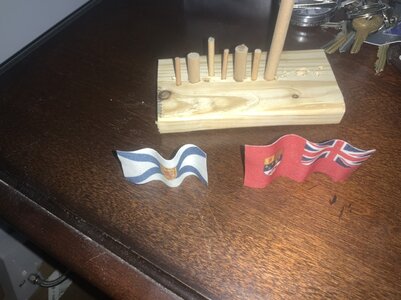
Ignore all the stuff on the piece of wood. Look at the impressions above the needles and brass. This is the wood I used for my chain plate making. You will see the pencil marks where the holes get drilled. Here’s that piece with nothing on it and turned so chain plates are up.
A762C5EA-7A8C-40F3-A9A8-E477F528E825.jpeg
 
Last edited:
Ignore all the stuff on the piece of wood. Look at the impressions above the needles and brass. This is the wood I used for my chain plate making. You will see the pencil marks where the holes get drilled. Here’s that piece with nothing on it and turned so chain plates are up.
View attachment 203672
Yes, that closer view tell the tale. Great idea at no cost other than time and use of waste materials. Your drill and bit seem to have worked well under your practiced hand. RIch
 
Yes, that closer view tell the tale. Great idea at no cost other than time and use of waste materials. Your drill and bit seem to have worked well under your practiced hand. RIch
LOL, no not really. Took quite a few tries, hence all the wasted strips and need to find those 1/64 x 1/8 strips. Persistence paid off in the end.
 
LOL, no not really. Took quite a few tries, hence all the wasted strips and need to find those 1/64 x 1/8 strips. Persistence paid off in the end.
Did you find any more strips? I have a questionable fallback with my 1 inch wide ones which could possibly be sheared or trimmed to width. Rich
 
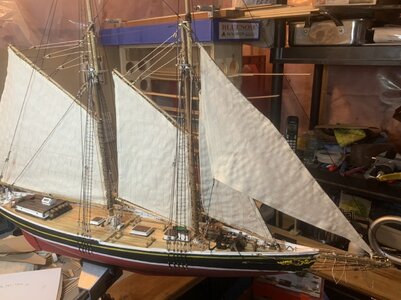
Your schooner is looking more like she wants to be launched every day!!! Great progress. One consideration from some of my reading is that the sails were typically set on a starboard tack when racing as that tack has right-of-way in crossings. If you set your sails shape with the wind filling them from starboard to port side the jib and upper staysails would be in the same configuration. I just noticed this in looking a your Jumbo Jib which looks like a starboard tack and the for stay jib on the opposite tack. I know that in your finishing touches everything will present well. Thank you for the hawser decoration which arrived today. I was surprised at the web of supporting work beneath which will take me some time to carefully remove. The Christmas card is appreciated. Rich
 
Your schooner is looking more like she wants to be launched every day!!! Great progress. One consideration from some of my reading is that the sails were typically set on a starboard tack when racing as that tack has right-of-way in crossings. If you set your sails shape with the wind filling them from starboard to port side the jib and upper staysails would be in the same configuration. I just noticed this in looking a your Jumbo Jib which looks like a starboard tack and the for stay jib on the opposite tack. I know that in your finishing touches everything will present well. Thank you for the hawser decoration which arrived today. I was surprised at the web of supporting work beneath which will take me some time to carefully remove. The Christmas card is appreciated. Rich
No problem Rich, I left the raft in place so it wouldn’t break in transit. An exacto should remove the piece from the raft.
 
Back
Top