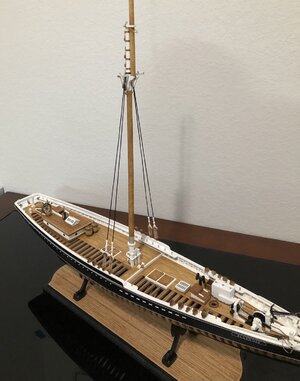
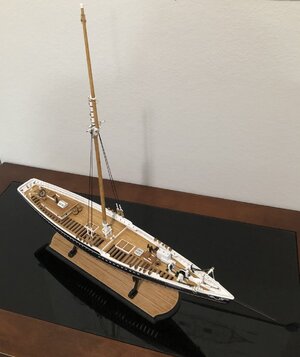
No need to be concerned about seeing the pedestals as they blend in with the model, particularly the black theme so well. RichThe ship on the new stand. Kind of hard to see the pedestals, but with close examination you can see the nice details.
View attachment 242294View attachment 242295View attachment 242296
- Home
- Forums
- Ships of Scale Group Builds and Projects
- Bluenose PoF Group Build
- Bluenose Group Build Logs
You are using an out of date browser. It may not display this or other websites correctly.
You should upgrade or use an alternative browser.
You should upgrade or use an alternative browser.
Hi Dean,The ship on the new stand. Kind of hard to see the pedestals, but with close examination you can see the nice details.
View attachment 242294View attachment 242295View attachment 242296
What I already foresaw comes out: a beautiful combination!

Regards, Peter
Thanks again everyone for the compliments. It’s a bit odd, and definitely unique…lol. 
Great ideas comes from ‘oddenary’ peopleIt’s a bit odd, and definitely unique…lol.
Regards, Peter
Well built Dean , proficiat!
- Joined
- Oct 28, 2018
- Messages
- 660
- Points
- 403

Looks beautiful
Grazie! I am now starting the shroud lines on the main mast...going to be fun! 
A new corner turned. I for one will be following this with great interest. My knowledge of rigging is minimal at best. To me, rigging is figuring out how to tie the anchor so I don't lose it.I am now starting the shroud lines on the main mast...going to be fun!
- Joined
- Jan 9, 2020
- Messages
- 10,377
- Points
- 938

Then we have the same idea about that EJ!A new corner turned. I for one will be following this with great interest. My knowledge of rigging is minimal at best. To me, rigging is figuring out how to tie the anchor so I don't lose it.

As a small sail boat racer (helm and crew) for me the rigging part is the active dynamic part from recollection of the entire process from the stays to get the mast properly set to the halyards and vang tension for proper tension in the sail, to the sheets for the boom, sails, and spinnaker pole to set them in the proper position for greatest driving force from the wind. Always changing with sensitive vibrational feedback as well as from the rudder/tiller/helm to the hull and centerboard themselves. A symphony of everchanging vibrations. To with model rigging I am constantly thinking about what the lines are supposed to be doing and where they should be taken for the proper balance of spars and sails for the presentation. It is the most interesting and yet challenging phase to get it as close to scale and form as feasible. For me it is not a static geometrical setting of lines but a moment in time captured from the balance of forces. RichThen we have the same idea about that EJ!
I think rigging is more intuitive to those who have sailed and used those lines. Although the type sails and methods used, varied from ship to ship. You obviously have experience with a schooner type vessel and so this should make sense to you.As a small sail boat racer (helm and crew) for me the rigging part is the active dynamic part from recollection of the entire process from the stays to get the mast properly set to the halyards and vang tension for proper tension in the sail, to the sheets for the boom, sails, and spinnaker pole to set them in the proper position for greatest driving force from the wind. Always changing with sensitive vibrational feedback as well as from the rudder/tiller/helm to the hull and centerboard themselves. A symphony of everchanging vibrations. To with model rigging I am constantly thinking about what the lines are supposed to be doing and where they should be taken for the proper balance of spars and sails for the presentation. It is the most interesting and yet challenging phase to get it as close to scale and form as feasible. For me it is not a static geometrical setting of lines but a moment in time captured from the balance of forces. Rich
To many of us without actual sailing experience, we have to learn about it through modeling! I know about standing rigging (shroud lines and stays), and I am always learning about the different running rigging. But the main thing, is how to display all of that together, and whether to imitate a ship under sail. There could be many variations, like all sails raised or some raised and others furled, or all furled…and finally docked for maintenance with all sails removed…many options…
All of my sailing and racing was aboard single masted "dinghys" If you Google them up you could look at: Blue Jay, Lightning, Thistle, Star, and my own last one a 5-0-5 trapeze racer. I only sailed in one type of catamaran, a Hoby 14 which was a trapeze for the crew where I served and only once helmed on my son's cat. Very different than a monohull for tacking and gybing. Never have sailed on a gaff rigged vessel or multiple masted ones but I have been looking at as many YouTube sailing ones for pilot boats and schooners in particular.I think rigging is more intuitive to those who have sailed and used those lines. Although the type sails and methods used, varied from ship to ship. You obviously have experience with a schooner type vessel and so this should make sense to you.
To many of us without actual sailing experience, we have to learn about it through modeling! I know about standing rigging (shroud lines and stays), and I am always learning about the different running rigging. But the main thing, is how to display all of that together, and whether to imitate a ship under sail. There could be many variations, like all sails raised or some raised and others furled, or all furled…and finally docked for maintenance with all sails removed…many options…
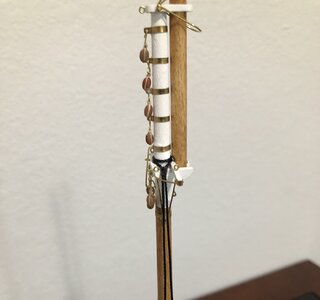
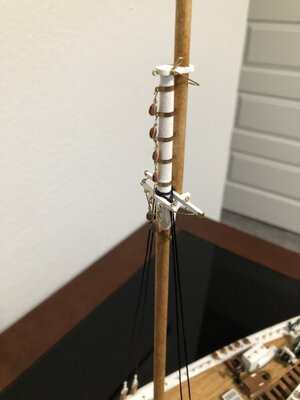
Not a lot to show, however I did get the first set of shroud lines done. The others should go faster now.
First I use a paper clip cut and angled at 90 degrees on each end to establish the length between the deadeyes.
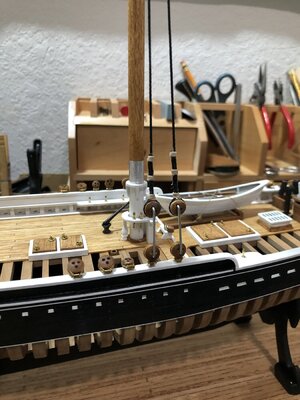
Then I painted the rope white like on the BN.
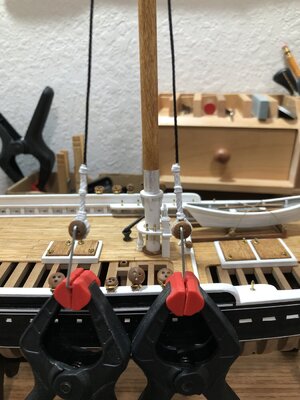
Then I added the ropes to tension the deadeyes. I didn’t get too carried away tightening them, because when you do the other set on the opposite side, that will pull the mast straight and tighten this side more. If you make the first set too tight, you won’t be able to pull the mast straight when you do the other side. In fact if you are not sure, you can wait and tension both sides together. But I kept pulling the mast straight while tensioning this side to make sure they were not too tight. So I am confident when I tension the other side that both sides will have the proper tension and the mast will be straight or plumb.
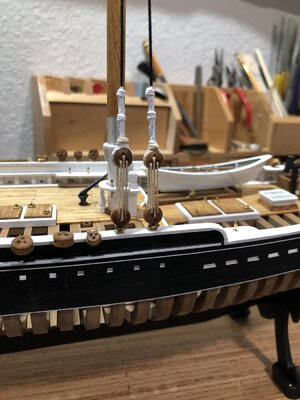
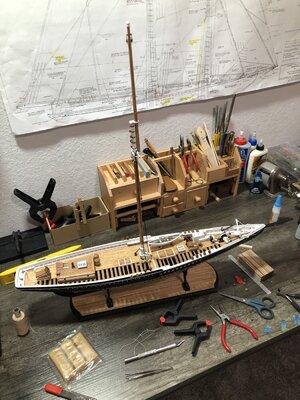
On to the next set of shroud lines…you alternate sides, and work from the bow towards the stern, starting on the starboard side.
First I use a paper clip cut and angled at 90 degrees on each end to establish the length between the deadeyes.

Then I painted the rope white like on the BN.

Then I added the ropes to tension the deadeyes. I didn’t get too carried away tightening them, because when you do the other set on the opposite side, that will pull the mast straight and tighten this side more. If you make the first set too tight, you won’t be able to pull the mast straight when you do the other side. In fact if you are not sure, you can wait and tension both sides together. But I kept pulling the mast straight while tensioning this side to make sure they were not too tight. So I am confident when I tension the other side that both sides will have the proper tension and the mast will be straight or plumb.


On to the next set of shroud lines…you alternate sides, and work from the bow towards the stern, starting on the starboard side.
- Joined
- Jan 9, 2020
- Messages
- 10,377
- Points
- 938

Good progress Dean and good advice on the tensioning of the lanyards. It is actually amazing to see just how much tension can be created by the rigging lines on a model ship so it makes sense not to put too much tension on at this stage.
The white was a canvas covering placed over that section of the shrouds. Nice start. RichNot a lot to show, however I did get the first set of shroud lines done. The others should go faster now.
First I use a paper clip cut and angled at 90 degrees on each end to establish the length between the deadeyes.
View attachment 243203
Then I painted the rope white like on the BN.
View attachment 243204
Then I added the ropes to tension the deadeyes. I didn’t get too carried away tightening them, because when you do the other set on the opposite side, that will pull the mast straight and tighten this side more. If you make the first set too tight, you won’t be able to pull the mast straight when you do the other side. In fact if you are not sure, you can wait and tension both sides together. But I kept pulling the mast straight while tensioning this side to make sure they were not too tight. So I am confident when I tension the other side that both sides will have the proper tension and the mast will be straight or plumb.
View attachment 243205View attachment 243206
On to the next set of shroud lines…you alternate sides, and work from the bow towards the stern, starting on the starboard side.
Yes I’m replicating it with white paint.The white was a canvas covering placed over that section of the shrouds. Nice start. Rich
Thanks. If you pull the mast too far on the first set, you won’t be able to straighten it on the other side. Then you have to cut your tensioning ropes and redo. It’s hard enough doing it once…lol.Good progress Dean and good advice on the tensioning of the lanyards. It is actually amazing to see just how much tension can be created by the rigging lines on a model ship so it makes sense not to put too much tension on at this stage.
It looks like you will have the shrouds finished before I receive my replacement of better sized thread to begin all over again with the lowers for both masts. We will be using differing methods but that is not relevant as we head toward the same goal. Yours look very precise. RichThanks. If you pull the mast too far on the first set, you won’t be able to straighten it on the other side. Then you have to cut your tensioning ropes and redo. It’s hard enough doing it once…lol.


