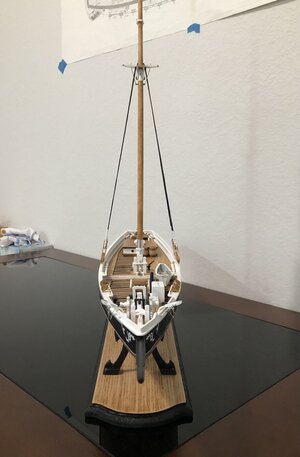
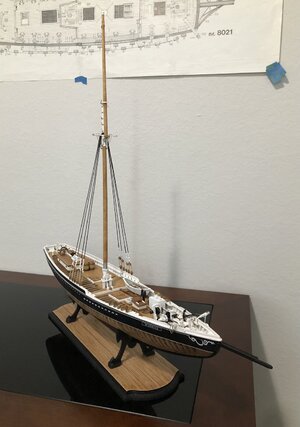
Pretty neat Dean , my complimentsNext set done…and I’m done for the day!
View attachment 243230View attachment 243231View attachment 243232
- Home
- Forums
- Ships of Scale Group Builds and Projects
- Bluenose PoF Group Build
- Bluenose Group Build Logs
You are using an out of date browser. It may not display this or other websites correctly.
You should upgrade or use an alternative browser.
You should upgrade or use an alternative browser.
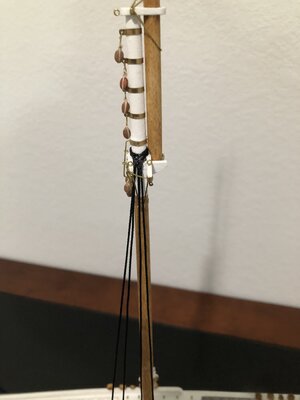
I installed the 3rd pair of shroud lines on the main mast on the starboard side.
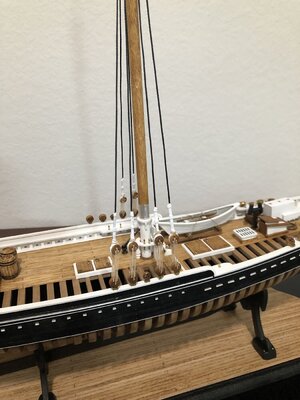
If you add the futtock supports for the upper shrouds, that should be there, note the bow pair of shroud lines come out between them. But the stern pair have to come out behind them to the left. Otherwise they would bend at the futtock supports, which would look bad, and put unnecessary stress on one of the supports.
Here is a pic…
And an overall pic…
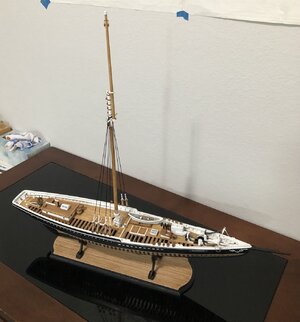
Now for the stern set on the port side to finish. Then I can do the upper shrouds and add all of the rat lines, and finally the side stays.
Then I have to do some work on the bowsprit and build the foremast!

If you add the futtock supports for the upper shrouds, that should be there, note the bow pair of shroud lines come out between them. But the stern pair have to come out behind them to the left. Otherwise they would bend at the futtock supports, which would look bad, and put unnecessary stress on one of the supports.
Here is a pic…

And an overall pic…

Now for the stern set on the port side to finish. Then I can do the upper shrouds and add all of the rat lines, and finally the side stays.
Then I have to do some work on the bowsprit and build the foremast!
Nice to see her growing, Dean.I installed the 3rd pair of shroud lines on the main mast on the starboard side.
View attachment 243397
If you add the futtock supports for the upper shrouds, that should be there, note the bow pair of shroud lines come out between them. But the stern pair have to come out behind them to the left. Otherwise they would bend at the futtock supports, which would look bad, and put unnecessary stress on one of the supports.
Here is a pic…
View attachment 243398
And an overall pic…
View attachment 243399
Now for the stern set on the port side to finish. Then I can do the upper shrouds and add all of the rat lines, and finally the side stays.
Then I have to do some work on the bowsprit and build the foremast!
Nicely set up. Like the 4 strings of a bass guitar.
Regards, Peter
Very nicely done. I used 7 strand wire and mini turnbuckles on my Lightning, and found that tensioning them was very easy using them. Not relevant here of course, but the fact that the tensioning on a model affects the mast straitness and position a lot, just like on the real thing.I installed the 3rd pair of shroud lines on the main mast on the starboard side.
View attachment 243397
If you add the futtock supports for the upper shrouds, that should be there, note the bow pair of shroud lines come out between them. But the stern pair have to come out behind them to the left. Otherwise they would bend at the futtock supports, which would look bad, and put unnecessary stress on one of the supports.
Here is a pic…
View attachment 243398
And an overall pic…
View attachment 243399
Now for the stern set on the port side to finish. Then I can do the upper shrouds and add all of the rat lines, and finally the side stays.
Then I have to do some work on the bowsprit and build the foremast!
Thank you!That really looks exceptionally clean and neat!
The true test is taking a picture down the length of the ship, to see if everything is square and symmetrical! I get nervous I’m going to see something out of line…lol.
Despite my best efforts of using a spacer, some of the upper deadeyes are not perfectly in line, but they aren’t on a real ship either! Due to tensioning, they end up being a little different despite starting out at the same length.
Thank you again, but keeping the rigging clean is always a challenge. It can turn into a real rats nest if you don’t stay one step ahead! I’m always studying the plans and other resources, trying to determine the right order to do things, so I can get to them. You can paint yourself into a corner real quick if you don’t plan ahead!No need to fret about this one. She is as near as perfect as one is ever going to get it!
I’m starting to wonder if adding sails isn’t going to make things much more difficult. But I want sails, so I just have to make sure to have a good plan.
- Joined
- Jan 9, 2020
- Messages
- 10,377
- Points
- 938

Hi Dean - on your build, in particular, I agree that sails are the way to go. Those big, billowing white sails will provide a unique continuation line of the many white deck fittings and ancillaries also in white.
By the way, it's really frustrating that we aren't always getting notifications of new posts. I have followed your build from day one (both logs), but did not receive any notification of your last posting. Luckily, I routinely check the Bluenose Group Build three or four times a day ...
By the way, it's really frustrating that we aren't always getting notifications of new posts. I have followed your build from day one (both logs), but did not receive any notification of your last posting. Luckily, I routinely check the Bluenose Group Build three or four times a day ...
I did the upper shroud lines on one side of the main mast. It took almost 3 hours…sigh!
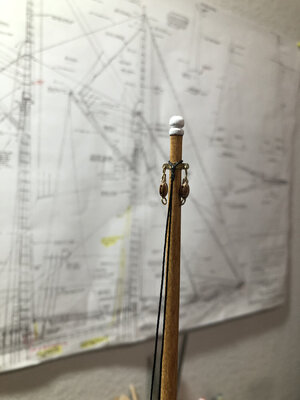
First, the shroud lines are wrapped around the mast, not connected to an eye. Second, they are not tied to an eye at the bottom, they have lanyards to tension them. You can’t have lanyards without pulleys or deadeyes. As far as I can tell, pulleys were used.
Anyway, that’s what I used. Luckily I had some tiny 3mm double pulleys from Dry Dock Models. However, they are so small I had to use thread that I waxed.
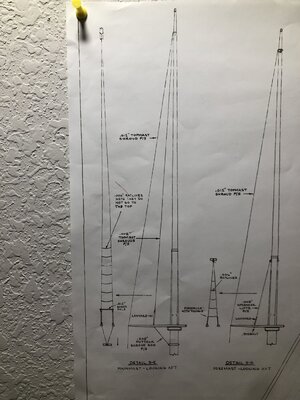
Rigging plans that show the proper shroud setup.
What I ended up with…
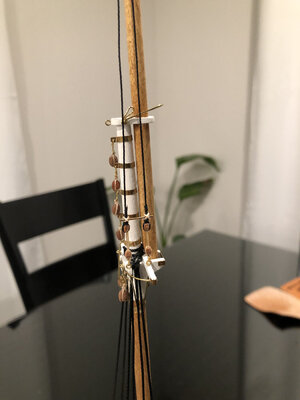
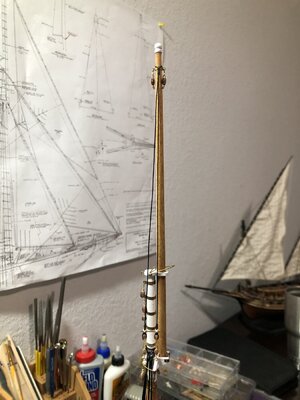
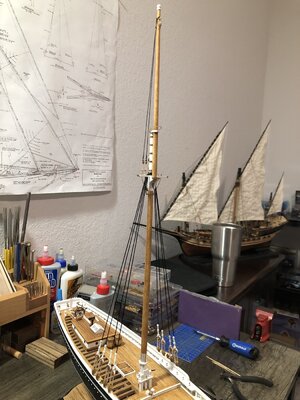
That’s all I have so far…
First, the shroud lines are wrapped around the mast, not connected to an eye. Second, they are not tied to an eye at the bottom, they have lanyards to tension them. You can’t have lanyards without pulleys or deadeyes. As far as I can tell, pulleys were used.
Anyway, that’s what I used. Luckily I had some tiny 3mm double pulleys from Dry Dock Models. However, they are so small I had to use thread that I waxed.
Rigging plans that show the proper shroud setup.

What I ended up with…


That’s all I have so far…
cleaver idea using double blocks. I don't think that blocks/sheaves were used but small deadeyes or larger thimbles for the lanyards. Yours look very nice though and I don't have a definitive source to relate these with. After you do the sails and interior rigging are you going to come back outside for ratlines which would get in the way if done before the interior work.? I have prerigged my sails with all of the lines and blocks that I can put in place to reduce that work and jiggling things around when I eventually get my new line to remake all of the lower shrouds. RichI did the upper shroud lines on one side of the main mast. It took almost 3 hours…sigh!
First, the shroud lines are wrapped around the mast, not connected to an eye. Second, they are not tied to an eye at the bottom, they have lanyards to tension them. You can’t have lanyards without pulleys or deadeyes. As far as I can tell, pulleys were used.
Anyway, that’s what I used. Luckily I had some tiny 3mm double pulleys from Dry Dock Models. However, they are so small I had to use thread that I waxed.
Rigging plans that show the proper shroud setup.
View attachment 243792
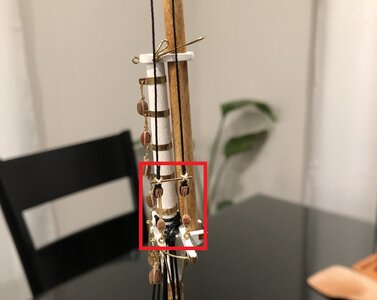
What I ended up with…
View attachment 243793View attachment 243794View attachment 243795View attachment 243796
That’s all I have so far…
- Joined
- Jan 9, 2020
- Messages
- 10,377
- Points
- 938

I plan to do the rat lines next, then the side stays that go over all of that. I will work my way around them.cleaver idea using double blocks. I don't think that blocks/sheaves were used but small deadeyes or larger thimbles for the lanyards. Yours look very nice though and I don't have a definitive source to relate these with. After you do the sails and interior rigging are you going to come back outside for ratlines which would get in the way if done before the interior work.? I have prerigged my sails with all of the lines and blocks that I can put in place to reduce that work and jiggling things around when I eventually get my new line to remake all of the lower shrouds. Rich
Then I will switch to the bow sprit, then the foremast. Then the same procedure for the foremast.
Then I will do the stays between the masts. Then the main boom and gaff. Then the fore boom and gaff, and finally the jib boom.
At least that’s my plan.
Then it will be time to do the sails and rigging for them, halyards, down hauls, etc.
Thank you! There is a natural sequence you have to follow.That is a LOT Dean. Someone who has never build a model before, will never realize the time and PLANNING that just went into this section in the red box. Just getting the sequence of those knots right, is a challenge! Well done and neatly executed!
View attachment 243800
Well now. . . when all else fails. . . look at the instruction book. Here are two illustrations for MS2130 of your areas of focus:Thank you! There is a natural sequence you have to follow.
Main Mast Futtock Shrouds which you have already provided your own solution:
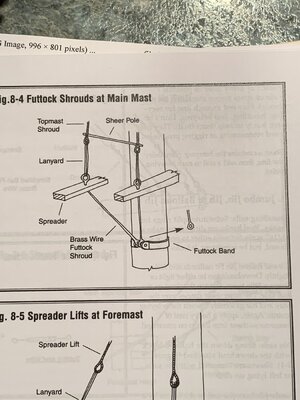
Foremast Spreader lifts with a similar rigging need:
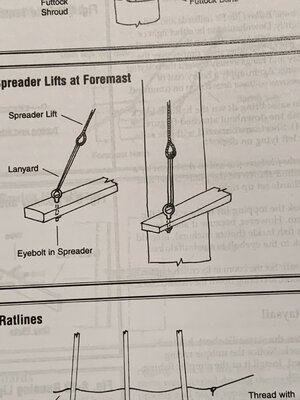
I was wrong with the small deadeye thought but close with the large thimble under the sheer poles. Rich
Well darn, guess I went through more trouble than I needed to! Oh well, I like my solution better…lol. It seemed like the best way to get enough tension. Wonder if I should redo it?Well now. . . when all else fails. . . look at the instruction book. Here are two illustrations for MS2130 of your areas of focus:
Main Mast Futtock Shrouds which you have already provided your own solution:
View attachment 243808
Foremast Spreader lifts with a similar rigging need:
View attachment 243809
I was wrong with the small deadeye thought but close with the large thimble under the sheer poles. Rich
I would redo it! It should be the correct way, knowing it is. I know this wouldn't be a huge task for you. In the end, it is your model...and only you can\will make a decision.Well darn, guess I went through more trouble than I needed to! Oh well, I like my solution better…lol. It seemed like the best way to get enough tension. Wonder if I should redo it?
Thanks for the feedback Jimsky! Those tiny blocks were so difficult to deal with, it would be far easier doing it with ropes! Looks better with the blocks, but not right...sigh! So I will change it!I would redo it! It should be the correct way, knowing it is. I know this wouldn't be a huge task for you. In the end, it is your model...and only you can\will make a decision.


