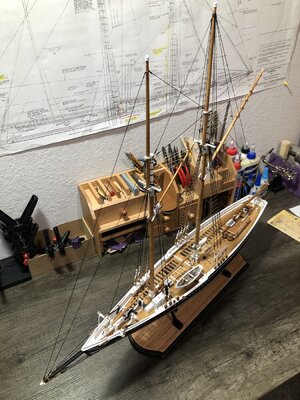
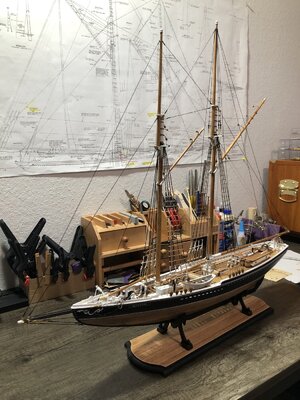
Yes, and very nicely set. I put in the photos in response to the question of gaff placement for other group members to consider. RIchThanks Rich…but my gaffs are raised!
- Home
- Forums
- Ships of Scale Group Builds and Projects
- Bluenose PoF Group Build
- Bluenose Group Build Logs
You are using an out of date browser. It may not display this or other websites correctly.
You should upgrade or use an alternative browser.
You should upgrade or use an alternative browser.
Thank you Eugene! I used the pearwood blocks from Dry Dock. The size is 5mm, anything smaller is too hard to get rope through!That is one sweet looking build.
If I may ask, did you use the kit blocks? If not, what size blocks did you use? I have some very nice pearwood ones from Drydock.
EJ
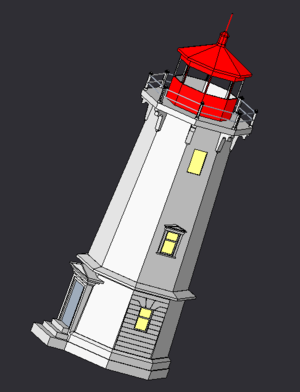
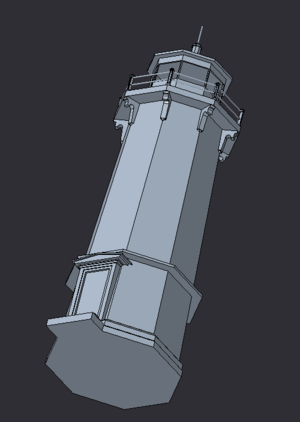
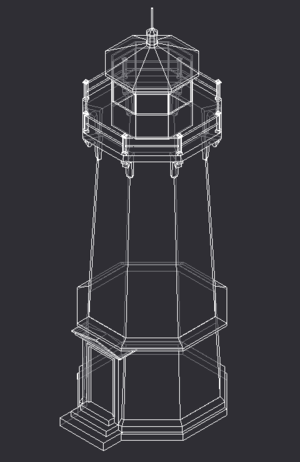
I modeled the lighthouse, I still have some windows to add, but this will give me dimensions to go by when I scratch build one.
I did a lot of research and found some dimensions... the base is 19 feet in diameter and it is 55 feet tall. About 5 stories high.
The most difficult part will be merging all of the angles, due to a octagon shape that tapers over the length up to the catwalk around the lantern house. And the corbels are in the corners, which should make for some interesting miter joints.
At 1/72 scale, the same as the BN kit, it will be a little over 9" tall.


Thank youThank you Eugene! I used the pearwood blocks from Dry Dock. The size is 5mm, anything smaller is too hard to get rope through!
Your CAD skills at 3-D modeling pay you large dividends beside your vocation. As to blocks . . . on my 64 scale BN I have limited myself to 3 mm on the low end but for a few associated with downhauls along the edges of some sails I may have used a few 2.5mm but the thread is very small as "threading the eye" becomes a challenge. Your lighthouse tower looks very promising. RichThank you
Thanks Rich. I have 4 and 4.5mm, singles and doubles, but might get some 3 and 3.5mm - just for kicks.Your CAD skills at 3-D modeling pay you large dividends beside your vocation. As to blocks . . . on my 64 scale BN I have limited myself to 3 mm on the low end but for a few associated with downhauls along the edges of some sails I may have used a few 2.5mm but the thread is very small as "threading the eye" becomes a challenge. Your lighthouse tower looks very promising. Rich
You will need a couple of triples too!Thanks Rich. I have 4 and 4.5mm, singles and doubles, but might get some 3 and 3.5mm - just for kicks.
I thought that the smaller sizes were more in the 64 scale of my BN but from the sail/rigging plan sheet I did upsize some of the smallest to 3 mm. RichYou will need a couple of triples too!
Thank you!Great work on the 3D modeling of that lighthouse Dean!
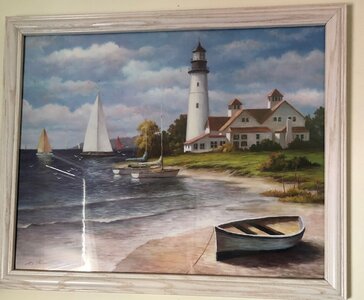
What a great idea Dean. 3D model a lighthouse and then scratch build it. I love it and may try it myself. I like your avatar, I have 12 different pictures and paintings of lighthouses in my office/drydock.
The precision of your bluenose is just a pleasure to look at and helps me to step up my game. Thanks for sharing.
The precision of your bluenose is just a pleasure to look at and helps me to step up my game. Thanks for sharing.
Thank you Daniel.What a great idea Dean. 3D model a lighthouse and then scratch build it. I love it and may try it myself. I like your avatar, I have 12 different pictures and paintings of lighthouses in my office/drydock.
The precision of your bluenose is just a pleasure to look at and helps me to step up my game. Thanks for sharing.
There are some cardboard models available of lighthouses in 1/72 scale, that can be embellished into a very nice end result. But they are of light houses in Germany (which are very nice) and other countries, other than Canada.
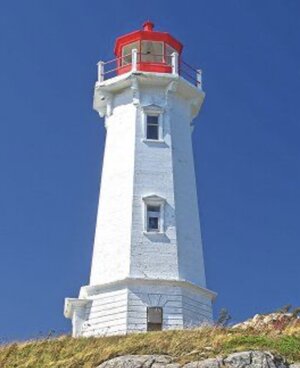
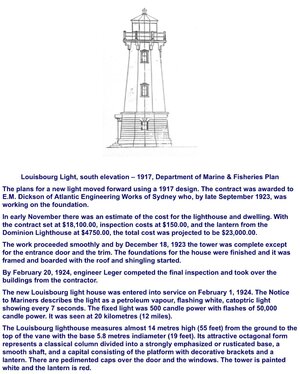
So I decided if I added a lighthouse to the BN case as part of the display, it should be a lighthouse that would have been passed by the BN. Since there are no kits available of lighthouses in Novia Scotia, I decided to do some research. I found this one, the Louisbourg Lighthouse and read the history. It was rebuilt 3 times, the last time being in 1923. The BN was built in 1921, therefore I think it is safe to say the the BN most likely passed this very lighthouse many times in her fishing voyages! It is not the actual lighthouse in Lunenburg Novia Scotia, but that one was literally a house, and too big of a footprint to be placed in the case. So although this lighthouse was not in Lunenburg, it is still very feasible the BN would have sailed by it. And that’s good enough for me to use it.
This will be about 3” at the base and over 9” in height at 1/72 scale.
So after doing research, I found enough dimensions to determine the scale for an elevation view I found. Then with a 3D model I can get dimensions for the pieces right off the model to scratch build. Seemed the easiest way, and I can see what I will get prior to cutting any pieces.
Here is the some of the info I used…
Last edited:
Onto shroud lines…there will be no lighthouse until I finish the ship…lol 
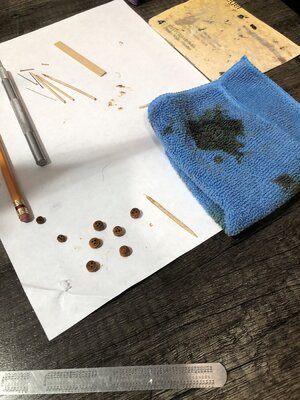
First I stain the deadeyes, I just use a toothpick inserted in one of the holes to hold them, then dip in the can of stain and wipe them off.
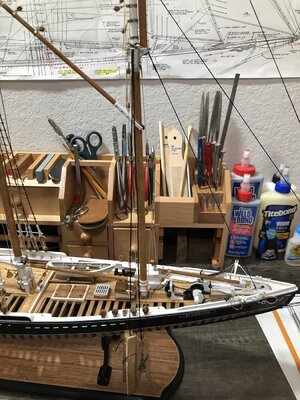
next… I put the shroud line around the mast and serve where it comes together. Then put my metal spacers in the lower deadeyes.
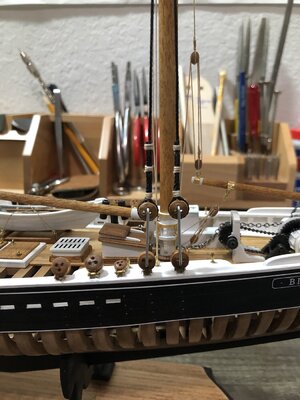
Next…I glue the shroud around the upper deadeye while it’s on the upper part of the spacer. Then I trim the excess rope to a predetermined length, so they are all the same. Then I serve that with 3 small ropes.
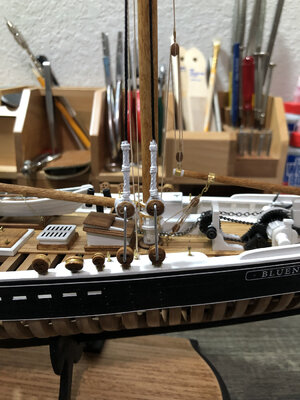
Next…I paint the rope white to simulate the wrapping around the upper deadeyes and rope.
Next…time to remove my spacer and tension the shrouds with waxed rope. Then tie the lanyards hitches and glue before cutting off excess.
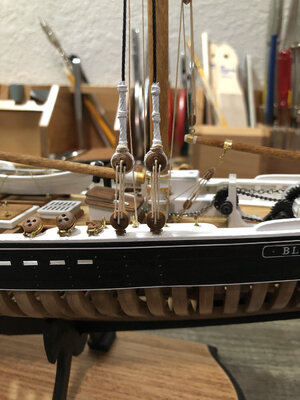
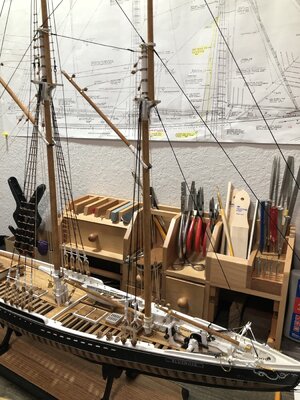
Next…the port pair of shroud lines will be added, then back to the starboard, etc. until I have 4 pairs finished. See you then! Happy modeling…
First I stain the deadeyes, I just use a toothpick inserted in one of the holes to hold them, then dip in the can of stain and wipe them off.

next… I put the shroud line around the mast and serve where it comes together. Then put my metal spacers in the lower deadeyes.

Next…I glue the shroud around the upper deadeye while it’s on the upper part of the spacer. Then I trim the excess rope to a predetermined length, so they are all the same.

Next…I paint the rope white to simulate the wrapping around the upper deadeyes and rope.

Next…time to remove my spacer and tension the shrouds with waxed rope. Then tie the lanyards hitches and glue before cutting off excess.


Next…the port pair of shroud lines will be added, then back to the starboard, etc. until I have 4 pairs finished. See you then! Happy modeling…
Thank you!
Hope it helps…it’s really about patience more than anything.
Hope it helps…it’s really about patience more than anything.
It is clear that having the shrouds and deadeyes in place before the shear rod and rat lines certainly provides more access and working space for the deadeyes than if those are in place before the deadeyes. Good advance planning and execution for a very precise and visually pleasant presentation. RicOnto shroud lines…there will be no lighthouse until I finish the ship…lol
First I stain the deadeyes, I just use a toothpick inserted in one of the holes to hold them, then dip in the can of stain and wipe them off.
View attachment 254191
next… I put the shroud line around the mast and serve where it comes together. Then put my metal spacers in the lower deadeyes.
View attachment 254192
Next…I glue the shroud around the upper deadeye while it’s on the upper part of the spacer. Then I trim the excess rope to a predetermined length, so they are all the same.Then I serve that with 3 small ropes.
View attachment 254193
Next…I paint the rope white to simulate the wrapping around the upper deadeyes and rope.
View attachment 254194
Next…time to remove my spacer and tension the shrouds with waxed rope. Then tie the lanyards hitches and glue before cutting off excess.
View attachment 254195View attachment 254196
Next…the port pair of shroud lines will be added, then back to the starboard, etc. until I have 4 pairs finished. See you then! Happy modeling…


