- Home
- Forums
- Ships of Scale Group Builds and Projects
- Bluenose PoF Group Build
- Bluenose Group Build Logs
You are using an out of date browser. It may not display this or other websites correctly.
You should upgrade or use an alternative browser.
You should upgrade or use an alternative browser.
Dean, great job.  Nice to look at. I am waiting for your lighthouse.
 Nice to look at. I am waiting for your lighthouse.
Thank you Alexander! I will be posting the lighthouse soon.Dean, great job.Nice to look at. I am waiting for your lighthouse.

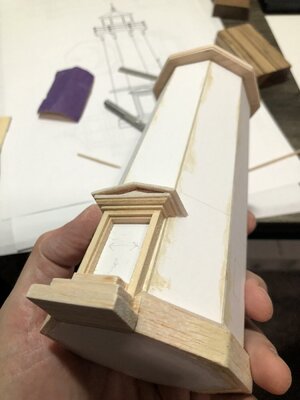
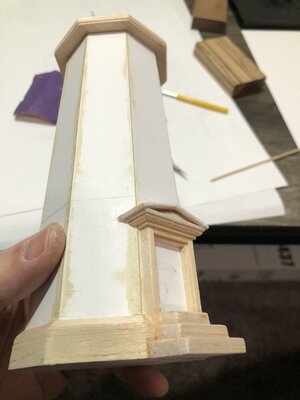
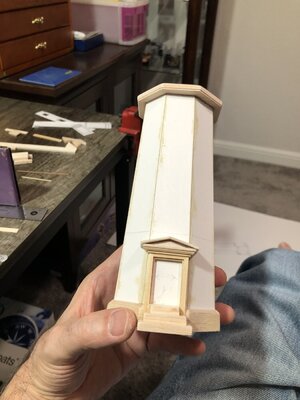
Initial progress on the lighthouse. It’s in the ugly stage…lol.
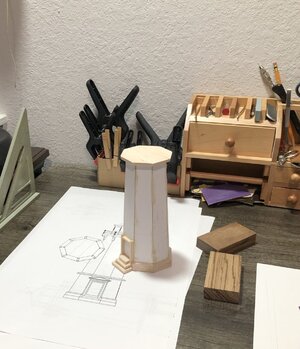
I made a drawing from my 3D model and printed it at scale. So I’m using my drawing as a template.
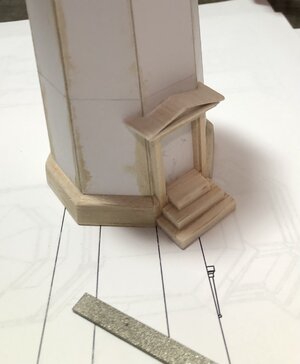
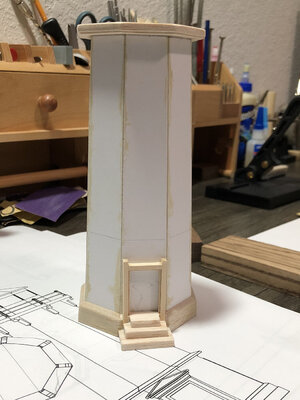
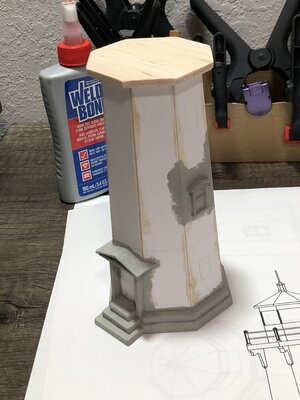
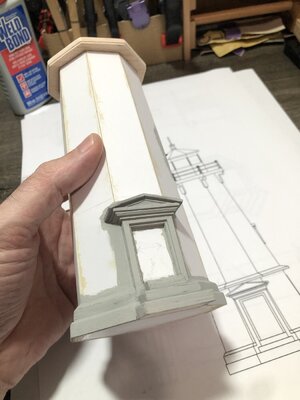
I started by making the main lower tower with construction board. I cut 8 tapered pieces to make the octagon shape that gets smaller as it gets tall. Then I made base trim with wood, door frame and casing out of wood. Catwalk platform out of wood.
Next will be the windows and window frames. And more work on the door and lower tower.


Last edited:
Excellent Classical Style entry door assembly with your typical precise detailing and execution!!! RichI am getting to do a lot of miter joints! The roof pieces were fun on the door.
Anyway it’s starting to take shape!
View attachment 256764View attachment 256765View attachment 256769View attachment 256767
- Joined
- Sep 3, 2021
- Messages
- 4,209
- Points
- 688

That's a lot of progress in a very short time frame!I am getting to do a lot of miter joints! The roof pieces were fun on the door.
Anyway it’s starting to take shape!
View attachment 256764View attachment 256765View attachment 256769View attachment 256767
And apparently of the same quality and craftsmanship as the model it's associated with
It's a beautiful result, Dean.
And despite of the ‘time pressure’ towards your son's birthday, you have maintained the quality of your work. A beautiful look and a well thought-out color combination.
And with the lighthouse it becomes an even more nicer layout.
During the build you encountered wind from all sides with even storm. But you can be proud of this result, my 'overseas friend'.
Regards, Peter
Last edited:
Well...with such a beautiful lighthouse (in progress), I am more and more thinking towards a complete diorama, including a sea! Perhaps, maybe a photo of the see background? Possibilities...
Lovely Dean. Turns out you're a pretty decent woodworker! 
- Joined
- Jan 9, 2020
- Messages
- 10,377
- Points
- 938

The lighthouse is shaping up beautifully. Now what are the chances are turning that into an operational lighthouse? A slowly-rotating centre shaft connected to an electric motor with a reduction gearbox connected to the mirror concave at the top? Come on, Dean!
Thanks everyone for the compliments and encouragement.
Rich, I am following the design of the original, and the doors and windows are one of the things I really liked about it!
Johan, I hit the ground running because I already did a lot of preliminary work… such as research, and making a model and dwg to go by.
Peter, many thanks. I look forward to your progress my friend.
Jimsky, I am afraid if I add anything else I won’t finish in time…lol. I am already going to put the lighthouse on a wooden base and add some rocks and grass.
Paul, true I’m no stranger to wood working, but at this scale everything is done by hand, because I like having finger tips!
I am already tiring of the octagon shape and the taper of it, as it requires miter joints on all of the pieces. But it will be a fun project. As you will see, there are many boards to put on the bottom that will simulate the design around the lower portion. Also it has a skirt around that, that will once again require a lot of miter joints. But it’s all getting painted, except for the door itself.
And all of the windows and the door require a slight angle to match the taper of the tower, in order to be plumb or level. So, after this I may reconsider a few mini power tools!
Lol…maybe next time Heinrich… I have less than three weeks and a lot of detail to add! But I like the way you are thinking! You been hanging around Peter lately?The lighthouse is shaping up beautifully. Now what are the chances are turning that into an operational lighthouse? A slowly-rotating centre shaft connected to an electric motor with a reduction gearbox connected to the mirror concave at the top? Come on, Dean!
Hey, that’s good too!Nope. I've been hanging around myself lately! Finally!
Small update…2 hrs later…I have one window! This is, as you know, tedious time consuming work. And not unlike building a cannon carriage, the first one is fun and challenging…then you realize you have to repeat that…again and again…and suddenly it seems like a daunting task with no end in sight!
But I only have three of these windows and two of the other kind.
But so much more to do after that!
Anyway, I made the window frame first, then the casing and sill, with roof.
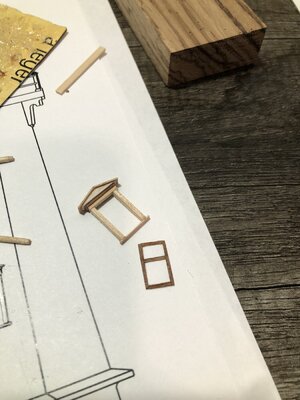
Then I joined the two sub assemblies…
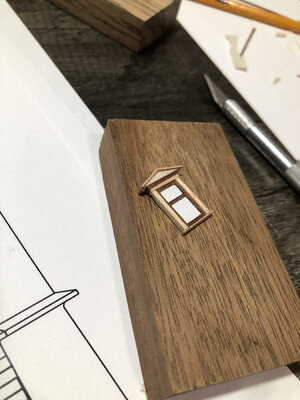
Then I tapered it, top to bottom, so when attached to the angled lighthouse wall it would be plumb.
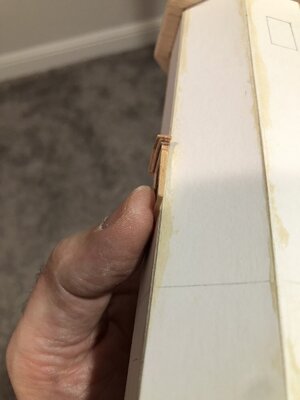
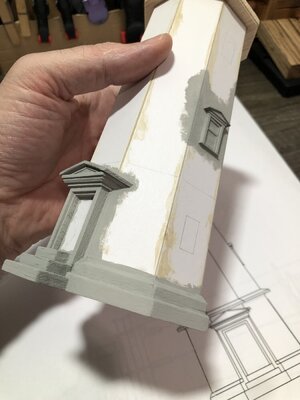
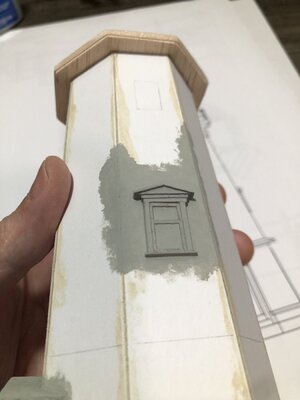
Then I glued it on the lighthouse…two more of these to go!
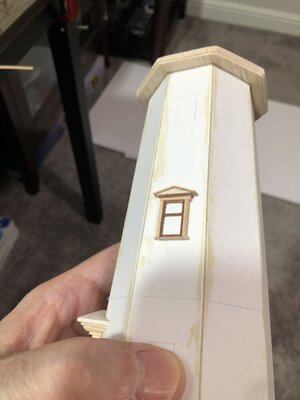
As you may notice, there are many different types of wood being used because I am just using whatever is the thickness or size I need, or close enough to cut down on work. Either way, it all gets painted white eventually, so ignore the wood colors and imagine it white.
But I only have three of these windows and two of the other kind.
But so much more to do after that!
Anyway, I made the window frame first, then the casing and sill, with roof.

Then I joined the two sub assemblies…

Then I tapered it, top to bottom, so when attached to the angled lighthouse wall it would be plumb.

Then I glued it on the lighthouse…two more of these to go!

As you may notice, there are many different types of wood being used because I am just using whatever is the thickness or size I need, or close enough to cut down on work. Either way, it all gets painted white eventually, so ignore the wood colors and imagine it white.
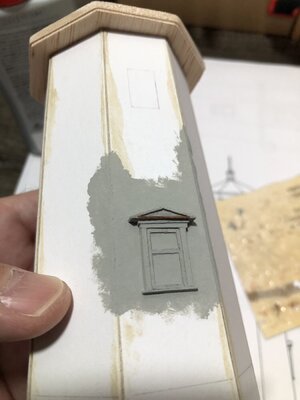
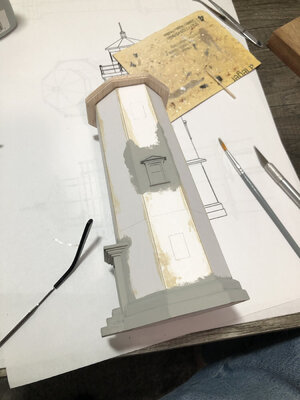
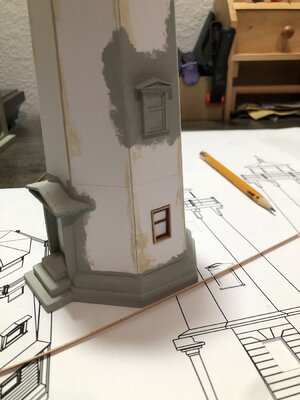
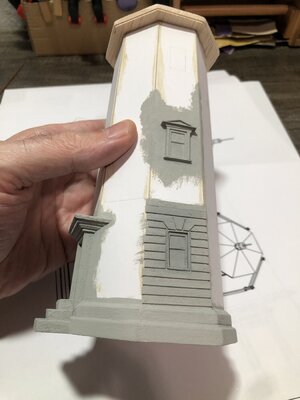
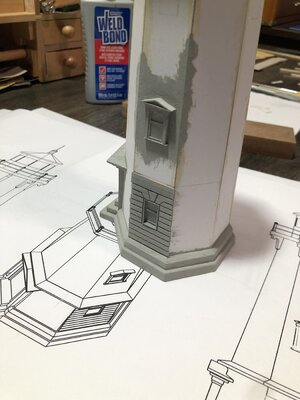
I added the final piece of trim on the base. Then beveled it, and blended it into the stairs. Then I decide to go ahead and add a base coat of grey on what is finished thus far. This way I can see better what I have, and if I need to fix any areas.This will eventually be dry brushed with white, to bring out more detail and give it a weathered look. So grey will be the base coat on all white components. Also keep in mind this lighthouse is concrete, and thus sharp crisp edges are not what you would see, which gives me a little breathing room on worrying about the edges. 


I have forgotten what the construction system of the lighthouse is. Out on the NW Pacific coast most were concrete and those in less vulnerable locations I think were reinforce clay masonry with an overcoat of concrete. It looks like this grey is a primer for things to follow. You prior wood tones were nice to look at but I knew they were painted on the actual tower. Nice to watch your progress with those compound mitered angles. RIchOops…I forgot a piece of wood on the roof dormer of the window…
View attachment 256963
Now to paint…whew…much better!
View attachment 256964
The lower windows…they are inset and need to be leveled (angle to wall).
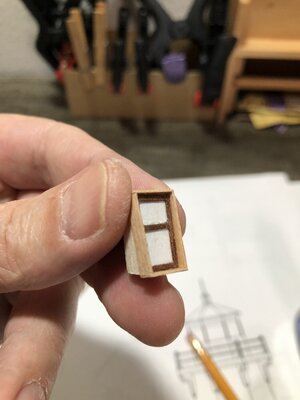
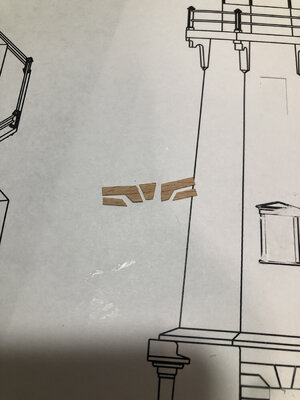
Then the boards to simulate the pattern on the lower tower and around the windows. It will be a lot of boards and a lot of work…but isn’t that how this goes…lol.
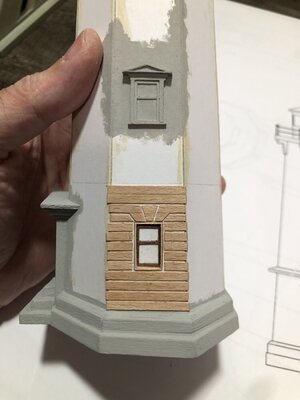
Then I painted to see what it’s going to look like. I am excited, once I start dry brushing the white on, it’s going to come alive. But that will be after I finish construction.

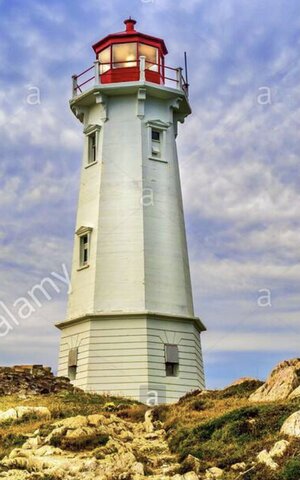
Pic for reference…


Then the boards to simulate the pattern on the lower tower and around the windows. It will be a lot of boards and a lot of work…but isn’t that how this goes…lol.


Then I painted to see what it’s going to look like. I am excited, once I start dry brushing the white on, it’s going to come alive. But that will be after I finish construction.


Pic for reference…

Last edited:

