Bluenose II Build (Artesania Latina) 1:75 by Nomad [Completed Build]

You can sand a piece of the same wood you used for the hull planking, and make a small pile of sawdust. Then just use regular pva glue, and mix some with the wood dust and make a filler. But you have to mix a small amount at a time and work fast, as it will cure quickly depending on the glue you use. Spread in or around the hole with a small board or toothpick. Let dry, sand, and touch up clear coat in that area. ;)
Thanks Dean!
 
Good point, although the AL kit's instructions are to apply a clear varnish only.
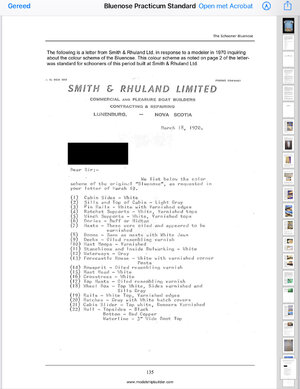
I think AL's instructions are not correct for the clear varnish application. Line item 22 below states a "red copper" below the waterline. The waterline itself is shown as a "3" Wide boot top". I don't have a clou what color that's supposed to be, but white seams to be a good guess, see also the replies from both Ritch and Dean on this topic.

1632514175814.jpeg
 
I think AL's instructions are not correct for the clear varnish application. Line item 22 below states a "red copper" below the waterline. The waterline itself is shown as a "3" Wide boot top". I don't have a clou what color that's supposed to be, but white seams to be a good guess, see also the replies from both Ritch and Dean on this topic.

View attachment 257927
I think he was referring to the stanchions, which are painted white, but the AL instructions say to clear coat them?
 
Yes, I see that I am to install a thin basswood baton all along the flotation line which should act as something of a white line and separate the two colours quite well. I think when I become a bit more experienced with this whole lark I'll do more research into the history of the actual ship I'm trying to construct, and maybe incorporate some of the real designs and colours into my build. I feel that's still a long way off though ... :p
I believe that an added strake over the ones that you have in place would be a wale which is a thicker strake to strengthen the hull along certain longitudinal lines where stresses may be higher (impact). If it is the same thickness and in the same plane of strakes and not projecting beyond then that would be a "color" waterline in a new manner. It will be interesting to see how your do it. Rich (PT-2)
 
I think he was referring to the stanchions, which are painted white, but the AL instructions say to clear coat them?
You might be right... I guess I was led astray by the waterline topic. Thanks for catching it.
My apologies for any confusion I might have caused.
 
I think AL's instructions are not correct for the clear varnish application. Line item 22 below states a "red copper" below the waterline. The waterline itself is shown as a "3" Wide boot top". I don't have a clou what color that's supposed to be, but white seams to be a good guess, see also the replies from both Ritch and Dean on this topic.

View attachment 257927
Now there's a handy set of instructions!
 
I think he was referring to the stanchions, which are painted white, but the AL instructions say to clear coat them?
Yes, it was in reference to the stanchions. AL's instructions are to simply coat them with a clear satin varnish. There is in fact very little painting throughout the kit. The upper hull (flat black) was probably the bulk of the paintwork, the remainder being shared between some of the smaller items on deck such as life rafts and lifebuoys. I must admit that the Sapele wood comes up really well after a light sanding and clear varnish. Minimal paintwork might have been AL's intention with this version of the Bluenose ;)
 
Last edited:
I believe that an added strake over the ones that you have in place would be a wale which is a thicker strake to strengthen the hull along certain longitudinal lines where stresses may be higher (impact). If it is the same thickness and in the same plane of strakes and not projecting beyond then that would be a "color" waterline in a new manner. It will be interesting to see how your do it. Rich (PT-2)
That too makes sense, thanks for the insight Rich :)
 
You might be right... I guess I was led astray by the waterline topic. Thanks for catching it.
My apologies for any confusion I might have caused.
Please don't apologise. If I had to surrender a penny for each time I'm confused or off-topic then I will be a poor man indeed ROTF
 
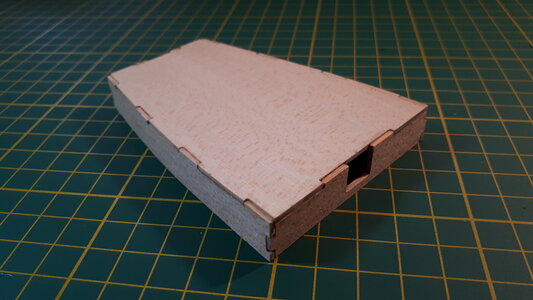
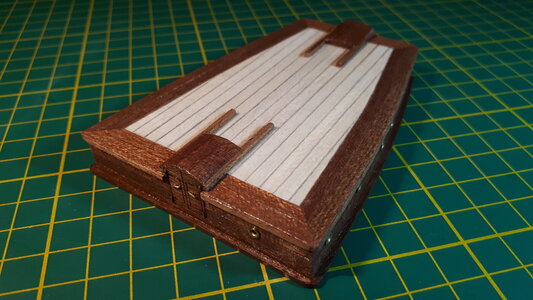
I made a start with the deck furniture while waiting for my stanchion wood to arrive. The stern cabin was the largest of these items, and began with a plywood box assembly that fitted together well enough.

0235_20211001_bluenose_II_build.jpg

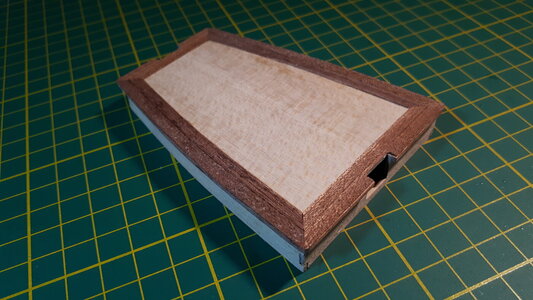
Sapele cornicing and exterior cladding were then added to the roof of the cabin. Diagonal joins at the corners were not called for, but the effect looked a lot tidier somehow.

0240_20211001_bluenose_II_build.jpg

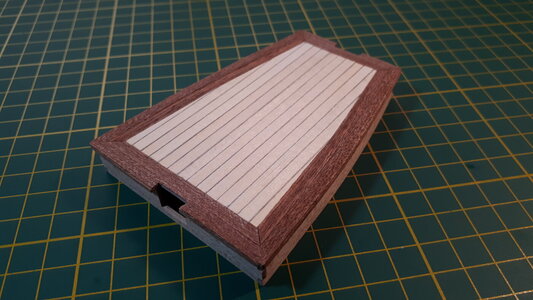
Basswood planking completed the roof of the cabin, and it had the same look and feel as the deck planking that I seemed to have done so very long ago. Symmetry was the key, and a .5mm 2B pencil lead took care of the caulking.

0245_20211001_bluenose_II_build.jpg

A quick varnish to get the best out of the Sapele wood, followed by a series of drilled holes around the sides to accommodate the bulls-eyes. And then things started to get a lot smaller. The brass wire cuttings that made up the door handles and hinges on either side of the cabin were barely visible, and my close-range sight was severely challenged when I saw three pieces between my tweezer ends when there was in fact just one :oops:

0250_20211001_bluenose_II_build.jpg

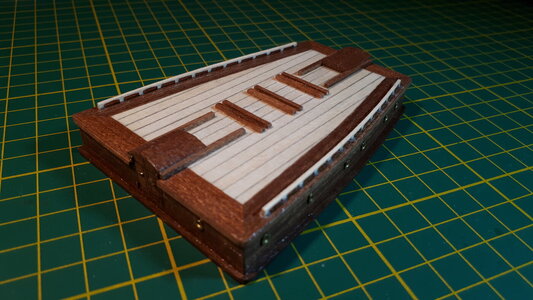
The handrails and container trims were next ...

0255_20211001_bluenose_II_build.jpg

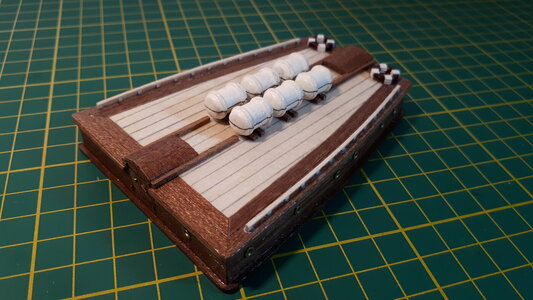
... and finally six life-raft containers and two red-and-white lifebuoys brought the stern cabin to life. My Tamiya white paint did not take to the boxwood containers and I eventually applied the same ivory white paint that was used for the inner bulwarks and transom. The Tamiya red paint did sit well on the cast-iron lifebuoys however, and were complemented by the same ivory white paint to give them their red-and-white marine look :)

0260_20211001_bluenose_II_build.jpg
 
I made a start with the deck furniture while waiting for my stanchion wood to arrive. The stern cabin was the largest of these items, and began with a plywood box assembly that fitted together well enough.

View attachment 259030

Sapele cornicing and exterior cladding were then added to the roof of the cabin. Diagonal joins at the corners were not called for, but the effect looked a lot tidier somehow.

View attachment 259031

Basswood planking completed the roof of the cabin, and it had the same look and feel as the deck planking that I seemed to have done so very long ago. Symmetry was the key, and a .5mm 2B pencil lead took care of the caulking.

View attachment 259032

A quick varnish to get the best out of the Sapele wood, followed by a series of drilled holes around the sides to accommodate the bulls-eyes. And then things started to get a lot smaller. The brass wire cuttings that made up the door handles and hinges on either side of the cabin were barely visible, and my close-range sight was severely challenged when I saw three pieces between my tweezer ends when there was in fact just one :oops:

View attachment 259033

The handrails and container trims were next ...

View attachment 259034

... and finally six life-raft containers and two red-and-white lifebuoys brought the stern cabin to life. My Tamiya white paint did not take to the boxwood containers and I eventually applied the same ivory white paint that was used for the inner bulwarks and transom. The Tamiya red paint did sit well on the cast-iron lifebuoys however, and were complemented by the same ivory white paint to give them their red-and-white marine look :)
Looking more like BNII all the time. Save a Life Raft for me to stay close. Rich
 
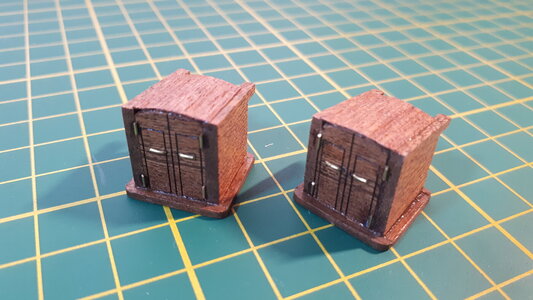
All of the larger deck furnishings are now assembled and varnished, ready for deck fitting later on. It has been an interesting exercise in miniature joinery that once again put my close-up vision to the test :oops:

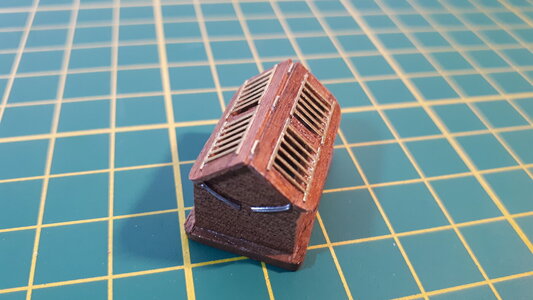
The two store rooms ...

0265_20211007_bluenose_II_build.jpg

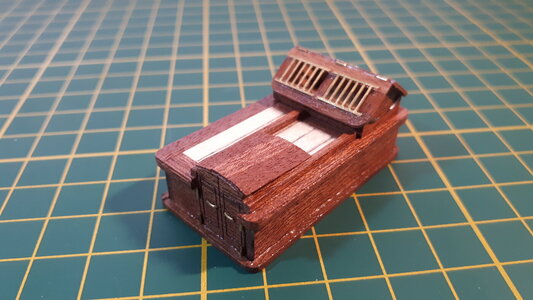
Large opening ...

0270_20211007_bluenose_II_build.jpg

Central mess room ...

0275_20211007_bluenose_II_build.jpg

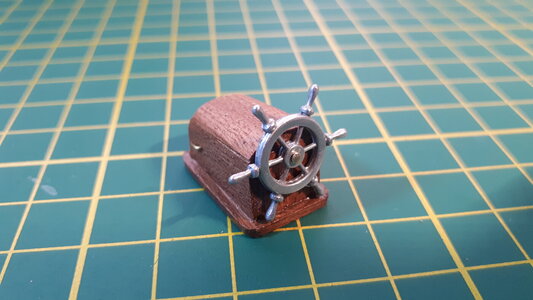
Ship's wheel ...

0280_20211007_bluenose_II_build.jpg

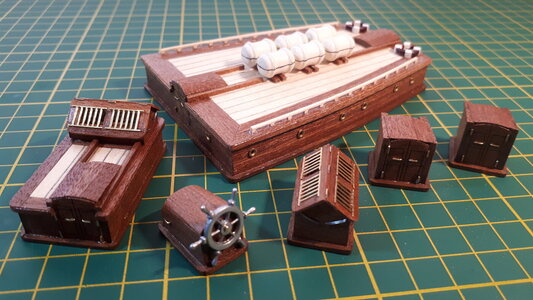
The complete assembly ...

0285_20211007_bluenose_II_build.jpg

Most of the parts were comprised of sapele timber, with walnut wood (dyed) for the bedplates. The door handles and hinges were .5mm brass wire and the roof rails were made of double lengths of thin galvanised wire. Like the other metal fixtures, the wheel was brushed down with steel wool, polished, and finally varnished to maintain its sheen.
 
All of the larger deck furnishings are now assembled and varnished, ready for deck fitting later on. It has been an interesting exercise in miniature joinery that once again put my close-up vision to the test :oops:

The two store rooms ...

View attachment 260135

Large opening ...

View attachment 260136

Central mess room ...

View attachment 260137

Ship's wheel ...

View attachment 260138

The complete assembly ...

View attachment 260139

Most of the parts were comprised of sapele timber, with walnut wood (dyed) for the bedplates. The door handles and hinges were .5mm brass wire and the roof rails were made of double lengths of thin galvanised wire. Like the other metal fixtures, the wheel was brushed down with steel wool, polished, and finally varnished to maintain its sheen.
Very nice! We always say ship building is tedious work. Some refer to it as being fiddly…lol. ;)
 
Most of the parts were comprised of sapele timber, with walnut wood (dyed) for the bedplates. The door handles and hinges were .5mm brass wire and the roof rails were made of double lengths of thin galvanised wire. Like the other metal fixtures, the wheel was brushed down with steel wool, polished, and finally varnished to maintain its sheen.
Very nicely done.
 
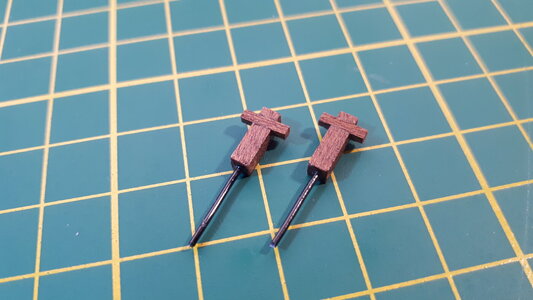
For the two quarter bitts at the stern of the deck, I followed a technique I saw in another build of the BNII somewhere by drilling a small hole into the base of the quarter bitts and affixing a short length of wire with glue. For starters, it makes it easier to handle the piece when applying paint or varnish. But later on, given that some of the rigging will be attached to these small items, the wire can be sunk and glued into a corresponding hole on deck to give it more strength and stability. That's the theory anyway :)

0290_20211007_bluenose_II_build.jpg
 
Last edited:
For the two rope tie-offs at the stern of the deck, I followed a technique I saw in another build of the BNII somewhere by drilling a small hole into the base of the tie-off and affixing a short length of wire with glue. For starters, it makes it easier to handle the piece when applying paint or varnish. But later on, given that some of the rigging will be attached to this small item, the wire can be sunk and glued into a corresponding hole on deck to give it more strength and stability. That's the theory anyway :)

View attachment 260177
Yes. the bottom rod just gives a more structural and secure method of securing the bits to or through the deck of the model. In realty they probably passed through to the under structure as there is a great deal of tension placed on these when a broad reach is being sailed; less when running before the wind as the speed is slower. In either case the longer boom tackle is needed. Takes me back to my days of racing where we were continually seeking best sail shape and position for greatest speed. Rich (PT-2)
 
All of the larger deck furnishings are now assembled and varnished, ready for deck fitting later on. It has been an interesting exercise in miniature joinery that once again put my close-up vision to the test :oops:

The two store rooms ...

View attachment 260135

Large opening ...

View attachment 260136

Central mess room ...

View attachment 260137

Ship's wheel ...

View attachment 260138

The complete assembly ...

View attachment 260139

Most of the parts were comprised of sapele timber, with walnut wood (dyed) for the bedplates. The door handles and hinges were .5mm brass wire and the roof rails were made of double lengths of thin galvanised wire. Like the other metal fixtures, the wheel was brushed down with steel wool, polished, and finally varnished to maintain its sheen.
Since my last visit I saw a lot of posts pass by. Making the attributes for the deck construction goes well. Especially the small details, such as the brass, make it come to life.
And ..... I also admit that using tweezers and (magnifying) glasses makes life more enjoyable.
Regards, Peter
 
Since my last visit I saw a lot of posts pass by. Making the attributes for the deck construction goes well. Especially the small details, such as the brass, make it come to life.
And ..... I also admit that using tweezers and (magnifying) glasses makes life more enjoyable.
Regards, Peter
I too depend upon tweezers (which I have ground down to very small sharp pointed ends as well as two other more broad ones) magnifying glasses and a head band type with an LED light, and the brightest lighting that I can provide for my old age eye. Rich
 
Back
Top