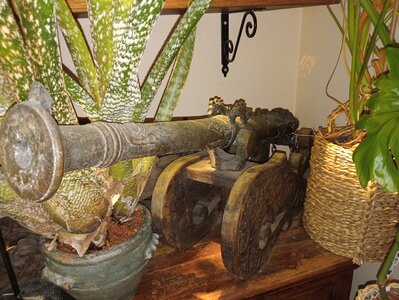
Bronze ½-pdr falconet 1554

Joined
Apr 26, 2023
Messages
546
Points
353

Location
European Union
.​

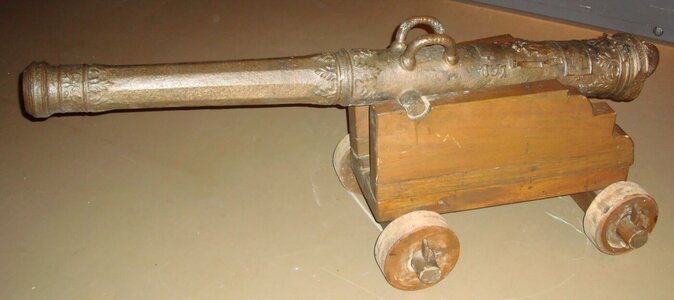
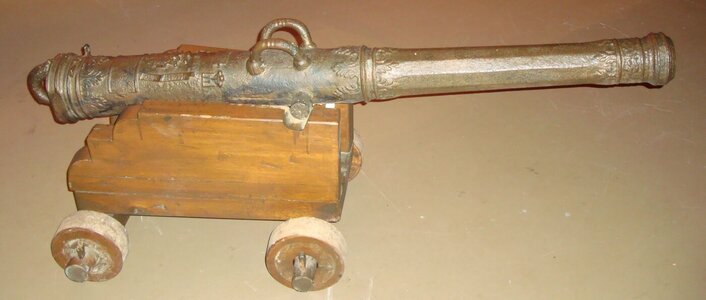
It can be said that this project started over twenty years ago. At that time, I travelled to Oudeschild on the island of Texel in the Netherlands to personally examine and measure a gun barrel from 1554. It was almost certainly cast in the then very active gun-foundry operating in Vilnius by a gun-founder of German origin, Hans Seber (or one of his assistants).

Photographs of the gun barrel, kept at the Museum Kaap Skil, in its present state (note: the wooden carriage, also visible in the photos, is a present-day, rather makeshift construction and will not be reproduced):
DSC04638.JPG


DSC04643.JPG


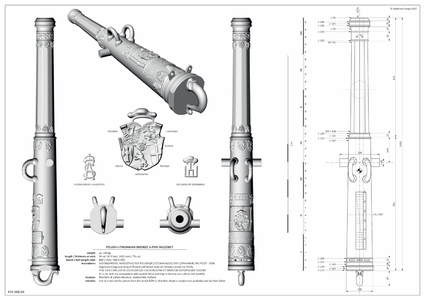
Documentation produced, based on visual inspection and detailed measurements:
#34 - Polish-Lithuanian bronze falconet 1554 - Oudeschild.png


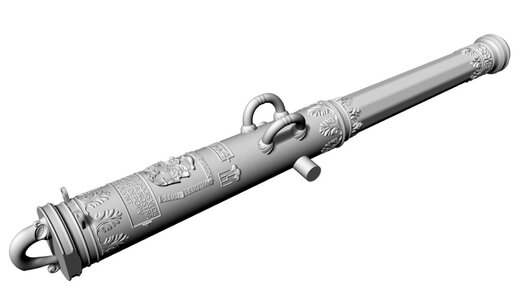
Render of the 3D model:

Polish-Lithuanian bronze serpentine 1554.jpeg


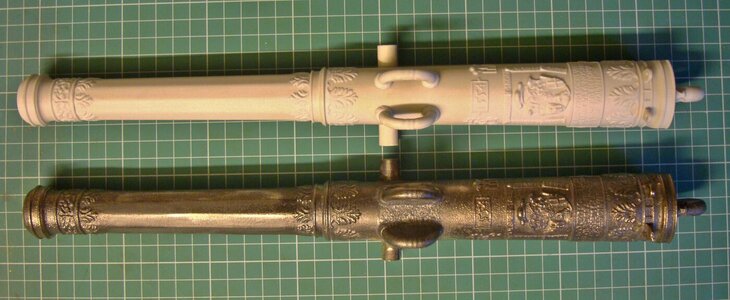
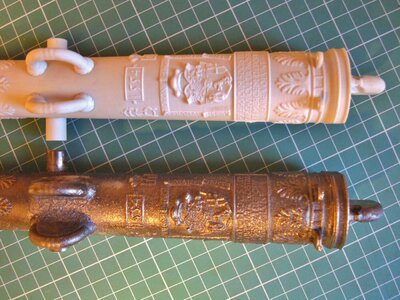
3D print and bronze casting of the gun barrel model (length ca. 35 cm, weight 2.2 kg):
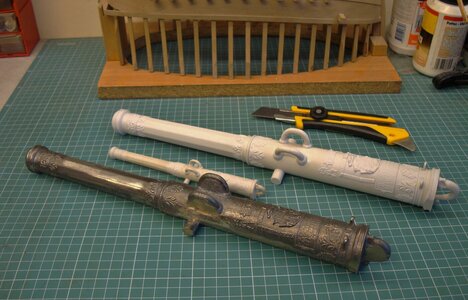
DSC07803.JPG

DSC07813.JPG

DSC07810.JPG

The bronze casting of the gun barrel model is in its raw state and still needs a lot of finishing work.

.​
 
Last edited:
.​
What an AWESOME project! Will you proof test and shoot it? That would be fun!

Many thanks. The intention is to make the gun barrel exactly like the original, including the material (bronze). So, if all goes well, it should be fully functional. The most challenging part will probably be drilling and reaming the gun barrel bore correctly (the scale being 1:4, the resultant calibre should be nearly 11 mm).


Delft clay casting or lost wax?

Ah, to be honest, I am still a bit angry with this. Despite my explicit instructions, the foundryman (unfortunately industrial rather than artistic), did not use the lost wax method, but clay split mould parts. This makes the casting very crude, requiring a lot of finishing work (drilling, milling, filing, chiselling, polishing). Arduous manual work, but it has at least one advantage – it gives me time to think about the type of carriage I would build for this gun barrel.

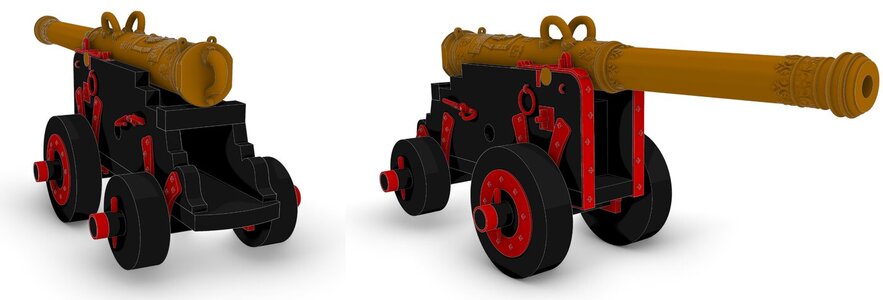
There are a couple of fairly diverse and yet historically correct options, both naval and land-based, suitable for a small calibre guns (below only some selected samples are shown).


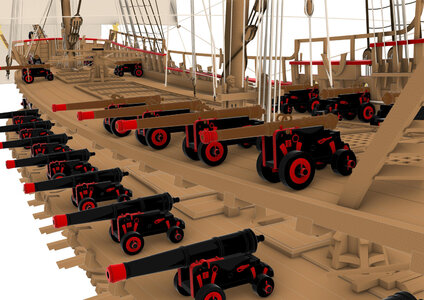
Naval carriage closely based on very well preserved objects from the man-of-war Solen 1627 (the renders themselves are of my 3D reconstruction of another warship – St George 1627):


falconet 1554 - battery.jpg


falconet 1554.jpg


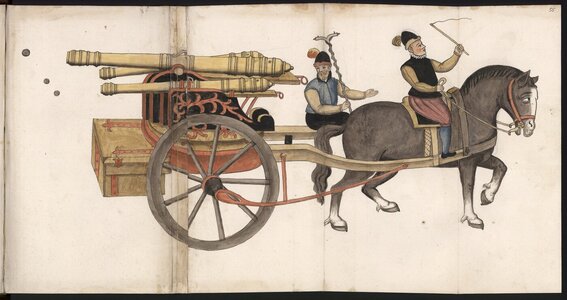
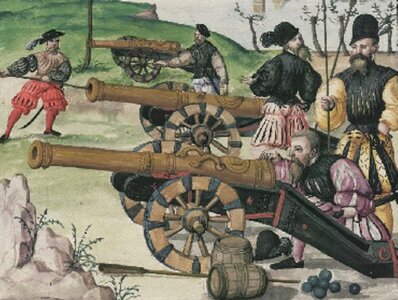
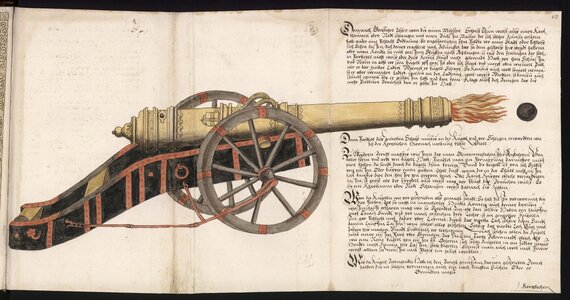
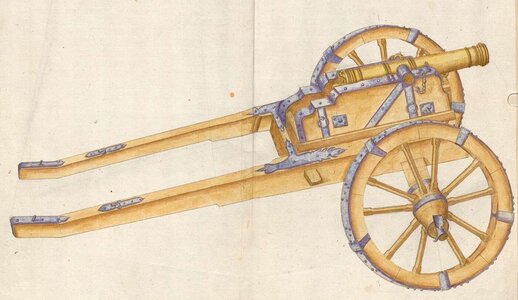
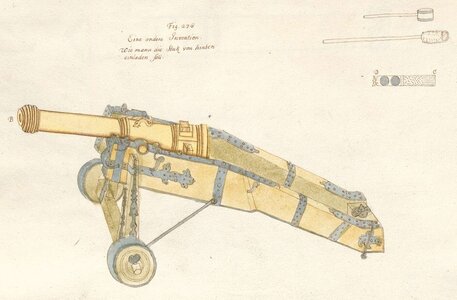
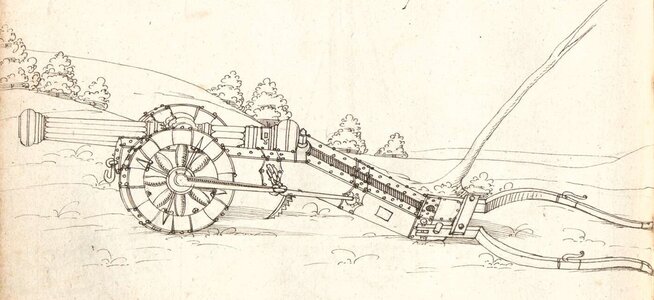
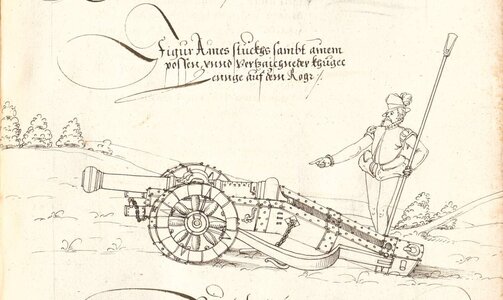
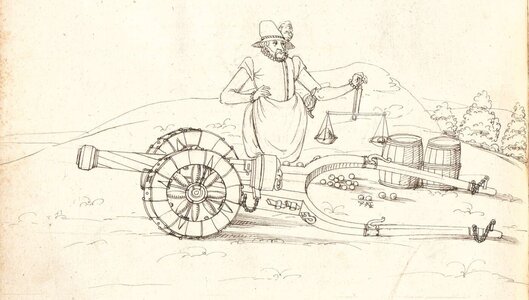
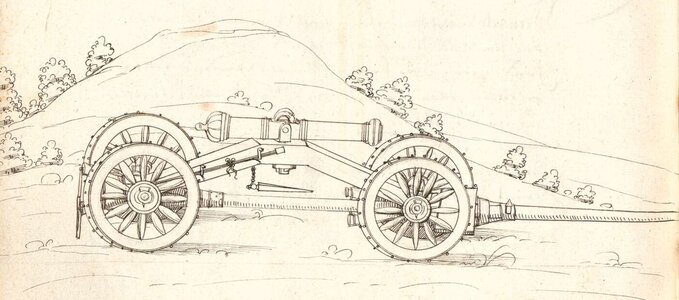
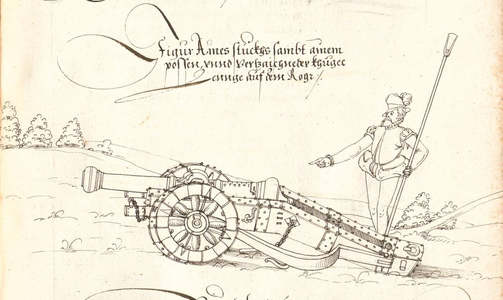
Examples of land-service carriages:


NKS-2_0101_055.jpg


Page 266 from Albrecht - Kriegsordnung - 1555-4.jpg


NKS-2_0101_043.jpg


Pages from Faulhaber Anton - Faulhaber Johann Matthäus - Artilleriekunst III. Tafelband - Ulm...jpg


Pages from Faulhaber Anton - Faulhaber Johann Matthäus - Artilleriekunst III. Tafelband - Ulm...jpg


Pages from Litzemann Walther - Artilleriebuch - Ingolstadt 1582.jpg


Pages from Litzemann Walther - Artilleriebuch - Ingolstadt 1582-2.jpg


Pages from Litzemann Walther - Artilleriebuch - Ingolstadt 1582-3.jpg


Pages from Litzemann Walther - Artilleriebuch - Ingolstadt 1582-4.jpg

.​
 
Last edited:
.​

To be honest, pyrotechnic games stopped amusing me a long time ago. But that doesn't mean I'm going to build models like movie props: big, plastic and quite unlike the originals. :p

.​
 
.​

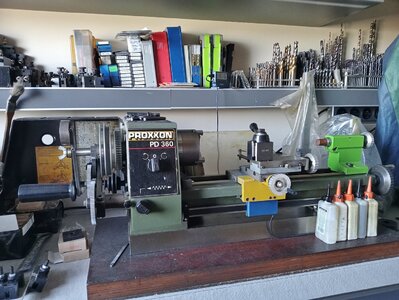
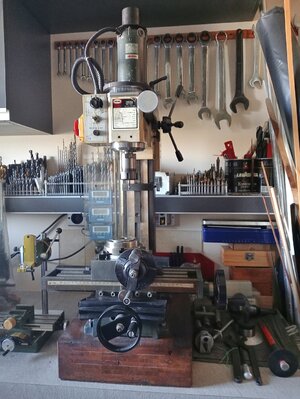
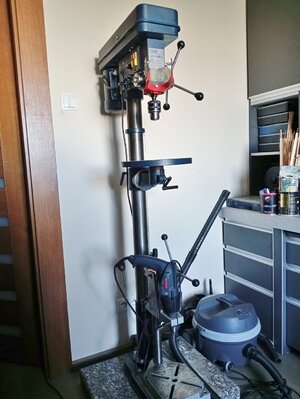
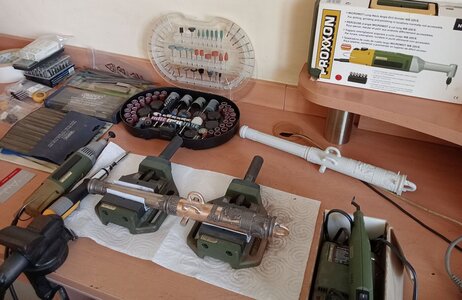
Work on finishing the gun barrel is still in progress, and below are some photos of the 'heavy' equipment that has already been used or is planned for use. Despite the quite considerable size of these machine tools (for home use), however, the lathe is still far too short to drill an almost 35 cm long bore in a 38 cm long barrel.

Normally a lathe with a working length of 35 cm + 38 cm + length of lathe chuck&tool holders would be needed, if the lathe's tailstock is not of the through type, as this one. As a result, I'm still figuring out how to drill the bore within acceptable tolerance in this barrel myself, so that I'm not forced to outsource this job to some workshop. Maybe just start on a precise lathe and then finish by rotating the upright held gun barrel on a vertical drill, which – incidentally – is how barrels were actually drilled in the first few centuries?


IMG20230928095930.jpg

IMG20230928095524.jpg

IMG20230928094737.jpg

.​
 
A very good photo, which is really an eye-opener.
Yes, the squares on your cutting mat would show us already the real size of this muzzle
but now on the latest photo we can see the real size - GREAT (either the model, but also the details)
Thumbsup Thumbsup Thumbsup
 
.​


Many thanks. The intention is to make the gun barrel exactly like the original, including the material (bronze). So, if all goes well, it should be fully functional. The most challenging part will probably be drilling and reaming the gun barrel bore correctly (the scale being 1:4, the resultant calibre should be nearly 11 mm).


Ah, to be honest, I am still a bit angry with this. Despite my explicit instructions, the foundryman (unfortunately industrial rather than artistic), did not use the lost wax method, but clay split mould parts. This makes the casting very crude, requiring a lot of finishing work (drilling, milling, filing, chiselling, polishing). Arduous manual work, but it has at least one advantage – it gives me time to think about the type of carriage I would build for this gun barrel.

There are a couple of fairly diverse and yet historically correct options, both naval and land-based, suitable for a small calibre guns (below only some selected samples are shown).


Naval carriage closely based on very well preserved objects from the man-of-war Solen 1627 (the renders themselves are of my 3D reconstruction of another warship – St George 1627):


View attachment 395511


View attachment 395512


Examples of land-service carriages:


View attachment 395513


View attachment 395514


View attachment 395538


View attachment 395515


View attachment 395516


View attachment 395517


View attachment 395518


View attachment 395519


View attachment 395520

.​
Why not make BOTH a naval and a land carriage? You get to use either one then!
 
.​
Why not make BOTH a naval and a land carriage? You get to use either one then!

:) Kurt, I am very much asking for advice that will reduce the amount of work, already considerable, rather than those that multiply it... :) The intentions are to build an exhibition model (as opposed to a fun model) and building several 'car bodies' for one 'engine' doesn't seem particularly attractive from that point of view. So, one has to choose though.

At the moment, I tend in favour of the naval carriage because it's compact and, besides, I've already prepared historically accurate documentation down to the smallest detail.

.​
 
.​


:) Kurt, I am very much asking for advice that will reduce the amount of work, already considerable, rather than those that multiply it... :) The intentions are to build an exhibition model (as opposed to a fun model) and building several 'car bodies' for one 'engine' doesn't seem particularly attractive from that point of view. So, one has to choose though.

At the moment, I tend in favour of the naval carriage because it's compact and, besides, I've already prepared historically accurate documentation down to the smallest detail.

.​
Ahh. I don't have any tips that could shorten the work other than those you have already probably guessed at. I would choose a wood that simulates oak in color but has a tighter grain, because oak is very coarse at 1:1 scale and you want the grain to look to scale. Modelers working at 1:100 scale often use beech. Since we have lots of specific measurements of the Wasa's carriages, and those carriages look rather unique compare to most other carriages, you might go with making a replica of one of those. A field carriage with iron reinforced wheels would look nice, but as you said, you have more information on naval carriage designs. It looks like you have a lot of work using riffler files and sanding sticks and Dremel to carefully smooth and polish all the bronze in the decorated areas. No shortcuts there.

Personally, I would make some drawings with measurements, cut all the parts from wood using the band saw, create the iron fittings from low carbon steel and aging/roughing the surface to appear as iron, blacken the parts, and assemble the carriage. Since naval carriages would not look complete without the gun port, gun tackles, and may the train tackle, I would choose to make the field carriage shown below, because it appears much older than carriages we are used to seeing in the 19th century. However making the iron reinforced wheels would be a challenge.

Then of course, I'd get some ffg black powder and test fire it in the back yard... several times. I wouldn't proof test it beyond 150 grains through. No sense risking blowing it up. That would stain the muzzle to the appropriate color, while alerting the locals that you are no one to trifle with. :D

Your project is one of the coolest things we have seen on this forum! However you choose to finish it, we know it will be fabulous.

1695993445431.png
 
Last edited:
.​
Then of course, I'd get some ffg black powder and test fire it in the back yard... several times. I wouldn't proof test it beyond 150 grains through. No sense risking blowing it up. That would stain the muzzle to the appropriate color, while alerting the locals that you are no one to trifle with. :D

:D

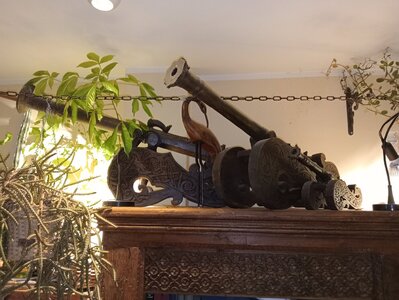
Both the locals and authorities are already on alert by my battery of ten lantakas that I once bought from an Indonesian trader. Incidentally, if these quite functional bronze castings, as below, can be made in the exotic conditions of a tropical jungle in Borneo, why not here too, instead of trivial turning, milling or 3D printing.

I totally agree with you that in reduced scale the material texture should also be scaled accordingly. Therefore, to still avoid painting, the wooden parts of the carriage will be made of black ebony. More difficult with the iron fittings, which are intended to be red. It is possible that they will be made of not-so-appropriate copper in the model, if I cannot find a way to chemically colour some metal red.

As for the type of carriage you have chosen, it is also one of my best favourites, although indeed not the easiest to reproduce, meaning both the design and the execution itself.


IMG20230929174421.jpg

IMG20230929174631.jpg

.​
 
Back
Top