Build Log - 1/200 RMS Titanic

Joined
May 16, 2021
Messages
300
Points
138

Location
Newcastle, Australia
My family all pitched in and got me this kit for Christmas, as the AUD$750.00 price tag was hard for me to justify, having not long ago retired from full time work. I'd been working on the Trumpeter 1/200 USS Arizona for the first couple of months of this year, but have decided to put that on hold for now and break out my new beauty.

I have been fascinated by the Titanic since I was young; way before she was rediscovered and James Cameron re-introduced her story to a new generation. My aim is to take my time, be as pedantic and possible, and create the best possible version of this ship that the kit and my skill sets will permit.

I will do my best to keep a detailed log of the build, when I remember to take photos before moving on. ;) This is one large kit; worthy of the subjects name!
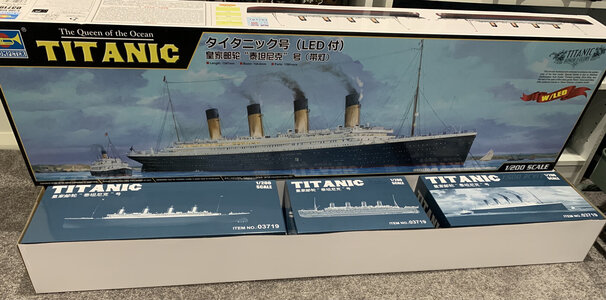
IMG_3166.jpeg
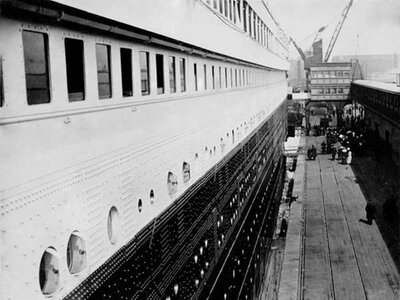
Drilling out the portholes alone on this hull will take some time (I intend to light the hull, as well as embellish the included LED kit for the superstructure).
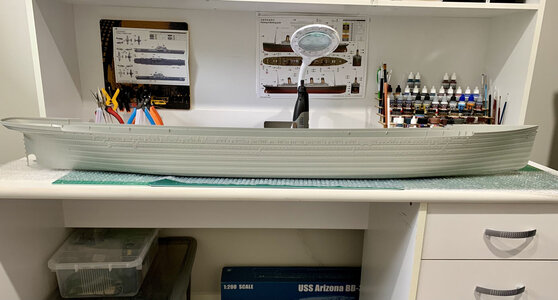
IMG_3167.jpeg
I will be using a number of books, primarily 'Titanic - The Ship Magnificent', to reference corrections to the hull (and model overall) as I go. I'm not a rivet counter, and have nothing put respect for those who are, but there are some obvious errors and omissions on the hull which even I should be able to fix up.

Wish me luck........... I'm going in! ROTF
 
superb model. Are you getting the Pontos aftermarket bits for it ?
Hi there. I will likely get the MK1 kit. I've seen reviews on both, and each have good and bad elements, but overall I think the Mk1 seems best; although both are quite pricey and can't seem to locate either at any of my usual hobby outlets.
 
I reckon the wooden deck (if available ) would be a good investment. I am considering the big 1/200 scale Scharnhorst for a future build myself.
 
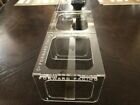
Just ordered my first set of 'upgrades'. First, a set of Titanic portholes from Scale Warship. They're coming from England so may take a few weeks. Secondly, ordered the clear hull brace kit which provides internal stability for the hull, and are clear so hopefully won't impact the interior lighting.

clear bracing.jpg
 
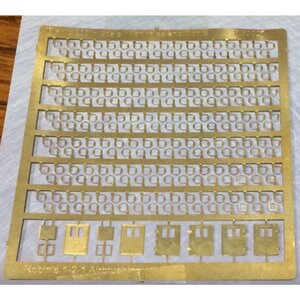
About half way through meticulously drilling out the portholes in this huge hull, and received my first aftermarket upgrade today; Titanic portholes from Scale Warship in the UK. The main function of this little PE kit is to correct the portholes on the model (C deck I believe) which are moulded round, but were actually more rectangular with rounded tops and bottoms.
Titanic Portholes.jpg
Also included are some pre-cut clear acrylic rod sections which can be used to simulate glass in the portholes and some PE hatch/doors. Overall, for the cost, a very nice little upgrade.
TitianicPorthole PE.jpg
 
Scale Warship 3mm PE porthole.

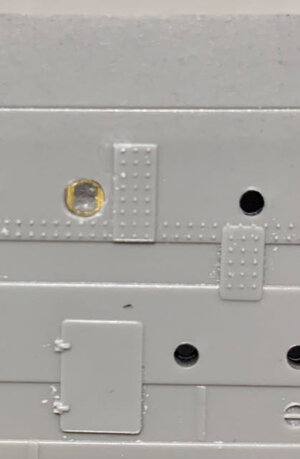
I just had to give one of the 3mm portholes a go, using 3mm clear acrylic rod to simulate the glass. There's a small fraction of offset on one side, but I think that is more my rush to see how this mod would look than anything else. No glued in yet of course, so I can paint the hull, but I think the combo seems to work well in correcting the accuracy in the shape of these portholes. :)
3mm porthole.jpeg
 
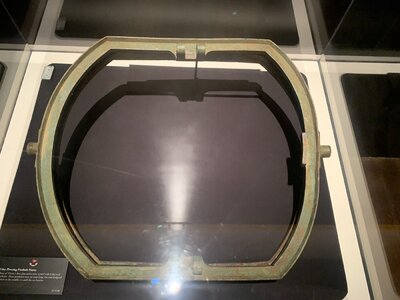
I know this may be a little late. Attached is an Utley pivoting porthole frame from a 1st class cabin on C deck that was recovered from Titanic. View attachment 239511
Never too late. Yep, got some good pics from my books, but that is awesome; didn't realise any had been recovered. It appears the PE frames I got are pretty close to the mark, given their size and all. Thanks. :)
 
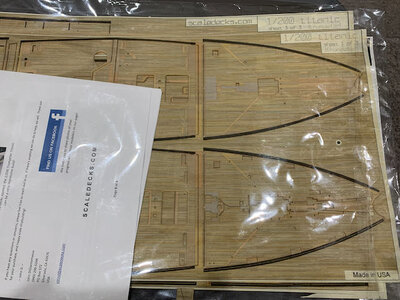
Well thanks to the generosity of another local Aussie SoS member, I have been lucky enough to obtain a set of ScaleDecks for my Titanic. All I can say about the product is that, on first inspection, they appear to be one of the finest quality decks I have ever come across.

Titanic-SDecks.jpeg

Thanks very much to Francis (Kutuzov), who had acquired two sets and agreed to sell one to me. :)
 
Last edited:
Drawing up a chair and grabbing some popcorn following your build. For your Scaledecks, deck, you may have to have order another detail deck from Scaledecks for the MK1 kit. I have the Titanic in the stash, just have to complete a few builds before starting.
 
Drawing up a chair and grabbing some popcorn following your build. For your Scaledecks, deck, you may have to have order another detail deck from Scaledecks for the MK1 kit. I have the Titanic in the stash, just have to complete a few builds before starting.
Hi there JL,
I need to check up on the extra detail deck, as I had read about that. The set I got includes one sheet for the forward and aft decks with extra detail to cater to the Mk1 kit, so just need to confirm if there are additional sheets I may need to find.
And you may need a lot of popcorn. :) I'm semi-retired and working the model as my spare time permits, but am slowly progressing her. Switched tac to work some of the decks and play with a couple of interiors. Hope to post this weekend.
Cheers,
Steve
 
Last edited:
Well, I seem to be on a lucky streak. First I score a ScaleDecks from another Aussie, and have now had the very good fortune to purchase the Mk.1 upgrade kit from a gent in the UK, minus the decks which I no longer need, for a very good price. :) Can't wait to receive it and get starting on detailing up my beast.
 
1st Dabble with an Interior:

Despite the fact they will be largely invisible once the ship is complete, I am determined to try and represent at least some of the interior areas. My first attempt has been on the port side Private Promenade. Rather than just print out a drawing or photo of the area, I decided to try and replicate, as best as my skills would allow, using Evergreen plastics.

Using small diameter lengths of rod, I created as closely as the scale would permit, the wooden divisions, doors and window frames.

Priv-Prom1.jpeg

I'm not. rivet counter, and am not going for total accuracy, just something to see through the windows that is a representation of what the areas may have looked like based on drawings, pictures, etc.

I then painted it up, electing to use some of the colourised images of the Olympic promenades and do the lower panels in a green. This photo is after the initial coats of white, brown and green and the Trumpeter PE provided window frames went in. Still some touching up to be done after the initial paint drys thoroughly and probably once I get a new script for my glasses, as I think my eyesight has deteriorated since I started this. :)

Priv-Prom2.jpeg

I plan to do both promenades, the Cafe Parisian, a couple of the dining areas and possible the entrance areas around the fore and aft staircases.

Keen to hear any thoughts the SoS community may have on the effort so far, good and/or bad. :)
 
Back
Top