Build Log Artesania Latina "La Pinta" - [COMPLETED BUILD]

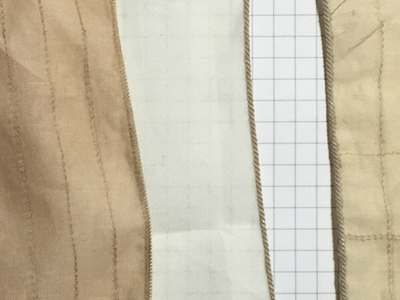
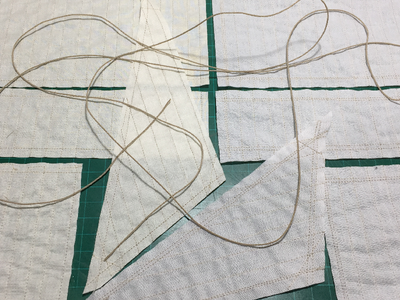
I resorted to purchasing ‘Madeira fabric Stabilizer’ (self-adhesive, water soluble, non woven ideal for working on lace and for borders) magic stuff but expensive. Low heat iron the material. Place the stabilizer on top and gently finger press down and smooth out to cover the entire surface of the material. Draw the sails (on the stabilizer) and all lines that need sewing etc. When finished, wash in warm water, the stabilizer dissolves leaving the sewn sail. Dry the sails then dye with what ever is preferred.

I ended up using the Madeira for both sets of sails Cotton lawn and Muslin. (Pure Cotton lawn on the Left and Muslin on the right)
112_la Pinta.png
 
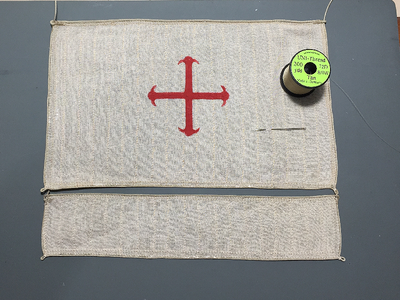
Of the test sail sets completed the disappointments commenced when dying with tea and/or coffee. Nothing seemed to result in an acceptable colour. Stockholm Tar is available in minimum quantities of 1 Litre (NZD26.00. EU15.85) but that would have been enough to dye the sails of every model sailing ship in the southern hemisphere so it wasn’t followed up on. Next issue arrived with attempts to sew on the Bolt Rope. That proved to be ‘finger pricking fun’ to say the least. - playing around with trying to attach Bolt Rope to material edge with Fabric glue. it stuck.

113_La Pinta.png
 
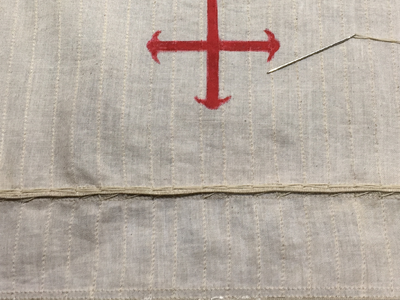
Sewing the main sail as per the book 'Ships of Christopher Columbus" (Franco Gay version) Stitching was challenging and not to scale in line with the rest of my build but it looked as per the book. Next attempt will be better with finer rope. I could have used the finer rope from Rope of Scale but for this exercise it would have been a waste of quality rope. Main sail front.

115_La Pinta.png
 
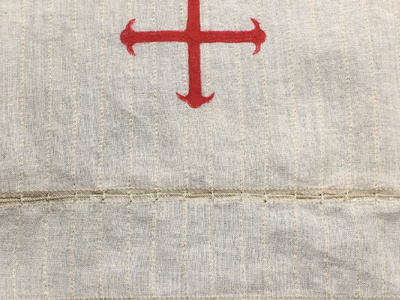
Main sail sewing as per the back of sail. Well it's all back to the trialing and making sets to test etc. It looks as though the Knights Templar Cross on the final sets(s) may need to be either silk screened on or rubber stamped (sheesh! more learning) --- that's me for now and apologises to SOS if I am unable to contribute excellent precision work as shown by other members... good night from NZ, Stay safe and enjoy life and living. Back again soonish.

116_La Pinta.png
 
Main sail sewing as per the back of sail. Well it's all back to the trialing and making sets to test etc. It looks as though the Knights Templar Cross on the final sets(s) may need to be either silk screened on or rubber stamped (sheesh! more learning) --- that's me for now and apologises to SOS if I am unable to contribute excellent precision work as shown by other members... good night from NZ, Stay safe and enjoy life and living. Back again soonish.

View attachment 319642
Good afternoon. I am playing some catch up here. I now know my decision to leave sails to you guys is justified. No easy feat and some fingers put through the wringer for sure.
 
Good afternoon. I am playing some catch up here. I now know my decision to leave sails to you guys is justified. No easy feat and some fingers put through the wringer for sure.
Hey Grant. good afternoon to you. Please don't be dicouraged by my incompetence and failures. Remember it's all about patience/learning and starting again and then again. Failure and setbacks are the steps upwards to totyal learning. As Salvadore Dali (my hero artist) said, "don't be alarmed by perfection because it will never be achieved but that is no reseason to not strive for it". all the best to you. Thumbs-Up
 
Hey Grant. good afternoon to you. Please don't be dicouraged by my incompetence and failures. Remember it's all about patience/learning and starting again and then again. Failure and setbacks are the steps upwards to totyal learning. As Salvadore Dali (my hero artist) said, "don't be alarmed by perfection because it will never be achieved but that is no reseason to not strive for it". all the best to you. Thumbs-Up
Good evening. True story and sound advice. For sure:D. Cheers Grants
 
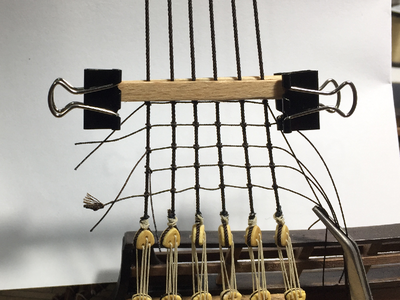
Finally decided to have a rest from sails and commit to Ratlines which should have been done before thinking about sails etc. Many thanks to members that encouraged, linked, shared their experiences on Ratlines etc.
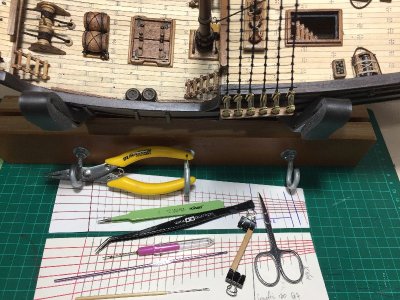
First up I thought about using standard thread maybe with a little wax but because being me it was essential to make my own rope. This proved to be another challenge as I could not for the life of me manage a thin rope. "full stop'. BenD was to far away for overnite assistance so there was no option but to pursue, try and try again. In the end several lengths of rope were made up using Serafil 120 - 3x2 on the ropewalk.
I disagree with 'Ratlines are scary because they aren't. They are totally terrifying' for those like me at the bottom of the novice learner stage or just below.

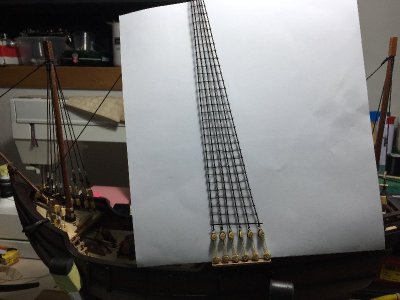
117_La Pinta Ratlines01 (1).png

118_La Pinta Ratlines02.png
 
Last edited:
Still can't decide whether to use cow hitch or clover hith on the outside shroud(s)
 
Finally decided to have a rest from sails and commit to Ratlines which should have been done before thinking about sails etc. Many thanks to members that encouraged, linked, shared their experiences on Ratlines etc.
First up I thought about using standard thread maybe with a little wax but because being me it was essential to make my own rope. This proved to be another challenge as I could not for the life of me manage a thin rope. "full stop'. BedD was to far away for overnite assistance so there was no option but to pursue, try and try again. In the end several lengths of rope were made up using Serafil 120 - 3x2 on the ropewalk.
I disagree with 'Ratlines are scary because they aren't. They are totally terrifying' for those like me at the bottom of the novice learner stage or just below.

View attachment 323753

View attachment 323754
Good morning- I am extremely happy I have a fellow modeler who shares my feeling on ratlines. However you have owned these! Well done - looking good. Cheers Grant
 
Good morning- I am extremely happy I have a fellow modeler who shares my feeling on ratlines. However you have owned these! Well done - looking good. Cheers Grant
Ta Muchly Grant. Think it best to first finish both sides, tighten and secure the Ratlines before owning anything they could still turnout a mess :oops:.
BTW, I took your advice and walked away after every 6th one to clear the grrrr and refocus. Cheers.
 
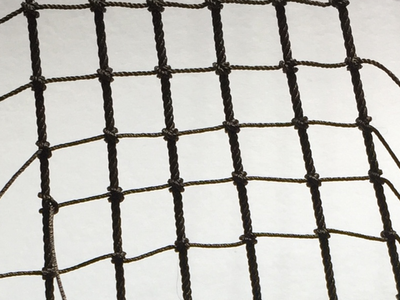
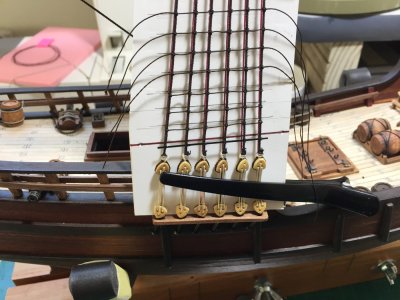
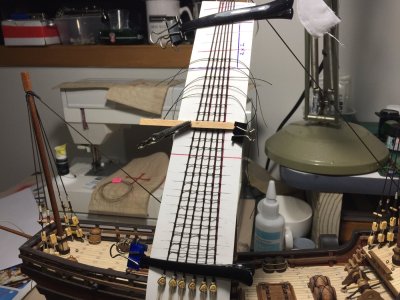
Several starts later all due to shrouds turning into hour glasses then displaying as "with child" not to mention looking very alternative "S" like shapes and/or configurations I tried a different method. Made a cardboard pattern, one for Port/Starboard respectively and proceeded with caution and patience which I really don't have much of. Every fourth ratline I walked away, returned, adjusted as required in line with the Card pattern and secured each Clove hitch with CA then worked on the next four Ratlines.

119_Ratlines_La Pinta.JPG

120_Ratlines_La Pinta.JPG
 
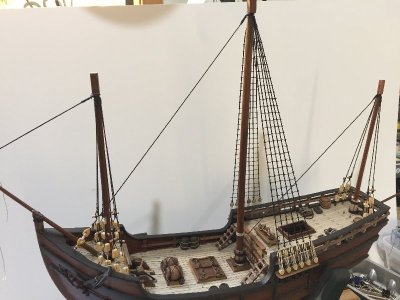
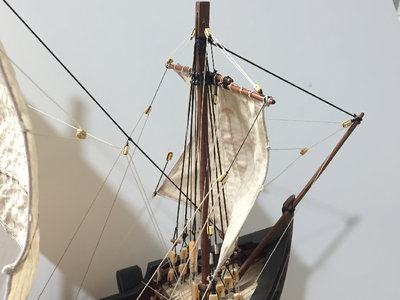
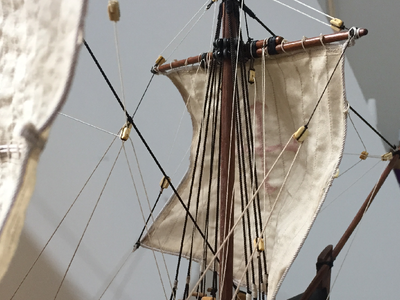
Okay, problem here is the ratlines (Serafil 180 3x2) to me look to thick. I think should I ever have the dubious pleaser of making ratlines a thinner rope will be used. Also, the two outer shrouds will be left till last and cow hitch'd instead of a clover hitch as per other shrouds. These are just thoughts for future models.
123_Ratlines_LaPinta.JPG
 
Since assembling “La Nina” a lot of time was and is spent in attempting to improve my “La Pinta” build by perusing/learning from You-tube and SOS. (the excellence, knowledge and workmanship by SOS members has been a little intimidating but then I say to myself ‘they must all have started from where I now find myself ie the Duh! learner stage’) What has intrigued me has been how, with the exception of a few, Model builds start with the packaging and stop abruptly when the hull has been immaculately finished. - Stop, then, Nada. - I now know why they have this sudden ending. It’s a phenomenon I discovered called “RATLINES, BOLTROPES and RIGGING”. Why oh why are they so difficult? Anyway the foremast sort of, almost completed. Not the best but the best I could do at this point in time.

124_La Pinta.png

125_La Pinta.png
 
Back
Top