Build Log: Colonial Schooner PORT JACKSON

Joined
Dec 30, 2021
Messages
278
Points
278

OVERVIEW:
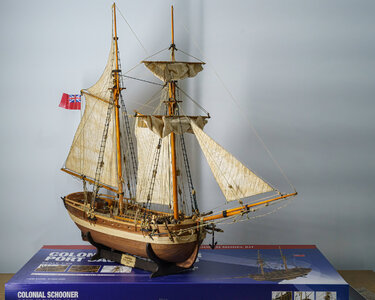
This log covers the construction of the Colonial Schooner PORT JACKSON from the Modeller Shipyard kit. The ship is based upon Admiralty drawings of 1803 of a schooner design sent to the Australian Colony for ships to be built in Port Jackson (Sydney) to service Norfolk Island some 900 nm to the east.
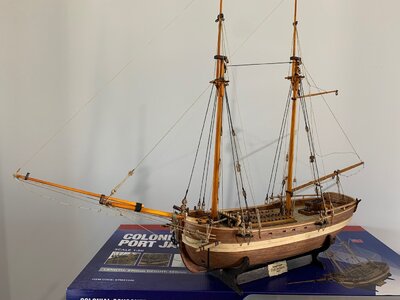
This is a Level 2 kit so there are a few compromises (shortcuts) in parts and rigging. The kit does not come with sails or most of the rigging requirements associated with sails. There are also several standing rigging shortcuts too so its up to the builder to work through the instructions (sorry no plans in this kit) to ID and rectify.
The kit is a standard double plank on a skeleton frame hull with walnut veneer second planking. The kit is complete with some left over material in case of errors in construction. The rigging hardware is sound though I did not like the laser cut cleats as the ply delaminated on small parts. The Modellers Shipyard threads are nice to work with. I found that seizing the ropes is not allowed for so additional Black and Tan threads will be required if you intend to seize ropes/joins.
_DSC6152-Edit.jpg
 
HULL:
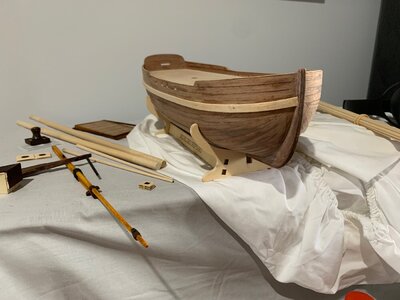
The hull went together well. The laser cut makes for a very tight fit so some sanding/filing was needed to get the parts together. I used yellow wood glue throughout the hull construction to end of first planking. More on that later.
Having faired the frames, I started with planking using the 3x5mm planks. At first it tried plank benders but being new to this hobby, I cut too many planks through so I quickly turned to using a soldering iron and wetting the planks. I followed a couple of YouTube videos to get the technique right.
All the planks were single length, stem to stern and tapered per the instructions. This worked relatively well but I soon found that there was need for compound curving at the bluff bow. I did not like the way the instructions simply cut off the bow planks already laid when the compound became too much to cope. I looked at some YouTube videos of how real ships were planked and started to following the natural curve and then filling the gaps later with specially shaped planks.
Once first planking was finished, I filled dips and gaps with car body filler and sanded it back. Unfortunately the images of this were loaded to a particular FB group but I no longer have access to that FB Group to retrieve them.
Second planking went better than first: 1 because I had some experience now, and 2 because the walnut was only 0.5mm this so twist and bend was easy. I fixed the second planking with CA; regret it and should have been more patient with wood glue. I ended up having some filling to do which I did with walnut colour putty. There is not a great sanding margin here so the hull has some tells on where the putty was used.
False Keel, Stem and Stern posts were glued on and stained walnut. Once dry I applied my first coat of matt varnish over the whole hull

IMG_0169.jpg
 
DECK:
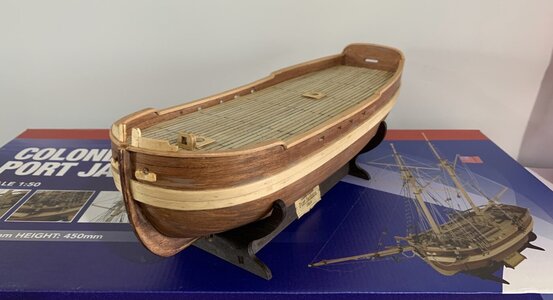
Decking proved relatively simple. I chose not to follow the instructions and laid in margin planks around the edge into which I would taper planks. I used Full planks rather than cutting them to a prototypical length as I wanted to assure that they were straight stem to stern. I used a permanent ink marker to mark the edges and ends of each cut plank before gluing in place. This gives an impression of pitch in the deck joins.
Having laid the planks I cleared the mast openings and then proceeded to make plank joins and nail holes with a 0.1mm marker.
Next came all the deck fittings: hatches, winches, capstans and Housing. The winch was nice but did not come with holes for the levers so I drilled holes then opened them up with a square needle file. The aches and housing were made from ply then covered in planking material. Combings were cut and shaped to fit and after staining all glued to their respective positions on the deck.
The tiller was shaped from a laser cut piece as was the rudder. The hinges were blackened chemically then attached to rudder and then the fittings attached to the hull with nails.

IMG_0175.jpgIMG_0177.jpg
 
Whats the next project Peter ?
I've started the new 1/65 HMB ENDEAVOUR by Artesania. I am not going to paint it like the replica but as it would have been in Cooks time. I'm glad I found Dry Dock Models and Ropes of Scale as the Artesanaia blocks, cleats and threads do not excite me one bit. I think they will end up in the bin.
 
MASTS:
I was looking forward to this section of the build. I had purchased a mini lathe off eBay and was dying to try it out. I realised the 300mm bed was too short so I ordered a 500mm replacement bed.
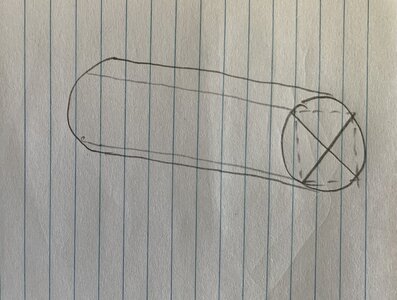
I turned all the tapers using the min lathe and two pieces of 120grit sandpaper. One glued to a block to support the turning wood and the other in my other hand putting pressure on the wood. I ran this up and down the length getting the taper I needed and a nice smooth finish. Holes were drilled where sheaves were to be located. I also square the sections using sandpaper on a block rubbing back the round surface to flat the rotating 90 degrees and doing the same, then 90 degrees etc. This was simplified by marking the end with a X and then a line down down the shaft from where the X meets the edge.
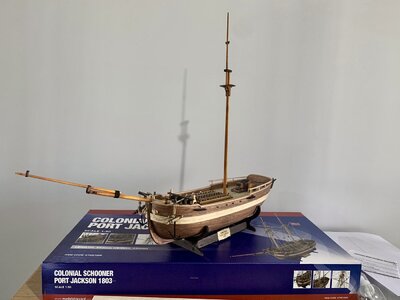
Assembly of masts, gaffs, booms and bow sprit all followed the instructions. I chose to use golden teak as the colour for my masts. All glued fitting were pinned to the masts by drilling a 0.5mm hole and inserting 0.5mm brass fixed with CA.

IMG_0206.jpg

IMG_0182.jpg
 
RIGGING:
This is the one area where I found many discrepancies (and got into trouble with Modellers Central and their FB Group).
Being an engineer and having served 24 years in the Navy, I queried instructions that just did not make sense. I soon realised this is where many of the compromises were being made in the kit. I was also a little perturbed that having gone to a lot of trouble serving blocks with rope loops onto the masts, booms, gaffs and bow sprit, I now had to remove some because they were the wrong blocks. Yes there are a number of rigging errors in the instructions too.
At this stage I had decided that I would like to add sails to the model so it was off to the internet to look at what this type of ship was rigged with and how it was rigged.
I found this link extraordinarily valuable as it identified the sails, locations and full rigging requirements so I went back to the diagrams in the kits instructions and made the necessary changes and additions.
Having already installed the masts into the ship, the actual alterations was not so simple. Still I managed to get in place what I think was needed to support sails correctly; not sure if its historically correct but it would appear logical and functional at the least.

IMG_0187.jpg
 
SAILS:
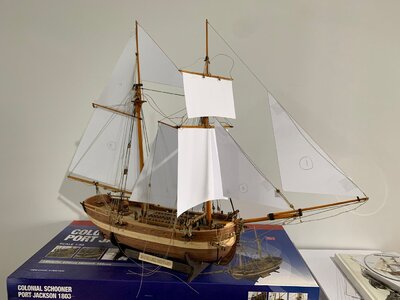
Well I had no plans to work with nor had I any experience in constructing sails, so it was back to the internet. There are several good videos tutorials on YouTube from modellers who make excellent looking sails for models so I adopted techniques from them. I purchased some loose weave cotton and some Gutermann thread. I then measured the mast/rigging layout and made some plans on paper which I then cut out and taped to the rigging.
I grabbed my wife's sewing machine and after a quick tutorial and practice piece under her supervision, I set out sewing the parallel lines in my piece of sail fabric.
The paper templates were laid against the material marked out with hem margin and then cut and hemmed to shape.
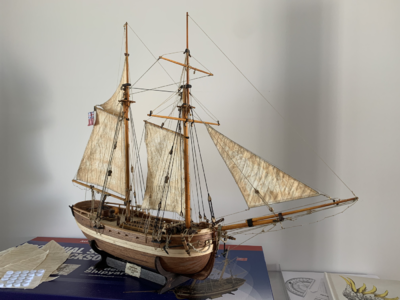
The sails were then weathered using the RJ Scaleships method and once dry I fabric glued 0.75mm rope to the edge of the sails serving loops in each corner. I could have sewn the rope in like Olha B does but that seemed like just too much work for a first model ship. (crawl before you walk...)

271550889_10159522653468911_1970064264431282234_n.jpg

tempImage5Jsvif.png
 
WRAPUP:
The build took me 150hours to get to start sails. The sails took another 60 hours but that included a lot of rework to fix kit issues.
I was happy with the overall quality of the kit especially now that I have opened up and looked at another manufacturers kit; you definitely get what you pay for and the quality of Modellers Shipyard accessories and threads is far superior to Artesania's. Since ordering replacement blocks, cleats and threads for my next build I see why the Modellers Shipyard model is roughly the same price even if a smaller ship.
I certainly would like to build another of the Modellers Shipyard kits; I just have to work out how to be accepted back into the fold....
 
Hi guys.
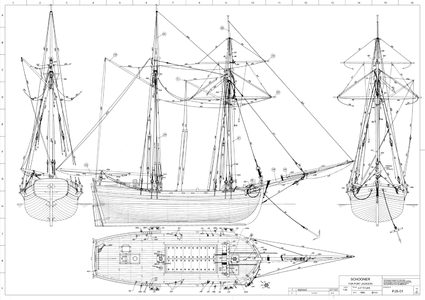
The plans are no longer included in the kit.
Keep in mind I did these plans 37 years ago.
The original idea was a build suitable for beginners so yes there were a few shortcuts.


So here you go.
PM me if you want a high res pdf.

Regards
Allan
View attachment 285468
You're a skilled hand at drawing Allan, even if it was 37 years ago. I understand that keeping rigging simple for a beginners kit is important, however there should be some indication in the instructions that shortcuts/simplifications have been made so anyone wanting to built the model but to a higher rigging standard knows that they need to rethink the instructions from the outset so as to prevent unnecessary rework later in the build. I am just supposed that Kit manufacturers (not just Modellers Shipyard) are so reticent to accepting any information to help improve their instructions, particularly in the case where they have obvious errors.
 
Hi Peter.
I have had no connection with Modellers Central since the original owner sold the business to the current owner.
The kit and instructions are not what was produced originally. Not that the original instructions were perfect.
However I am not aware of ANY kit that is above criticism. One either accepts the kit on face value or “bashes” it to their liking and research. There are always points of conjecture and errors/discrepancies in contemporary and modern references. I am currently drawing rigging plans for HMS Investigator. Even though it is on the publication date of Steel’s work there are anomalies. However between Lees, Steel, Falconer, Harland and others there is a probable rigging layout.
So even if you scratch everything. It will always be subject to scrutiny and differences of opinion.
But the research that is conducted by individuals adds to the pool of knowledge and here is a good place to tap into that knowledge.
Regards
AllanInvestigator_bowsprit_1.png
 
Allan, Noted. There are number of obvious errors where a DB was fitted to the masts then later in the rigging instructions it states a SB etc. This is the key issue regarding the need for rework. I agree that there is always going to be some compromises made in kits so that less skilled modellers can make a good looking ship. What I find difficult to understand is the pushback by manufacturers when remedy is offered freely.
 
Hi Peter.
I have had no connection with Modellers Central since the original owner sold the business to the current owner.
The kit and instructions are not what was produced originally. Not that the original instructions were perfect.
However I am not aware of ANY kit that is above criticism. One either accepts the kit on face value or “bashes” it to their liking and research. There are always points of conjecture and errors/discrepancies in contemporary and modern references. I am currently drawing rigging plans for HMS Investigator. Even though it is on the publication date of Steel’s work there are anomalies. However between Lees, Steel, Falconer, Harland and others there is a probable rigging layout.
So even if you scratch everything. It will always be subject to scrutiny and differences of opinion.
But the research that is conducted by individuals adds to the pool of knowledge and here is a good place to tap into that knowledge.
Regards
AllanView attachment 287577
PS. Nice artwork....
 
Any chance of having the files for this ship added to files area of the forum for other to use if they buy this kit.

If not, could you please send me a copy.
 
Allan, Noted. There are number of obvious errors where a DB was fitted to the masts then later in the rigging instructions it states a SB etc. This is the key issue regarding the need for rework. I agree that there is always going to be some compromises made in kits so that less skilled modellers can make a good looking ship. What I find difficult to understand is the pushback by manufacturers when remedy is offered freely.
Hi Peter. I have tried that myself. But its usually not very productive. Most manufacturers of almost anything think their products are perfect and how dare anyone suggest improvements let alone highlight errors. Best to bury yourself in the next challenge and enjoy the modeling.
Allan.
 
Hi Peter. I have tried that myself. But its usually not very productive. Most manufacturers of almost anything think their products are perfect and how dare anyone suggest improvements let alone highlight errors. Best to bury yourself in the next challenge and enjoy the modeling.
Allan.
Hi Peter, I pointed out errors in the drawings and in the instructiuons to Occre, the manufacturer of the Endeavour I am currently building. Occre responded in most cases positively and provided me with the correct information I needed.
Trevor
 
Back
Top