





- Joined
- Dec 23, 2020
- Messages
- 12
- Points
- 58

Well, after a long time away from the shipyard I've made quite a bit of progress with the build. Having fitted the stem, keel and sternpost I decided to carry on with the first planking without cutting a rabbet and have fared the garboard into the keel as per the instructions. I've nearly completed the first planking and learned that I should have tapered the planks toward the prow as well as the stern (the instructions only mention the stern). In consequence the planking is not as smooth as it should be toward the prow and looks wrong. I should able to smooth when I get to grips with sanding it all down and will not make the same mistake with the second planking. I'm not convinced that the hull shaping toward the prow is correct for the period and may try and fill it to be more bluff bowed.
Fitting the gun ports was a real pain! The instructions refer to pegging the gunport to holes provided in the gun deck. There are no holes and no pegs provided in the kit so I fashioned my own plinths and firmly glues these to the deck and the bulwark. Another problem was deciding the positioning of the gun ports. As has been mentioned by others, the plans are not quite the same size as the model so I had to adjust the measurements accordingly. I measured the upper deck on the plan at 525mm and on the model at 500mm. The model is therefore 95.24% of the plan. By reducing the plan measurements accordingly I seem to have got the placement right i.e. evenly spaced, avoiding all the bulkheads and looking correct relative to the masts etc on the plan.
As has also been mentioned, I shouldn't have fitted the upper deck so early in the build. Doing so made fitting the gun ports, gun carriages and supports for the final planking between the gun ports very difficult. I spent ages performing keyhole surgery with two pairs of tweezers!
Now to finish the first planking between the ports and fore and aft bulwarks.

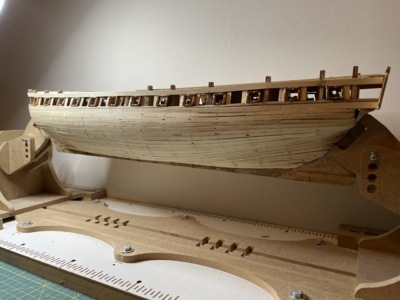
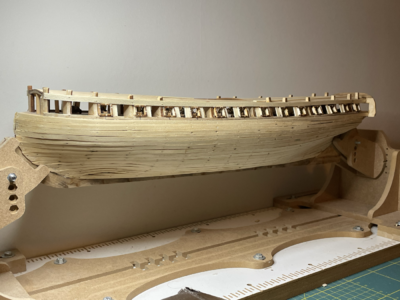
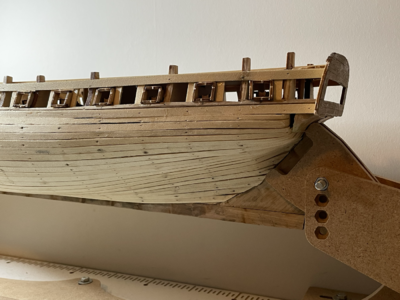
Fitting the gun ports was a real pain! The instructions refer to pegging the gunport to holes provided in the gun deck. There are no holes and no pegs provided in the kit so I fashioned my own plinths and firmly glues these to the deck and the bulwark. Another problem was deciding the positioning of the gun ports. As has been mentioned by others, the plans are not quite the same size as the model so I had to adjust the measurements accordingly. I measured the upper deck on the plan at 525mm and on the model at 500mm. The model is therefore 95.24% of the plan. By reducing the plan measurements accordingly I seem to have got the placement right i.e. evenly spaced, avoiding all the bulkheads and looking correct relative to the masts etc on the plan.
As has also been mentioned, I shouldn't have fitted the upper deck so early in the build. Doing so made fitting the gun ports, gun carriages and supports for the final planking between the gun ports very difficult. I spent ages performing keyhole surgery with two pairs of tweezers!
Now to finish the first planking between the ports and fore and aft bulwarks.

