Bluenose 1:64 by Model Shipways - Build log

Do I paint the hull or do I install the rails?

  • Hull

    Votes: 0 0.0%
  • Rails

    Votes: 0 0.0%

  • Total voters
    0
  • Poll closed .
Joined
Apr 8, 2023
Messages
174
Points
103

Decided to take the plunge and start a log. I’m going to continue to have questions and a build log seems to be the best way to get them answered. So here goes.

I’ve been working on my Bluenose (1/64; Model Shipways) since October of 2000 - yes almost 24 years. I started it after a divorce but then within a month or so of starting it, I put it away until last month. It survived multiple moves (including Denver to Phily and back to Denver then a few moves within the Denver area). It had survived, but there was some damage that would need to be repaired.

I don’t have pictures of how I found it when I re-started it, and very few detailing what I’ve done so far. I hope to change that, but just how detailed this log will be, at this point, who knows.

Quick recap…
Before putting it away in October of 2000, I spent around 6 hours on it including an inventory of pieces, putting the keel together, installing the sternpost, cutting the rabbet, tapering the stern, and installing the bulkheads.

On 3/15/23 I pulled it out and started working on it. Or wanted to work on it, but it took a while to repair the damage and figure out what I had actually done on it . The damage that needed repair was rebuilding basically everything after bulkhead N as it was broken off with one half of bulkhead O completely missing.

Once the repairs were done, I created and installed the stern blocks. The bulkheads were a bit warped/curved so I pretty much sprayed the whole thing with hot water and used a temporary batten along each slide in an attempt to straighten everything out. All in all, I was pleased with what I was able to do. It began to look like I’d be able to save it.

As to why I decided after so long to work on it again, it was because I bought a place in Puerto Vallarta last year and after a couple of trips all of my must do honey do’s were done. And even though we’re only a block off the malecón and the beach, I found myself getting bored and needing something do. As I told all my friends, you can only drink so much beer on the beach. My quick search of hobbies brought me fairly quickly to my Bluenose, or actually model ship building as my first thought was to work on the Bluenose in the States, and bring another one to Mexico on our next trip.

My wife is fully supportive of my new old hobby and when I told her I’d like to build something with a Mexican twist, SHE started looking for my next build. We landed on a pirate ship as Vallarta and the Bay of Banderas was known for its pirates at one time. Heck there is a dinner cruise each night in the Bay on a pirate ship. It’s cannons shoot off fireworks nightly around 9pm that we can see from our balcony. After looking at pirate ships, we decided on Buccaneer from Occre. Yeah I know it has nothing to do with Mexican pirates, but it “looks” like a pirate ship. So it is now sitting on my shelf waiting for my return to Vallarta in early May.

Ok, back to the Bluenose.
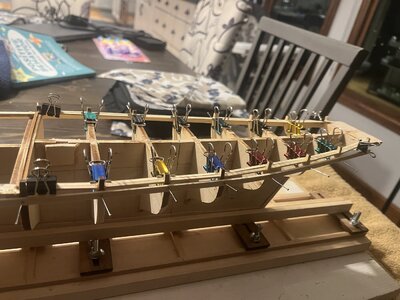
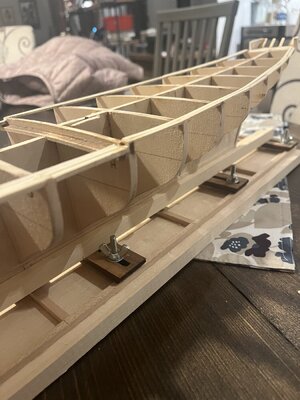
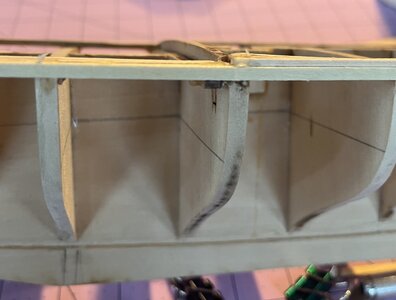
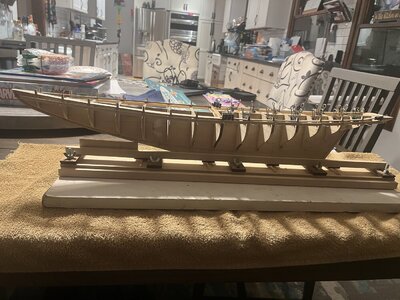
I skipped over framing the transom and added the horn timbers and decided to reshape my stern blocks (wood puddy and sanding). I then added the waterways and decided to cut off the bulkhead stanchions. In retrospect, I wish I would have done the inner waterways first and then added the small pieces in between each bulkhead. Live and learn. I created knightheads/chaffing blocks.
12AE188E-4712-4368-B445-7B055665FEF6.jpeg
4129A4B2-68AB-440F-B368-948F0DA4AF9D.jpeg
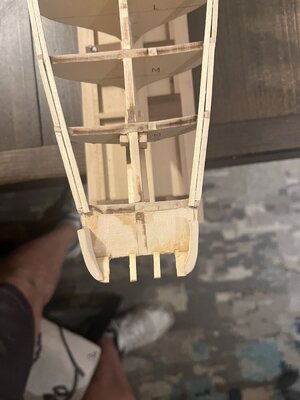
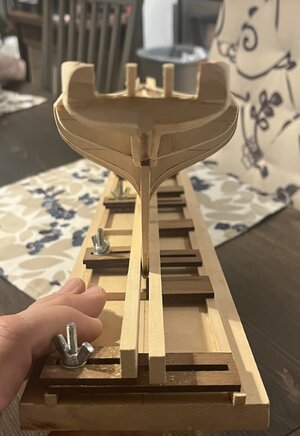
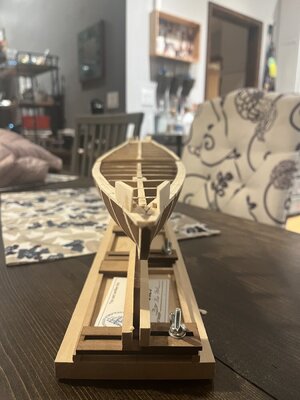
After a good sanding, I tackled framing the transom. And after I was done with it, I felt the overall shape of the transom wasn’t right and worked on it a third time. More puddy and sanding. The third time was really the charm in my opinion. It’s not perfect, but it matches the shape of the ship.
62890DEE-FE7B-440E-A2CB-FE5DC75F2FB3.jpegFBB1D48F-2790-403B-8E57-EF383E16AA03.jpeg2AC58BD5-ED51-49E7-AEA9-D04D179FD4E9.jpeg2D8E6A20-084E-4C5F-AC1F-20472AD6F805.jpeg
In all, I’ve probably spent about 30 hours since pulling it out of moth balls (ok, it was just sitting on the freezer in the basement) to get to the point I’m at now. So maybe about 36 hours in total.

The last day or so I’ve been trying to figure out if I should begin planking the hull or painting the waterways. I decided to plank the hull. I read a bunch of build logs and decided to start from the waterways and move down. In order to do that, I needed some 1/16 x 1/16 stock as the quarterdeck is that much different from the foredeck. And of course the kit does have any, so my working time today was eaten up by having to run to the store and by writing this. But I should be ready to start planking tomorrow.
 
Hughlo,
Congratulations on getting started after a long time away from your Bluenose build. So many builds are left unfinished either due to a lack of time and determination or just life itself. I am looking forward to your build log.
 
I look forward to seeing the rest of your build. Very instructive. thanks for sharing your progress thus far!
 
4/10/23 to 4/16/23
My 1st planking… I started at the quarterdeck waterways by adding some 1/16 x 1/16 stock to even out the planking from the foredeck waterways. I also decided to go with planks around 7” in length - sure they will all be painted over, but gives me some practice on my joints.
423425CB-9E61-437E-8A1D-B950DE96D407.jpeg

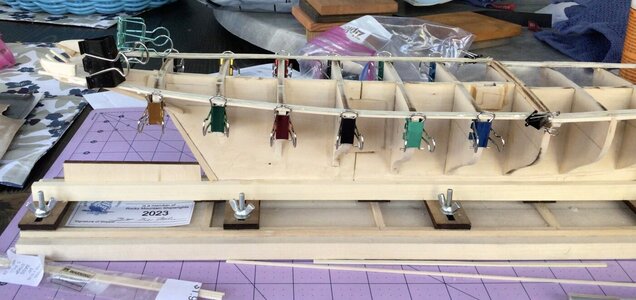
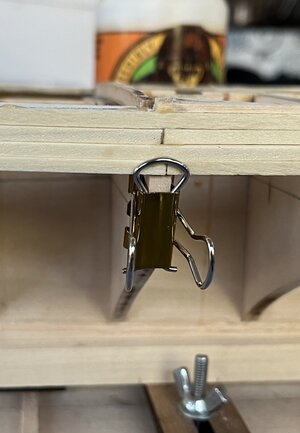
Given the first plank is at deck level, I didn’t feel like it was planking. The 2nd plank began to feel like what I thought planking would be like. And one thing I realized fairly quickly is that I need more binder-clip clamps otherwise I’ll only be able to work on one side or section at a time.
CE44CAF0-E11B-41A8-96C9-DF8F1011D700.jpeg

So far so good/ok. I did break one of the transom quarter frames off while adjusting clips. Sometimes my fingers are just too fat or clumsy . Easy fix - this time.

Before calling it a night I cut and dry fit the next plank. Looks good everywhere except for right at the tip of the bow, from the knightheads/chaffing blocks forward. The planks just don’t line up. I messed up the 1st plank and/or the waterways. Whittling, sanding, and possibly some puddy (and more sanding) will make it look better.
C48C645C-A5E1-4D49-8E5C-99C1E368494A.jpeg

Cleaned up the bow and glued the next plank on both sides.
C56BDAFC-EADC-4F3B-BA09-3B1029D4966B.jpeg

Ended up adding 4 planks including one with a very little bit of tapering (very little as how much can you really taper a 1/8” plank). From what I’ve read, I could have probably gotten away without tapering, but I wanted to get some practice.
FEAEF32A-B4A8-4FB6-B108-4A003D637628.jpeg
F2344816-5C83-4748-A7B4-14ECA6C174B1.jpeg
227C7F63-3B99-4217-8033-6DC6EE69D0C2.jpeg

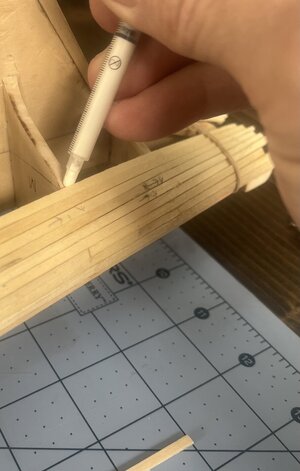
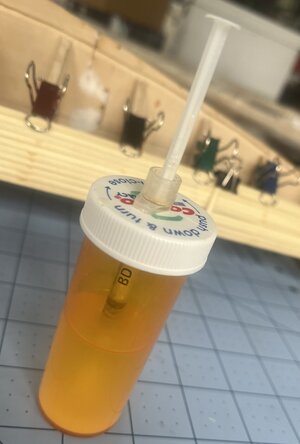
I also read where someone put glue on with a syringe, and then storing the syringe in a medicine bottle with some water to keep the glue from drying in the syringe. I’m going to give it a try. I’ll add a note on how it works the next time I glue.

Time for this portion: 5
Total time to date: 35 hours
 
4/17 to 4/21
Finished planking the 1st belt (A) of eight 1/8” boards. Because of life, I can generally only do one (maybe 2) planks (both sides) a day, with each one taking between 30 minutes and and hour. It’s starting to look like a hull and I can’t wait to finish so I can sand (and puddy) and even more sanding to see what it looks like.
80B5D954-348F-4A6B-BD4D-D0BF603C4D2E.jpeg
Given the “simplicity” of the hull, I don’t think I’ll move forward with belts “B” through “D” and I’ll continue planking from the top down to about the 1/2 way point.

At that point, which I should hit in a couple of days, I am thinking of planking from the bottom up. Two questions for the masses out there…
  1. Is this a good idea/approach to forgo the formal belts process and planking 1/2 from the top and “then” switching to planking from the bottom up?
  2. Regardless of when I plank at the bottom, what width of board should I use for the garboard and other lower planks (belt D)? All I can find in the instruction manual or the plans is that these “planks widen near the stern souse wider stock”.
C7FA2AD1-69FD-48BC-B4D9-36A9281C5593.jpeg
Quick follow up on using the syringe for glueing. I’m using a syringe (minus the actual needle) that I had at the house for giving my dog allergy medicine, and the actual opening is very small so I widened it by gently sticking a straight pin through the hole. I like the control it gives me in applying the glue, and by “storing” it in a pill bottle with water in it, the glue has stayed soft except for at the top/opening where the plunger is. The glue does dry out up there and I need to break that by pulling the plunger out a bit and then pushing it back in until the seal is broken. My complaint is when it comes to refilling the syringe with glue, it’s a bit messy.
B3E9AB38-5856-4956-96B5-FCB3A47B14D8.jpeg
Thanks for following along and for any advice.

Time for this portion: 6.5 hours
Total time to date: 41.5 hours
 
Hi HughLo. Good to see you have started a build-log of the building of your MS-Bluenose. The planking looks nice.
And about questions, examples and advices:
In the 1st post of this thread, you will find a excel ‘BN-list’:
It is in the BN YuanQing area, but in the lower part of the list you will see builds of BN’s of other manufacturers.
Incl. 10 of MS. In the column ‘E’ you find the direct link to there build-log’s.
I will ad your build-log to the list.
About the planking from the top or from the bottom:
Normally you plank from the top and you can let the pointed planks in the front follow the rabbet in the keel.
But at the bottom the garboard strake must fill in the rabbet in a straight line.
You can also look at Jeff’s @Jeff T build-log. He is ‘just ahead of you’:
PS:
I now see I had already informed you about some of this info in the thread ‘Help with models / Present it here’. Better twice then none ….. :)
Regards, Peter
 
Last edited:
Hi HughLo. Good to see you have started a build-log of the building of your MS-Bluenose. The planking looks nice.
And about questions, examples and advices:
In the 1st post of this thread, you will find a excel ‘BN-list’:
It is in the BN YuanQing area, but in the lower part of the list you will see builds of BN’s of other manufacturers.
Incl. 10 of MS. In the column ‘E’ you find the direct link to there build-log’s.
I will ad your build-log to the list.
About the planking from the top or from the bottom:
Normally you plank from the top and you can let the pointed planks in the front follow the rabbet in the keel.
But at the bottom the garboard strake must fill in the rabbet in a straight line.
You can also look at Jeff’s @Jeff T build-log. He is ‘just ahead of you’:
PS:
I now see I had already informed you about some of this info in the thread ‘Help with models / Present it here’. Better twice then none ….. :)
Regards, Peter
Thanks. Most of the MS builds I was already watching but there were a couple of new ones.
 
4/22 to 4/29
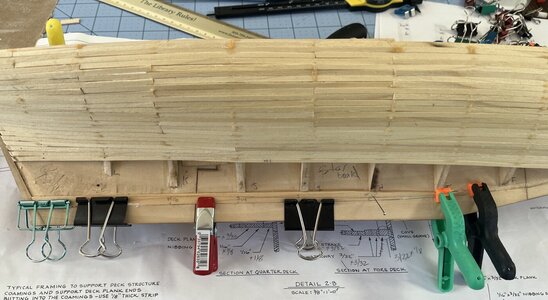
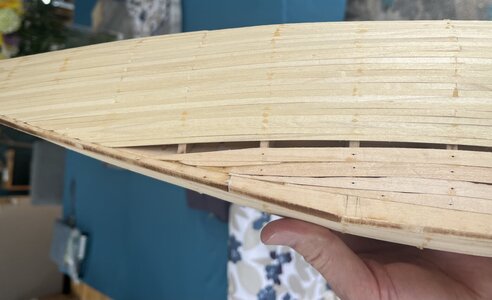
Finished planking using the 1/8” planks from the top down, 24 planks in all (belts A thru C), only leaving the garbord and the larger planks of belt D.
5316D39E-D0FE-45EA-BF27-77937E2F35E0.jpeg

Since the size of the garbord is not specified in the instructions, I measured them in the plans. The garbord is 5/16” while the other boards of belt D are 3/16”. I could not find either of these at the local Hobby Lobby, but they did have 1/4” - right in the middle of the two measurements above. I grabbed a few and will be using them. Definitely more to come on them and belt D.

While Hobby Lobby didn’t have the sizes in basswood, they did have a 3/16” in balsa wood. I didn’t buy it, but could I have? Im thinking balsa is a lighter and not as dense as basswood, but that’s only a guess. Can someone let me know a big more about the two?

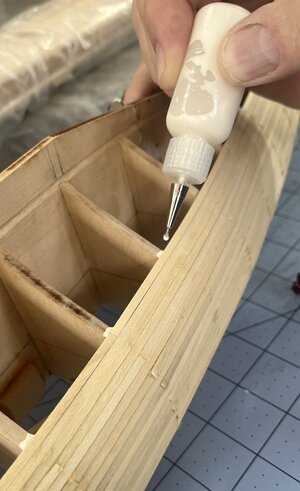
I stopped using the syringe for glueing. It worked but was too messy to fill up. I found these little bottles at Hobby Lobby - 2 for less than $2. So far they work great. Great control over how much glue comes out as well as where it goes.
A37598E7-61AE-4399-B8F4-0A22E3F20409.jpeg

Another tool I started using was a set of good toe nail clippers for cutting planks. It was a recommendation from a guy I met at the Rocky Mountain Shipwrights, a local ship builders group that I joined. They meet twice a month, one time for a workshop and a second time for the actual meeting, complete with “show and tell” and a demonstration of something ship model related. This month it was on how to make a lifelike sea diorama.

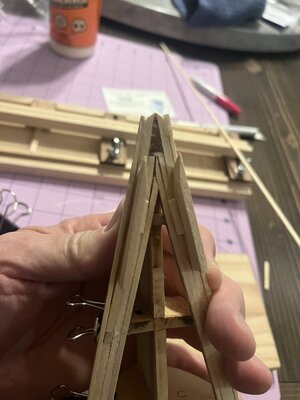
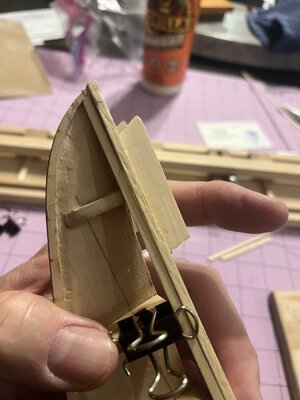
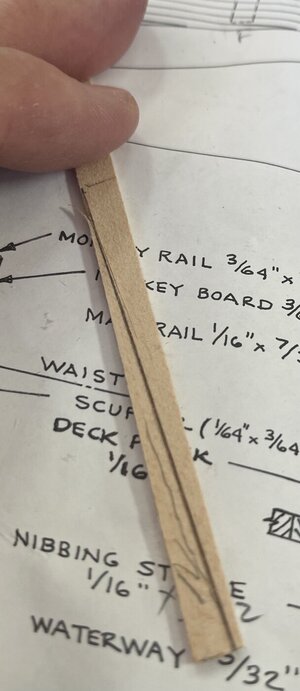
On to the garboard! I searched high and low and found very little on creating it, even in pictures. After a morning long search on Saturday, I found a build log on Model Ship World that says the garboard and 3 planks above it need to be tapered to 1/32” for the front 3”. And then on Suburban Ship Builder I found a good picture of the front of the garboard at the rabbet line. Success.

I created the 2 garboards and let them soak in hot water for a bit since they do have some good curves (for a beginner like me). Voila - the garboard is done.
1ACF151D-29DD-4A4E-9035-2AF0316641F2.jpeg996406F0-F300-4285-A98E-81B61C06B0B3.jpeg1A7D5C55-2E27-4B94-BCD3-D0AF3A9793FC.jpeg

I tried to document this process in text and pics since I found so little on it. Hopefully it’s correct and helpful. With only the garboards done, it will take a few more boards to find out.

Time for this portion: 14 hours (not counting my research time)
Total time to date: 55.5 hours
 
4/30 to 5/3
Even though I feel that it’s not a great idea to put a specific goal in mind when completing planking (meaning get this much done by this specific time), but I’m leaving for Mexico on 5/4 and will be gone for two and a half weeks, so I’ve set the goal of finishing planking the hull before I leave.

Part of my time restraints (in addition to my upcoming trip) is my reality of having my daughter and 2 grandkids living with us. This is still kinda new for us, so I’m still learning the joys of living with a 6 year old grandson and a 16 month old granddaughter.

Installed one more of the “larger “ boards above the garboard and realized that there isn’t much more to do before the hull is complete, like maybe 2 more of the larger boards (for a total of the garbord plus 3 boards) and one 1/8” boards.

I’m continuing with tapering the front couple of inches of each board from 1/4” down to 1/32”.
B4BD92A3-826E-4EB8-BADE-512713064A73.jpeg

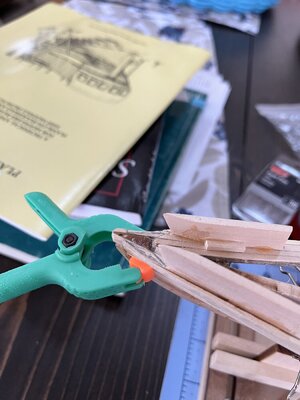
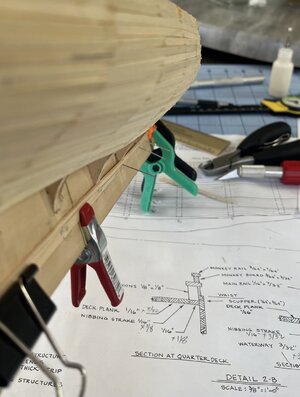
There is a bit of twisting on these boards so I am soaking them in hot water for about 10 minutes before installing them. There also in not a lot of room for any of the clips I usually use, so I’m holding them in place with a straight pin tapped into the keel or bulkhead. For some I used small scraps of 1/8” boards along with a larger binder clip to help hold it in place.

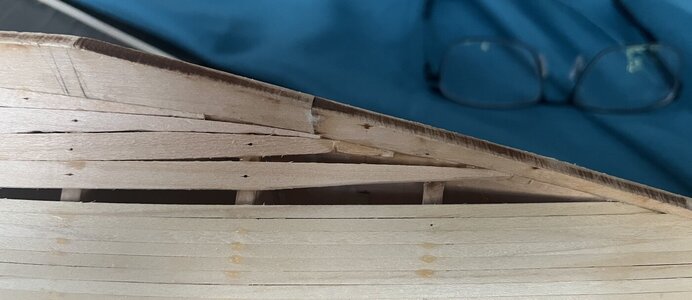
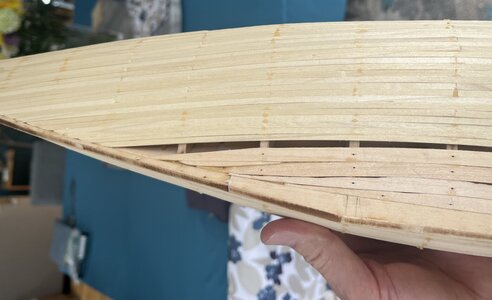
As I wrapped up these larger boards, I wasn’t too happy with the last one (maybe last 2), but wasn’t going to fight it as I knew I could fill in the gaps with a stealer of some sort (plus puddy if needed). Guess it comes down to not very good instructions on how to do these lower boards, my lack of tapering skills/practice, and my “hurrying” to get the hull done before leaving for Mexico.
9AD6B37A-261D-4660-9B55-35BBFFAE17B0.jpeg
BAF7B352-B179-41EF-A8C7-808CE26F4490.jpeg
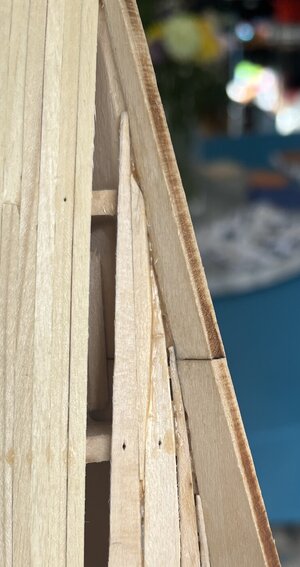
My stealers on the bow worked out okay. Not 100% happy with them, but they’ll be okay.
5089DA92-CBED-4B32-B87D-6EA0051F5734.jpeg
27327D36-BB1B-45FF-9AD4-7353768AD239.jpeg
Down to one board to finish the hull, but it is a tweener width that needed to be cut/sanded individually. 9C6424F4-8068-4EA0-BD85-5E931DFA420B.jpeg

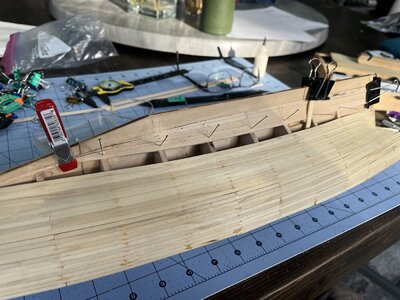
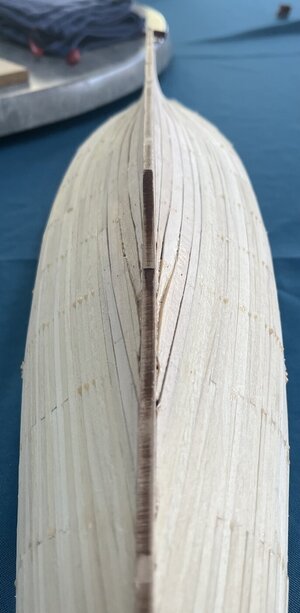
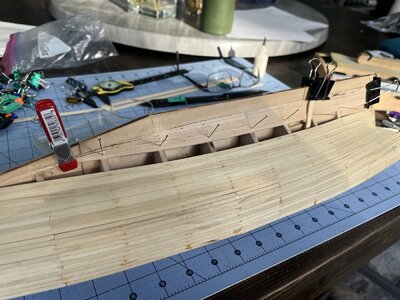
All in all I learned a lot from my first planking. Even when I first purchased this kit 20+ years ago, the planking was probably the task I was most concerned about. That first time is now behind me.
01719ABC-D641-44E7-B5BD-EAB6E061C647.jpeg
8DED5894-ED69-429C-9C9A-566A0238DB27.jpeg
Here are my learning points as I wrap up my first hull planking.
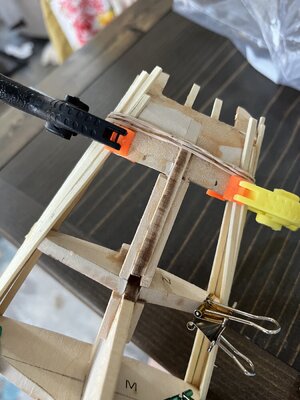
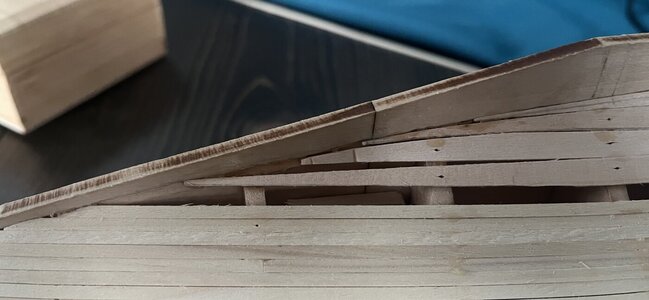
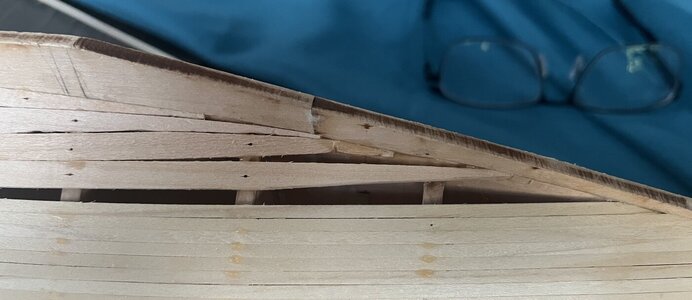
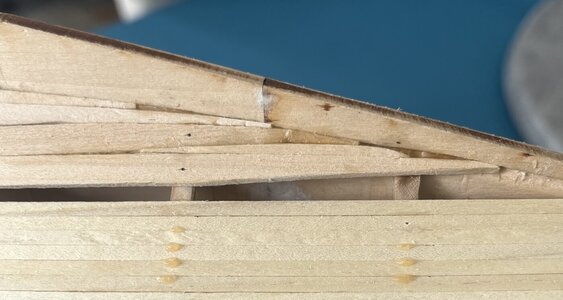
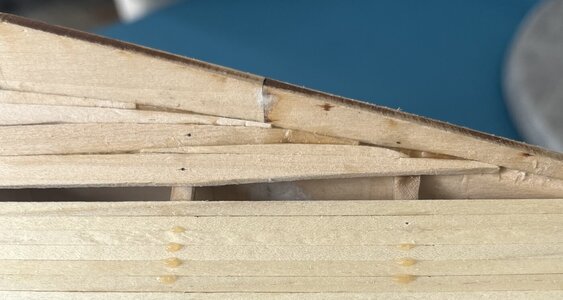
  1. Moist wood and strong clips are not a good mix. While putting in the larger boards near I noticed the tip of the middle larger board got pinched by the binder clip where it connects into the rabbet line at the bow. Again, it will be hidden under puddy and paint, but something good to keep in mind as I continue to learn.EA296780-17E3-4F42-BBBE-E4357FB5F87B.jpeg
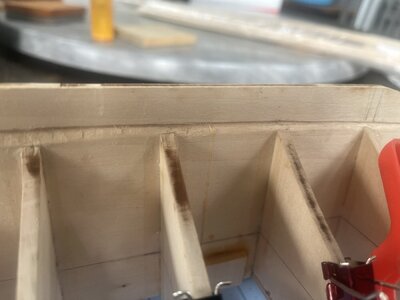
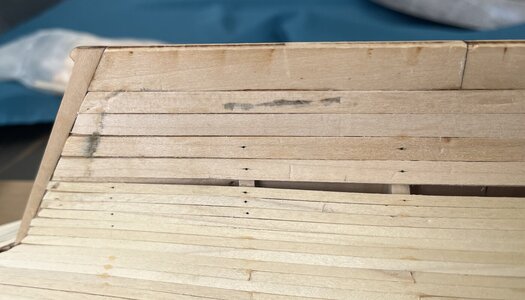
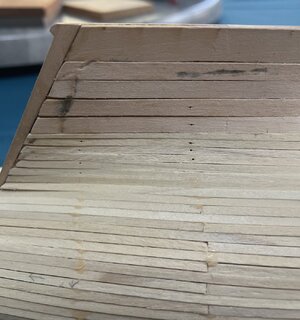
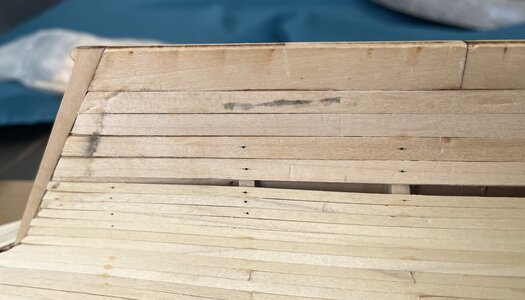
  2. Moist wood and metal clips are not a good mix. I noticed that at the stern the binder clips left black marks. 5B7A936D-2B62-42F4-82D4-2FC36E878320.jpeg
  3. Make sure to give myself enough time to complete a task and don’t just set completion goals. Goals are good, but be prepared to be flexible. This goes not just for model building, but for my life in general. I set a goal for myself (realistic or not) and I will do almost whatever needs to be done to meet it. Be flexible and modify as needed… after all, this is supposed to be fun and relaxing.
I keep coming back to the Bluenose having a painted hull, so these items will be hidden and out of view.

It’s now off to Vallarta for a couple of weeks during which time I’ll start my Buccaneer. Watch for my build log on it.

Time for this portion: 6.5 hours
Total time to date: 62 hours

FD91EA3B-B3B9-489A-89E6-A8E7172DE85B.jpeg

BE85CD64-69BE-4B42-BB83-007656927F7D.jpeg

A73FAFE8-CD1C-4AD1-9ED6-280D37F0E5C5.jpeg

911736A4-8DAC-4444-939C-1BB1976FA84F.jpeg

2004EB96-B3F6-4D32-B02C-657E610E3207.jpeg
 
Thanks for teaching me a lot more than just planking with this tutorial. Like patience and caregiving later in life and still maintaining some personal goals along the way, no matter what life throws at you.( I'm in that boat as well).

I especially appreciate your willingness to share everything about your process: the good bits (which is most of your planking project) as well as the part that reminds us we always need to leave room to learn and improve. I believe that your daughter and grand kids have a father and grandfather in whom they can take great pride, as I believe you should do in your Bluenose project.;)

Pete Gutterman
 
Thanks for teaching me a lot more than just planking with this tutorial. Like patience and caregiving later in life and still maintaining some personal goals along the way, no matter what life throws at you.( I'm in that boat as well).

I especially appreciate your willingness to share everything about your process: the good bits (which is most of your planking project) as well as the part that reminds us we always need to leave room to learn and improve. I believe that your daughter and grand kids have a father and grandfather in whom they can take great pride, as I believe you should do in your Bluenose project.;)

Pete
Thanks for teaching me a lot more than just planking with this tutorial. Like patience and caregiving later in life and still maintaining some personal goals along the way, no matter what life throws at you.( I'm in that boat as well).

I especially appreciate your willingness to share everything about your process: the good bits (which is most of your planking project) as well as the part that reminds us we always need to leave room to learn and improve. I believe that your daughter and grand kids have a father and grandfather in whom they can take great pride, as I believe you should do in your Bluenose project.;)

Pete Gutterman
Thanks for the words of encouragement. So far the kids all think the shop is “cool” and can’t wait to hear about my pirate ship.
 
How I ended up with a duplicate comment I have no idea. My analog brain is still bewildered by all this digital-virtual stuff.If I can use my hands and tools I can pick up I'm fine.:rolleyes:
 
4/30 to 5/3
Even though I feel that it’s not a great idea to put a specific goal in mind when completing planking (meaning get this much done by this specific time), but I’m leaving for Mexico on 5/4 and will be gone for two and a half weeks, so I’ve set the goal of finishing planking the hull before I leave.

Part of my time restraints (in addition to my upcoming trip) is my reality of having my daughter and 2 grandkids living with us. This is still kinda new for us, so I’m still learning the joys of living with a 6 year old grandson and a 16 month old granddaughter.

Installed one more of the “larger “ boards above the garboard and realized that there isn’t much more to do before the hull is complete, like maybe 2 more of the larger boards (for a total of the garbord plus 3 boards) and one 1/8” boards.

I’m continuing with tapering the front couple of inches of each board from 1/4” down to 1/32”.
View attachment 372685

There is a bit of twisting on these boards so I am soaking them in hot water for about 10 minutes before installing them. There also in not a lot of room for any of the clips I usually use, so I’m holding them in place with a straight pin tapped into the keel or bulkhead. For some I used small scraps of 1/8” boards along with a larger binder clip to help hold it in place.

As I wrapped up these larger boards, I wasn’t too happy with the last one (maybe last 2), but wasn’t going to fight it as I knew I could fill in the gaps with a stealer of some sort (plus puddy if needed). Guess it comes down to not very good instructions on how to do these lower boards, my lack of tapering skills/practice, and my “hurrying” to get the hull done before leaving for Mexico.
View attachment 372686
View attachment 372687
My stealers on the bow worked out okay. Not 100% happy with them, but they’ll be okay.
View attachment 372690
View attachment 372689
Down to one board to finish the hull, but it is a tweener width that needed to be cut/sanded individually. View attachment 372692

All in all I learned a lot from my first planking. Even when I first purchased this kit 20+ years ago, the planking was probably the task I was most concerned about. That first time is now behind me.
View attachment 372695
View attachment 372696
Here are my learning points as I wrap up my first hull planking.
  1. Moist wood and strong clips are not a good mix. While putting in the larger boards near I noticed the tip of the middle larger board got pinched by the binder clip where it connects into the rabbet line at the bow. Again, it will be hidden under puddy and paint, but something good to keep in mind as I continue to learn.View attachment 372697
  2. Moist wood and metal clips are not a good mix. I noticed that at the stern the binder clips left black marks. View attachment 372698
  3. Make sure to give myself enough time to complete a task and don’t just set completion goals. Goals are good, but be prepared to be flexible. This goes not just for model building, but for my life in general. I set a goal for myself (realistic or not) and I will do almost whatever needs to be done to meet it. Be flexible and modify as needed… after all, this is supposed to be fun and relaxing.
I keep coming back to the Bluenose having a painted hull, so these items will be hidden and out of view.

It’s now off to Vallarta for a couple of weeks during which time I’ll start my Buccaneer. Watch for my build log on it.

Time for this portion: 6.5 hours
Total time to date: 62 hours

View attachment 372688

View attachment 372691

View attachment 372693

View attachment 372694

View attachment 372699
Nice to see your completed planking and to read about your learning proces. ‘A first time’ is most of the time a challenge.
And I agree with Kurt, your are not alone with your +20year build. My Lee was also collecting dust for such a period, even longer.
Regards, Peter
 
One tip is to always bevel one edge of each new board so they fit flush without gaps when going around the curves of the frame. Otherwise two boards touching at the frame on a curve will create a v groove and leave openings that have to be filled because they can‘t be sanded out. Also scrape off excess glue with a razor before it dries. Sometimes the wood glue is harder than the wood and can create problems when you sand it off, because the wood around the glue will sand away faster. Things to consider, especially if you use a soft wood. And never mix soft balsa wood with a harder wood on the same surface, as they will never sand the same. Also be sure to glue the planks on the hull to each other, not just to the frame. Otherwise when you try to sand two adjacent boards flush, the higher board will get pushed down while sanding and just pop up higher again when you stop sanding. Nothing more frustrating than that! ;)
 
One tip is to always bevel one edge of each new board so they fit flush without gaps when going around the curves of the frame. Otherwise two boards touching at the frame on a curve will create a v groove and leave openings that have to be filled because they can‘t be sanded out. Also scrape off excess glue with a razor before it dries. Sometimes the wood glue is harder than the wood and can create problems when you sand it off, because the wood around the glue will sand away faster. Things to consider, especially if you use a soft wood. And never mix soft balsa wood with a harder wood on the same surface, as they will never sand the same. Also be sure to glue the planks on the hull to each other, not just to the frame. Otherwise when you try to sand two adjacent boards flush, the higher board will get pushed down while sanding and just pop up higher again when you stop sanding. Nothing more frustrating than that! ;)
Thanks - lots of good tips. I read a little about beveling the edges, but didn’t want to add the extra step on my first planking plus I knew the hull would be painted. It’s very forgiving hull. I’m currently working on my 2nd build, a Buccaneer which has a more curvy hull. When I get to the hull, I’ll keep the beveling in mind. It is a double planked hull - is beveling still necessary?

Since I did not glue the planks to each other and only to the bulkheads, is there a fix or bandaid? Maybe add glue from the inside since the top is still open?
 
You might think of a medium to thick CA glue and use to fill the gaps between planks. If you have some extra wood left, small bits of planking, make a sawdust pile, and after placing CA, sprinkle the sawdust in to act as filler, when when dried and sanded looks seamless.
 
Thanks - lots of good tips. I read a little about beveling the edges, but didn’t want to add the extra step on my first planking plus I knew the hull would be painted. It’s very forgiving hull. I’m currently working on my 2nd build, a Buccaneer which has a more curvy hull. When I get to the hull, I’ll keep the beveling in mind. It is a double planked hull - is beveling still necessary?

Since I did not glue the planks to each other and only to the bulkheads, is there a fix or bandaid? Maybe add glue from the inside since the top is still open?
If you can still access the inside of the hull, you can get a disposable brush and brush the wood glue on the inside to glue all the planks to one another. Basically paint the inside with wood glue! ;)
On a double plank hull, the better the first layer is, the better the second planking will be. It’s always a good idea to treat each planking as a single plank, that way you create good habits and it’s good practice for when you do a single plank.
In addition, even though you may be painting the hull, often times paint shows surface imperfections more than stain. Especially when using darker colors. And using a lot of putty is just more work you can avoid if you do a better planking job. So more work up front, beveling edges, tapering and pre bending, results in less work later. Ideally you just want sand the hull to a nice smooth finish. Adding excessive amounts of putty can lead to cracks and other issues, not to mention it creates a lot of extra sanding. So no matter what, it is work. So it’s better to do more work up front for a better result. Hope that helps.
 
Last edited:
Back
Top