Build Log Muscongus Bay Lobster Smack [COMPLETED BUILD]

Joined
Oct 31, 2021
Messages
94
Points
113

Location
Greeneville TN usa
Started work on the Muscongus Bay Lobster Smack (Model Shipways 1:24) 2 weeks ago. This is my second model. My first was the Lowell Grand Banks dory 1:24. This is very different. Well here we go !
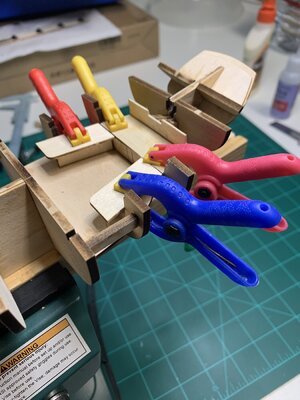
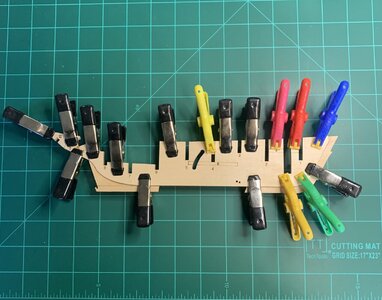
You can never have too many clamps. Getting everything lined up before the glue get too tacky was a job. I will have to do a little filling to get the bulkhead frame to fit right. The centerboard was a lot of work for me but it looks like it is working. It better. Once I glue the bulkhead frames there is no return.
DCA7C4F2-653B-48FF-990D-ABFBF86B85BA.jpegDD71BE35-D4CB-45CD-9DBA-B00C9664FBBC.jpeg

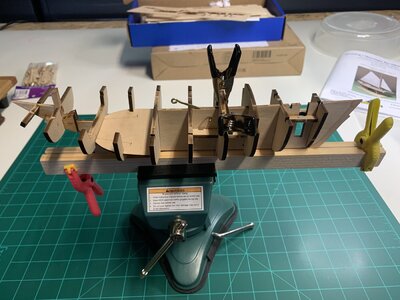
Ok. Everything dry fitted. I think I will add a few blocks to keep things square during the gluing of the bulkhead frames. I think the cockpit floor needs a bit more support.
 
Started work on the Muscongus Bay Lobster Smack (Model Shipways 1:24) 2 weeks ago. This is my second model. My first was the Lowell Grand Banks dory 1:24. This is very different. Well here we go !
You can never have too many clamps. Getting everything lined up before the glue get too tacky was a job. I will have to do a little filling to get the bulkhead frame to fit right. The centerboard was a lot of work for me but it looks like it is working. It better. Once I glue the bulkhead frames there is no return.

View attachment 273931View attachment 273932

Ok. Everything dry fitted. I think I will add a few blocks to keep things square during the gluing of the bulkhead frames. I think the cockpit floor needs a bit more support.
This will be fun to watch. A few months ago I bought the book, American Small Sailing Craft, by Howard J. Chappelle. It tracks a history and development of these small work boats and is well illustrated. In your present tack of building this smack you may enjoy having his book on hand. Rich (PT-2)
 
This one has my interest as well. I have the partially finished kit on the shelf.
 
Why is it unfinished?
The parts for the spine seem to have been cut from the wrong thickness of material so the bulkheads don't marry up properly (way too much slop). Consequently, they were just out of alignment enough that the deck halves wouldn't align properly fore and aft. That, in turn, threw off the planking, and lacking anything to verify I had the hull shape correct, the planks were getting farther and farther out of alignment as I progressed. I think an experienced builder could have overcome this, but it was all too much for my level of skill of compensate (The death knell was when my wife tried to force closed the half-open box in the closet, causing the centerboard handle to take a big gauge out of the deck). I may yet give it another go at some point in the future when my abilities have improved. Unfortunately, I was too far along in the build before I stumbled onto this site and became acquainted with @Bluebeard, who works at model shipways. I think if I had been in contact with him as soon as I discovered the issue, he would have had an opportunity to make things rights with the parts. Everything I have heard from others who have built this kit have been very positive so I would ask you view my experience as a one-off and not a detraction from the kit or the company.
 
If you work with Bluebeard and identify the damaged and defective items, he may be able to get replacement at low cost for you.

Then we can watch the build come back from bottom of the bay.
 
Yes I noticed that the bulkhead pieces are tight front to back but very loose and rock right to left. I had to mark the center of the bulkheads to aline with the center of the spline and use small shims to keep things in place while gluing. I hope everything lines up for the planking. Did @Bluebeard give you any suggestions?
 
I did speak with him at some length, but the build had progressed well beyond the point that exchanging parts would take care of things.

Sorry, Duncan; I had not meant to hijack your blog. We’re supposed to be enjoying your build; not hearing about mine
 
Today I added some supports under the cockpit floor on bulkhead #7 and #9. I am sure that the edge glue to bulkheads #7 and #9 would work ok but that’s just the way I am.

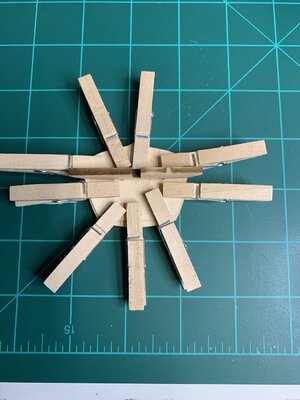
The transom is glued together. These small clothespins are ok but they need to be a little stronger.

BDFEC046-5469-4B4E-8A2F-B30E6F82618B.jpeg
 
Thanks, Duncan. I've been wracking my brain trying to remember the specific details of where I went wrong so that I could be more helpful than just complaining. I remember the transom parts being a very different shape than they appeared on the prototype used in the instructions. I think that was a major contributor to my hull planking issues.

One thing I do remember, which may save you some grief, concerns the deck, which it appears to be coming up soon in your build. I laid down the starboard half of the deck, trying to align it very carefully with the cutouts for the mast, bitt, and cabin wall grooves in the bulkheads. Then when I started to lay down the port half, work from aft forward, I discovered that if the deck halves were butted perfectly to one another at the stern, there was a gap forward of the cabin. When I attempted to close this gap, it threw the cutouts for mast, bitt and cabin walls out of alignment. there are a couple of ideas I had (after the fact, of course) for avoiding this. One would be to edge glue the two haves together before installing on the model, and the other would be to work forward to aft on the second half in order to ensure cutouts for the mast and bitt are perfectly aligned (my assumption is it will be easier to fix any misalignment around the cockpit than around the mast and bit). For my smack that is already past the point of no return, I think I'll have to expand the cutouts and then plank over the whole thing with mahogany. This would also hide the damage done by SWMBO (She Who Must Be Obeyed).
 
Thanks for the insight. Now I need to glue these bulkheads in place. I am trying very hard to make sure that when I glue the bulkheads to the spine they are perpendicular and centered. (The bulkheads are tight fore and aft on the spine but lose port to starboard.)
I see you watched Rumpole of the Bailey.
I shimmed them out on each side with a couple of lengths of hull planking (very thin stuff) from an old kit from decades ago. That got me a reasonably tight fit and guaranteed they were centered properly. Good luck!
 
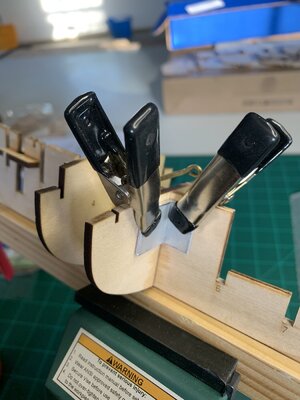
Today I started gluing the bulkhead. I used a piece of aluminum angle to keep things perpendicular to the spine.

2C4C241F-32B9-47B5-8828-0BE29D6ECD45.jpeg
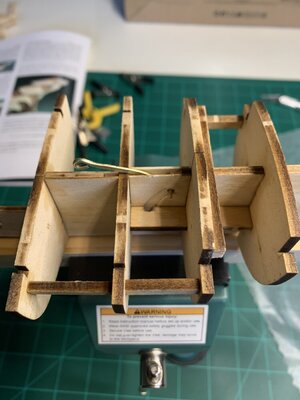
The spine is not strong enough to keep everything aligned so I added a block, measured at the spine, to keep the bulkheads parallel. Maybe the deck will do this later in the build.
D0F7C6FB-DBEC-4721-A340-041576D92C34.jpeg
 
CA with what I call a hummingbird applicator acts like a spot weld if I I keep the drop very very small. If the connection is not right I can easily break it and make a correction. If it is ok then I can finish the weld along the full length of the connection.
 
Looking good, Duncan, and the spacer blocks are a great idea. Before you put the deck on, I recommend you check to make sure the end of the centerboard handle will clear the notch in the horizontal stiffener. Mine didn’t initially, but it was an easy fix. harder once the deck is on.
 
Back
Top