You are using an out of date browser. It may not display this or other websites correctly.
You should upgrade or use an alternative browser.
You should upgrade or use an alternative browser.
Build Log Muscongus Bay Lobster Smack [COMPLETED BUILD]
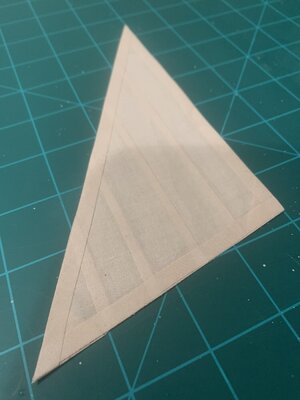
NIcely folded and set however I have a question as to the width of the hem compared with the size of the sail as it appears to my eye as too wide for that size. In full size a hemmed edge would not be more than two or three inches which at the model scale would be much more narrow. Just my eyes and reaction for consideration but yours to fabricate. Rich (PT-2)View attachment 282626
Well my first sail. A little more work then I first thought. But not to bad. For the mainsail I will mix the glue a little thicker. It took to long for the glue to stick will enough to move on to the next panel.
You are more than likely correct. I followed the dimensions that came with the kit. But everything I have seen on line says the hem should be much narrower. I am becoming less and less confident in what this teaching kit is teaching me. The more I progress with this kit the more questions I have and the more time I spend looking for answers. Maybe that’s the point of the learning kit.NIcely folded and set however I have a question as to the width of the hem compared with the size of the sail as it appears to my eye as too wide for that size. In full size a hemmed edge would not be more than two or three inches which at the model scale would be much more narrow. Just my eyes and reaction for consideration but yours to fabricate. Rich (PT-2)
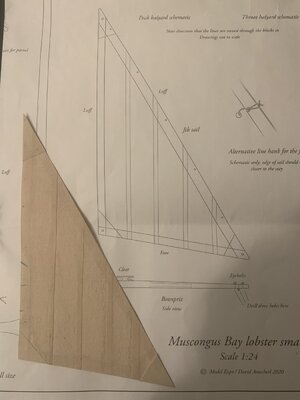
Let’s see if I get other inputs. I have plenty of material. I not going to build the mainsail until this jib is correct.
Last edited:
I would suggest that you use a sniff test and think about what is being "instructed", test it out on paper and see the result. Then maintaining the sense and reality of the scale to which you are working, translate that into a full 1:1 understanding and adjust as would be in the correct scale dimension. Some things are too small to do at scale and may need to be enlarged sufficiently to be able to execute them as the smallest size and closest to correct. For some of the small blocks in my Bluenose at 1:64 those were too small for me to able to use so I went up 1/2 or 1 mm in size. The same thing applies to the diameter of the thread/lines with which you are rigging. I suggest to continually think in terms of scale and not blindly or with too much trust proceeding with what you have in the kit. All kits seem destined to be altered, either for practical or builders visual (artistic license) prefrences. Just a thought. Rich (PT-2)You are more than likely correct. I followed the dimensions that came with the kit. But everything I have seen on line says the hem should be much narrower. I am becoming less and less confident in what this teaching kit is teaching me. The more I progress with this kit the more questions I have and the more time I spend looking for answers. Maybe that’s the point of the learning kit.
View attachment 282648
Let’s see if I get other inputs. I have plenty of material. I not going to build the mainsail until this jib is correct.
Well done on your first sail Duncan.I am with Rich with his advice. Yep I think kits are made to be enhanced, made more authentic and for those experienced guys bashed beyond recognition etc etc.... I don’t think there are too many modelers who haven’t done some changes to their kits. Enjoy it. CheersView attachment 282626
Well my first sail. A little more work then I first thought. But not to bad. For the mainsail I will mix the glue a little thicker. It took to long for the glue to stick will enough to move on to the next panel.
Hello Duncan- excellent improvement. The choice of color etc is always the builders preference-something the guys and ladies on SOS have always encouraged. Something I appreciate. Well done.View attachment 283622
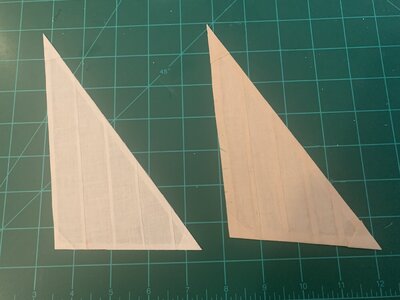
Did some research on sails. Here’s my second shot at sailmaking. (On the left.) Reduce the size of the hemming. It does look better. Also I think I will go with whiter sails. This boat is not that old.
I agree fully with GrantTyler - much better
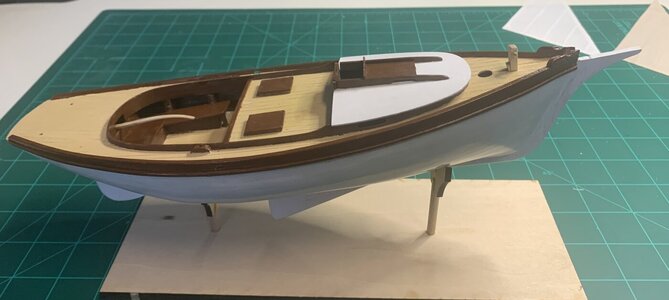
Did a second coat of brown paint. Now it’s time to do the waterline. I don’t think I will do another coat of paint on the decking.
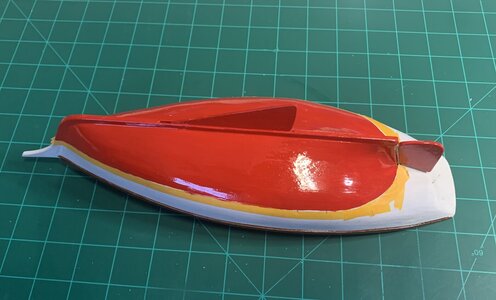
Getting the waterline marked out was not easy for me. I ended up turning the boat upside down and scribing the line. I didn’t have that stretchy masking tape, so I used regular tape. The red is too red. The final coat I’ll tone it down with some brown.
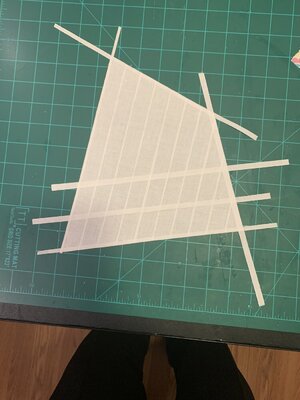
The mainsail is progressing.
Very good job, Duncan!
Technique that works for me.
(I am new to model making, so more than likely everyone knows how to do this but it’s new for me. I thought I would share it for other new model builders. )
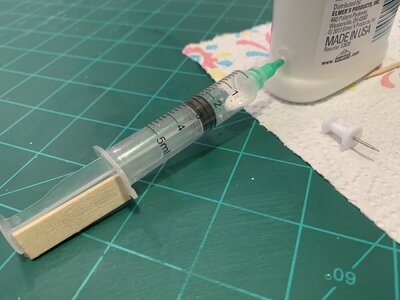
Use a push pin to make a hole in the glue container. Insert the syringe. Pull the plunge back and use a piece of something to hold the plunger back. The vacuum created will draw the glue into the syringe.
When you have what you need, remove what is holding the plunger back, with the needle still in the bottle. The pressures will equalize. Remove the syringe and put the pushpin in the hole.
With the syringe load with glue, you can put a small drop where you need it or run a long tiny bead for sail making or planking.
When you finished, if there is glue remaining in the syringe, stick the syringe in the little hole in the glue container and eject the unused glue back into the container.
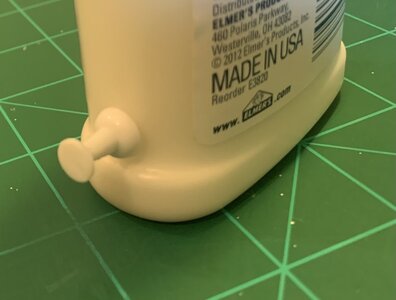
Replace the pushpin to seals the hole. When you need to use the syringe again just twist the pin, pull it out and insert the syringe and repeat the syringe loading process.
(I am new to model making, so more than likely everyone knows how to do this but it’s new for me. I thought I would share it for other new model builders. )

Use a push pin to make a hole in the glue container. Insert the syringe. Pull the plunge back and use a piece of something to hold the plunger back. The vacuum created will draw the glue into the syringe.
When you have what you need, remove what is holding the plunger back, with the needle still in the bottle. The pressures will equalize. Remove the syringe and put the pushpin in the hole.
With the syringe load with glue, you can put a small drop where you need it or run a long tiny bead for sail making or planking.
When you finished, if there is glue remaining in the syringe, stick the syringe in the little hole in the glue container and eject the unused glue back into the container.

Replace the pushpin to seals the hole. When you need to use the syringe again just twist the pin, pull it out and insert the syringe and repeat the syringe loading process.
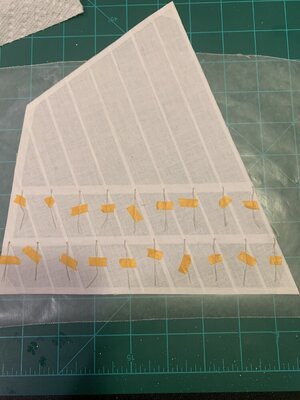
Working on the sails now. The reefs were not easy. I made them as one piece. (Not two as the directions say.) I cut a piece of rope (0.4 mm line) above 2.5” and tied a double knot in the center. Put a drop of CA on the knot and both ends. Used a push pin to make the hole in the sail. Pushed the rope through the hole and secured it with a piece of tape on both sides. When all the reefs were in position I put a drop of white glue on both sides. (The CA stains the white sail.)
It will be interesting to see what happened when I removed the tape. The reef has no weight so it will not hang down. More than likely I will have to use CA when they are cut to length to make them hang down.
I’m not finished with this model yet but I’m already thinking about my next build. I want to keep the scale 1:24 so I see the Glad Tidings Pinky Schooner (Model Shipways). Then looking at some building logs (the Russian lady and others) this kit seems to be way above my pay grade. What do you think?
That needle prick was new to me as I have regularly unscrewed the to and inserted the syringe to draw up the glue and then replaced the cap. More of a mess than your less invasive way. I also don't return the glue if I am working with consecutive days which at times necessitates using a very small probe into the needle to clear it out to continue use. As for sail reef lines I just used a needle to pass the precut thread half way through and also used the glue spot to secure it. Such reef lines would be blowing aft depending upon the head wind unless you have a calm day at the pier. Nice progress. Rich (PT-2)Nice technique, Duncan. I'm lazy, so I just squeeze out a glob of glue into a plastic cup and then use a toothpick or old airbrush needle to put the glue where I want it.
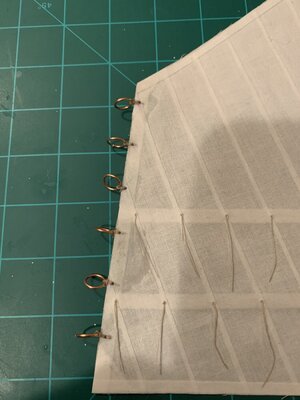
So far, with this build, attaching these mast hoops was the most time consuming. I had to really blunt the needle so it would not catch the threads that were already looped through the sail. Also next time I have to make mast hoops I will solder the ends together. The rope had a way of finding that little opening in the hoop.
Question. Is there any way of better controlling the drop from those CA micro tips?
You may want to use a small syringe needle or else a needle tip touched in the adhesive and then to the cloth as a smaller contact area. RichView attachment 288150
So far, with this build, attaching these mast hoops was the most time consuming. I had to really blunt the needle so it would not catch the threads that were already looped through the sail. Also next time I have to make mast hoops I will solder the ends together. The rope had a way of finding that little opening in the hoop.
Question. Is there any way of better controlling the drop from those CA micro tips?
- Joined
- Nov 4, 2021
- Messages
- 301
- Points
- 168

I agree with Rich. I have an old airbrush needle to which I have added a wooden dowel for a handle. when I'm working with CA I squeeze out a little puddle onto a scrap of card stock and then use the needle to apply a tiny amount exactly where I want it (well, except for the part about my shaky hands...)
Thanks for the advice. I’ve ordered some thick CA as well. Maybe that will help with the control along with your suggestions.
I think I will make another sail. The CA stain on this one does not look good. Also I will try soldering those rings closed.
I think I will make another sail. The CA stain on this one does not look good. Also I will try soldering those rings closed.
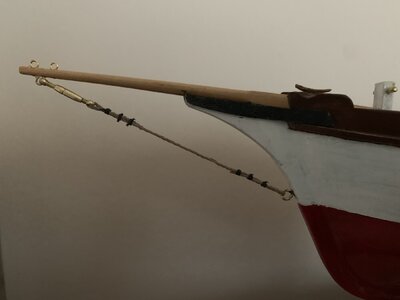
This was a pain in the ….. The turnbuckles in the kit are junk. I found some real ones at harbormodels.com and made this tensioner. It was not easy for me. I think I am going to make a wide pan to work in with these small parts. (I’m tired of sweeping the floor looking for parts. ) I also ground down some needle-nose and round-nose pliers to work with these small parts. Patients. Patients. Patients.


