Caldercraft Hms Victory- Build Log

  • Thread starter Thread starter GregW
  • Start date Start date
  • Watchers Watchers 6
Joined
Mar 18, 2023
Messages
149
Points
113

Location
Largs Bay, South Australia
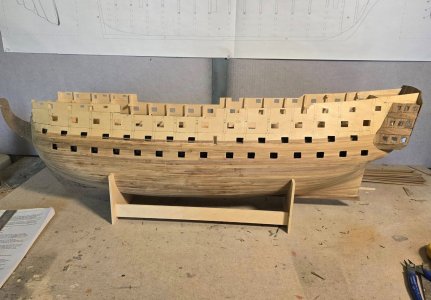
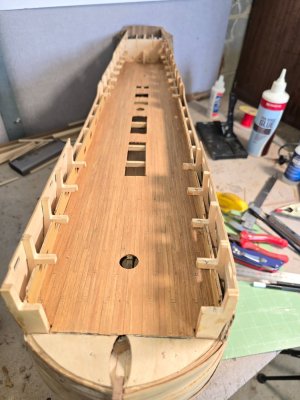
After completing my first ship, The Soleil Royal, I decided I would definitely do something a little easier for my second build. As I started looking, a ship I was fascinated ,with popped up at a reasonable price and I just had to have it. The Caldercraft HMS Victory.
As I am still really a beginner I will be taking my time and referencing some of the outstanding builds of the Victory I have seen on these forum's. I only recently decided to do another build log so didn't take photos of every step up to this point but I have a few and will be more thorough going forward.
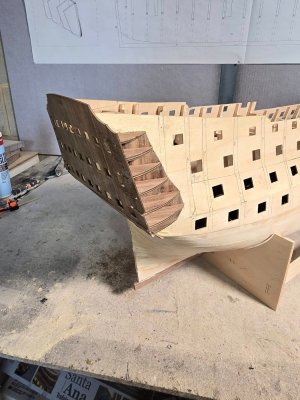
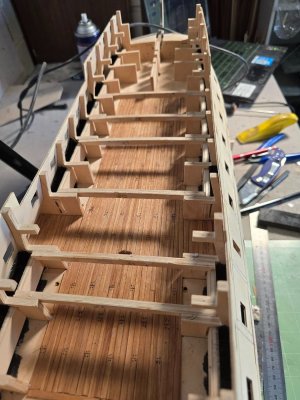
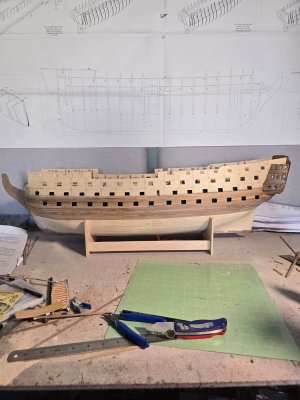
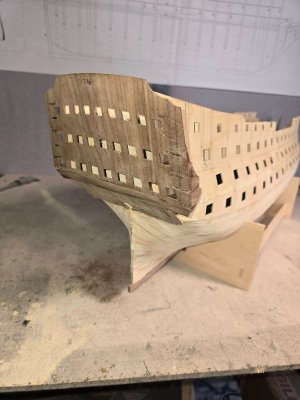
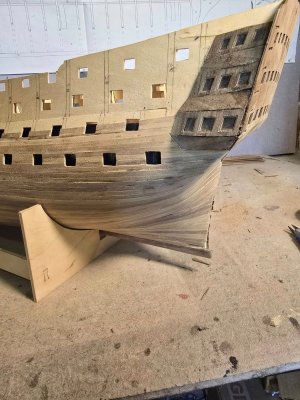
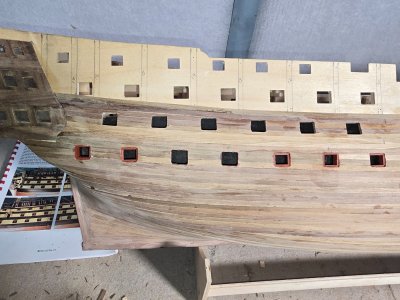
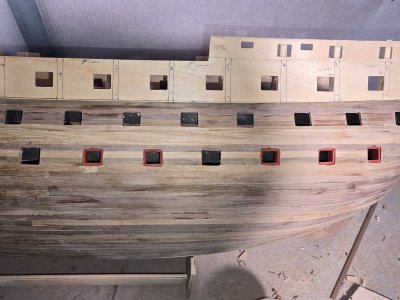
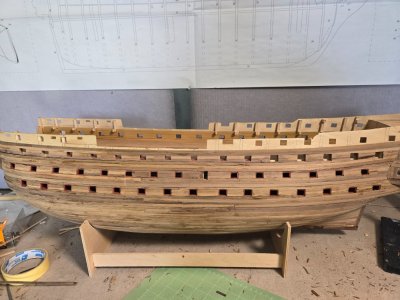
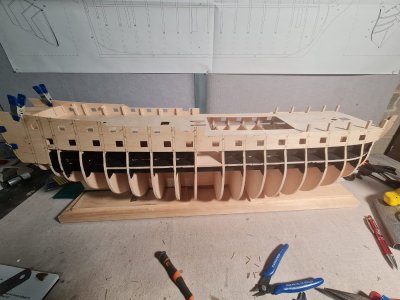
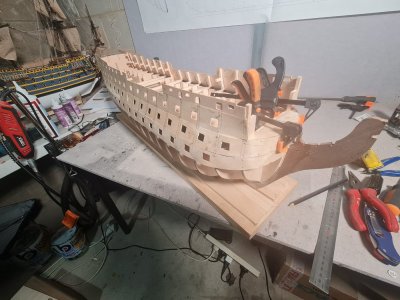
I've nearly completed the lower half of the second planking and so far looks ok. It's a ways of yet but copper plating (something I've never done) worries me but that's in the future.
1.jpg

2.jpg

3.jpg

4.jpg

5.jpg

6.jpg

7.jpg

8.jpg

9.jpg

10.jpg

11.jpg
 
After completing my first ship, The Soleil Royal, I decided I would definitely do something a little easier for my second build. As I started looking, a ship I was fascinated ,with popped up at a reasonable price and I just had to have it. The Caldercraft HMS Victory.
As I am still really a beginner I will be taking my time and referencing some of the outstanding builds of the Victory I have seen on these forum's. I only recently decided to do another build log so didn't take photos of every step up to this point but I have a few and will be more thorough going forward.
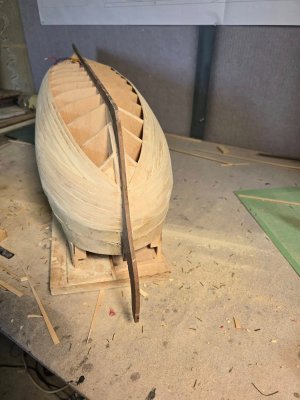
I've nearly completed the lower half of the second planking and so far looks ok. It's a ways of yet but copper plating (something I've never done) worries me but that's in the future.
View attachment 488592

View attachment 488593

View attachment 488594

View attachment 488595

View attachment 488596

View attachment 488597

View attachment 488598

View attachment 488599

View attachment 488600

View attachment 488601

View attachment 488602
Good morning Greg. Good luck with this Victory. I am with Paul here not an easy build however have loads of fun with her. Cheers Grant
 
After completing my first ship, The Soleil Royal, I decided I would definitely do something a little easier for my second build. As I started looking, a ship I was fascinated ,with popped up at a reasonable price and I just had to have it. The Caldercraft HMS Victory.
As I am still really a beginner I will be taking my time and referencing some of the outstanding builds of the Victory I have seen on these forum's. I only recently decided to do another build log so didn't take photos of every step up to this point but I have a few and will be more thorough going forward.
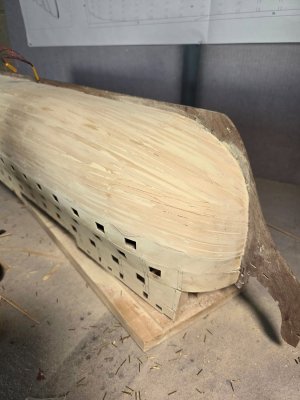
I've nearly completed the lower half of the second planking and so far looks ok. It's a ways of yet but copper plating (something I've never done) worries me but that's in the future.
View attachment 488592

View attachment 488593

View attachment 488594

View attachment 488595

View attachment 488596

View attachment 488597

View attachment 488598

View attachment 488599

View attachment 488600

View attachment 488601

View attachment 488602
Hi Greg
Nice start and really looking nice
I'll follow your build with interest
Cheers
 
Hi Greg, happy holidays to you!
Does the kit instruct the planking to go in as you show it? Planking should never end in a point and should land in the rabbet, not aft of it. There are some great planking tutorials that show how to do planking properly without a lot of stress. One that is free on line. https://www.scribd.com/document/42536606/Planking-Project

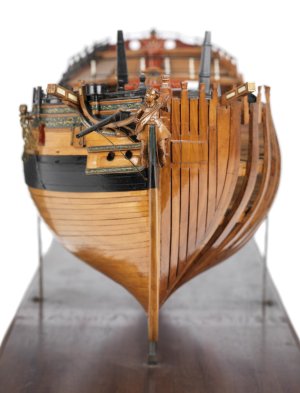
As this is only your second build it is a great place to learn. A very basic design flaw in most kits is lack of taper of the knee of the head. As you have not yet added the rails and cheeks you can still taper the knee of the head from the stem to the seat of the figure head as can be seen in the photo below before adding the rails and such.
Allan

1734974978214.jpeg
1734975090155.jpeg
 
Last edited:
Hi Greg, happy holidays to you!
Does the kit instruct the planking to go in as you show it? Planking should never end in a point and should land in the rabbet, not aft of it. There are some great planking tutorials that show how to do planking properly without a lot of stress. One that is free on line. https://www.scribd.com/document/42536606/Planking-Project

As this is only your second build it is a great place to learn. A very basic design flaw in most kits is lack of taper of the knee of the head. As you have not yet added the rails and cheeks you can still taper the knee of the head from the stem to the seat of the figure head as can be seen in the photo below before adding the rails and such.
Allan

View attachment 491375
View attachment 491376
Hi Allan , happy holidays to you also. Thank you very much for the advice. I'm afraid my planking is self-taught, so I'm not surprised I'm incorrect, but I'm always willing to take on advice of any kind. I will definitely check out those planking tutorials. I have watched a few but everyone seems to do it differently and it varies from ship to ship from what i have seen. Hopefully i will improve with each ship.
 
Great choice of kit Greg. This is a great start to a very challenging kit to build. I will pull up a chair and follow with interest.

Please post as often as you are able with many photos. I think the benefits of posting in a build log are mutual.
 
Great choice of kit Greg. This is a great start to a very challenging kit to build. I will pull up a chair and follow with interest.

Please post as often as you are able with many photos. I think the benefits of posting in a build log are mutual.
Thanks very much I'm hoping I haven't bitten off more than I can chew but we will see. I'll post as many photos as I can but will still take a while as I tend to go slow in the hope of minimising mistakes but i know I'm in the best spot to receive advice
 
It's not a great start to lining the lower gun ports. Instructions said to basically line the top and bottom and then add the sides.
Which probably would have been fine if I had cut the holes exactly square.
I wasn't happy with them, so I have started removing them all, and I'm going to make the frames complete off ship square and then file the holes till they are a perfect match.
Will take longer, but the end result should be worth it. I wish I had the skills of others on this site lol 20241224_170524.jpg20241224_170517.jpg
 
I have watched a few but everyone seems to do it differently
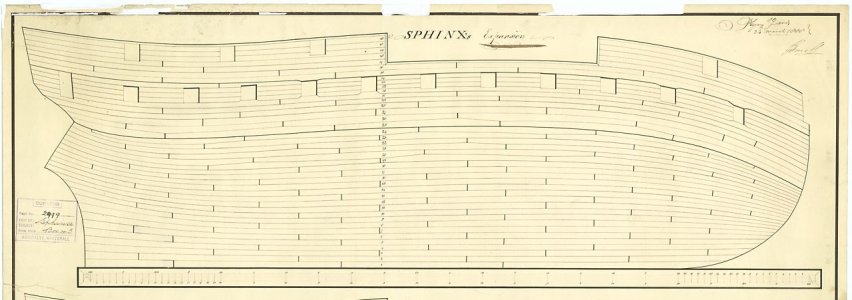
I agree that you will see modern models done in different ways, some correct, some not. But, the actual ships were pretty much all the same. My four favorite tutorials that will yield realistic planking are the following three attachments and the four part video. Part one is at www.youtube.com/watch?v=KCWooJ1o3cM
Allan
 

Attachments

I agree that you will see modern models done in different ways, some correct, some not. But, the actual ships were pretty much all the same. My four favorite tutorials that will yield realistic planking are the following three attachments and the four part video. Part one is at www.youtube.com/watch?v=KCWooJ1o3cM
Allan
Thank you very much Allan. That is just the sort of information I need. This method of planking looks so much better and after watching the 4 videos it doesn't look exceptionally difficult either. I had heard of a rabbet line but had no idea how to cut one. Despite my searches I couldn't find any information on it which is why my Victory doesn't have it. From what I have just watched that was definitely a mistake. I almost want to plank another ship now to try this method out. I probably should have started my ship building journey with smaller simpler kits but I have a tendency to throw myself in the deep end.
I really appreciate you taking the time to help me out.
 
HI Greg,
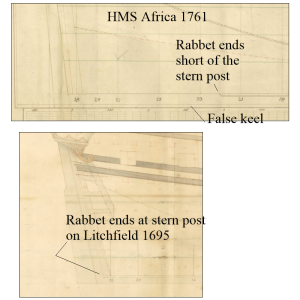
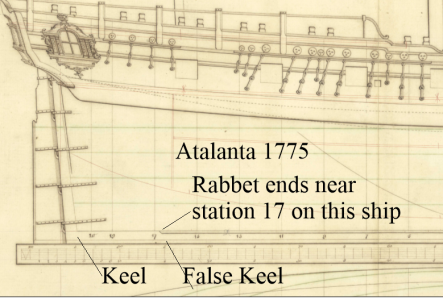
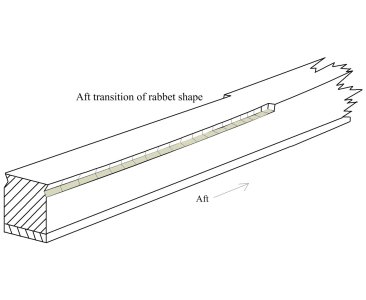
There are some books that show how to cut the rabbet, but basically it is best to use a sharp small chisel or even a good hobby scalpel. Keep in mind the shape is dynamic as the angle pretty much matches the angle of the frames (or bulkheads). As it goes aft it is just about vertical. Sometime in the 18th century it actually ends short of the stern post but most folks don't know or care so you can run it to the post. The way it ends when the change came about can be seen on the frame disposition drawings and profile drawings. Examples of each are below. For the future, maybe consider a good quality kit, even if a smaller vessel, as these kinds of things are often addressed. Hope you find this helpful.
Allan

1735067283926.png
1735067562671.png

1735067318715.jpeg
 
Last edited:
HI Greg,
There some books that show how to cut the rabbet, but basically it is best to use a sharp small chisel or even a good hobby scalpel. Keep in mind the shape is dynamic as the angle pretty much matches the angle of the frames (or bulkheads). As it goes aft it is just about vertical. Sometime in the 18th century it actually ends short of the stern post but most folks don't know or care so you can run it to the post. The way it ends when the change came about can be seen on the frame disposition drawings and profile drawings. Examples of each are below. For the future, maybe consider a good quality kit, even if a smaller vessel, as these kinds of things are often addressed. Hope you find this helpful.
Allan

View attachment 491534
View attachment 491541

View attachment 491535
Thats brilliant
Thank you so much Allan
 
Back
Top