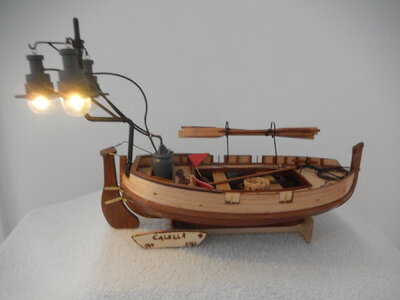
Calella (OcCre 1:15) [COMPLETED BUILD]

Joined
Aug 1, 2020
Messages
727
Points
298

20220529

Started the OcCre Calella a couple of weeks ago. Work on it has been slow as the day job has had me travelling.

When looking for a next boat model, this one caught my eye. A colorful oar-powered fishing craft equipped with lights for attracting the catch-of-the-day. At 1:15 it is a relatively large craft so plenty of room to work on everything. As it turns out, it is also fairly involved – no rigging but a double planked hull and deck and the hull has fairly severe curves fore and aft due to the bluntness of both ends.DSCN8621.JPG
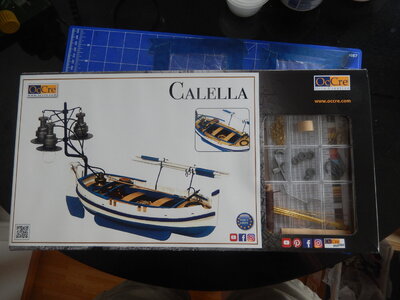
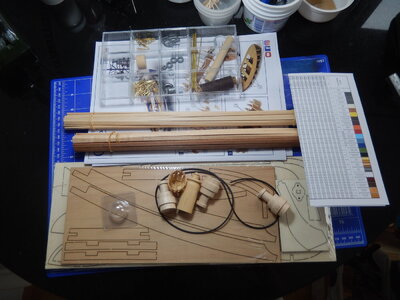
The kit contents are well organized and the castings are clean. The framing is plywood but the decking and hull planking are all good quality. No issue with those locations where the plywood might be visible as most of the boat is going to be painted. The lighting will give me the opportunity to add LEDs; I expect to be able to rig them to run off of a button battery with the wiring hidden inside the tubing that runs between the lights and the gas canister. (That is further into the build so plenty of time to develop the idea. I have plenty of LEDs in my kit; just need to get some thinner wiring.)
DSCN8622.JPG

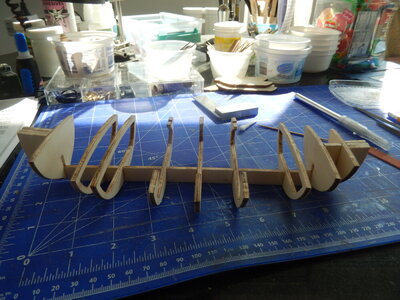
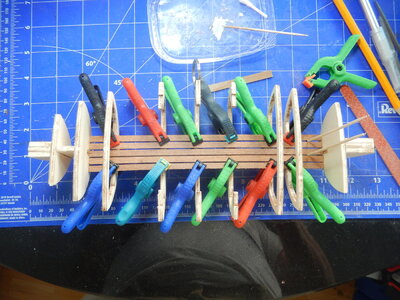
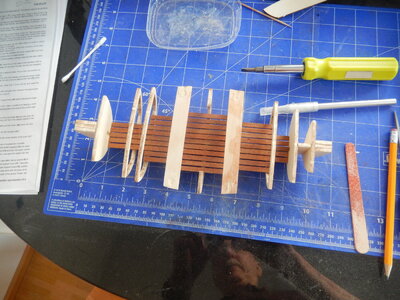
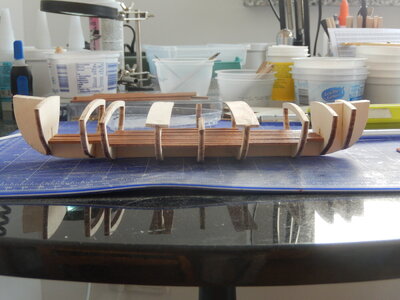
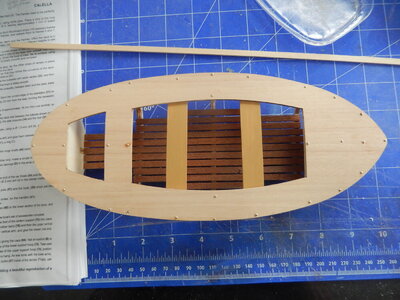
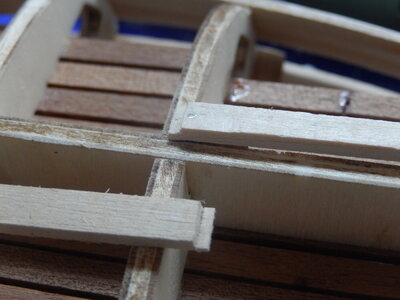
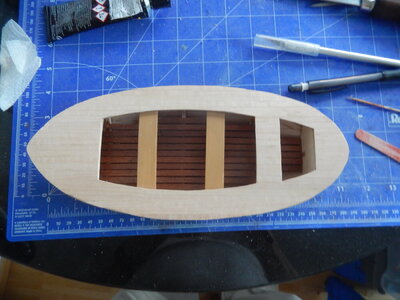
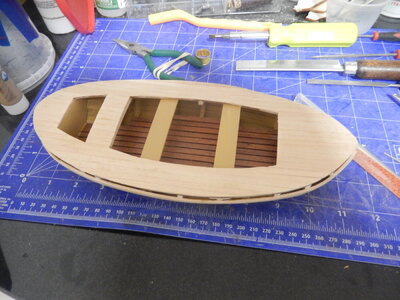
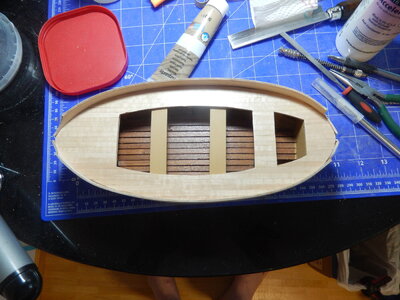
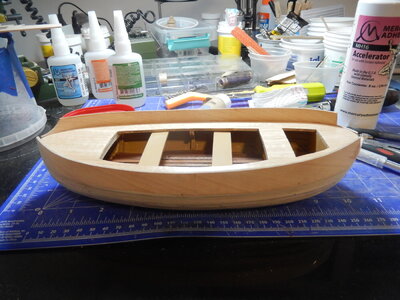
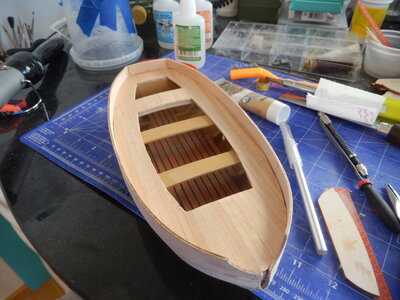
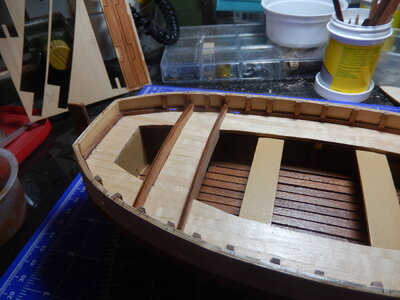
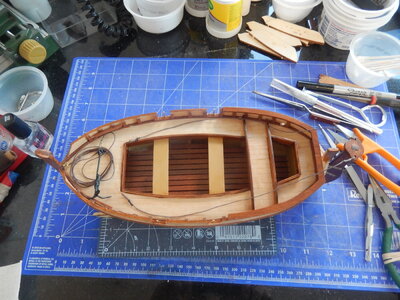
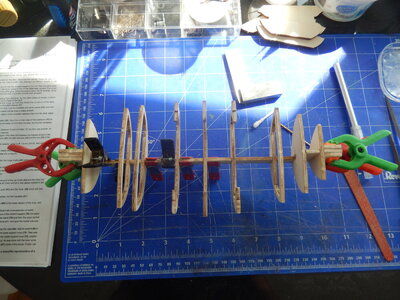
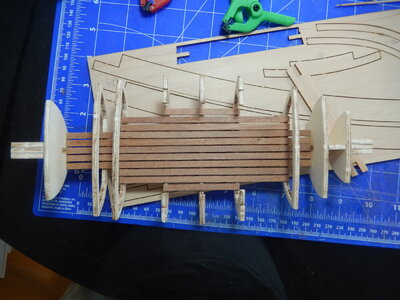
The build has been straight forward so far. Frames glued to false keel, floor planks installed, thwarts glued in, first decking added. I used 2 coats of a clear finish on the floorboards instead of painting them. I was planning to do the same on the thwarts but after spilling some thin CA on one of the thwarts I decided to paint them (the CA discolored the thwart as it was pulled into the grain) with some ochre paint I had in my collection.DSCN8623.JPGDSCN8624.JPGDSCN8625.JPGDSCN8627.JPGDSCN8628.JPG
DSCN8629.JPG
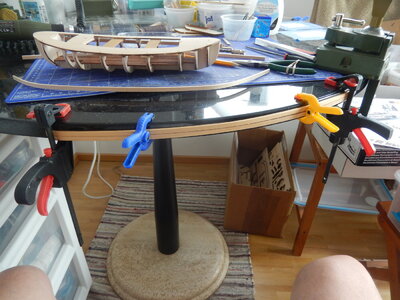
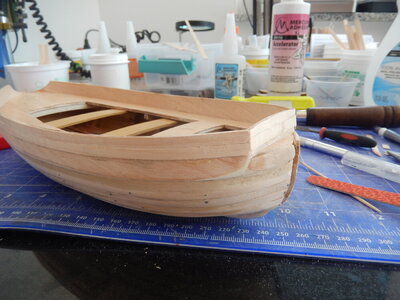
The first planking strakes on each side have been installed and work has begun on the next ones. The bend in the strakes is gentle in the middle portion of the hull but pretty severe at each end. I’ve soaked several of the strakes and then clamped them to the edge of the round table that is my work surface; this creates the major part of the hull curve. Then I use an older hair curler to create the more severe bends at the bow and stern. As the hull flattens out as the bottom is reached, enough stakes have been left unbent for now; they will be bent/twisted as needed to fit.
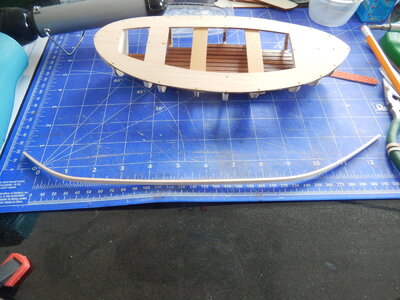
DSCN8630.JPGDSCN8631.JPGDSCN8632.JPGDSCN8633.JPG

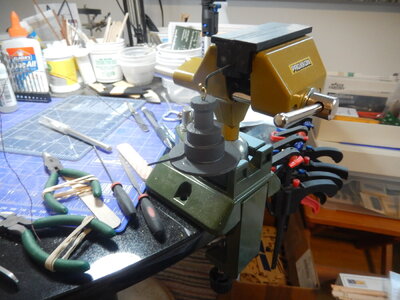
The strakes are glued on and held in place with nails. I have a 0.5 mm drill bit with a large diameter shaft for my Proxxon drill but that size is just a hair too small for the nails. 0.6 mm works better but the drill chuck won’t hold them. So I initially drill the nail holes with the Proxxon and 0.5 mm bit; then I use the spring operated twist drill and 0.6 mm bit to enlarge them just enough so the nails can be pushed in without difficulty. When I bought that twist drill I wasn’t sure if I’d have a need for it; it just seemed like a nice tool to have in my tool box. Is has proven itself so I’m glad I purchased it.
DSCN8635.JPG

Will try and post more often as this build progresses.

DSCN8626.JPG
 
Last edited:
an interesting project and not often seen

we have a nice model of such a boat in the Gallerie
 
an interesting project and not often seen

we have a nice model of such a boat in the Gallerie
Thanks for the references. Hope to post the next part of my log in a few days. Actual work (sigh) is getting in the way of the boat building!
 
20220612

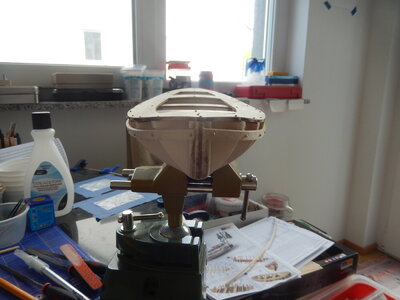
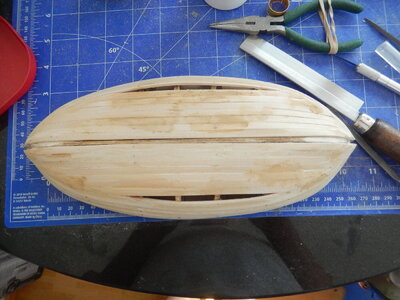
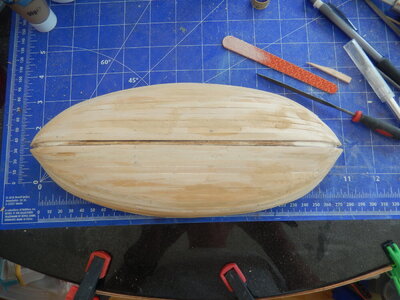
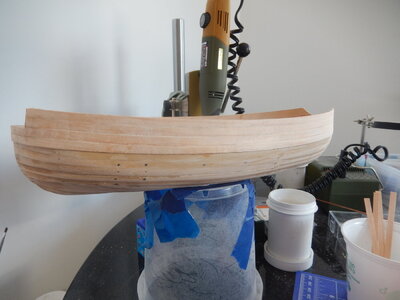
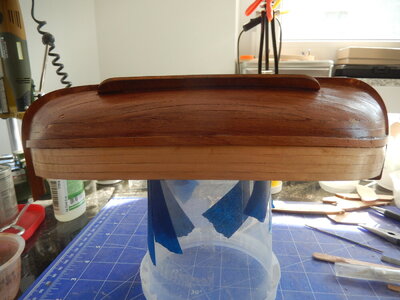
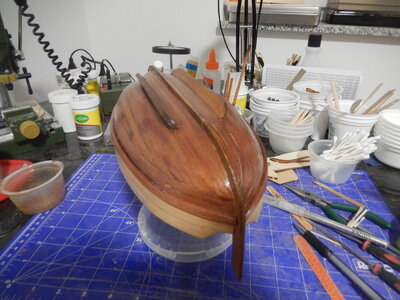
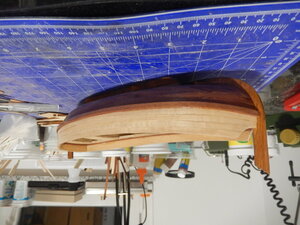
I’ve been working on planking the hull the past couple of weeks and finally have it finished – except for the final sanding. Will start working on that once the wood filler I used in a couple of places is dry.

I planked down the side of the hull 5 strakes on each side then started from the bottom and worked upwards. Why 5 strakes? That brings the sides down to just about where the frames start to curve towards the keel. No science involved; just what I thought would look OK.

On one side of the keel I decided to see if I could do a three piece strake – bow/center/stern – using scarf joints. There was no need to do this; just wanted to practice. It came out looking OK so I did not replace it with a single piece.

When I went to remove the first few nails, I nearly split one of the frames. I decided to cut off the heads and file the bodies down as there is a second planking of thin strips that will cover the hull. I kept the use of nails on the bottom part of the hull to a minimum. Used CA (thick and thin) instead of wood glue to attach the strakes on the bottom part of the hull (only a couple of instances where I glued fingers to the hull; managed to get them off without losing any skin).

As I used a bit of wood filler and sanded as I went there is not a lot of finish work to do. Basically sand down several spots where I used additional wood filler and then final sand the hull.

The bulwarks (thin plywood) that will be installed on the hull above the planking have been soaked in water and are in the bending jig (the edge of my round work table). This should make them a bit easier to install.

Will post again in about a week.

DSCN8638.JPGDSCN8641.JPGDSCN8642.JPG
 
20220619

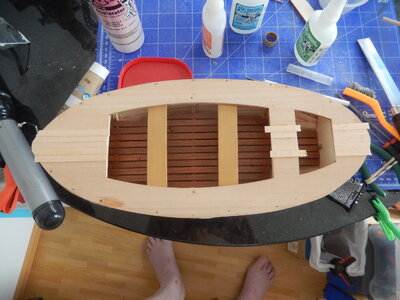
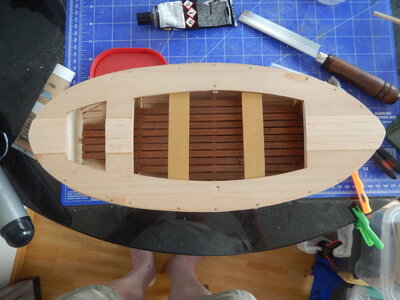
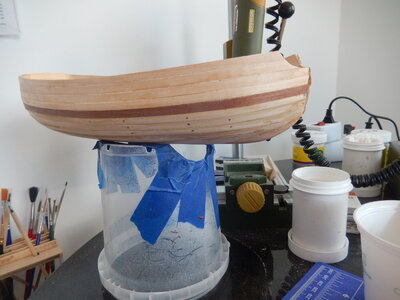
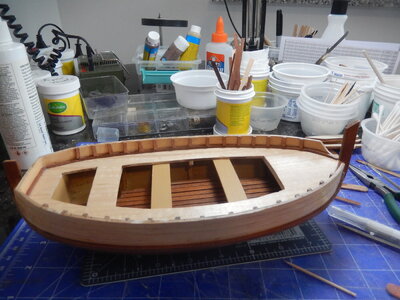
Installed the deck planking, painted the inside of the hull with ochre paint, sealed the deck planks, installed the bulwarks and started the second planking of the hull. I started the second planking from the top (exterior of bulwark); thinking about it afterwards it may have been better to start the second planking where the bulwarks meet the main hull then working upwards; that way any little bit of error in the planking would end up above the bulwarks to be sanded off flush. Will just need to work carefully to make sure the second planking proceeds without any issues.

DSCN8643.JPGDSCN8645.JPGDSCN8646.JPGDSCN8649.JPGDSCN8651.JPGDSCN8652.JPGDSCN8653.JPGDSCN8655.JPG
 
20220709

Long intervals between posts; work travel & vacation so not a lot of time to put into the boat.

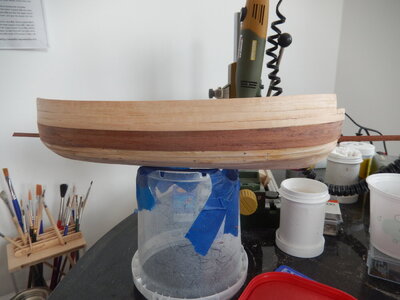
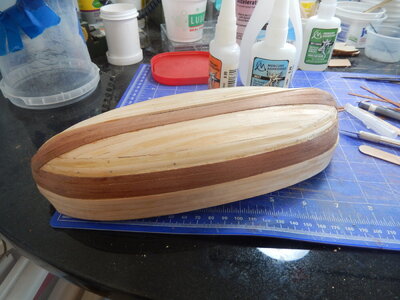
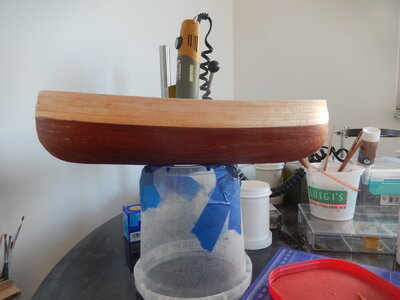
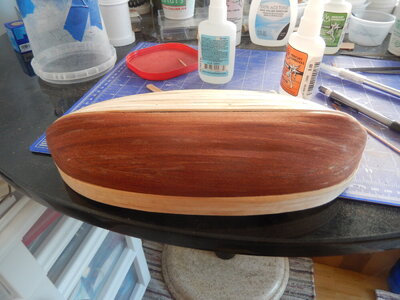
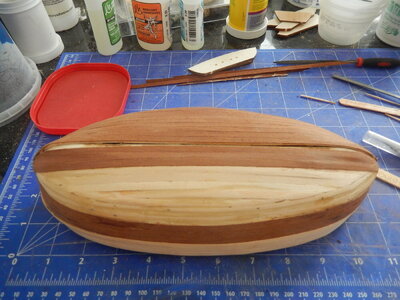
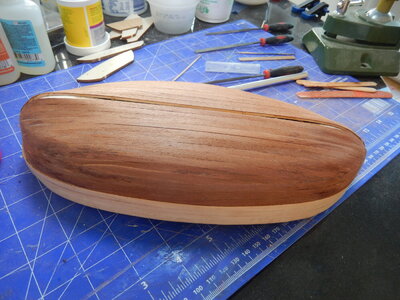
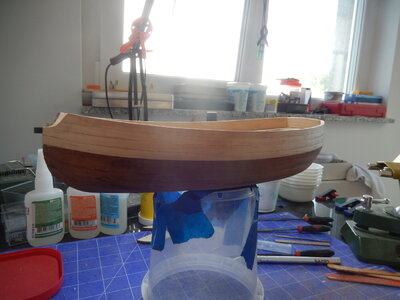
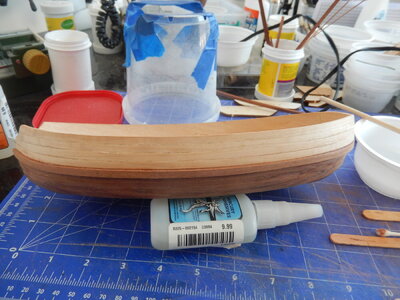
Finished the second planking on the starboard side of the side of the hull. At the risk of sounding boastful, I think it came out nice. I haven’t yet decided if I’m going to paint the hull; right now I’m leading towards not painting as I like the color of the wood. Plenty of time to decide; still have the port side of the hull to plank, the rubbing strakes to install, the keel/stem/stern pieces to install, the stabilizers to install, the list goes on. I’m only about a third of the way through the build instructions but when the planking is finished the largest part will be completed. The remainder is a lot of parts – small and not so small.

DSCN8656.JPGDSCN8657.JPGDSCN8659.JPGDSCN8660.JPGDSCN8662.JPGDSCN8663.JPG
 
One of the things I love about this hobby, and forum, is that we work at our own pace.

I like the color of the planking too.

May I make a suggestion? Apply the finish to the wood, then make your decision if to paint it or not.

It is looking great so far!

Glenn
 
One of the things I love about this hobby, and forum, is that we work at our own pace.

I like the color of the planking too.

May I make a suggestion? Apply the finish to the wood, then make your decision if to paint it or not.

It is looking great so far!

Glenn
Exactly what I plan to do - finish the planking and then see how it looks. I'll paint whatever seems to need painting.
 
20220529

Started the OcCre Calella a couple of weeks ago. Work on it has been slow as the day job has had me travelling.

When looking for a next boat model, this one caught my eye. A colorful oar-powered fishing craft equipped with lights for attracting the catch-of-the-day. At 1:15 it is a relatively large craft so plenty of room to work on everything. As it turns out, it is also fairly involved – no rigging but a double planked hull and deck and the hull has fairly severe curves fore and aft due to the bluntness of both ends.View attachment 311167

The kit contents are well organized and the castings are clean. The framing is plywood but the decking and hull planking are all good quality. No issue with those locations where the plywood might be visible as most of the boat is going to be painted. The lighting will give me the opportunity to add LEDs; I expect to be able to rig them to run off of a button battery with the wiring hidden inside the tubing that runs between the lights and the gas canister. (That is further into the build so plenty of time to develop the idea. I have plenty of LEDs in my kit; just need to get some thinner wiring.)
View attachment 311168

The build has been straight forward so far. Frames glued to false keel, floor planks installed, thwarts glued in, first decking added. I used 2 coats of a clear finish on the floorboards instead of painting them. I was planning to do the same on the thwarts but after spilling some thin CA on one of the thwarts I decided to paint them (the CA discolored the thwart as it was pulled into the grain) with some ochre paint I had in my collection.View attachment 311169View attachment 311170View attachment 311171View attachment 311173View attachment 311174
View attachment 311175
The first planking strakes on each side have been installed and work has begun on the next ones. The bend in the strakes is gentle in the middle portion of the hull but pretty severe at each end. I’ve soaked several of the strakes and then clamped them to the edge of the round table that is my work surface; this creates the major part of the hull curve. Then I use an older hair curler to create the more severe bends at the bow and stern. As the hull flattens out as the bottom is reached, enough stakes have been left unbent for now; they will be bent/twisted as needed to fit.
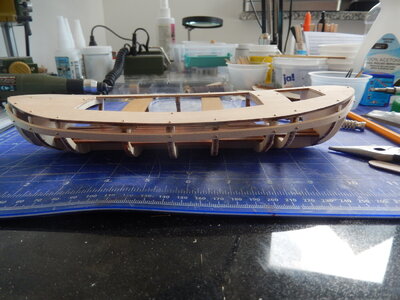
View attachment 311176View attachment 311177View attachment 311178View attachment 311179

The strakes are glued on and held in place with nails. I have a 0.5 mm drill bit with a large diameter shaft for my Proxxon drill but that size is just a hair too small for the nails. 0.6 mm works better but the drill chuck won’t hold them. So I initially drill the nail holes with the Proxxon and 0.5 mm bit; then I use the spring operated twist drill and 0.6 mm bit to enlarge them just enough so the nails can be pushed in without difficulty. When I bought that twist drill I wasn’t sure if I’d have a need for it; it just seemed like a nice tool to have in my tool box. Is has proven itself so I’m glad I purchased it.
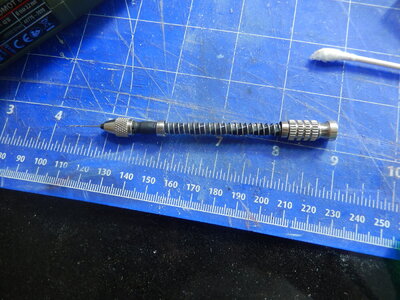
View attachment 311180

Will try and post more often as this build progresses.
View attachment 311172
Hallo @JohnR
we wish you all the BEST and a HAPPY BIRTHDAY
Birthday-Cake
 
20220822

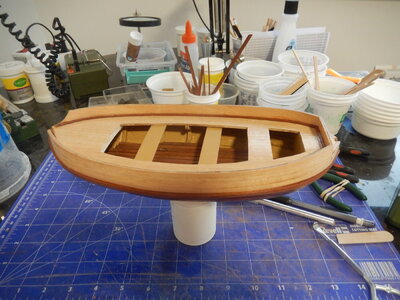
Rubbing strakes, interior stringers, keel and stabilizers all done.

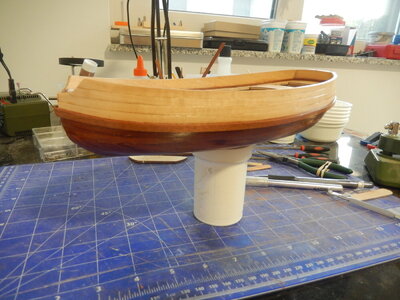
It doesn’t sound like a whole lot of work but one decision made me really take my time – not painting the hull but using a clear finish. This meant that the keel and stabilizers were going to be stained to match the bottom of the hull; always interesting when working with plywood pieces. I had some teak stain I bought for an earlier project and testing on a scrap of the ply showed that the color was close enough to the natural color of the sapelli used for the bottom of the hull.

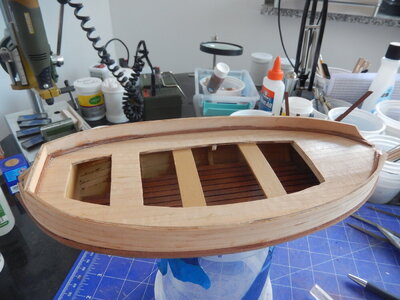
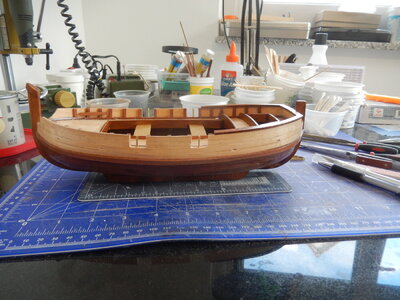
The rubbing strakes, being pretty thick (2mm) were a pain to bend but soaking, clamping to the edge of my round work table and then doing the final bending with a hot curling iron seemed to do the trick – along with patience and CA. The interior stringers, being much smaller in dimension, were considerably easier. Both sets of boards were sapelli so no need to stain them. Once they were installed I coated the hull (inside/outside upper & lower) with 2 coats of a clear finish.

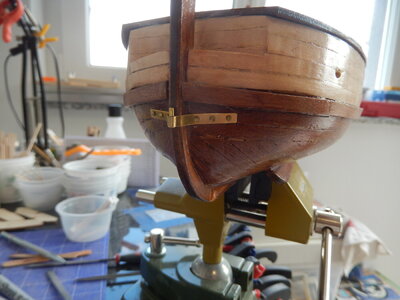
Moving on to the keel things were looking like smooth sailing (excuse the pun). The keel was in 3 pieces with pre-cut scarf joints; what could be difficult? I positioned the bow portion, glued it in place and moved on to the center section. The minor gap at the scarf joint was filled and sanded down. Moving on the stern section I noticed that the piece was too short to join up with the center section – by about 2mm. At first I was going to cut a whole new stern section but to do so I was going to have to glue two scrab boards together to have a large enough piece to use for a blank. Back to thinking about it and I decided to cut a new section ending in a scarf joint and then join it to the piece that came with the kit by cutting both and joining them with a butt joint. Glued everything up, add a bit of filler and sanded it down – all looked good. Some stain and 2 coats of clear finish - the keel was complete.

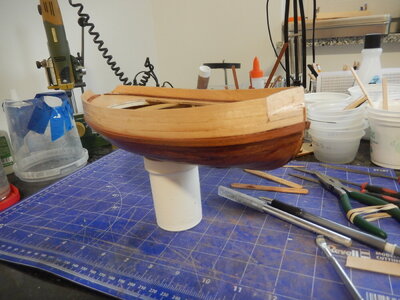
The stabilizers that came with the kit needed to be modified to fit the actual hull shape on my boat. A little bit of carving, a lot of sanding, the liberal use of filler after gluing them in place, followed by more sanding – both looked OK. Stained and finished both.

Overall, I’m happy with the way the boat looks. Still lots of details to go; will start on that later this week.

DSCN8667.JPGDSCN8669.JPGDSCN8670.JPGDSCN8671.JPGDSCN8672.JPGDSCN8673.JPGDSCN8675.JPGDSCN8676.JPG
 
20220904

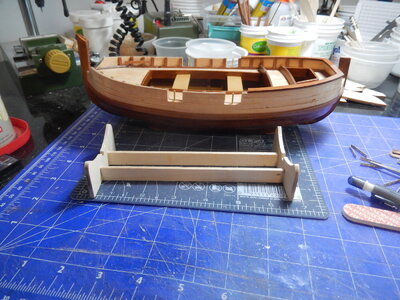
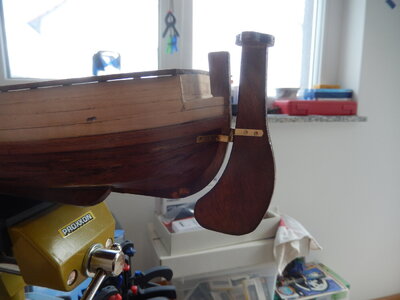
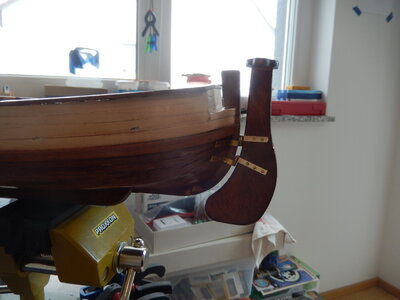
Futtocks, interior dividers, aft gunwales, oar locks, bow finials installed; scuppers cut through the sides (the starboard aft was the first one cut; I did it from the outside – cut the rest from the inside). While waiting for finish to dry I constructed a display stand. Soldered the pins to the rudder hinges that attach to the boat. Attached the tiller to the rudder and then attached the hinges to the rudder and the stern. The boat is steered by means of ropes attached to the tiller so those were added next.

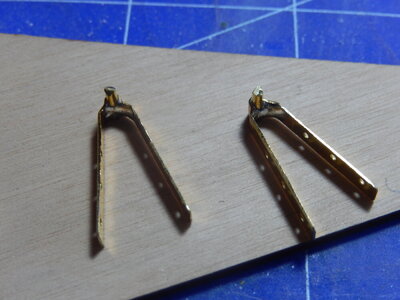
The anchor was next up and was a bit of a disaster. The kit came with 4 metal flukes to be glued to a central brass rod. Before I could even start trying to glue things together I dropped one of the flukes – it broke in two pieces. Not a big deal; I’ll just make a 3-fluke anchor. I broke a 2nd fluke trying to adjust it while the glue was drying (twisted it a bit too much for the pot metal to handle). I decided to solder the flukes to the brass shaft; no good as I couldn’t hold the pieces in place. Scrapped what came with the kit and decided to make an anchor from left over brass rod, soldering the bits together. Not great, in fact down right ugly. It will do until I can get to the local model shop and see if they have a 3-fluke anchor of the right size – if not, back to the drawing board. The oar rack arms are the same metal as the flukes; will have to be careful mounting them to the boat.

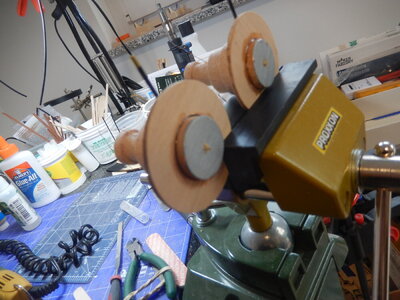
Have the oars & floats to do next but the biggest challenge coming up will be modifying the gas cylinder that came with the boat (pre-formed wood; looks like an old milk jug) to hold a couple of small button batteries and an on/off switch for the 3 lights. Will need to modify the lamp holders as well to hold the LEDs I have.

I won’t be posting for a couple of weeks as work has me on the road. Can see the finish line; just need the time to get there.

DSCN8677.JPGDSCN8679.JPGDSCN8684.JPGDSCN8686.JPGDSCN8687.JPGDSCN8688.JPGDSCN8689.JPGDSCN8690.JPGDSCN8691.JPGDSCN8693.JPGDSCN8694.JPG
 
20220904


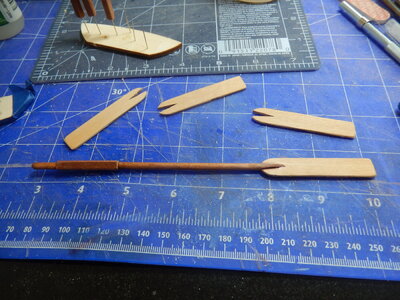
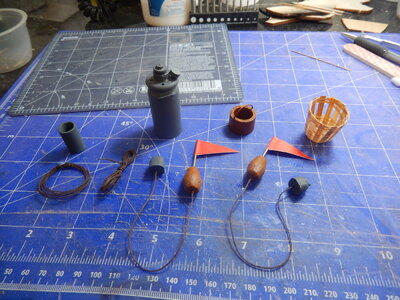
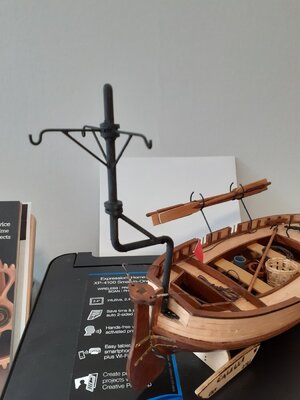
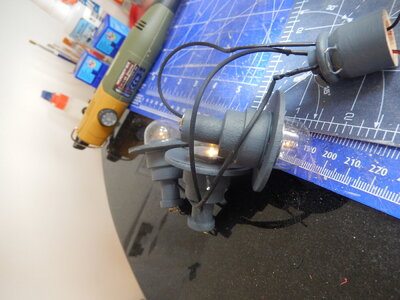
Spent this rainy weekend working on accessories and preparing the boat to carry LED lanterns. Have all of the accessories (oars, boat hook, bucket, basket, bait pail, buoys with flags, ropes and gas canister) completed. The pole for holding the lanterns is installed and the lanterns have been assembled (all but the globes).

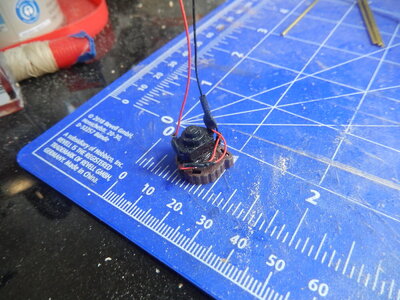
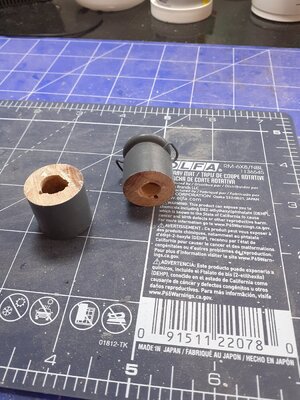
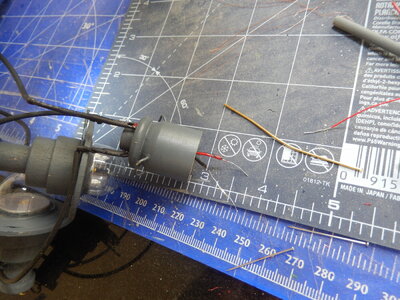
For the electrification I decided to get some pico sized flickering LEDs from Evans instead of using ones already in my parts box. Going this route saved me having to add a resistor to each LED and will allow the lanterns to run on 3 vDC instead of a higher voltage. I also purchased a small 3 vDC button battery holder and a push-button micro switch. The battery holder came with an attached slide switch which I replaced with the push-button micro switch. I hollowed out the gas canister so that the battery holder & switch assembly fit inside with the push-button facing the top of the canister. I cut the top of the canister off, drilled through to the interior of the canister, and glued the top to a length of dowel which when everything is reassembled will rest on top of the push-button. The lights can now be turned on/off by pushing on the top of the gas canister. The flickering effect of the LEDs should effectively mimic gas lanterns.

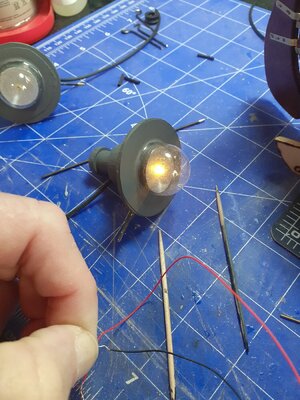
I have the LEDs installed and the wires run through the lanterns; all LEDs have been op checked and work. Next weekend I’ll complete the electrical assembly by running the LED wires to the gas canister through the gas tubing supplied with the kit and then hooking the LED wires to the power leads. (The construction dust showing on the battery holder will be gone by then.)

Only a few more hours of work and the Calella will be complete.
DSCN8695.JPGDSCN8697.JPGDSCN8698.JPGDSCN8700.JPGDSCN8701.JPGDSCN8702.JPGDSCN8704.JPGDSCN8707.JPGDSCN8705.JPGDSCN8706.JPG
 
20221002

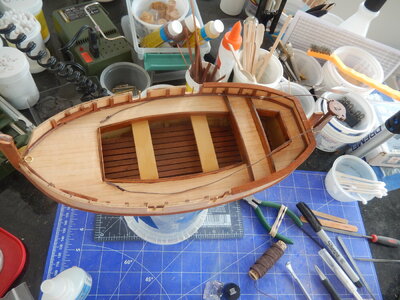
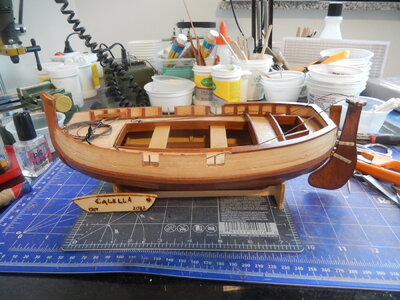
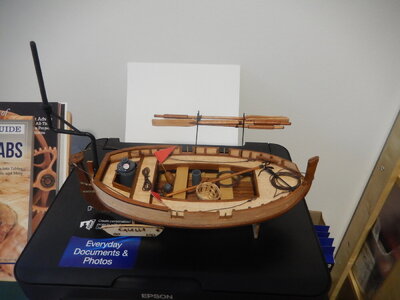
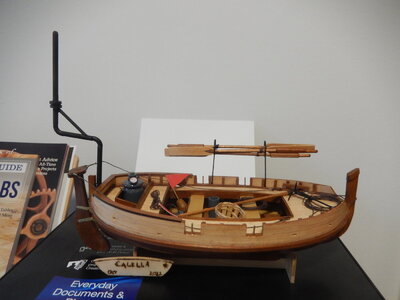
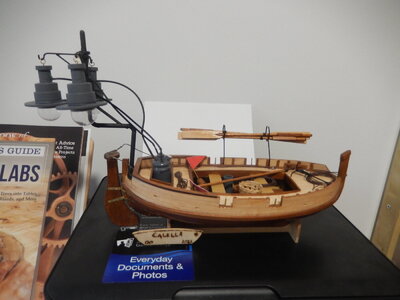
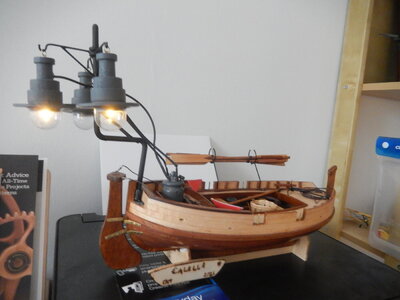
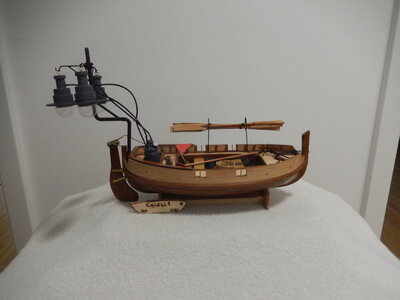
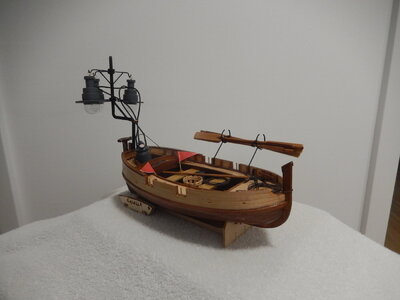
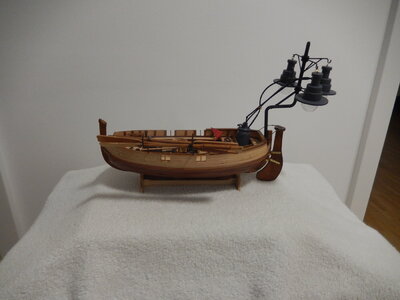
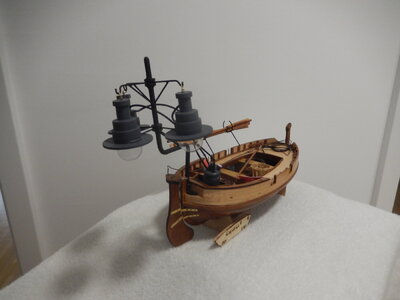
The Calella is finished.

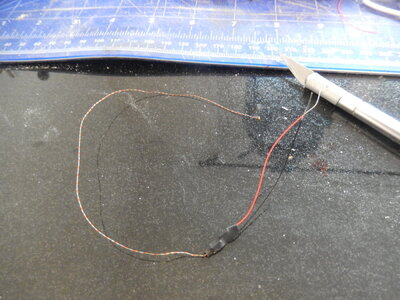
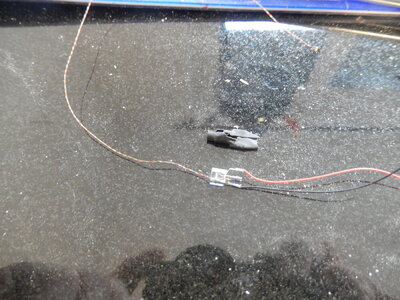
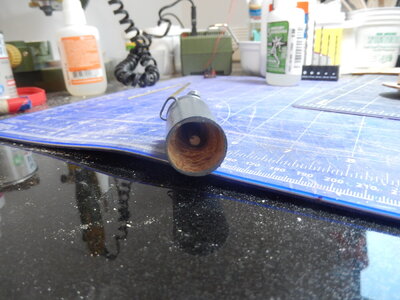
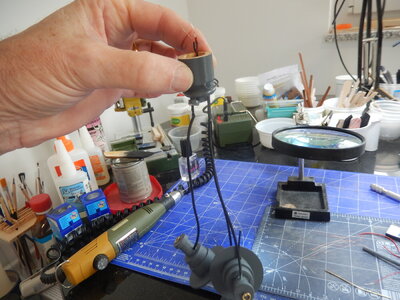
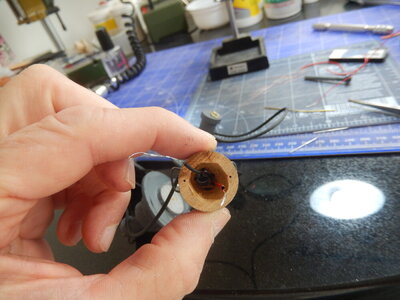
To make the wiring a bit easier the gas canister was cut into 2 parts and the interior was hollowed out more (when reassembled and glued together, some paint will help hide the separation). While running the thin LED wires into the interior of the gas cylinder I managed to break a couple; repaired them by soldering on some thin wires removed from a stranded piece of electronics wire. Glad I had a small battery-operated soldering iron for making the connections & some small diameter shrink tubing to keep the negative and positive wires separated. (The LED wires are shellac/lacquer coated for insulation. The portions of the thin extension wires that were not covered by shrink tubing were coated with clear nail polish and then red or black paint for insulation purposes.) The lights were checked at each step to make sure they worked.

My attempt to make a plunger from the top of the gas cylinder to operate the micro push button switch didn’t work correctly; the wires took up too much room inside the gas cylinder and the plunger would not work smoothly. I removed the plunger extension, glued the top back on the gas cylinder and am operating the push button switch by hand and then placing the battery holder/switch assembly into the bottom of the gas cylinder so it is hidden from view.

In the end, somehow, I managed to only have 2 of the 3 lanterns working. I suspect that I may have broken the positive lead wire on the 3rd lantern when I pushed the wires into the inside of the gas cylinder and glued the halves together. I’ve decided that I’ll look at it sometime in the future to get all 3 lanterns operational again.

This has been an entertaining build. I’m happy I decided to electrify the lanterns (even if one is not currently working). As for what is next, I have 3 sitting on the shelf ready to be started (1:24 pinnace; SBD dive bomber; Mercedes in-line WWI airplane engine). I think I’ll do the Mercedes engine next; that will complete the set of 3 WWI aero engines. First, however, is finishing the display case for the Wright Flyer.

20221002_102245.jpg20221002_115144.jpg20221002_115639.jpgDSCN8708.JPGDSCN8709.JPGDSCN8710.JPGDSCN8711.JPGDSCN8714.JPGDSCN8715.JPGDSCN8716.JPGDSCN8717.JPGDSCN8718.JPGDSCN8719.JPGDSCN8720.JPG
 
My congratulations for finishing this very special model
Well done my friend :cool:
 
Back
Top