Cazador Xebec 1750 - OcCre - scale 1:60 [COMPLETED BUILD]

I really like this ship! It was fun to build, and Occre has good instructions. Especially the rigging instructions, which is rare!
And the nice thing about this ship, is there are so many color variations and woods you could go with, the possibilities are endless. I like everything you have done so far. Keep up the great work! ;)
 
Hello everybody!

This weekend was a nice productive weekend for modeling. I had some spare hours to work on Cazador and particularly the 2nd planking on port side and I can say that the hull is finished. Planking is done. A milestone in every build I must say. :)
Let me show you the process...

I start off with the same way of working I did on SB. Because this is a veneer, I can do it this way, say SB first and later Port. Do not try this way on a single planked hull because it will warp the keel / hull.

I cover the first section with veneer strips. Each and every strip has been tapered to reduce the width along the length of every strip. It's a droughting task and you need to approach it with perseverance and endure the "long" run. It's not easy so to say, and the bigger the ship, the longer this process will take.

View attachment 269584

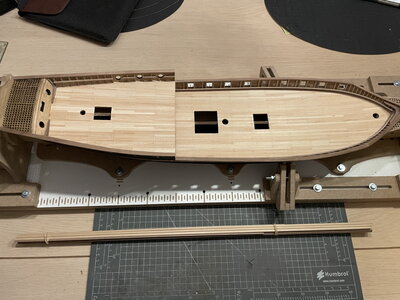
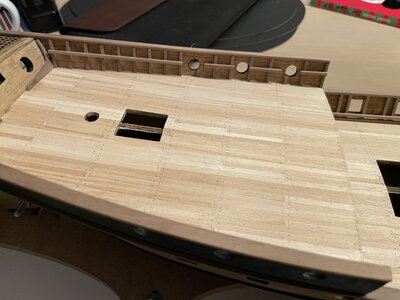
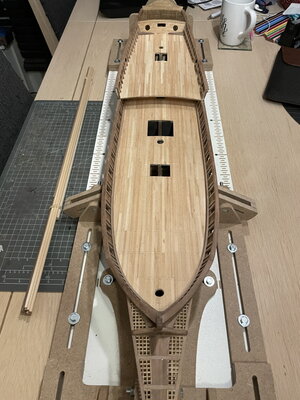
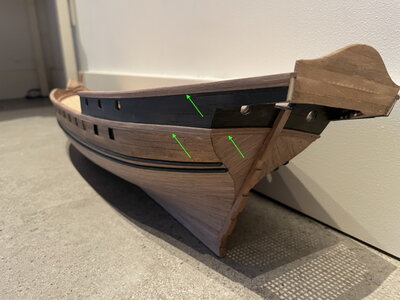
I always, and I mean always check the running of a strake after every strip of veneer. It must have a nice curved line and to do that, I look from port to stern and vise versa. See the pictures below that gives a nice view on the strakes. No lumps or bumps, just a clean line that should be parallel to the green line. Just to give you a bit of an insight of my way of work. ;)

View attachment 269585View attachment 269586

Continue with the planking job and filling up the other sections the same way.

View attachment 269587

View attachment 269588View attachment 269589View attachment 269590

So the last board is the garboard plank. Again I recommend normally to place the garboard plank as the first plank due to the rabbet line. However I'm using veneer strips and these can be placed easily. So I decided to use the garboard plank as my "whisky / whiskey plank" during this process and place it at the end.

View attachment 269591View attachment 269592View attachment 269593View attachment 269594
View attachment 269595

I'm pretty pleased how it turned out. I'll just quote Forrest "It's like a box of chocolates, you never know what you're gonna get" :)
So, hull closed, in some time later I will seal and finish it with Danish Oil. One of my favorites.
I also stained the outer and inner bulwarks with an medium oak color. It give the wood a more "authentic" look. It was a first time try and I like it so far.

Next I did find some time to work on the stern and replace the plywood stern and made a new one from some strips of wood.

View attachment 269596View attachment 269597

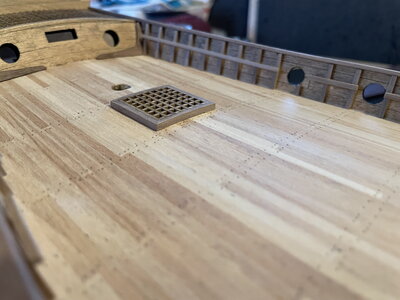
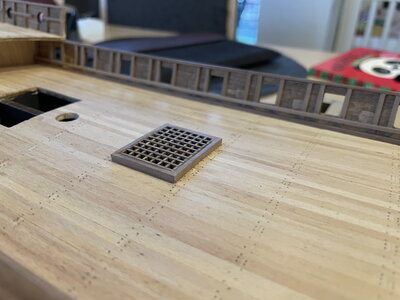
Placed it on the ship including the gratings at the stern. Bit of a thing, I wanted the gratings to curve a bit. It's not "normal" wood very dense and hard and tough to work with. However I did find a way to sand a bt of a curve into it. The top railings have to be placed later on and will cover the small gap on the side of the gratings. So no worries.

View attachment 269598

If you have any questions, likes or comments, please leave a reply and I'll get back on it as soon as possible.

And that's it. Until next time,
Peter
What a magnificent work of "over-planking" with perfect edge matching. Joy to behold. Keep going . . . as it is said" it is too late to stop now!" Rich (PT-2)
 
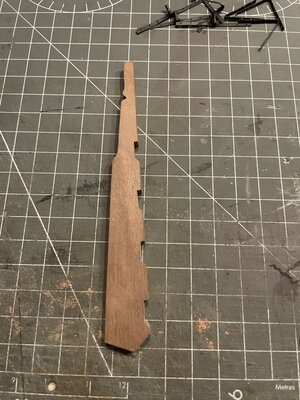
I've used a scroll saw to cut out the parts.

View attachment 268009View attachment 268010View attachment 268011

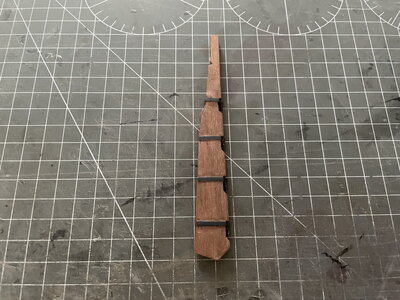
Assembly of the stem parts.
Hello everybody!

This weekend was a nice productive weekend for modeling. I had some spare hours to work on Cazador and particularly the 2nd planking on port side and I can say that the hull is finished. Planking is done. A milestone in every build I must say. :)
Let me show you the process...

I start off with the same way of working I did on SB. Because this is a veneer, I can do it this way, say SB first and later Port. Do not try this way on a single planked hull because it will warp the keel / hull.

I cover the first section with veneer strips. Each and every strip has been tapered to reduce the width along the length of every strip. It's a droughting task and you need to approach it with perseverance and endure the "long" run. It's not easy so to say, and the bigger the ship, the longer this process will take.

View attachment 269584

I always, and I mean always check the running of a strake after every strip of veneer. It must have a nice curved line and to do that, I look from port to stern and vise versa. See the pictures below that gives a nice view on the strakes. No lumps or bumps, just a clean line that should be parallel to the green line. Just to give you a bit of an insight of my way of work. ;)

View attachment 269585View attachment 269586

Continue with the planking job and filling up the other sections the same way.

View attachment 269587

View attachment 269588View attachment 269589View attachment 269590

So the last board is the garboard plank. Again I recommend normally to place the garboard plank as the first plank due to the rabbet line. However I'm using veneer strips and these can be placed easily. So I decided to use the garboard plank as my "whisky / whiskey plank" during this process and place it at the end.

View attachment 269591View attachment 269592View attachment 269593View attachment 269594
View attachment 269595

I'm pretty pleased how it turned out. I'll just quote Forrest "It's like a box of chocolates, you never know what you're gonna get" :)
So, hull closed, in some time later I will seal and finish it with Danish Oil. One of my favorites.
I also stained the outer and inner bulwarks with an medium oak color. It give the wood a more "authentic" look. It was a first time try and I like it so far.

Next I did find some time to work on the stern and replace the plywood stern and made a new one from some strips of wood.

View attachment 269596View attachment 269597

Placed it on the ship including the gratings at the stern. Bit of a thing, I wanted the gratings to curve a bit. It's not "normal" wood very dense and hard and tough to work with. However I did find a way to sand a bt of a curve into it. The top railings have to be placed later on and will cover the small gap on the side of the gratings. So no worries.

View attachment 269598

If you have any questions, likes or comments, please leave a reply and I'll get back on it as soon as possible.

And that's it. Until next time,
Peter
Magnificent Peter.
 
Hi guys,

I can show you only some results and not the process. I just forget to take pictures in between. It was a race against the clock, due to the immense exiting Formula 1 weekend. As a huge fan, this was the most exiting race of the whole season. We have a new world champion and what a race it was.

To the ship,

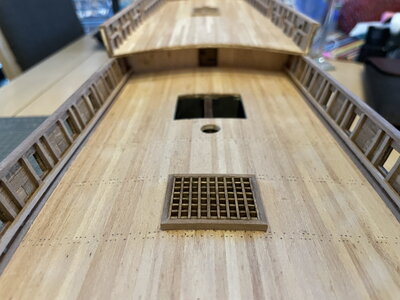
I placed the top railings (solid walnut again) and some gratings. It's fun working on her and see her grow under my hands. The gratings have a subtle curve just like the curve of the deck. What do you think?

Cazador_145.jpgCazador_146.jpgCazador_147.jpgCazador_148.jpgCazador_149.jpgCazador_150.jpg

After this, I made a start with the rudder and the hinges. I used the hinges that came with the kit, but made them smaller and altered the shape.

Cazador_151.jpgCazador_152.jpg

The last picture is the rudder I make out of solid walnut.

Cazador_153.jpg

Until the next one,
Pter
 
Hi guys,

I can show you only some results and not the process. I just forget to take pictures in between. It was a race against the clock, due to the immense exiting Formula 1 weekend. As a huge fan, this was the most exiting race of the whole season. We have a new world champion and what a race it was.

To the ship,

I placed the top railings (solid walnut again) and some gratings. It's fun working on her and see her grow under my hands. The gratings have a subtle curve just like the curve of the deck. What do you think?

View attachment 275226View attachment 275227View attachment 275228View attachment 275229View attachment 275230View attachment 275231

After this, I made a start with the rudder and the hinges. I used the hinges that came with the kit, but made them smaller and altered the shape.

View attachment 275232View attachment 275233

The last picture is the rudder I make out of solid walnut.

View attachment 275234

Until the next one,
Pter
You are producing very clean and well set work. It looks like it will be a work to be proud of. Rich (PT-2)
 
Your gratings look superb - just like the rest of the build. WOW - what about that race! I don't have VPN so I cannot watch F1, but I follow all the live updates from Skysports! With 10 laps to go, I thought it was all over for Max - it just shows you - never give up!
 
I'm really enjoying viewing your build Pter! The walnut is beautiful!
Thank you Daniël, I'm glad you like it. I'm also happy to choose the walnut instead of the Sapeli and plywood. It was a bit of a gamble, but I think it will improve the overall looks of the model, or so I hope. There is more to come, she is far from completed, so stay tuned. :)
 
As I have said before, you are doing a great job Pter! And I really enjoy seeing each persons version of the same ship. We all start with the same kit, yet no two builds are identical! And I am glad the Cazador is becoming more popular, as I think it's a beautiful ship! And you are proving that with your version! Keep up the good work! ;)
 
Finishing the rudder

Hello everybody,
Not much work has been done on the shipyard, these are busy times so to say. I would like to show you the finished work on the rudder. Some minor adjustments and cleanup work need to be done, but overall, the hinges are placed.

Cazador_154.jpg

My next step would be to place the hinges on the schip's hull. I'll come to that in another update.
In the mean time I had an Idea for the hinges of the oarlids. The kit instructions shown some simple hinges made out of 1mm brass round bar.
I wanted to change these into something else I've seen on a French Xebec.

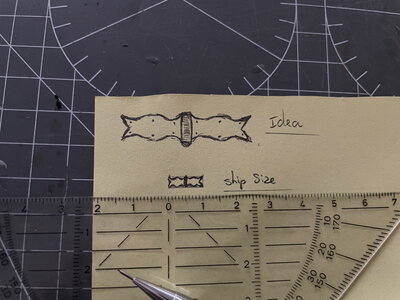
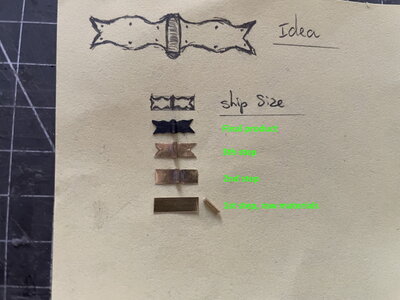
First I put my idea on paper and put it down to scale...

Cazador_155.jpg

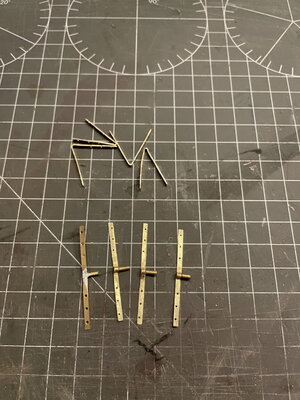
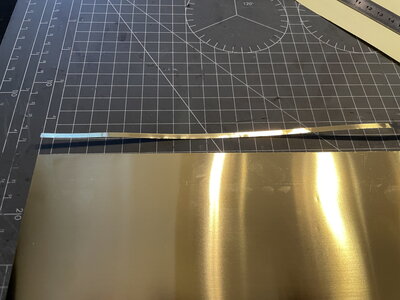
Then I took some 0.12mm brass sheet and cut a strip of 3mm width off.

Cazador_156.jpg

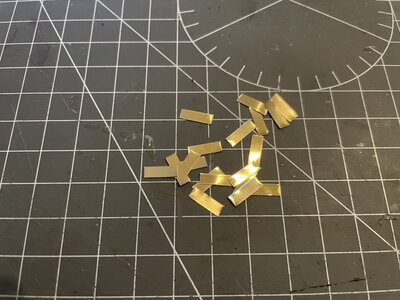
Cut the strip into small pieces of 1cm / 10mm.

Cazador_157.jpg

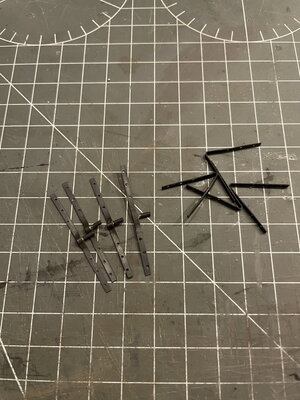
Next the process of getting it into the final product.

Cazador_158.jpg

So, now I need to make 18 of these hinges. Hopefully in my next update I can show all 18 on the ship including the rudder placed at the stern.

See you later and for all my viewers, have a wonderfull Christmas time and thank you for all your support, likes, loves, reactions and more!

Pter
 
Wonderful hinges Peter! I can only stand amazed at this level of artistry on such a small scale. I would not even know where to begin with. I wish you and your family a blessed Christmas and a 2022 full of health.
 
Finishing the rudder

Hello everybody,
Not much work has been done on the shipyard, these are busy times so to say. I would like to show you the finished work on the rudder. Some minor adjustments and cleanup work need to be done, but overall, the hinges are placed.

View attachment 277317

My next step would be to place the hinges on the schip's hull. I'll come to that in another update.
In the mean time I had an Idea for the hinges of the oarlids. The kit instructions shown some simple hinges made out of 1mm brass round bar.
I wanted to change these into something else I've seen on a French Xebec.

First I put my idea on paper and put it down to scale...

View attachment 277318

Then I took some 0.12mm brass sheet and cut a strip of 3mm width off.

View attachment 277319

Cut the strip into small pieces of 1cm / 10mm.

View attachment 277320

Next the process of getting it into the final product.

View attachment 277321

So, now I need to make 18 of these hinges. Hopefully in my next update I can show all 18 on the ship including the rudder placed at the stern.

See you later and for all my viewers, have a wonderfull Christmas time and thank you for all your support, likes, loves, reactions and more!

Pter
Very nicely cut and filed to shape . Rich (PT-2)
 
Finishing the rudder

Hello everybody,
Not much work has been done on the shipyard, these are busy times so to say. I would like to show you the finished work on the rudder. Some minor adjustments and cleanup work need to be done, but overall, the hinges are placed.

View attachment 277317

My next step would be to place the hinges on the schip's hull. I'll come to that in another update.
In the mean time I had an Idea for the hinges of the oarlids. The kit instructions shown some simple hinges made out of 1mm brass round bar.
I wanted to change these into something else I've seen on a French Xebec.

First I put my idea on paper and put it down to scale...

View attachment 277318

Then I took some 0.12mm brass sheet and cut a strip of 3mm width off.

View attachment 277319

Cut the strip into small pieces of 1cm / 10mm.

View attachment 277320

Next the process of getting it into the final product.

View attachment 277321

So, now I need to make 18 of these hinges. Hopefully in my next update I can show all 18 on the ship including the rudder placed at the stern.

See you later and for all my viewers, have a wonderfull Christmas time and thank you for all your support, likes, loves, reactions and more!

Pter
Annealed first? Just wondering....
 
Finishing the rudder

Hello everybody,
Not much work has been done on the shipyard, these are busy times so to say. I would like to show you the finished work on the rudder. Some minor adjustments and cleanup work need to be done, but overall, the hinges are placed.

View attachment 277317

My next step would be to place the hinges on the schip's hull. I'll come to that in another update.
In the mean time I had an Idea for the hinges of the oarlids. The kit instructions shown some simple hinges made out of 1mm brass round bar.
I wanted to change these into something else I've seen on a French Xebec.

First I put my idea on paper and put it down to scale...

View attachment 277318

Then I took some 0.12mm brass sheet and cut a strip of 3mm width off.

View attachment 277319

Cut the strip into small pieces of 1cm / 10mm.

View attachment 277320

Next the process of getting it into the final product.

View attachment 277321

So, now I need to make 18 of these hinges. Hopefully in my next update I can show all 18 on the ship including the rudder placed at the stern.

See you later and for all my viewers, have a wonderfull Christmas time and thank you for all your support, likes, loves, reactions and more!

Pter
Those hinges look fantastic! I love them, look forward to seeing them on the ship! ;)
 
Hi Guys,

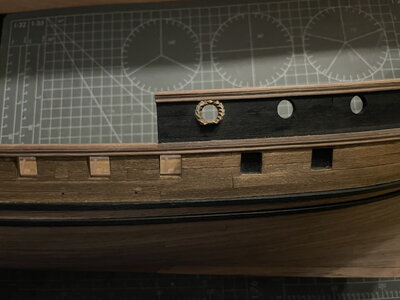
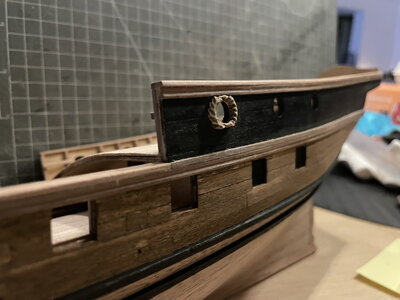
Just before Christmas eve, I would like to show you a little bit of progress. I was just experimenting a bit.
I've really stretched my abilities for this one, hope you like it.

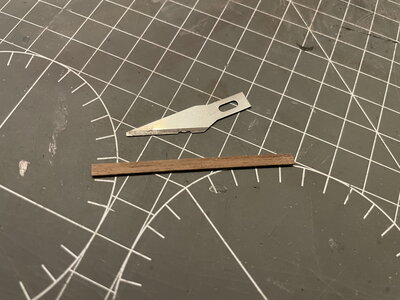
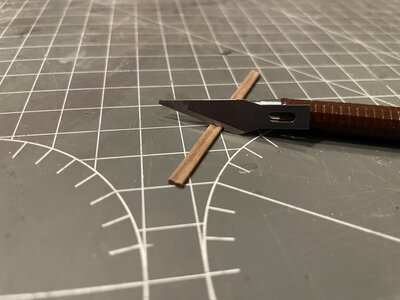
Below a strip of walnut of 1x3mm and a dull blade. I made a profile in the knife and used it on the walnut.

Cazador_159.jpgCazador_160.jpgCazador_161.jpg

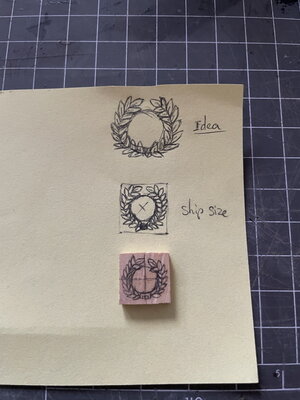
Next I took the time to experiment a little bit with woodcarving. Only the size is so very small, it's hard to do.
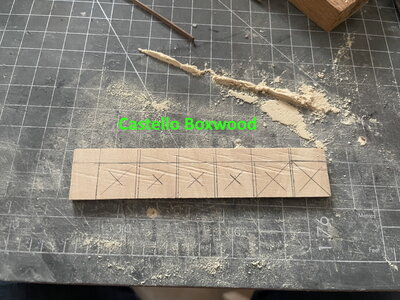
I've collected some Castello Boxwood, unfortunately real boxwood isn't available in my area. real boxwood is much harder and better to carve is my opinion, but Castello is a nice alternative.

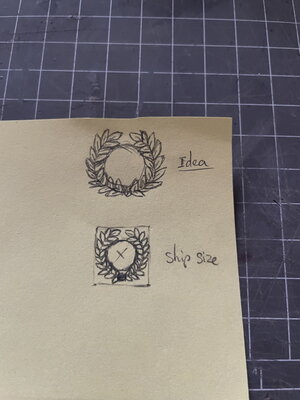
First I made a rough sketch of my idea and put it on paper...

Cazador_162.jpg

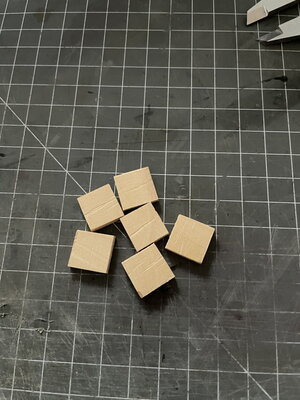
After that I took some Castello.....

Cazador_163.jpg

Cazador_164.jpg

Cazador_165.jpg

Cazador_166.jpgCazador_167.jpg

Have a very nice Christmas everybody!

CU,
Pter
 
Back
Top