Wow Pete really impressive work on your carvings.
You are using an out of date browser. It may not display this or other websites correctly.
You should upgrade or use an alternative browser.
You should upgrade or use an alternative browser.
Cazador Xebec 1750 - OcCre - scale 1:60 [COMPLETED BUILD]
- Joined
- Oct 11, 2021
- Messages
- 710
- Points
- 403

Guys, what can I say with all the likes, loves and comments. Thank you for all your support!! 
As mentioned in the topic of @BenD Ropes of Scale I've ordered new high quality rope for my Xebec. I figured out that all the changes I've made to this model so far and will do in the near future, only high qyality ropes will do the model justice. I'm not in the position to make good quality rope myself at this moment and I found in "ropes of scale" a perfect alternative to reach my goal. I must say to you, it's more than I asked for. By this I mean the quality of the ropes itself as well as the service provided by BenD.
So, I've ordered cotton ropes & cable because that's what's been offered, but Ben asked me if I would like to upgrade it to poly rope & cable for free. Polyester rope will last longer and does not have any fussiness, so for me this was a no brainer at all. Ben made all the ropes for me and send it overseas within a few days. Before I even received the package, Ben mentioned the color of the "dark brown" I've ordered. His opinion was that the color was a bit too dark, almost black (I did not wanted black) and suggested to send me a new batch with a lighter color for free. Now, I'm in the "providing service" business myself and this is more than I could wish and ask for as a customer! Excellent service!!
When received both packages, I was more than pleased, more ecstatic about the quality. The tightness and overall quality of the ropes & cable is just mindboggling.
He was right about the color of the dark brown. The second package was more in my perception of "dark brown" what I was looking for. But this is a matter of opinion. Both types of dark brown ropes looks amazing!
Here's some pictures of the ordered ropes & cable and if you want to upgrade your ropes on your model? Try BenD's for a change and visit his website ropes of scale and be amazed of the quality and service. I will order again, that's for sure!
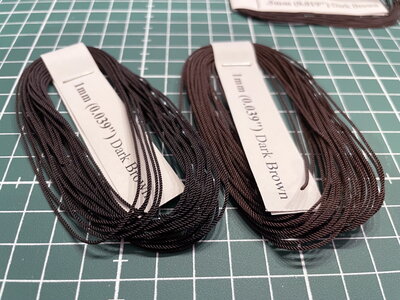
On the left the first "dark brown" which is almost black and looks like tarred ropes which is really nice! On the right the lighter shade of color I was looking for and I will use on my ship!
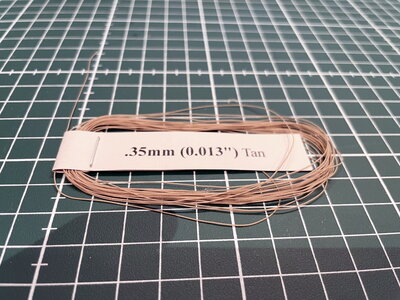
Even the smallest of threat is of outstanding quality! It's hard to do it justice on the photo...
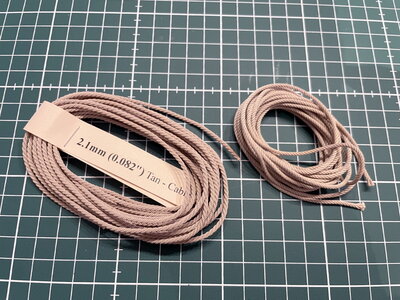
On the left one of the cable made by Ben. On the right a very good quality cable I had made of cotton. You can see the difference is tightness and do love the poly cable over the cotton one but that's a matter of opinion because both are of excellent quality.
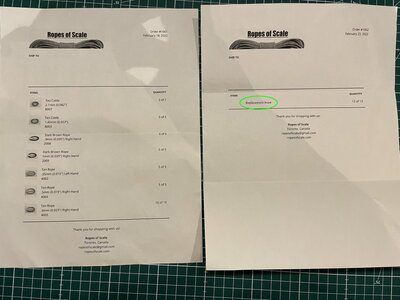
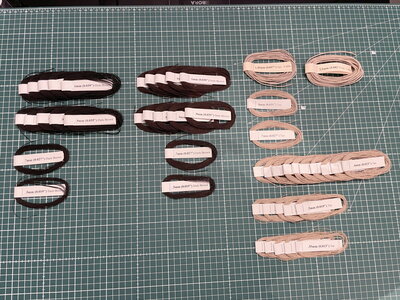
Well as I said, it's very hard to do the ropes justice on the photo's. It will do so much for my Xebec that I can hardly wait to see how they look on the ship. However, I'm not there yet to start on rigging the ship, so until then I'll keep them in a very safe place.
To be continued.
Pete
As mentioned in the topic of @BenD Ropes of Scale I've ordered new high quality rope for my Xebec. I figured out that all the changes I've made to this model so far and will do in the near future, only high qyality ropes will do the model justice. I'm not in the position to make good quality rope myself at this moment and I found in "ropes of scale" a perfect alternative to reach my goal. I must say to you, it's more than I asked for. By this I mean the quality of the ropes itself as well as the service provided by BenD.
So, I've ordered cotton ropes & cable because that's what's been offered, but Ben asked me if I would like to upgrade it to poly rope & cable for free. Polyester rope will last longer and does not have any fussiness, so for me this was a no brainer at all. Ben made all the ropes for me and send it overseas within a few days. Before I even received the package, Ben mentioned the color of the "dark brown" I've ordered. His opinion was that the color was a bit too dark, almost black (I did not wanted black) and suggested to send me a new batch with a lighter color for free. Now, I'm in the "providing service" business myself and this is more than I could wish and ask for as a customer! Excellent service!!
When received both packages, I was more than pleased, more ecstatic about the quality. The tightness and overall quality of the ropes & cable is just mindboggling.
He was right about the color of the dark brown. The second package was more in my perception of "dark brown" what I was looking for. But this is a matter of opinion. Both types of dark brown ropes looks amazing!
Here's some pictures of the ordered ropes & cable and if you want to upgrade your ropes on your model? Try BenD's for a change and visit his website ropes of scale and be amazed of the quality and service. I will order again, that's for sure!

On the left the first "dark brown" which is almost black and looks like tarred ropes which is really nice! On the right the lighter shade of color I was looking for and I will use on my ship!

Even the smallest of threat is of outstanding quality! It's hard to do it justice on the photo...

On the left one of the cable made by Ben. On the right a very good quality cable I had made of cotton. You can see the difference is tightness and do love the poly cable over the cotton one but that's a matter of opinion because both are of excellent quality.


Well as I said, it's very hard to do the ropes justice on the photo's. It will do so much for my Xebec that I can hardly wait to see how they look on the ship. However, I'm not there yet to start on rigging the ship, so until then I'll keep them in a very safe place.
To be continued.
Pete
- Joined
- Oct 11, 2021
- Messages
- 710
- Points
- 403

Hello my fellow modelers,
It's been several weeks since my last update on Cazador. Well, sometimes work and family takes up all my time and so the ship had to wait.
However, I found some spare minutes last week and made some progress on Cazador. Unfortunately I didn't have enough time to shoot pictures of the building process and for that I'm sorry. Next time I'll keep in mind that the creative fabrication process is one of the most appealing things to watch.
The things I've done so far is remodeling the part where the rudder meets the hull. The kit had it wrong so I needed to correct this before attaching the rudder to the ship. I replaced the plywood with walnut and copied the original piece with these "notches". I removed the wood between the notches and placed a solid walnut piece in between. Much better if I may say so....
Also carved some more items and placed these on the stern of the ship.
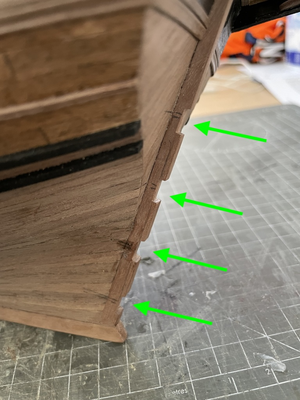
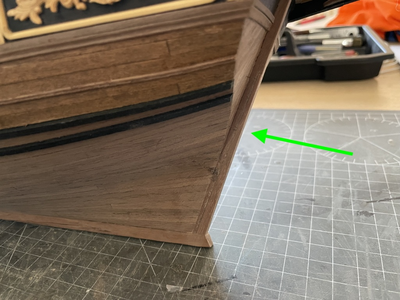
After this I attached the rudder and finally applied the Danish Oil on the outside of the hull and the inside of the bulwarks. Time to pop the texture of the wood out. I love this moment!
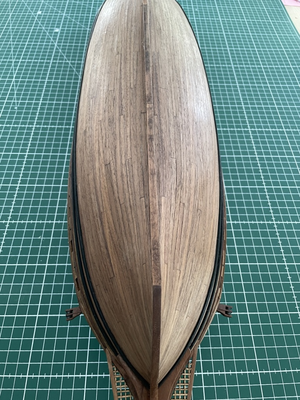
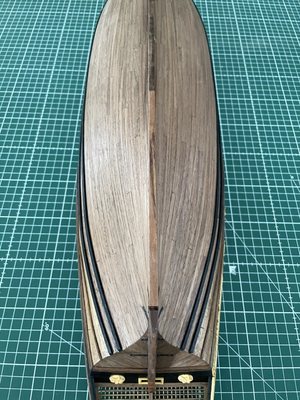
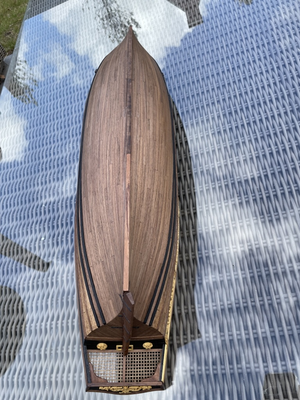
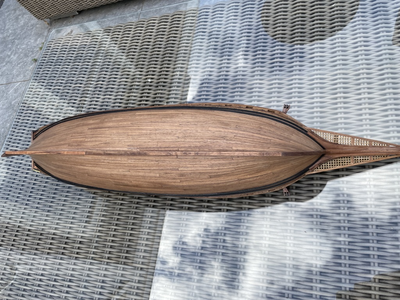
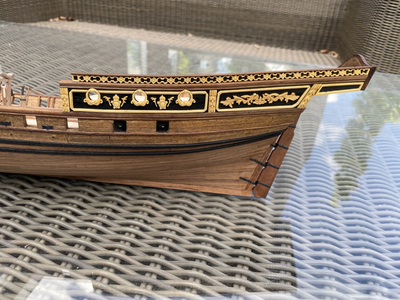
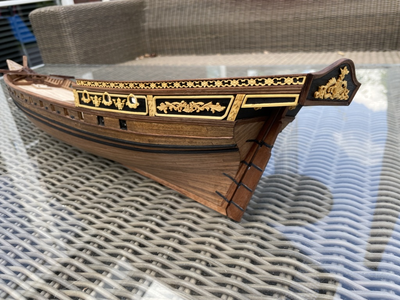
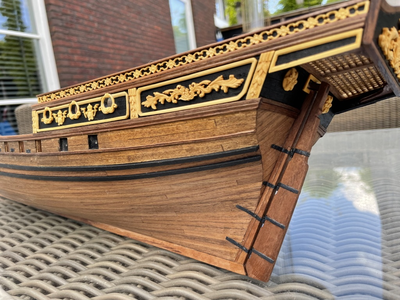

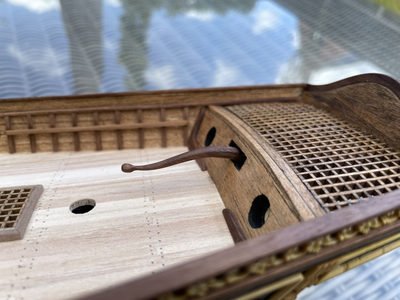
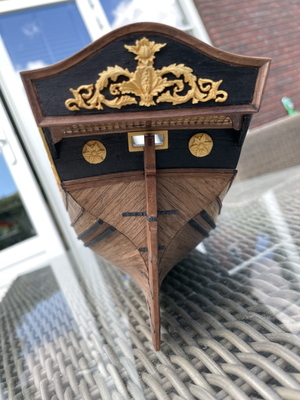
I hope you guys like the progress, next time I'll make some photo's of the fabrication process, promise!
Cheers!
Pete
It's been several weeks since my last update on Cazador. Well, sometimes work and family takes up all my time and so the ship had to wait.
However, I found some spare minutes last week and made some progress on Cazador. Unfortunately I didn't have enough time to shoot pictures of the building process and for that I'm sorry. Next time I'll keep in mind that the creative fabrication process is one of the most appealing things to watch.
The things I've done so far is remodeling the part where the rudder meets the hull. The kit had it wrong so I needed to correct this before attaching the rudder to the ship. I replaced the plywood with walnut and copied the original piece with these "notches". I removed the wood between the notches and placed a solid walnut piece in between. Much better if I may say so....
Also carved some more items and placed these on the stern of the ship.


After this I attached the rudder and finally applied the Danish Oil on the outside of the hull and the inside of the bulwarks. Time to pop the texture of the wood out. I love this moment!


I hope you guys like the progress, next time I'll make some photo's of the fabrication process, promise!
Cheers!
Pete
... and I love your planking and carving! I like the way you work, accuracy, and sound!
Beautiful work Peter! Love the carvings! 
Ptèr,
Congratulations for the work and thanks for sharing with us.
I have a question, in how many parts are made the frames around the carved pieces placed on the port side ?
Congratulations for the work and thanks for sharing with us.
I have a question, in how many parts are made the frames around the carved pieces placed on the port side ?
- Joined
- Oct 11, 2021
- Messages
- 710
- Points
- 403

Hello Guys, thanks for the cheers!! Appreciated very much!
@Steef66 Thanks for cheering twice
@Jimsky Thanks for following and your appreciation of my work.
@shota70 Thank you!
@Heinrich, much appreciated and your WB is fantastic
@Dean62, Thank you my friend, love your flying models as well, but glad you are working again on NL!
@Luiz B. F. Grassi, I made the frame out of one piece. It's so small, so to prevent my wood from warping, I used a solid piece and cut away the middle part so the frame was left over. Hope this explenation makes some sense....
If the scale was bigger, I definitely would make the frame out of sections!
- Joined
- Feb 2, 2018
- Messages
- 120
- Points
- 183

wonderful job Ptèr.
Tks for the explanations , Ptèr@Luiz B. F. Grassi, I made the frame out of one piece. It's so small, so to prevent my wood from warping, I used a solid piece and cut away the middle part so the frame was left over. Hope this explenation makes some sense....
If the scale was bigger, I definitely would make the frame out of sections!
- Joined
- Oct 11, 2021
- Messages
- 710
- Points
- 403

Working on the gun carriages
Hello guys,
Last weekend I continued to work on the fabrication of the gun carriages. I needed to make 20 in total and already made two previous examples.
So, I opened the production line and get started. First step is to cut some Limewood strips to length. I use a simple strip cutter from Amati. Second is to model all the individual parts like sides, axels, wheels etc. For that I use my knife and needle files.


Next update will show all pieces ready!
Pete
Hello guys,
Last weekend I continued to work on the fabrication of the gun carriages. I needed to make 20 in total and already made two previous examples.
So, I opened the production line and get started. First step is to cut some Limewood strips to length. I use a simple strip cutter from Amati. Second is to model all the individual parts like sides, axels, wheels etc. For that I use my knife and needle files.


Next update will show all pieces ready!
Pete
I love this. I am impressed with your ability to maintain the angle cut of the base of the canon carriage as evidenced by how well the curve looks when placed side by side.Working on the gun carriages
Hello guys,
Last weekend I continued to work on the fabrication of the gun carriages. I needed to make 20 in total and already made two previous examples.
So, I opened the production line and get started. First step is to cut some Limewood strips to length. I use a simple strip cutter from Amati. Second is to model all the individual parts like sides, axels, wheels etc. For that I use my knife and needle files.


Next update will show all pieces ready!
Pete
- Joined
- Oct 11, 2021
- Messages
- 710
- Points
- 403

Thanks Daniël, this was possible due to the fact I use a template of the base and copied this on all carriages. A lot of elbow grease is going into it. I am glad this is a marathon instead of a sprint, I would fail the speedtest for sure.I love this. I am impressed with your ability to maintain the angle cut of the base of the canon carriage as evidenced by how well the curve looks when placed side by side.
- Joined
- Oct 11, 2021
- Messages
- 710
- Points
- 403

Hi guys,
I'll continue with the gun carriages. This time I fabricated all wheels. I use two different diameters on the wheels. The front wheels are bigger that the ones on the rear axel. I have only one diameter of walnut and so I fabricate the smaller wheels by hand with a knife, file and some elbow grease.


Wheels done, time to move on to the fabrication of all the axles. I made them out of toothpicks.


All the carriages are rolling now but I need to make all the parts that support and aim the guns.


Well, still not finished, to be continued...
regards,
Pete
I'll continue with the gun carriages. This time I fabricated all wheels. I use two different diameters on the wheels. The front wheels are bigger that the ones on the rear axel. I have only one diameter of walnut and so I fabricate the smaller wheels by hand with a knife, file and some elbow grease.


Wheels done, time to move on to the fabrication of all the axles. I made them out of toothpicks.


All the carriages are rolling now but I need to make all the parts that support and aim the guns.


Well, still not finished, to be continued...
regards,
Pete
- Joined
- Aug 30, 2020
- Messages
- 639
- Points
- 308

After admiring this detailed build of individual components I suddenly realised I am a lazy modeler, I would be looking where can I buy some carriages and wheels, so really nice work now I need to rethink my processes.Hi guys,
I'll continue with the gun carriages. This time I fabricated all wheels. I use two different diameters on the wheels. The front wheels are bigger that the ones on the rear axel. I have only one diameter of walnut and so I fabricate the smaller wheels by hand with a knife, file and some elbow grease.


Wheels done, time to move on to the fabrication of all the axles. I made them out of toothpicks.


All the carriages are rolling now but I need to make all the parts that support and aim the guns.


Well, still not finished, to be continued...
regards,
Pete
My suggestion, Richie is to browse our forum before making a decision to buy aftermarket parts. The chances some already discussed how to make one or another part. Specifically, I was talking about gun carriages and trucks in the forum section Tools and Techniques hereAfter admiring this detailed build of individual components I suddenly realised I am a lazy modeler, I would be looking where can I buy some carriages and wheels, so really nice work now I need to rethink my processes.
Tools, Lathes, Mills, Jigs and Techniques
This forum has combined all the Topics for Tools, Lathes, Mills, Jigs and Techniques
shipsofscale.com
- Joined
- Jan 9, 2020
- Messages
- 10,377
- Points
- 938

Richie I do not think that it is a question of being lazy per se. I simply know that I cannot make scratch gun carriages in this scale that will look as good as those supplied by a good kit or as an aftermarket option.After admiring this detailed build of individual components I suddenly realised I am a lazy modeler, I would be looking where can I buy some carriages and wheels, so really nice work now I need to rethink my processes.


