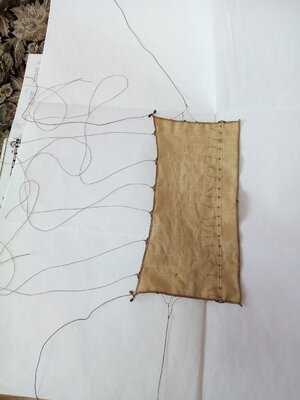
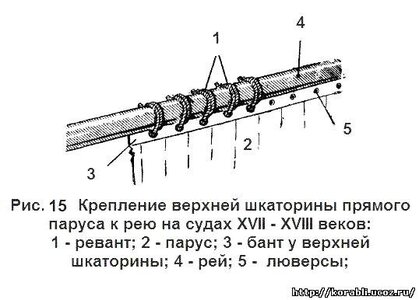
I don’t have a lot of experience but I think putting sails on after things are rigged makes more sense to me. That’s how they would have done it when the ship was built. I think it allows for a more accurate sizing and then positioning of the sails.I have a question for those with more experience. Is it beneficial to put the sails on the yards before putting them on the masts? Or is it better to put the sails on the yards after installing the yards (and all rigging for the yards), so they are not in the way? Thanks!
You are using an out of date browser. It may not display this or other websites correctly.
You should upgrade or use an alternative browser.
You should upgrade or use an alternative browser.
I don’t have a lot of experience but I think putting sails on after things are rigged makes more sense to me. That’s how they would have done it when the ship was built. I think it allows for a more accurate sizing and then positioning of the sails.
I am not sure if that is true. I HATE rigging, nevertheless, if I think in my last built, The Marmara Trade Boat, to witch I did the rigging because it was an easy one, if I would have tried to add the sails after the rigging, probably it will be ending in the trash can
Just my thoughts. But not an expert though at all, as I try to avoid rigging from the bottom of my Heart... hence no sails either....
Cheers
Daniel
There is most likely pros and cons both ways. I think with the sails on, I can better adjust the yard heights, however the sails will get in the way some when attaching the yards. But it will also be easier to attach the sail to the yard when they are off the ship.I am not sure if that is true. I HATE rigging, nevertheless, if I think in my last built, The Marmara Trade Boat, to witch I did the rigging because it was an easy one, if I would have tried to add the sails after the rigging, probably it will be ending in the trash can.
Just my thoughts. But not an expert though at all, as I try to avoid rigging from the bottom of my Heart... hence no sails either....
Cheers
Daniel
So my plan is to do the big blocks and rigging to raise the yards prior to doing the shroud lines. That way I’m working inside out.
So I built the blocks and pre rigged them prior to putting on the ship.
That was not a fun task, but doable.
Then I glued the eyes into the deck behind the mast. Once dried enough I ran the line to raise the yard through the mast and put a clip on it for now to keep tension on until I hang the yard.
Now I can start on the shroud lines with toggles.
On a side project, I had ordered some barrels. I stained and painted them, and put on the deck.
Not sure if they would have been in this location, but hey...it’s my ship!
Last edited:
- Joined
- Aug 16, 2019
- Messages
- 870
- Points
- 343

I just love your work Dean clean and precise

Dean, with the Ragusian Galley I built the sails were attached to the yards before mounting to the masts. The rigging and sails/yards are almost identical to your ship. I had no problems whatsoever doing it that way.
Thank you very much Charles! I’m not the best at rigging, but hoping to do a good job.I just love your work Dean clean and precise
Progress...made shroud line pieces. It’s crazy how one line can be made of 4 separate parts and have 5 pulleys and 1 toggle!
Above are the sub assemblies needed to make the two shroud lines for one side of the foremast. They connect to the shroud pendants through running rigging.
Above are the lines done for one side...
More pics below...
Above are the sub assemblies needed to make the two shroud lines for one side of the foremast. They connect to the shroud pendants through running rigging.
Above are the lines done for one side...
More pics below...
Last edited:
First rigging milestone!
All shroud lines done on foremast, and lines to raise yard with pulleys in place!
I brushed satin clear coat on lines and wiped with my fingers to get rid of most of the fuzzies. Still some, but very little now.
Next will be main mast shroud pendants...
All shroud lines done on foremast, and lines to raise yard with pulleys in place!
I brushed satin clear coat on lines and wiped with my fingers to get rid of most of the fuzzies. Still some, but very little now.
Next will be main mast shroud pendants...
Last edited:
A few latest progress overall pics...
Last edited:
Looking good Dean, every completed step is bringing the Bluenose closer to the bench!
Tidy work as always Dean! Love the care and precision you bring to your build.
Nice clean and precise build. I’m having some challenges with eyes popping out of the deck and rails on my build. Reaching around to tie down lines has me brush up against another line and out it pops! Very frustrating. I’m using PVA should I be using CA?First rigging milestone!
All shroud lines done on foremast, and lines to raise yard with pulleys in place!
I brushed satin clear coat on lines and wiped with my fingers to get rid of most of the fuzzies. Still some, but very little now.
Next will be main mast shroud pendants...
View attachment 204040View attachment 204038View attachment 204039View attachment 204040
I use Weldbond and have no issues. But I make sure to place the glue next to the eye head prior to putting in the predrilled hole, that way glue is between head and deck or rail. I also add a little towards the bottom of the eye pin, to get into the hole. So I am liberal with the glue as it dries clear.Nice clean and precise build. I’m having some challenges with eyes popping out of the deck and rails on my build. Reaching around to tie down lines has me brush up against another line and out it pops! Very frustrating. I’m using PVA should I be using CA?
True Don, I am trying not to rush. And I don't want to work on both at the same time because I need to concentrate on this rigging madness!!!Looking good Dean, every completed step is bringing the Bluenose closer to the bench!
I would much rather do typical shroud lines with deadeyes and rat lines! But the lateen sail masts are totally different, and for the life of me, I can't figure out why there is no consistency from one shroud line to another as far as how they are done!!!
It really makes you study and preplan every step! Some have 2 pulleys, some 3 or 4, even up to 5 pulleys to get one line tensioned! They all have toggles, the only consistency...lol! Its the craziest rigging I have ever seen!
Here
Last edited:
Thanks, I have Weldbond as well as Elmers, will try the Weldbond next time.I use Weldbond and have no issues. But I make sure to place the glue next to the eye head prior to putting in the predrilled hole, that way glue is between head and deck or rail. I also add a little towards the bottom of the eye pin, to get into the hole. So I am liberal with the glue as it dries clear.
That is some complicated tackle. Have fun with that. I’m having enough of a challenge with what I think of as regular rigging.Here is the rigging madness for the shroud lines for the main mast!
View attachment 204179
As you will see, there are 4 shroud pendants to make that are attached top the top of the mast with woolding ropes. There are 3 lines with a single pulley and 1 line with two pulleys. I make these using the plans for the length. Then will attach to the mast.
Then on the bottom there is 5 lines that attach with a toggle. So I will make 5 toggle lines.
Then there is 5 lines that attach to the toggles with a hoop on one end and either a single pulley or two pulleys on the other end. Some of these pulleys need a strop on the end if the tension lines starts from that pulley. So you have to pay attention to which ones need or not.
I added a red round loop as a symbol for my reference where a strop is needed when making the block sub assemblies. So if you look at the running rigging for the tension lines, you will see no consistency!?
View attachment 204182
Here you see the first set of lines to be rigged. I numbered the sub assemblies to be made.
The right side has 4 sub assemblies. 1,2 and 4 being standing rigging, and 3 being running rigging (different ropes).
The left side has 7 sub assemblies! 1,2,4,6 and 7 being standing rigging and 3 and 5 being running rigging. (different ropes).
But the left side gets even more crazy if you look at it! You have a line with two blocks on each end going through the pulley on the shroud pendant. Then one side gets tensioned through 4 blocks and the other though 3 blocks. Fun stuff!
View attachment 204184
Above is the second set. Once again no consistency!
The right side is tensioned starting from the single block on the shroud pendant.
The left side is tensioned starting from the block below and goes through two pulleys on the shroud pendant.
So at the end of the day I will have 17 sub assemblies for one side! Then I get to put it all together with running rigging.
So my questions are....
What is the logic behind all this madness?
Why are no two shroud lines alike? (It would be so much easier to rig and understand!)
Who came up with this?
Started making all the sub assembly lines for the main mast shrouds. I’ve done 18, and I have 16 more to go!
Last edited:


