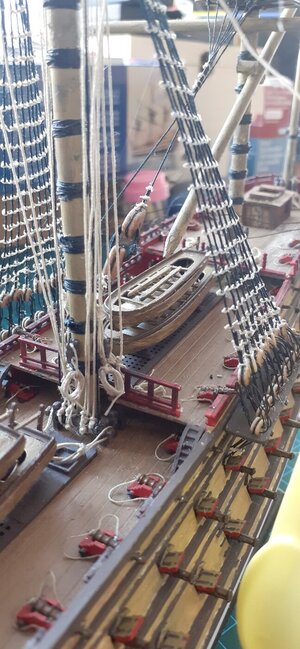
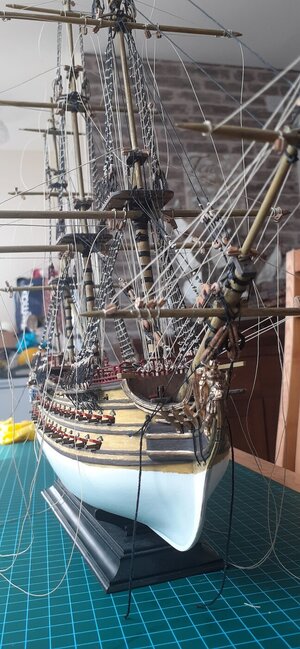
Deadeye Tool and rigging.

Joined
Sep 5, 2020
Messages
327
Points
278

Just a suggestion as it works for me
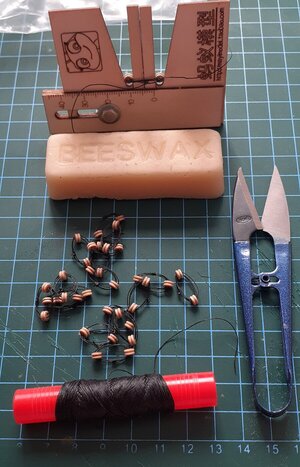
It's just a simple device that holds the 2 deadeyes adjacent to each other without the need for tweezers etc..
Then it's just a a case of threading the deadeyes and tying them up, thus you have one pair of rigged deadeyes.
The v shaped channels make sure your deadeyes are secured in place like a vice and obviously the wider the channel at the top caters for different sizes of deadeyes but once you push the deadeye down it becomes secure, it's just a case of aligning the deadeye holes before threading them, and with them secured you can rig deadeyes tightly without fear of them coming loose or differently sized in length to other ones as the space between them remains the same.
Hope this is of help....20210512_165804.jpg20210629_081320.jpg20210719_155207.jpg
 
Now as the deadeyes rigged, I see no way to put metal chains around them. The chains are a metal closed loop around the deadeye block. I am confused.
 
Now as the deadeyes rigged, I see no way to put metal chains around them. The chains are a metal closed loop around the deadeye block. I am confused.
Then perhaps maybe this tool should only be used with Plastic kits as this is what build, the photos above are of my improvised version of Heller's ROYAL LOUIS, these deadeyes were secured by rigging thread and lashings rather than metal chains.
Maybe it is possible to attach the metal chains to the deadeyes before inserting into the tool for rigging ?
 
Don't shoot me or get me wrong, you are the captain of your ship. But I don't like these halyards on the deadeyes. They look loose and not tighten to me. It makes a messy look.
Better do it in this way https://shipsofscale.com/sosforums/threads/le-fleuron-1729-1-48-kudin-andrey-youtube.3249/post-67179
it is very easy to follow up. You don't have to make these perfect knots but the idea with the pins is good to keep them all lined up.
They ain't loose I can assure you of that!
 
I used a strip of plastic from a CD jewel box, Thread two holes in deadeye (upper and lower) and adjust to approximate fit. Once entire lanyard is fit you can easily adjust for a snug fit.
Would send pics of my Billings Cutty Sark, but work area is a mess.
 
I am doing a Billings Cutty Sark and am using 4mm and 5mm deadeyes from Syren. I came up with this method after searching for help but with no avail.

Using the plastic piece ( 2 different sizes since 5mm are supposed to be 2 Feet apart and the 4 3 feet apart, according to the rigging plan I got from the Royal Museum. Figured out the scale and cut the CD jewel case with an X-acto razor saw. Used blue painters tape to mark the cut lines but masking tape should work as well.

For the lanyards I used Syren tan rigging rope. Most of the deadeyes came through the "manufacturing" process with out twist. The ones with twist were disassembled and the line straighten out between my fingers. Worst case, soaked in water and hung to dry with mini clamps on either end. Since I bought all my supplies before I retired, they have been sitting for a while. As a matter of practice, I used the above methods on all the rope I have used, If you watch it after hanging, it is remarkable how much twist is built into the rope. You might try it on some lanyards and see if that does not solve the problem. The line should lay flat before you start reeving.

My intention is to slip the plastic through the deadeyes and use it as a final check when adjusting stays and shrouds. Used it as a mock up and it worked fine.
When adjusting the lanyard, the key is the middle leg. This controls the adjacent sides. It is surprising that there is not much play in the lanyard once it is reeved through all the holes.

One other point on the Cutty. The standing rigging is wire rope in real life, so it is all black. Lanyards and running rigging is tan rope

Let me know if you need any clarification. In the mean time I will strive to clear my bench so it is in shape to allow pictures.

Jim
 
Back
Top