Hello colleauges,
as I think we all have to do with the
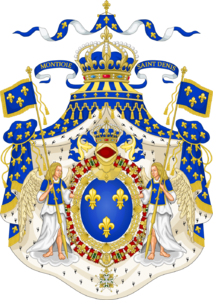
Royal Cote of Arms on our baroque ships I decided to pick out this detail for a seperated project to the commonwealth.
Se do find it mainly on the middle of the "appearing balcony" (as we say in German
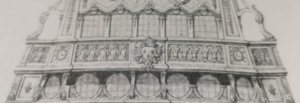
not very ofen there are other C ote of arms, too. As here on ROYAL LOUIS 1666 - but the uppest is the COA we do all need. (on the 1eme and 2eme rank ships fourtimes under this tier often two or minimaly one is needed on a fregat or smaller vessel.

The LE BON shows the COA over the balkony moved to the center of the transom:
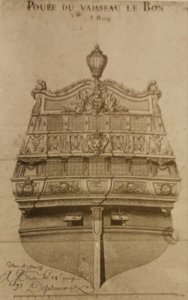
3eme rank LE FLEURON has it lifted even higher as the central icon in the couronnament :

But quite often it is the very center of the transom an first class eye catching item - so this may justify my littet step aside.
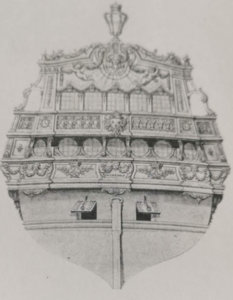
At my model of SAINT PHILIPPE 1693 it is quite a tuny object in 1/64:
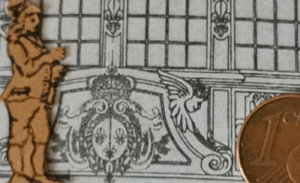
Basically we have got the oval with the three golden Fleur-de-lys on the iroyal blue background surrounded by two knights orders colliers.
The inner is the one of Saint Michael - an intersting thing to model as it is an repeating of two lelements shells and lattice bridge pices. But both do need special care in the production and the colouring.
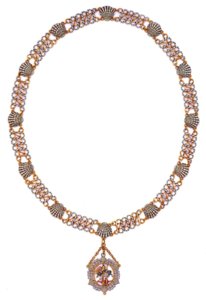
with an astoniching detailled amulet:

Of St. Michael fighting the devil and as he is loosing he is no longer able to stay in his magic role as a dragon so he does appear in his true shape as a fallen/ugly angle.
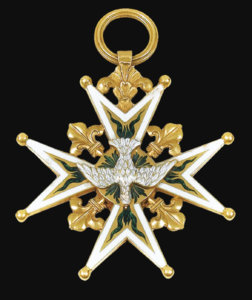
The outside collier is the one of the order of saint esprit:
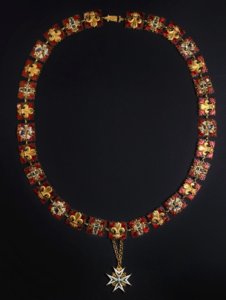
with a elaborated cross:
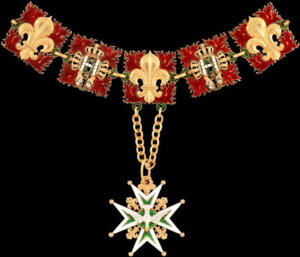
We have got several variations of the collier's chains connection to the cross - this is a quite late one if you vompare the cross' detailling here and below.
My prototyp is at the Louvere and looks a bit more complex in detailling... (as the hole thing does being honest).
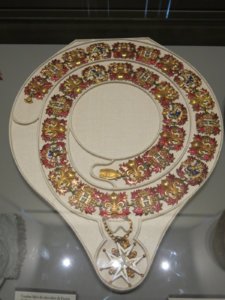
I do start with the collier that is a combination of 29 squares of three different types:
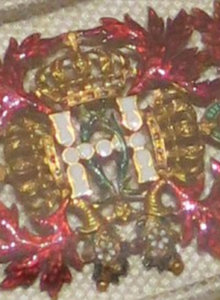
the H is for Henri founder of the knight's order
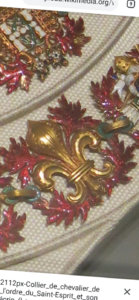
The Fleur-de-lys is for the family of the King symbol for the dynasty of the Bourbons
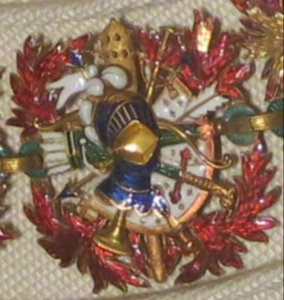
This is the most complex part.
The cross is an item I will have to deal with in an extra part of the thread seperatly.
But to the model:
So my problem was how to find a path into this project.
And I decided "Yes it is a juwelier's handcrafted work - but it must be made from several (certainly very cpmplex) single pices soldered together to a complete quare part."
So I figured out that the H was a pattern of two symmetrical pices and tryied to draw it:
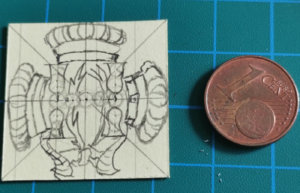
but failed several times to get the H the two corn d'abdunance, the crowns and the flames into the given space.
So I rebooted and looked on the fire and figured out an also symmetrical issiue (and to keep the story short) I drawn, I misses, several times and then I passed and stared to cut the fire out: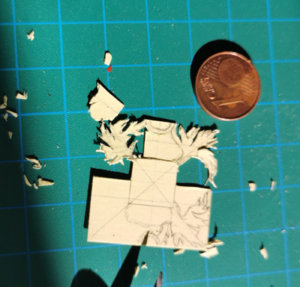
and it does work. I am quite happy abou the very first result

and decided to cast the hole part in tin. So I does need a mould and for the mould I do need a model. And by this I sayed: let's soak it with CAglue to harden it...
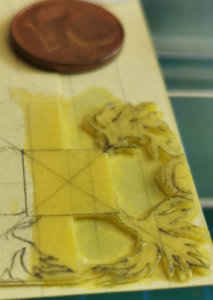
and fixed it on a next layer of cardboard. So I rised the thickness and got it stiff.
To get a better view on the garnularity of details I sprayed it with primer:
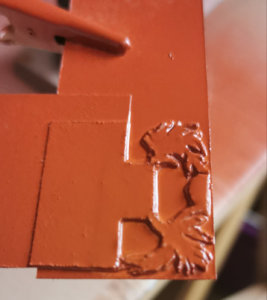

This was yesterdays progress.
Hope you like it.
as I think we all have to do with the

Royal Cote of Arms on our baroque ships I decided to pick out this detail for a seperated project to the commonwealth.
Se do find it mainly on the middle of the "appearing balcony" (as we say in German

not very ofen there are other C ote of arms, too. As here on ROYAL LOUIS 1666 - but the uppest is the COA we do all need. (on the 1eme and 2eme rank ships fourtimes under this tier often two or minimaly one is needed on a fregat or smaller vessel.

The LE BON shows the COA over the balkony moved to the center of the transom:

3eme rank LE FLEURON has it lifted even higher as the central icon in the couronnament :

But quite often it is the very center of the transom an first class eye catching item - so this may justify my littet step aside.

At my model of SAINT PHILIPPE 1693 it is quite a tuny object in 1/64:

Basically we have got the oval with the three golden Fleur-de-lys on the iroyal blue background surrounded by two knights orders colliers.
The inner is the one of Saint Michael - an intersting thing to model as it is an repeating of two lelements shells and lattice bridge pices. But both do need special care in the production and the colouring.

with an astoniching detailled amulet:

Of St. Michael fighting the devil and as he is loosing he is no longer able to stay in his magic role as a dragon so he does appear in his true shape as a fallen/ugly angle.
The outside collier is the one of the order of saint esprit:

with a elaborated cross:

We have got several variations of the collier's chains connection to the cross - this is a quite late one if you vompare the cross' detailling here and below.
My prototyp is at the Louvere and looks a bit more complex in detailling... (as the hole thing does being honest).

I do start with the collier that is a combination of 29 squares of three different types:

the H is for Henri founder of the knight's order

The Fleur-de-lys is for the family of the King symbol for the dynasty of the Bourbons

This is the most complex part.

The cross is an item I will have to deal with in an extra part of the thread seperatly.
But to the model:
So my problem was how to find a path into this project.
And I decided "Yes it is a juwelier's handcrafted work - but it must be made from several (certainly very cpmplex) single pices soldered together to a complete quare part."
So I figured out that the H was a pattern of two symmetrical pices and tryied to draw it:

but failed several times to get the H the two corn d'abdunance, the crowns and the flames into the given space.
So I rebooted and looked on the fire and figured out an also symmetrical issiue (and to keep the story short) I drawn, I misses, several times and then I passed and stared to cut the fire out:

and it does work. I am quite happy abou the very first result

and decided to cast the hole part in tin. So I does need a mould and for the mould I do need a model. And by this I sayed: let's soak it with CAglue to harden it...

and fixed it on a next layer of cardboard. So I rised the thickness and got it stiff.
To get a better view on the garnularity of details I sprayed it with primer:


This was yesterdays progress.
Hope you like it.


