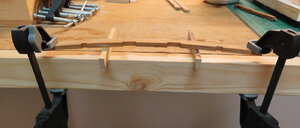
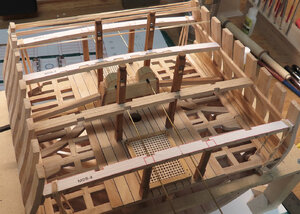
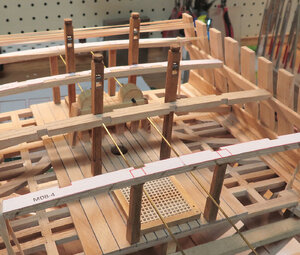
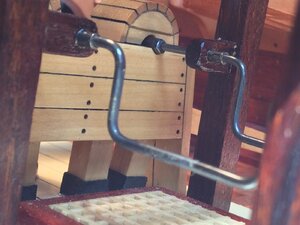
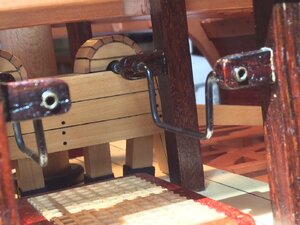
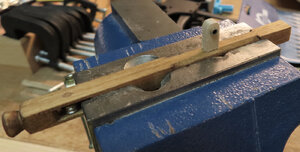
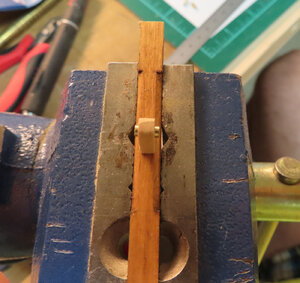
In my opinion, the hardest part of this build is coming up, Donnie. That is, making and fitting the pump handles for the chain pumps. Take a deep breath and plan ahead.
- Home
- Forums
- Ships of Scale Group Builds and Projects
- Group Build Archives
- Blandford Cross Section PoF Group Build
You are using an out of date browser. It may not display this or other websites correctly.
You should upgrade or use an alternative browser.
You should upgrade or use an alternative browser.
Donnie's HMS Blandford Cross Section Build: 1/32 Scale [COMPLETED BUILD]
Maybe rare for that period, also another section of the ship, but actually I think Blandford was one of the few ships where brass was used on her steering wheelOk, so someone needs to come up with a list of when to use wooden treenails and then iron nails and where and when to use them. Not only that but what material to use - wood, brass, etc.
I see a broad range of uses here on the forum. If you really want to get into the details, brass is NOT going to be used on a ship anywhere. . . .
Looks good Donnie

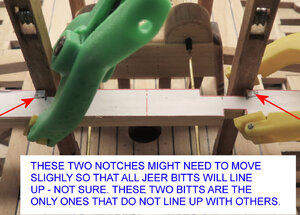
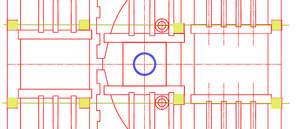
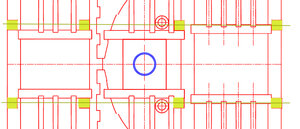
In order for all the Jeer Bitts to line up in a row (and I not sure if they are supposed to). One plan sheet shows them all lined up and then the Main Deck Plan shows them a little staggered. Therefore, these are the ONLY two that are slightly off - so, all I need to do is to move the notches over. The other side of the notch will just be filled in with wood and after sanding down, I will barely see where the move took place. I have done this procedure by moving notches and yielded good results. Of course, this is not the optimum, but it is what it is.
Kurt Konrath
Kurt Konrath
Don’t the Jeer Bitt Posts support the cranks for chain pump? Do they need to align for this purpose?
Kurt
Kurt
I know. The brass rod does seem far away from the pillars as this is the location of the crank handles. They are not too far out as it seems and I will have to go with what I have. The order of build process is very important. I see now that the Pillars should have been made first, then the Chain pump last. As the Chain pump location and its associated brass rod can then be adjusted for better alignment (spacing) to the pillars.
The brass rod going all the way through (straight) is just for alignment purposes to see how things will progress. The Chain pump should have been made last.
The brass rod will be removed once the supports for the brass rods on the pillars are established, then the bending begins.
The brass rod will be removed once the supports for the brass rods on the pillars are established, then the bending begins.
I think you‘ve got it, Donnie! I played this whole sequence out in my head a dozen times before I had it figured out. Moving those two bitt posts Was the right call.
Scratch building really does require a lot of predictive and analytical thinking.
Thank you Doc and others for the likes and your approval. This means a lot. You all are correct. You really have to find the least common denominator when you have so many variables. I went straight by the book on the Chain Pump and now, I wish I had made it with the round barrels "spaced out" a little wider. This would have made the rod/shafts separation a little more, hence allowing the brass rods to be even closer to the pillars. Right now, I am probably 2 mm out a little TOO far from the pillars.
The Bitts just cannot move in any closer to each other as this would throw the entire upper ledges and carling off. The only last resort would be to widen the Chain Pump about 3 to 4 mm - not sure if it is worth it or not.
I thought about modifying the Chain Pump assembly by (cringe) using a scroll saw and cutting it right down the middle and putting about 4 mm space. I can do this and it would not be noticeable unless it is pointed out. I have become pretty good at slicing wood ( LOL). But, is it worth about 3 to 4 hours and the Pump is glued down and have to (use the water trick) to unglue it just for this one thing? not sure. I might have other things to worry about coming up !!
In order for one thing to be changed causes an avalanche of other things to follow - The method is to how little change to make without affecting too many other variables.
Kurt Konrath
Kurt Konrath
I am just glad others find the problems before I get to them.
That's what I love about the forums and build logs!
That's what I love about the forums and build logs!
Well, true enough, but what helps is the builder introduces their mistakes and how they corrected them in an open forum. I admit that it can be a little embarrassing to admit and to even expose what I did wrong, but I have to get over that and realize that I am helping others avoid the same mistakes. As Doc said, the Blandford can be built regardless and will eventually "come all together in the end" and no two models are ever going to look the same. Never. Even a kit that has most or some parts laser cut, you still will have the persona show through.
Yes Doc, I am planning way ahead to add the pump handle supports. I have already marked the location on each pillar and have the materials to make the supports.
thx for tuning in !!!
thx for tuning in !!!
I figured as much!
Don't be too worried if your cranks aren't absolutely, perfectly straight, level and parallel! Mine weren't! When the model is finished, the area on the lower deck is so crowded, it's impossible to tell the cranks aren't 100% perfect. You're doing a great job!
Don't be too worried if your cranks aren't absolutely, perfectly straight, level and parallel! Mine weren't! When the model is finished, the area on the lower deck is so crowded, it's impossible to tell the cranks aren't 100% perfect. You're doing a great job!
Mike, you are right. If I do not think and plan ahead, then like I have already done (but not mentioning it), I will royally screw up. It probably takes me a little longer to get the hang of things. I also explain stuff a little too much, but the ones that come after me, maybe they will see my mistakes and how I intend to correct them. Yes, I am probably overthinking things, but if I don't, I am destined to mess something up, and like you said, re-doing something is more painful. I am trying to keep the pain down - LOL.
So, with all this thinking going on - it is time I guess to cool down some. Here finally is the location of the crank pump supports. So, to make Mike squirm a little, this is what I measured. 34.5 mm from deck to the hole.
This Bitt is at location #3 Beam and has a dimension of 7mm from edge of pillar to hole. So, now that I gave all the dimensions, something will go wrong and I will have to redo - we will see.
Kurt Konrath
Kurt Konrath
Looking good for now, will wait and see how they look installed.
- Joined
- Aug 10, 2017
- Messages
- 1,646
- Points
- 538

Hi Donnie, pre-planning the work to be done and how it will affect the next stages of your build is always faster than rebuilding or relocating a part after it has been installed and finding interferences with the rest of the build. With a cross section almost, everything will be visible when the model is displayed the time detailing parts and equipment is well spent. Keep up the good work, you are building a fine model.


