You are using an out of date browser. It may not display this or other websites correctly.
You should upgrade or use an alternative browser.
You should upgrade or use an alternative browser.
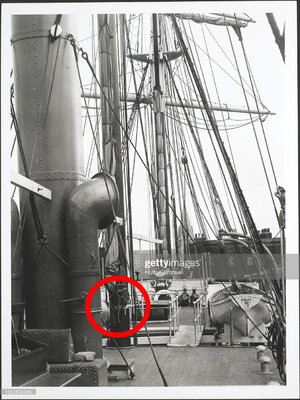
I have been looking ahead to the rigging, specifically marking lines and anchor points on the ship. Charlie (STGCS) has pointed out that the eyebolts on the deck are not very realistic in terms on fastening running rigging and he came up with an excellent work around (https://shipsofscale.com/sosforums/...nce-by-occre-completed-build.8181/post-207884). He used a "collar" around the mast with belaying pins to use as fastening points. I spent some time going through Getty Images of the Endurance and found this one. It appears that there is some foundation for belaying pins on the mast. (See area inside the red circle.) I am not positive these are belaying pins, but they certainly could be.
So in keeping with the image, I worked up a mock version of the belay pins attached to the mast. I used some brass wire and bent them to an eyebolt shape and drilled 6 holes in a excess piece of mast dowel. I placed an eyebolt into each hole and came up with the following mock-up.
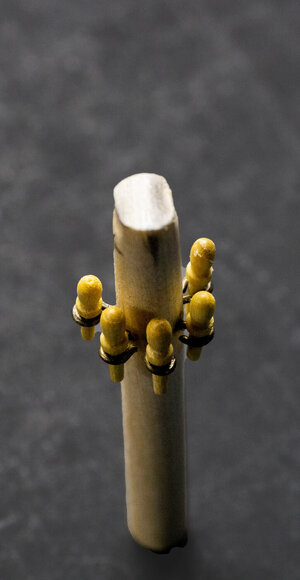
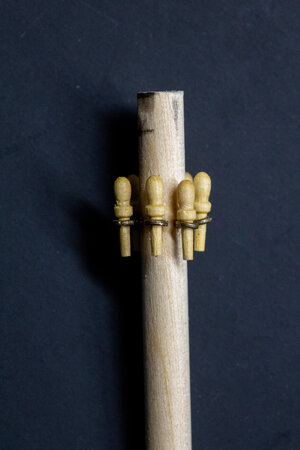
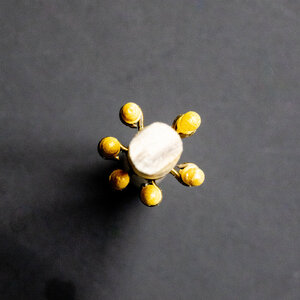
I need to take a bit more care in the lengths and spacing when I do the eyebolts for the actual model, but I think it is a reasonable facsimile of what is seen in the photo of the real ship. This will work on the main and mizzen mast where there are 6 eyebolts on the deck (per the plans). The fore mast has 11 eyebolts with 12 ropes attached to them. For the fore mast I am thinking of using this method for the 6 clewlines attached to the sails and then building a pin/fife rail for the other ropes.

So in keeping with the image, I worked up a mock version of the belay pins attached to the mast. I used some brass wire and bent them to an eyebolt shape and drilled 6 holes in a excess piece of mast dowel. I placed an eyebolt into each hole and came up with the following mock-up.


I need to take a bit more care in the lengths and spacing when I do the eyebolts for the actual model, but I think it is a reasonable facsimile of what is seen in the photo of the real ship. This will work on the main and mizzen mast where there are 6 eyebolts on the deck (per the plans). The fore mast has 11 eyebolts with 12 ropes attached to them. For the fore mast I am thinking of using this method for the 6 clewlines attached to the sails and then building a pin/fife rail for the other ropes.
I am using flat acrylics, mostly Model Expo brand on this model. I think the main reason for lack of gloss, is that I add a coat of matte varnish after painting. I am currently using Liquitex Basics Acrylic (https://www.amazon.com/dp/B073FSW6HK?psc=1&ref=ppx_yo2ov_dt_b_product_details).
I took a break from working directly on the model this weekend and spent some time working on tracing/planning the rigging of the ship. I saw somewhere in the past where a modeler used Photoshop to make layers of rigging so that it could be viewed as individual layers or all of the rigging could be viewed at one time. I liked the idea, so I created such a file for the Endurance. Here are some examples from the PSD file of what I ended up with.
I scanned the outline of the ship from the plans and removed the rigging that was in that particular scan leaving me with just the ship. I took out the grayish background leaving the black outlines over a plain white background.
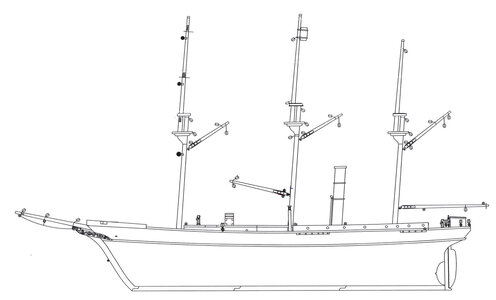
I then drew in the fore & aft standing rigging and the bowsprit rigging (each on their own layers and put them in a layers group. Shrouds, deadeyes and back stays were drawn on separate layers and groups and then the two standing rigging groups were nested inside a single layer group.
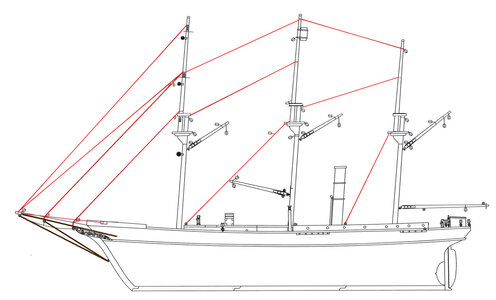
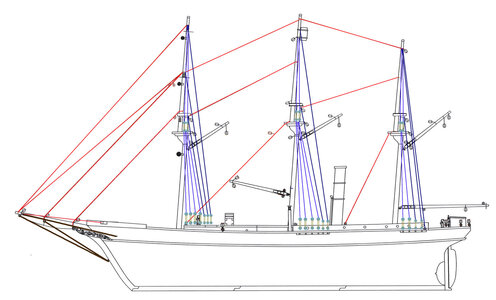
I then prepared individual layers for the different types of running rigging and added them to a running rigging group shown below with the standing rigging group made invisible (except two stays that I needed for attachment of the braces.
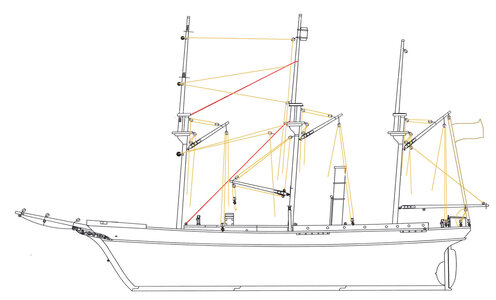
Each jib and its rigging was added to a jibs group shown below with the fore/aft rigging layer visible.
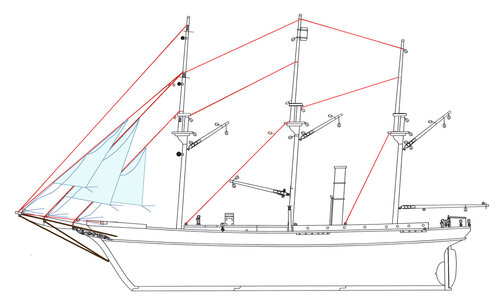
I then added the sails to a sails group and placed it under most of the other groups so as not to hide the rigging that was already added to the file.
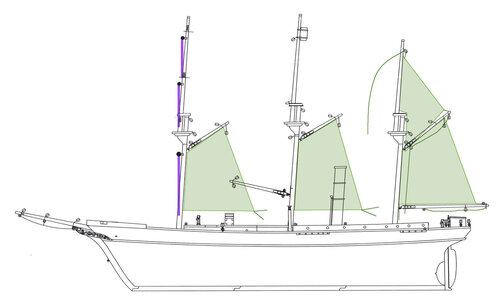
Here it is with all groups/layers visible.
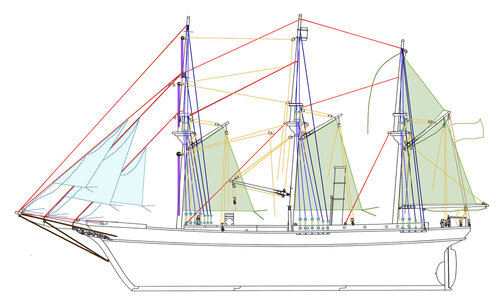
The big question - Was it worthwhile to go to the effort to do this? Possible not, but it was fun. I still need to do the square sail rigging, but that might require a front or back view to do. You do get a sense of where you need an eye on a block, which the instructions/plans do not mention. I also noted that there seems to be at least one block that needs to be a double, but I'm not certain if the plan calls for one. This is a fairly simple rig, but a more complex model such as a full square rigger might benefit more from this approach. I think the different colors of the lines will be helpful going forward.
The next step might be to number the lines by attachment point on the deck plan to make it quicker to identify where each line ties.
I scanned the outline of the ship from the plans and removed the rigging that was in that particular scan leaving me with just the ship. I took out the grayish background leaving the black outlines over a plain white background.

I then drew in the fore & aft standing rigging and the bowsprit rigging (each on their own layers and put them in a layers group. Shrouds, deadeyes and back stays were drawn on separate layers and groups and then the two standing rigging groups were nested inside a single layer group.


I then prepared individual layers for the different types of running rigging and added them to a running rigging group shown below with the standing rigging group made invisible (except two stays that I needed for attachment of the braces.

Each jib and its rigging was added to a jibs group shown below with the fore/aft rigging layer visible.

I then added the sails to a sails group and placed it under most of the other groups so as not to hide the rigging that was already added to the file.

Here it is with all groups/layers visible.

The big question - Was it worthwhile to go to the effort to do this? Possible not, but it was fun. I still need to do the square sail rigging, but that might require a front or back view to do. You do get a sense of where you need an eye on a block, which the instructions/plans do not mention. I also noted that there seems to be at least one block that needs to be a double, but I'm not certain if the plan calls for one. This is a fairly simple rig, but a more complex model such as a full square rigger might benefit more from this approach. I think the different colors of the lines will be helpful going forward.
The next step might be to number the lines by attachment point on the deck plan to make it quicker to identify where each line ties.
Last edited:
I like the way you think!
I like the way you do!
This is an incredible idea and makes it so clear what goes where. I'm not sure I have the patience, but I like the idea.
Back to the build. Over the past month or so I have finished the second layer of planking. I sort of followed the OcCre method in the instructions and sort of followed my own process. In the end, I have a serviceable surface for painting. I had some gaps the I need to fill, but for the most part, I think it is an acceptable planking job. This is my third build, and I am still in awe of those of you who can do such superb planking jobs.
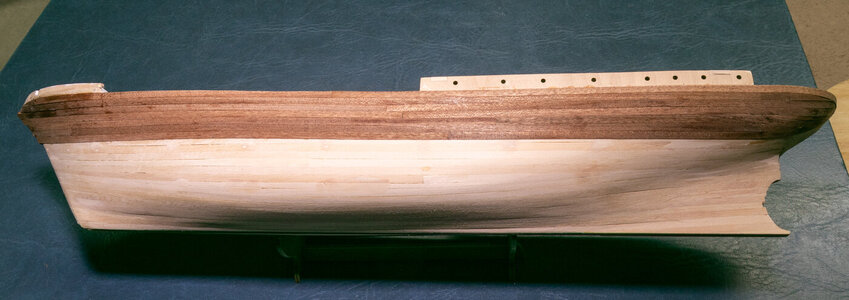
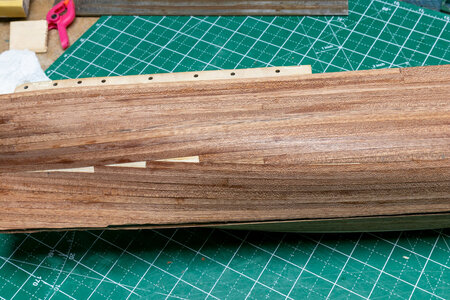
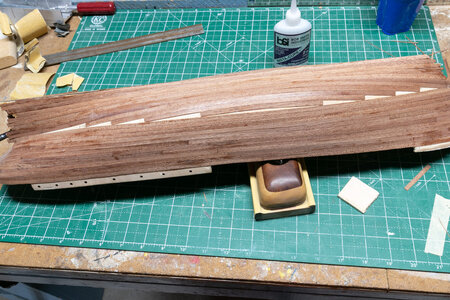
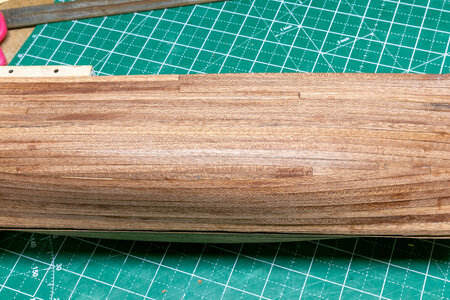
Next will be some gap filling and sanding. Then on to a coat of primer now that the weather has warmed enough to do so.


Next will be some gap filling and sanding. Then on to a coat of primer now that the weather has warmed enough to do so.
Last edited:
Significant progress this week. I was able to get the hull primed and painted. I had to do a bit of fill and sanding after priming, but I was satisfied with the hull in the end.
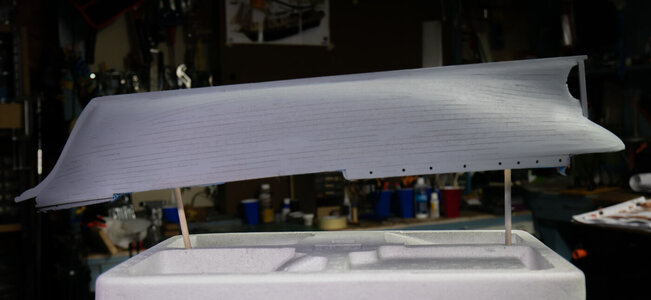
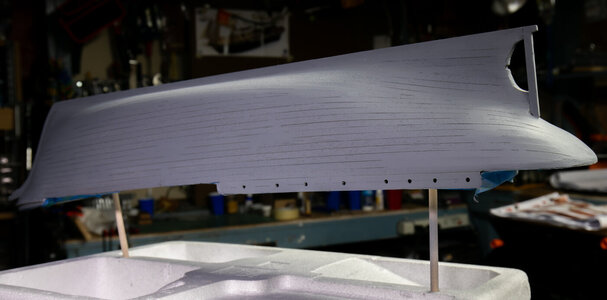
Unfortunately, I forgot to take pictures after painting the black and white onto the hull. I painted the white part, taped it off and then sprayed the black on in a single session of 9 or 10 thin coats. The day was warm and dry so that each coat dried quickly, and I could just keep going one coat after another. Next was some brush paint to fix a few spots of the white after doing the black.
The rails were stained and put into place and the white strake was added. The curve on the stern was somewhat challenging as it is a full "U" shape and fairly tight. I was able to get a good one on the second try.
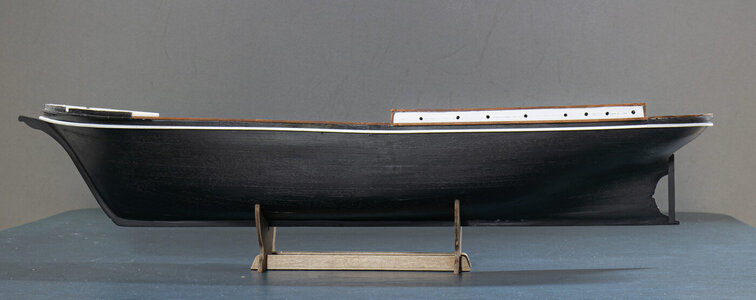
I still have the second strake at the stern, the bow decoration and the name and star at the stern before I finish the hull of with a coat of matt varnish.


Unfortunately, I forgot to take pictures after painting the black and white onto the hull. I painted the white part, taped it off and then sprayed the black on in a single session of 9 or 10 thin coats. The day was warm and dry so that each coat dried quickly, and I could just keep going one coat after another. Next was some brush paint to fix a few spots of the white after doing the black.
The rails were stained and put into place and the white strake was added. The curve on the stern was somewhat challenging as it is a full "U" shape and fairly tight. I was able to get a good one on the second try.

I still have the second strake at the stern, the bow decoration and the name and star at the stern before I finish the hull of with a coat of matt varnish.
Last edited:
Your hull looks awesome! I'm starting the Endurance, and one of the reasons I picked it was because of the black hull. What did you use to paint it? BLD SHPS used Rust-oleum satin protective enamel spray paint and Minwax clear aerosol lacquer.
I am pretty basic with my painting. Due to fumes in the house, I only use water-based acrylics inside. The primer was Rustoleum grey primer. For small areas of bare wood, I use an acrylic sealer before painting the final color. The painted parts of the ship are various matte acrylics. I like to use an airbrush for larger areas. My final coat is a matte acrylic varnish (See post #45). The varnish has not been applied yet in the pictures of the hull already posted.
The dark wood such as the railing is an acrylic stain.
The dark wood such as the railing is an acrylic stain.
I have purchased the Endurance kit and will begin working on this model in September. I recently completed the OcCre tug boat. I find working with OcCre kits
most helpful. Am sure, watching others build the Endurance will make my journey much more enjoyable. Thanks, in advance
most helpful. Am sure, watching others build the Endurance will make my journey much more enjoyable. Thanks, in advance
Jim,I have purchased the Endurance kit and will begin working on this model in September. I recently completed the OcCre tug boat. I find working with OcCre kits
most helpful. Am sure, watching others build the Endurance will make my journey much more enjoyable. Thanks, in advance
I wish you the best working on your Endurance and that you thoroughly enjoy building the kit.
- Joined
- Oct 17, 2020
- Messages
- 1,336
- Points
- 393

Good evening Jim, is it possible for you to post a picture of the tugboat? ThanksI have purchased the Endurance kit and will begin working on this model in September. I recently completed the OcCre tug boat. I find working with OcCre kits
most helpful. Am sure, watching others build the Endurance will make my journey much more enjoyable. Thanks, in advance
I have nearly finished the hull at this point. I had to fill a void in the plywood of the rudder before painting and installing it.
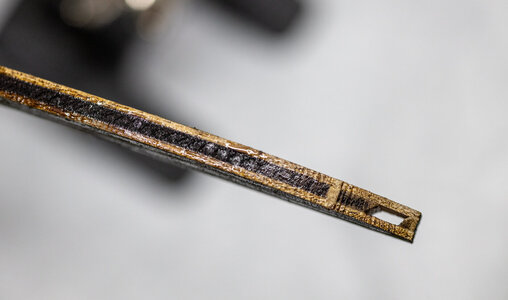
The following set of pictures show the current state of the hull.
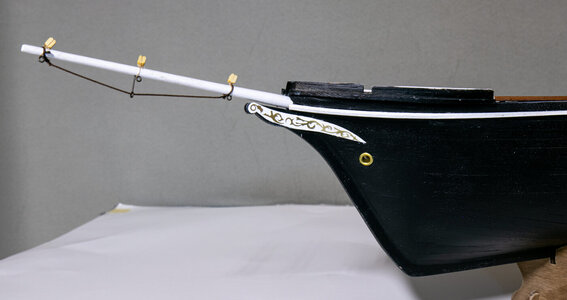
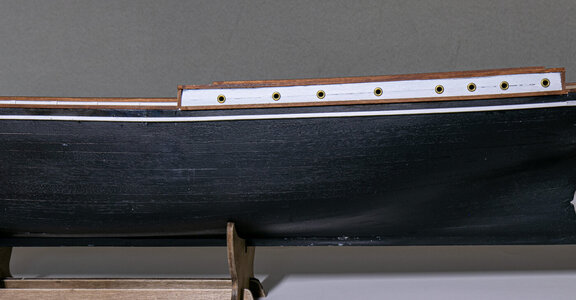
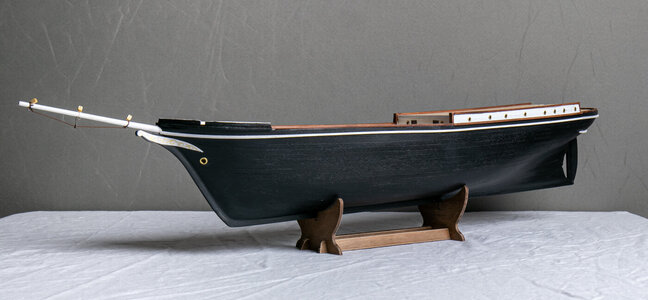
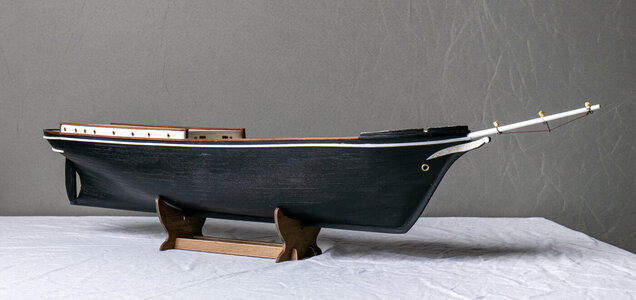
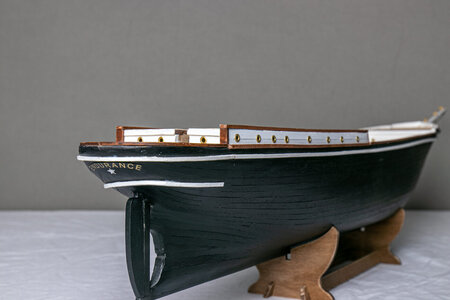
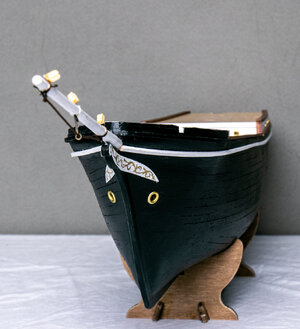
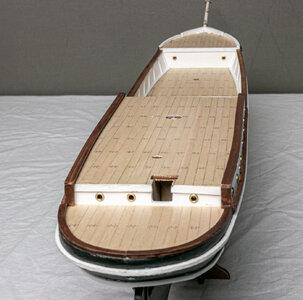
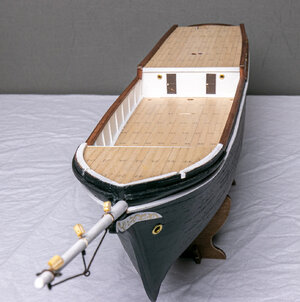
The wonderful thing about still photography is that you get to see all of the imperfections in painting and such that you don't readily see on the ship itself.

The following set of pictures show the current state of the hull.


The wonderful thing about still photography is that you get to see all of the imperfections in painting and such that you don't readily see on the ship itself.
Last edited:
Merci.Magnifique, très beau
Je fait également L’Endurance
Bonne continuer
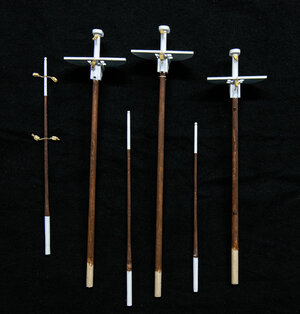
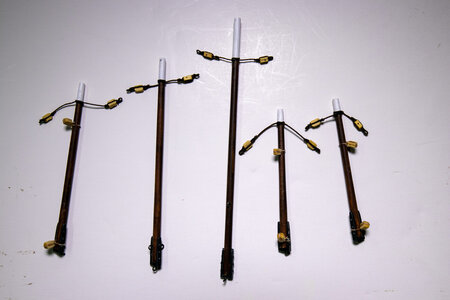
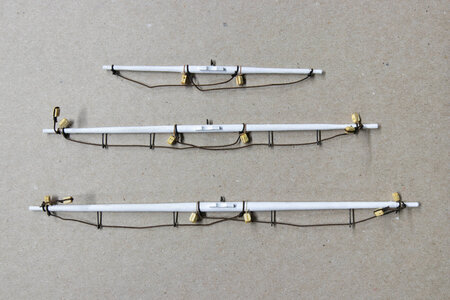
Some more catching up my progress. I have mostly finished the assembly of the masts and yards. I still have a couple of blocks to put onto the upper main and mizzen masts.
Masts
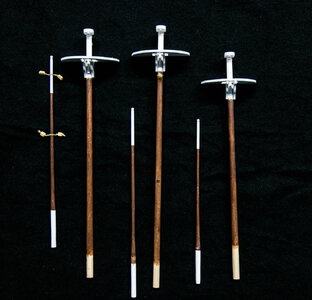
Booms and gaffs
Fore mast yards
I made a count of the number of double blocks specified in the parts list (17) and the actual count I received (20, I think). However, when I counted the number of double blocks used in the rigging plan, the anchors, and the 4 boats, the number actually required is 34. I contacted OcCre and they will be sending the additional blocks at no charge. If you purchase the Endurance, check the rigging plans and the instruction pictures for how many double blocks you need and how many you actually receive. Perhaps OcCre will get this remedied in the future. My kit was purchased fairly early after OcCre released the kit.
Masts


Booms and gaffs

Fore mast yards

I made a count of the number of double blocks specified in the parts list (17) and the actual count I received (20, I think). However, when I counted the number of double blocks used in the rigging plan, the anchors, and the 4 boats, the number actually required is 34. I contacted OcCre and they will be sending the additional blocks at no charge. If you purchase the Endurance, check the rigging plans and the instruction pictures for how many double blocks you need and how many you actually receive. Perhaps OcCre will get this remedied in the future. My kit was purchased fairly early after OcCre released the kit.


