Endurance - OcCre - 1:70 - Jeff T [COMPLETED BUILD]

Good catch, Jeff. I just started the Endurance by OcCre, so I'll check the double blocks. I, too, found OcCre to have great customer service. My previous build was their Albatros, and the few times I needed extra stuff they sent it free of charge.

Did you get your paint and stain from OcCre?
 
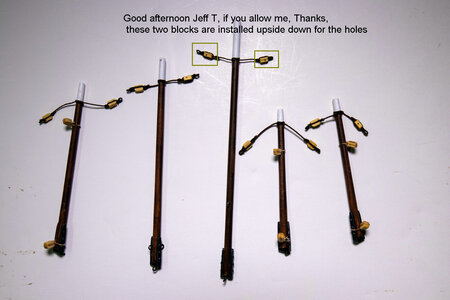
Some more catching up my progress. I have mostly finished the assembly of the masts and yards. I still have a couple of blocks to put onto the upper main and mizzen masts.

Masts
View attachment 311491View attachment 311492

Booms and gaffs
View attachment 311490

Fore mast yards
View attachment 311489

I made a count of the number of double blocks specified in the parts list (17) and the actual count I received (20, I think). However, when I counted the number of double blocks used in the rigging plan, the anchors, and the 4 boats, the number actually required is 34. I contacted OcCre and they will be sending the additional blocks at no charge. If you purchase the Endurance, check the rigging plans and the instruction pictures for how many double blocks you need and how many you actually receive. Perhaps OcCre will get this remedied in the future. My kit was purchased fairly early after OcCre released the kit.
Good afternoon Jeff T, if you allow me, Thanks,

IMG_6709.jpg
 
Good catch, Jeff. I just started the Endurance by OcCre, so I'll check the double blocks. I, too, found OcCre to have great customer service. My previous build was their Albatros, and the few times I needed extra stuff they sent it free of charge.

Did you get your paint and stain from OcCre?
I am using various acrylic paints and stains, none of which are OcCre. Paints are Vallejo, Model Expo or RichArt. Stains are SaMaN. All are finished off with a coat (or 2) of Liquitex acrylic matte varnish.
 
Continuing onwards (but not upwards, yet).

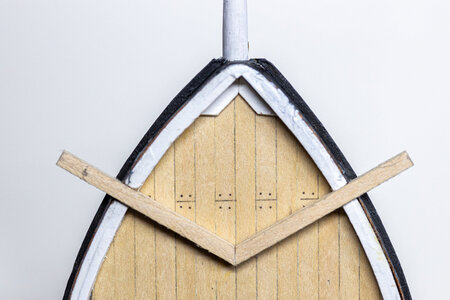
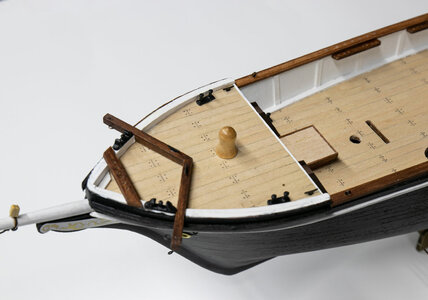
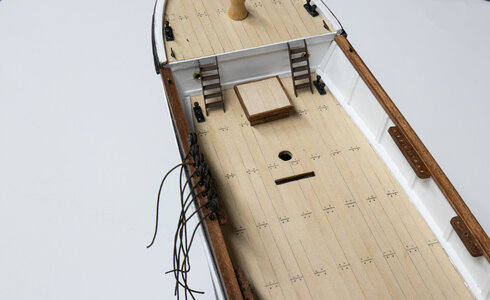
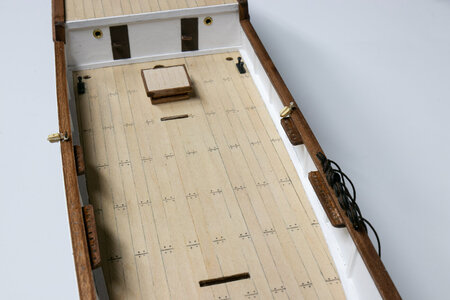
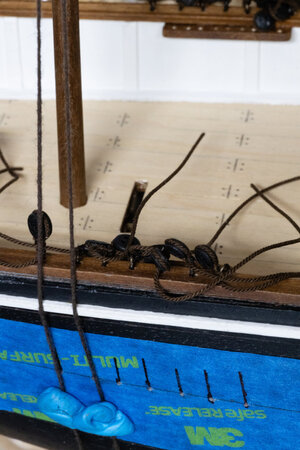
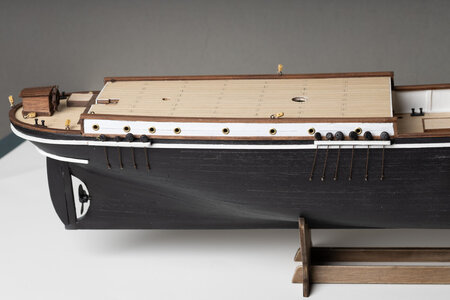
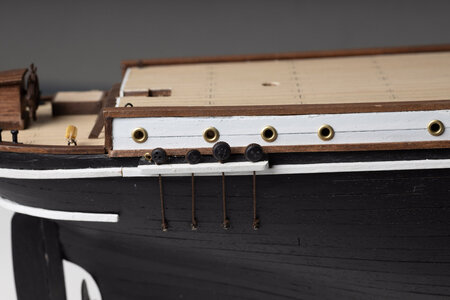
Work on the bow has been mostly completed other than the rail. Catheads, capstan, pin rail, and cleats installed. I decided to replace the eye bolt that was to be used for the inner jib sheets with a cleat on the deck. I seem to have problems with the idea of tying running rigging to eyebolts. This will be the case throughout the build.
EOSR9376.jpgIMG_6756.jpg

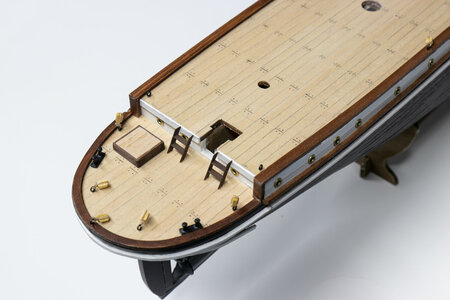
Some of the stern parts installed.
IMG_6755.jpg

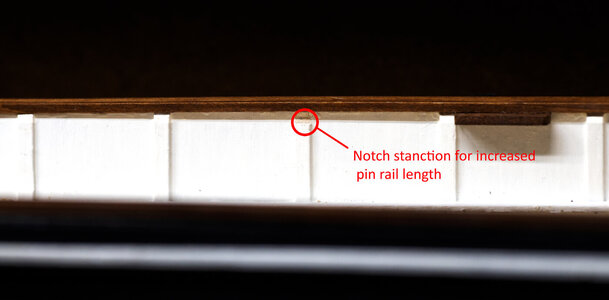
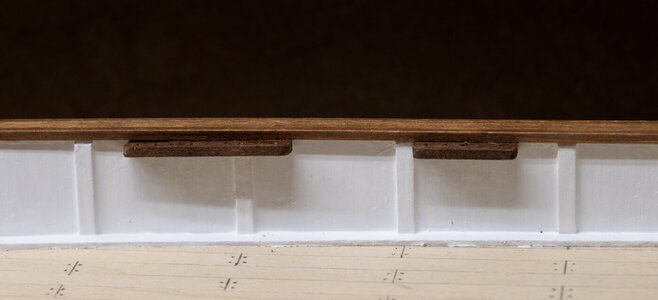
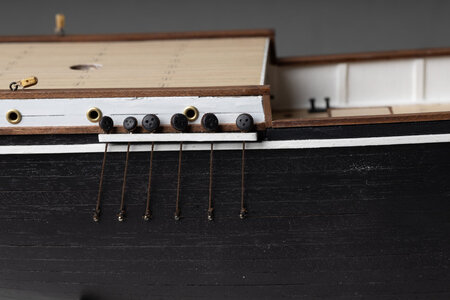
I decided that it was a good time to install the fore and mizzen bulwark pin rails at this time. Once again, I did not like the plans that had the jib sheets tying to shrouds. So, I decided to extend the fore pin rail and add pins for the jib sheets. This required carefully cutting the top of bulwark support pieces that were installed earlier. This was necessary since the longer pin rail was going to extend past that point. I extended the pin rail toward the bow by 3 additional pins.
EOSR9440-Edit.jpgEOSR9442.jpg

Next, more work on various deck fittings and the lower deadeyes.
 
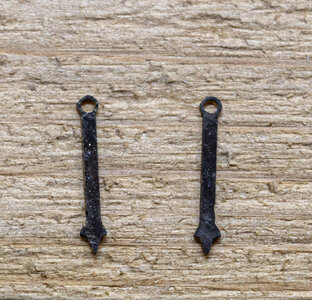
I am looking for any comments that members might have on the stanchions for the ship. The kit supplies thin flat brass stanchions as shown for the bow in the picture below. I have been struggling with how to change the rails since I got the kit. The stanchions are weak and flimsy and don't take brass black well even after a significant amount of time trying to remove whatever coating is on the brass in the kit.
EOSR9632.jpg

I really like the way Charlie (STGS) did his (https://shipsofscale.com/sosforums/...nce-by-occre-completed-build.8181/post-197843), but after a few tries I found my skills are insufficient to do what he did. So here is what I am considering instead: Using 1 mm brass nails as stanchions and tying line using clove hitches to them. The nails I will require at least a couple of trips through the Brass Black, but I don't necessarily want them to be fully black anyway. I also like the idea of having round stanchions instead of flat ones. Here's a mockup of what the double rail will look like if I stick to this scenario.
EOSR9631.jpg

Any comments, criticisms or suggestions would be most welcome. I know I am straying away for the real Endurance, but OcCre has already done a lot of that with the kit, so I don't think my changes are too much worse.
 
Last edited:
I am looking for any comments that members might have on the stanchions for the ship. The kit supplies thin flat brass stanchions as shown for the bow in the picture below. I have been struggling with how to change the rails since I got the kit. The stanchions are weak and flimsy and don't take brass black well even after a significant amount of time trying to remove whatever coating is on the brass in the kit.
View attachment 312304

I really like the way Charlie (STGS) did his (https://shipsofscale.com/sosforums/...nce-by-occre-completed-build.8181/post-197843), but after a few tries I found my skills are insufficient to do what he did. So here is what I am considering instead: Using 1 mm brass nails as stanchions and tying line using clove hitches to them. The nails I will require at least a couple of trips through the Brass Black, but I don't necessarily want them to be fully black anyway. I also like the idea of having round stanchions instead of flat ones. Here's a mockup of what the double rail will look like if I stick to this scenario.
View attachment 312307

Any comments, criticisms or suggestions would be most welcome. I know I am straying away for the real Endurance, but OcCre has already done a lot of that with the kit, so I don't think my changes are too much worse.
Good morning Jeff. Ahh yes kit imperfections and blackening brass. One of our challenges. Paul @dockattner gave a good procedure on how to use brass black. I can’t remember if it was in his log or someone else’s. To get a good result with it is a procedure and timing.

Re your stanchions- I personally don’t like the nails and clove hitches. They looks too much like nails. Of course if you do go for it- I have used this principle on my Victory many times. They are our ships after all Thumbsup

Cheers Grant
 
I agree with the comments about the generous quantities of materials in the OcCre kits. Surplus from my first two models have usefully supplemented the subsequent three (Mantua, Corel and Master Korabel). I agree that the rigging thread is soft and a bit fuzzy but it knots securely and doubles round a tight radius (pin or small block) convincingly. An alternative for long runs (braces and stays) might be considered. OcCre thread is user friendly for the dreaded ratlines.
 
Good morning Jeff. Ahh yes kit imperfections and blackening brass. One of our challenges. Paul @dockattner gave a good procedure on how to use brass black. I can’t remember if it was in his log or someone else’s. To get a good result with it is a procedure and timing.

Re your stanchions- I personally don’t like the nails and clove hitches. They looks too much like nails. Of course if you do go for it- I have used this principle on my Victory many times. They are our ships after all Thumbsup

Cheers Grant
Thanks for your thoughts especially on the rail stanchions. They do look like nail's. I have thought about using just wire so there are no heads, but they are still likely to look like nails. I am still on the lookout for alternatives. I just don't see myself using the supplied stanchions at the present time. Getting them straight without bending them looks like it could be a challenge.
 
I am looking for any comments that members might have on the stanchions for the ship. The kit supplies thin flat brass stanchions as shown for the bow in the picture below. I have been struggling with how to change the rails since I got the kit. The stanchions are weak and flimsy and don't take brass black well even after a significant amount of time trying to remove whatever coating is on the brass in the kit.
View attachment 312304

I really like the way Charlie (STGS) did his (https://shipsofscale.com/sosforums/...nce-by-occre-completed-build.8181/post-197843), but after a few tries I found my skills are insufficient to do what he did. So here is what I am considering instead: Using 1 mm brass nails as stanchions and tying line using clove hitches to them. The nails I will require at least a couple of trips through the Brass Black, but I don't necessarily want them to be fully black anyway. I also like the idea of having round stanchions instead of flat ones. Here's a mockup of what the double rail will look like if I stick to this scenario.
View attachment 312307

Any comments, criticisms or suggestions would be most welcome. I know I am straying away for the real Endurance, but OcCre has already done a lot of that with the kit, so I don't think my changes are too much worse.
Are you sure, that these are the rail stanchions of the kit.
Looking at the photos of the Occre page, the stanchions should have two holes
For my personal taste they are looking better than the used nails - btw I would change definitely the rope, it has a too big diameter and also with this the knot is bigger.....

12008_20_-jpg.jpg

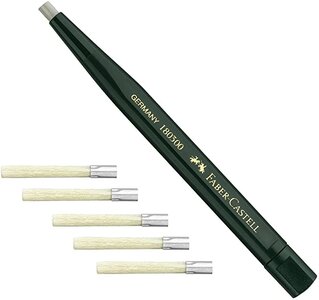
before blackening I am cleaning the small brass parts with a fiber-glass eraser, when the parts are still fixed to the photo etched sheet
61i5jseyNxL._AC_SX679_.jpg
 
Are you sure, that these are the rail stanchions of the kit.
Looking at the photos of the Occre page, the stanchions should have two holes
For my personal taste they are looking better than the used nails - btw I would change definitely the rope, it has a too big diameter and also with this the knot is bigger.....

View attachment 312762

before blackening I am cleaning the small brass parts with a fiber-glass eraser, when the parts are still fixed to the photo etched sheet
View attachment 312761
Thanks for the feedback. The kit has two types of stanchions. The bow area uses a stanchion with a single hole and the rest of the ship uses the 2-hole variety shown in the picture that you have shown. I will look into the fiber-glass eraser. I used a buffing wheel on the ones I showed in my post, but after I had removed them and seen the error of my ways, All of the double ones were cleaned while still attached to the sheet. I haven't tried blackening them yet.

I completely agree with the oversized rope. I will be using something smaller on the build. I tried a mockup with ball head pins where I used a smaller rope diameter and it looks much better.
 
Good evening Jeff. I am following your build with interest as I am as considering building this as my next build. Still away off but I really like the Endurance and it’s History. Also no cannons and few ratlines ROTF . Cheers Grant
 
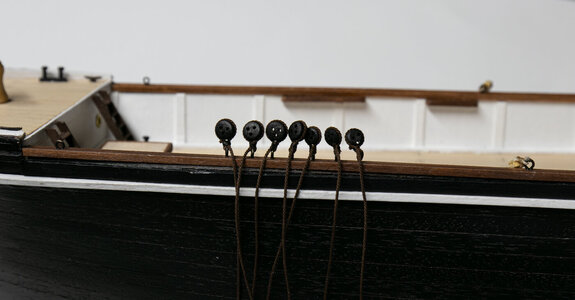
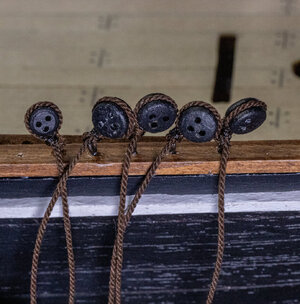
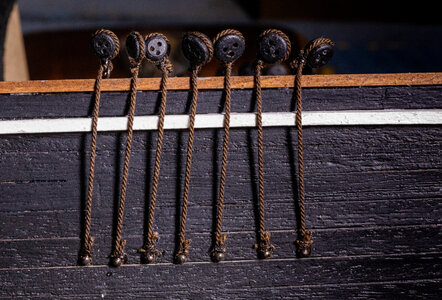
Deadeyes installed. I decided to stain the deadeyes black before installing them. The foremast deadeyes attach to eyebolts and the main & mizzen pass through the channels.
IMG_6757.jpgIMG_6760.jpgIMG_6758.jpgEOSR9450.jpg

I used a rope to the masts to get the angle that was needed to carry the shrouds to the hull.
EOSR9454.jpg

EOSR9611.jpgEOSR9612.jpgEOSR9613.jpg

EOSR9457.jpg
 
I am looking for any comments that members might have on the stanchions for the ship. The kit supplies thin flat brass stanchions as shown for the bow in the picture below. I have been struggling with how to change the rails since I got the kit. The stanchions are weak and flimsy and don't take brass black well even after a significant amount of time trying to remove whatever coating is on the brass in the kit.
View attachment 312304

I really like the way Charlie (STGS) did his (https://shipsofscale.com/sosforums/...nce-by-occre-completed-build.8181/post-197843), but after a few tries I found my skills are insufficient to do what he did. So here is what I am considering instead: Using 1 mm brass nails as stanchions and tying line using clove hitches to them. The nails I will require at least a couple of trips through the Brass Black, but I don't necessarily want them to be fully black anyway. I also like the idea of having round stanchions instead of flat ones. Here's a mockup of what the double rail will look like if I stick to this scenario.
View attachment 312307

Any comments, criticisms or suggestions would be most welcome. I know I am straying away for the real Endurance, but OcCre has already done a lot of that with the kit, so I don't think my changes are too much worse.
Hi Jeff,

Caldercraft make brass stanchions, you need the 12mm long pieces.
The part no is 66B0518 for the two ball stanchions and for the single 1 ball stanchion for the bow, the part no is:66B1881.
There are ten pieces in a pack so count out the Occre photoetch sheet flat 2D parts then you can figure out how many you need. The Caldercraft parts look like a realistic replacement for the Occre parts.

Hope this helps?
As an aside I am replacing the portholes supplied with the kit by other 5mm portholes as the kit pieces look simplified compared to photos of the actual ship.
 
Deadeyes installed. I decided to stain the deadeyes black before installing them. The foremast deadeyes attach to eyebolts and the main & mizzen pass through the channels.
View attachment 313234View attachment 313236View attachment 313235View attachment 313228

I used a rope to the masts to get the angle that was needed to carry the shrouds to the hull.
View attachment 313229

View attachment 313231View attachment 313232View attachment 313233

View attachment 313230
Good morning Jeff. You may have mentioned previously- are the ropes from the kit? They look rather good. Cheers Grant
 
Deadeyes installed. I decided to stain the deadeyes black before installing them. The foremast deadeyes attach to eyebolts and the main & mizzen pass through the channels.
View attachment 313234View attachment 313236View attachment 313235View attachment 313228

I used a rope to the masts to get the angle that was needed to carry the shrouds to the hull.
View attachment 313229

View attachment 313231View attachment 313232View attachment 313233

View attachment 313230
Lovely work BTW- a good looking Endurance thus far. Nice!
 
Good morning Jeff. You may have mentioned previously- are the ropes from the kit? They look rather good. Cheers Grant
I am not using the OcCre supplied rigging rope (too soft and fuzzy and only 3 sizes are provided). What you see is rope that I have made on a Syren Rope Rocket. The thread I am using on this build is cotton 50 wt thread. The rigging number of threads used in each rope will vary based on its use. 1x3 (3 individual threads made into a single rope) for most running rigging. 3x3 (3 ropes in each of the three eyes of the machine) for the shrouds. and either 3x3 or 3x4 for fore and aft stays. Not very scientific in terms of sizing, but the scales will look OK on the ship. I also run the line through a diluted (1:10 or so) white PVA glue bath after I make the rope. It helps to control "fuzzies" and adds just a touch of stiffness to the rope. I may move to polyester rope on my next build; I just made some to see how I like it and it turned out quite well.
 
Hi Jeff,

Caldercraft make brass stanchions, you need the 12mm long pieces.
The part no is 66B0518 for the two ball stanchions and for the single 1 ball stanchion for the bow, the part no is:66B1881.
There are ten pieces in a pack so count out the Occre photoetch sheet flat 2D parts then you can figure out how many you need. The Caldercraft parts look like a realistic replacement for the Occre parts.

Hope this helps?
Thanks for the information. I previously looked at the Caldercraft stanchions. They are very nice. Unfortunately, also expensive. It would cost about $70 dollars plus shipping to use them and this puts them out of my budget for the build.

I have decided to use the kit supplied stanchions even though I don't particularly care for them.
 
Back
Top