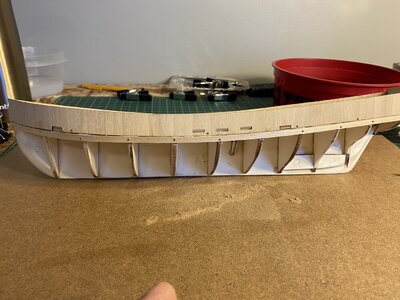
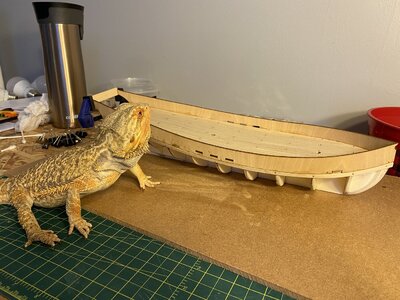
First Build - Polaris by OcCre, 1:50 scale [COMPLETED BUILD]

Joined
Jun 3, 2021
Messages
56
Points
88

Location
Nashville, TN
So here we go...

Finally got my workshop set back up after some family responsibilities forced me to give it up for a while. Time for a new hobby! I've always like sailing ships, just from an aesthetic point of view, and have been fascinated by the scale models I've seen people build. But it's always been something that I thought, "even if I had the time, I could never do that." Then, late one night, I found myself down a YouTube rabbit hole, and started to think, maybe I CAN do this if I don't try to build the most complicated thing right off the bat.

That brought me to this:

IMG_2367.png

I got a collection of tools together (I already had a lot of them, anyway), and ordered the kit. Last night, I opened the box...
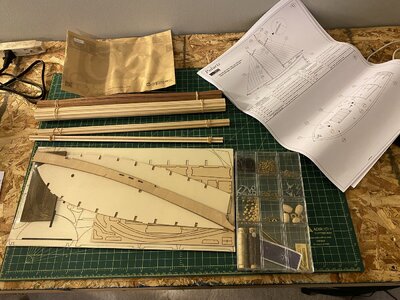
IMG_2374.JPG

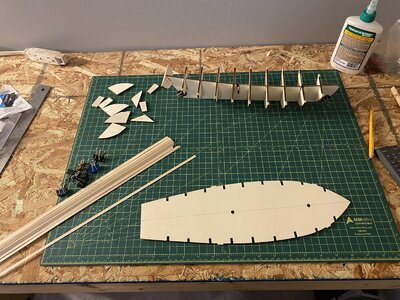
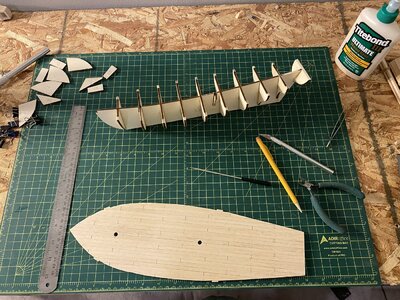
Ooookay... little more intimidated now, but still confident. I started by numbering the laser-cut hull parts, and then separating them from the frame. A quick sanding to remove the tabs, and things are looking a bit more manageable.
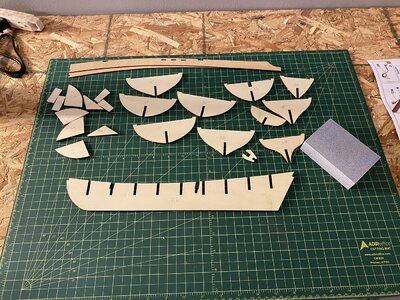
IMG_2375.JPG

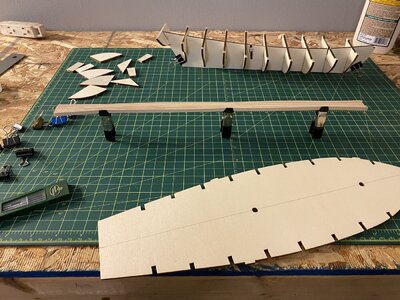
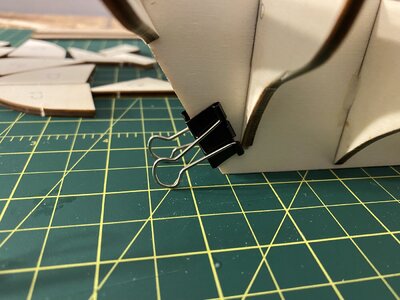
I didn't get any photos of the actual assembly, since I was doing my best not to get glue all over everything, and I certainly didn't want any on my phone. I had a bit of trouble keeping the bulkheads straight while preparing the next piece, then I had a bit of an epiphany:
IMG_2377.JPG

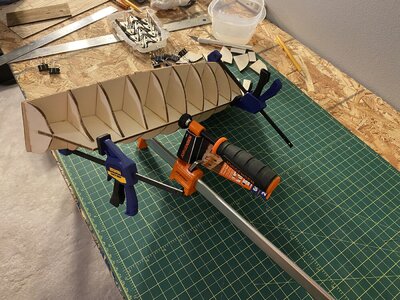
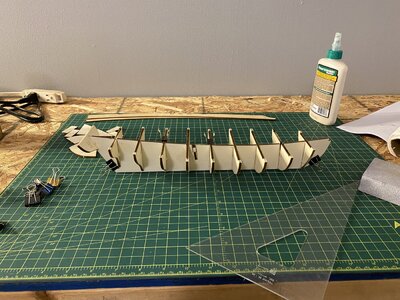
Bulldog clips make excellent stabilizers! After about 2 hours of work, it was beginning to look (at least conceptually) like a ship.
IMG_2376.JPG

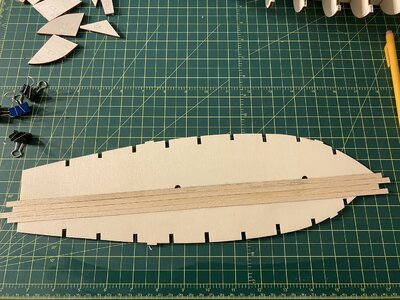
Next step is planking the deck. The instructions call for drawing the plank pattern as a simple staggered pattern, but after looking at a lot of other builds, I like the look of a 5-butt shift. My concern is that it would be too "busy" on a deck this small, but the staggered pattern looks too plain, and not "realistic" to me. Anybody have any thoughts?
 
Good afternoon. Search the Internet for Mondfeldt's book "Models of Historical Ships". In general, the book is interesting, about the skin and deck boards is written in the section " Hull"
 
Let's plank the deck!

IMG_2380.JPG

I found the blackening of the edges of the planking material with pencil to be more difficult than I had anticipated. I had some soft lead from drafting pencils (which can be seen in the green box to the left in the below image), and that worked better, by using the side of the stick of graphite. I saw another post where someone on here had used black crayon. I may try that in the future.

IMG_2381.JPG
IMG_2382.JPG

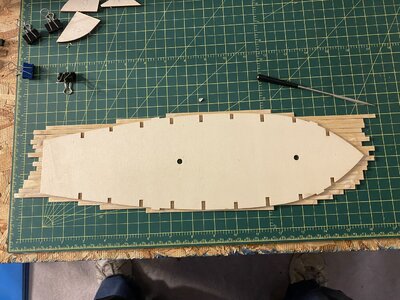
Due to some of the comments I have read in these forums about the problems with using contact cement, which is what the instructions say to use, I opted for white wood glue instead. I have been using Titebond III, and I find the work time/set time ratio to be pretty good. I can still slide things around for a minute or two, but within ~30 minutes it is set enough to support trimming.

IMG_2384.JPGIMG_2385.JPG

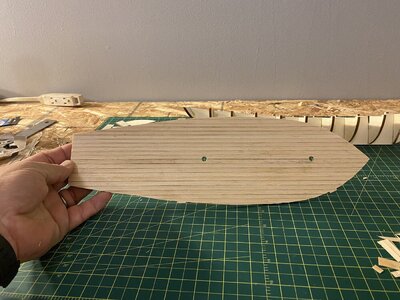
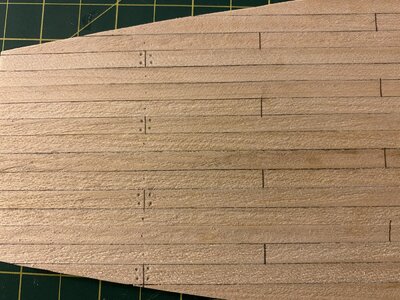
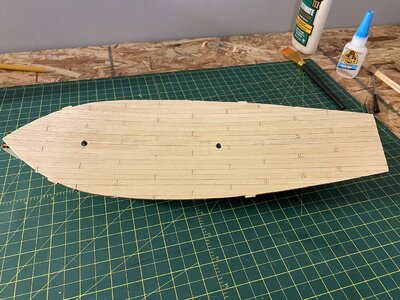
After a light sanding, I started drawing in the ends of the planks and the nails. I initially VERY lightly penciled in the 5-butt shift to see if I liked it before sanding, figuring it would be sanded out if I didn't like it. It ended up that I did like the look, so that's what I went with.

IMG_2386.JPG
IMG_2387.JPG

By this time, it was getting pretty late, so I will have to finish the penciling and varnish the deck next session. So far I'm pretty pleased with how this is going, but as always, comments and advice are welcome!
 
Let's plank the deck!

View attachment 238078

I found the blackening of the edges of the planking material with pencil to be more difficult than I had anticipated. I had some soft lead from drafting pencils (which can be seen in the green box to the left in the below image), and that worked better, by using the side of the stick of graphite. I saw another post where someone on here had used black crayon. I may try that in the future.

View attachment 238084
View attachment 238085

Due to some of the comments I have read in these forums about the problems with using contact cement, which is what the instructions say to use, I opted for white wood glue instead. I have been using Titebond III, and I find the work time/set time ratio to be pretty good. I can still slide things around for a minute or two, but within ~30 minutes it is set enough to support trimming.

View attachment 238086View attachment 238087

After a light sanding, I started drawing in the ends of the planks and the nails. I initially VERY lightly penciled in the 5-butt shift to see if I liked it before sanding, figuring it would be sanded out if I didn't like it. It ended up that I did like the look, so that's what I went with.

View attachment 238089
View attachment 238090

By this time, it was getting pretty late, so I will have to finish the penciling and varnish the deck next session. So far I'm pretty pleased with how this is going, but as always, comments and advice are welcome!
You are doing a great job so far!
Not to be critical, but I thought I would offer some advice on the deck planking for consideration.
On the deck planking, your method of using one long plank, the distance of the deck, is easier. And many people use this method. However when you add the butt joints, the wood grain runs through one board and continues on the adjacent board. This tends to look less realistic, verses cutting boards to length and mixing them up, like a real wood floor or deck, where the wood grain is different for each board and does not continue through the butt joint. Something to consider on your next ship. ;) Currently it isn't that obvious, but once you add stain or finish, the wood grain will pop and it will become more noticeable to the trained eye. But by the time you add all of the deck furnishings, those details tend to be a little less noticeable. Keep up the good work!
 
Last edited:
This tends to look less realistic, verses cutting boards to length and mixing them up, like a real wood floor or deck, where the wood grain is different for each board and does not continue through the butt joint.
Thanks for the input! I actually considered this as in a former life I was a tile man, and this is the method we used for materials like slate, but seeing as it is my first build, I decided it was best to focus more on developing technique and try for more "artistic" touches on subsequent builds. I have a tendency to let my reach exceed my grasp on projects, and in the interest of turning this into something I may actually enjoy long-term as a hobby, I made a conscious decision to employ the KISS method for this build. :)
 
Thanks for the input! I actually considered this as in a former life I was a tile man, and this is the method we used for materials like slate, but seeing as it is my first build, I decided it was best to focus more on developing technique and try for more "artistic" touches on subsequent builds. I have a tendency to let my reach exceed my grasp on projects, and in the interest of turning this into something I may actually enjoy long-term as a hobby, I made a conscious decision to employ the KISS method for this build. :)
Sounds like good logic to me! ;)
 
Я согласен с автором и с мнением Din62. У каждой версии своя логика.
Xmtrdude - правильное решение, чтобы завершить сборку и посмотреть, действительно ли она вам нравится. Но учтите советы в будущем (если вам нравится это хобби). Они не будут лишними. Поэтому, если автор не возражает, я не буду комментировать, если автору это не нужно. Буду рад посмотреть.

I agree with the author and with Din62's opinion. Each version has its own logic.
Xmtrdude is the right solution to complete the build and see if you really like it. But consider the tips in the future (if you enjoy this hobby). They will not be superfluous. Therefore, if the author does not mind, I will not comment if the author does not need it. I'll be glad to see.
 
Last edited by a moderator:
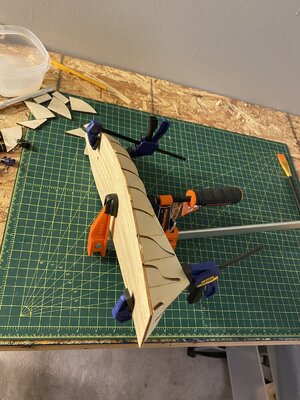
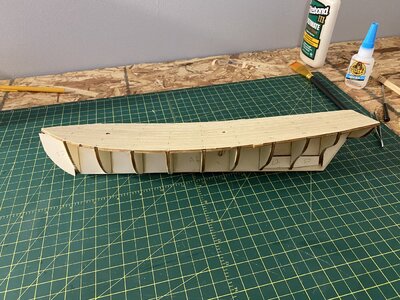
Not a lot of progress this time, as a lot of the time was spent waiting for the 2 coats of polyurethane to dry on the deck, but I did manage to get it glued to the bulkhead with the aid of clamps.


Rc89d086564ca13de985f04e43344821d.png


No, no, no, not him. THESE clamps...

IMG_2390.JPGIMG_2391.JPG

After an hour or so, everything was set and looking pretty good...

IMG_2392.JPG

IMG_2393.JPG

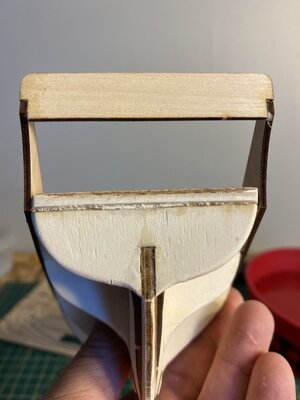
I also added the reinforcements. While gluing them in place, I noticed a problem, which some of you more experienced guys may have seen in one of the above photos...

IMG_2394.JPG

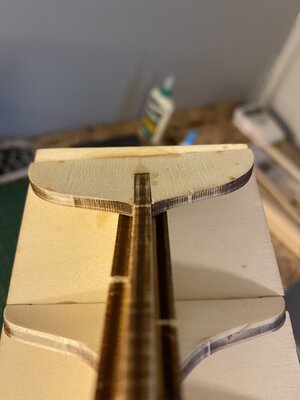
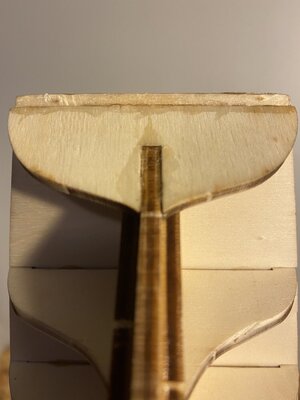
It appears something slipped while the glue was still wet on the tailpiece. I set it with a square and with a ruler, but I guess it moved before the glue completely set up. So, how do I proceed with this? I could try cutting it away, but I'm afraid I may end up damaging something else in the process. Another option I thought of was to try to use wood filler to even it out before I sand down the edge. Or is this a big enough issue to even worry that much about? Looking ahead at the plans, the planking on the rear is actually attached to the tail end of the bulwarks, so maybe could just use some scrap wood the create a support shim for the port side?

85865.png

Thanks Clamps, but I think I'll see what everybody else has to say.
 
I am in synch with Alexander, another method is to use alcohol. Use cotton swabs and wet the gluing surface, after a while pry with a sharp knife in the gaps.
 
You put Titebond on the glue. Wet the place of gluing and heat with a hair dryer. Carefully disassemble and align this place in the stern.
I am in synch with Alexander, another method is to use alcohol. Use cotton swabs and wet the gluing surface, after a while pry with a sharp knife in the gaps.
Thanks for the advice, I will try this.
 
Even if you say this is your first build (of which you are really doing great), your techniques are all well in hand. This should turn out to be a nice looking ship.
 
Well, the water and alcohol didn't really do anything to dissolve the glue. In the end, it just took a new Xacto blade and some patience, and I was able to square things up on the stern.

IMG_2396.JPG

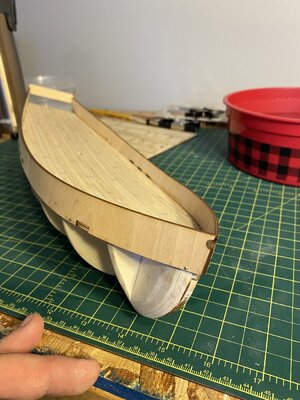
So, that unpleasantness sorted, time move on! Bulwarks were the next to go on...

IMG_2397.JPG

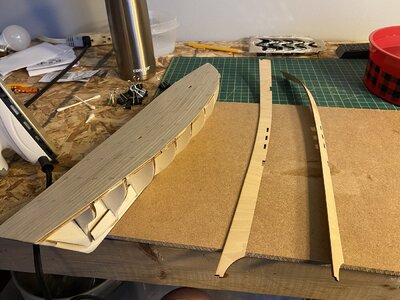
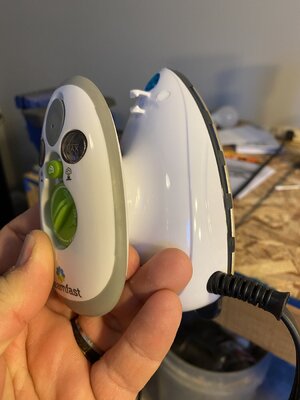
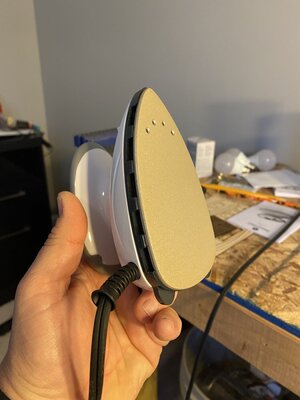
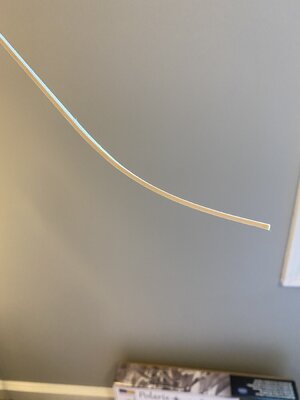
I was on the verge of ordering a plank bender, when I ran across this adorable little devil at Wally World...

IMG_2402.JPGIMG_2403.JPG

It works really well, and only 12 bucks!

IMG_2404.JPG

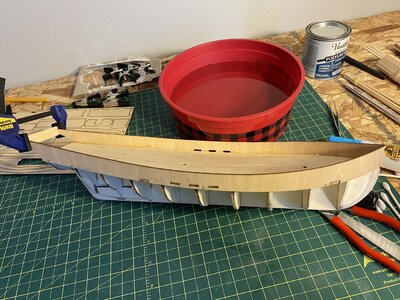
Attaching the bulwarks was interesting. First time using a push nailer, and it took a couple times to get the technique down. I think it came out ok in the end though...

IMG_2398.JPG

IMG_2399.JPG

This tailpiece is being a real #@$%& though. It keeps falling off. I initially attached it with the Titebond, but it fell off. So I used Titebond and a clamp. STILL fell off. Tried CA. STILL FELL OFF. I think I finally got it to hold, but if it comes off again, I think I will just wait until the rear planking goes on so it has something more substantial to attach to.

IMG_2400.JPG

OK, now for the part I've been the most apprehensive about. Time to start the first hull planking layer...

IMG_2401.JPG

Well, the first plank is on, and I think I have the hang of the nailer, so maybe it will be alright. Going to take it slow, and... Uh oh. Foreman just dropped by to check on the job. Hey, Doug!

IMG_2405.JPG

That's all for now. Doug has to do an inspection and I've got homemade meatballs in the crockpot, so I'll sign off. Later!
 
Even if you say this is your first build (of which you are really doing great), your techniques are all well in hand. This should turn out to be a nice looking ship.
Thank you! My day job requires quite a bit of attention to detail, and you don't do something for 30 years and not have some of the habits leak into your personal life.
 
Great start, and welcome aboard. I live just South of you.
Thanks! You probably live just southwest of me, actually. I'm in Gallatin. You know how it is, it's easier to tell people from outside the area "I'm from Nashville".
 
Back
Top