Gokstad Viking Ship by jack.aubrey - Dusek Ship Kits - 1:35 Scale [COMPLETED BUILD]

An interesting question I received from another user . .
Have you considered pre-staining the strakes before installation?
Yes, I really considered to stain the planks before installing them as i made for the keel and the frames . . but at the end I decided that it was a painful task to be done (stain, wait to dry, fix the color with diluted glue, wait to dry and finally use it) and in addition the dark color would made the work much more difficult, adding visibility problems to watch what I was doing . . in place of it I made a lot of care to remove as better as possible any trace of glue during the process.

Saturday, January 30, 2016

After having applied a few more strakes it's now time to remove the hull from this building slip because I can no more effectively use the standard clamps to hold the strip while the glue dries. But I am sure that it's unlikely, at this point, the hull will be deformed. . And soon we will also see how she looks like inside . .

01 31012016 P1100459.jpg
y4mQjTV54EKp-UBWoubNzmfUH8wjPszyTzvjMTLe


02 31012016 P1100462.jpg
y4m4B5w33XQ-RLDL9hNJVfPJAx3bVoTgizH8nJEx


03 31012016 P1100463.jpg
y4mkcUB1WYpnOWk3DGkokeJZpFV0BazBaJwuBOvA


04 31012016 P1100460.jpg
y4mpW7deSMdLNJ5WHOeAu7Ubq3lHo94I_bU1KzTV


05 31012016 P1100461.jpg
y4m4igHdaYQbT2I_yudNMAZeLJ8z4Fyu_6edZdpP


Regards, Jack.

PS: do not pay attention to the different lengths of the strips at the bow and stern; some were long, some even almost short, when I'll finish the planking I expect a little extra work to fix these two areas . .
 
Monday, February 1st, 2016

The photos here below are obviously not so great, being them shot using my smartphone in low light conditions, but still give an idea of how the hull looks like when the model was detached from its building board.

01 20160201_165033.jpg
y4mSMjYjaLaS-u0qG1vn4yTp83jaijYAlEUEdQpR


From this moment it's possible to reuse the first building board I made, although theoretically the hull does not deform anymore, but it makes easier working inside. Later today I finally installed the internal deck, after having applied a coat of glue inside the shell. With the deck installed this coating cannot be seen and then I took the opportunity to further strengthen the planking of the hull.

02 20160201_164938.jpg
y4mRVnt76jrQHK0F8ipyIllhUb12Z8M7-D6QDXxv


03 20160201_164930.jpg
y4mnk72BCsirhEBKsu69adP9Ipfj_RThwaCGVpXT


04 20160201_164923.jpg
y4mF-iiivJ40gUTYu7TNgZ6XVDKw3nF0PHjvSsQF


Regards, Jack.
 
Sunday, February 21st, 2016

Just a brief update on this build:
when I installed the deck I made a small but unrecoverable mistake, that anyway most probably will be corrected more in advance.
But this fact had a negative impact on my enthusiasm with the result I did nothing for a while.
When I was ready to resume I got a problem on my right shoulder that stopped me for another week.
So I restarted only yesterday, continuing with the planking. But I cannot proceed as fast as I'd like and I can install only a plank per side each day. As soon as I'll have something showable 'll resume the log with new comments and images.
Kind regards, Jack.Aubrey.

Monday, February 22nd, 2016

After twenty days from my latest update, I'm publishing, more due to desperation than anything else, the photos of this Viking ship model, stressing the fact that during this time I have not made much progresses. The reasons were many, but certainly one is mainly related to the greater complexity of the planking with the clinker system. Now I nicknamed it as "Klingon" system, named after the alien race in the Star Trek saga, so much hard and "time consuming" this system is: between the installation of a half plank and the remaining half (remember that a strake is made of two pieces, one of about 2/3 the total length and the other the remaining 1/3) it's necessary to wait that the glue will dry very well before to proceed further. Due to this fact I'm more or less forced to work with short sessions of one hour or less at a time and it may happen I can not always apply an entire course per side during one day. Hence the long lead times which certainly do not stimulate the wish to continue.

At the time, I reached the point illustrated by the pictures below: three courses per side are still needed to finish the planking, but before their installation it's necessary to clean the top of the frames, over which there is some waste material coming from the removal of the hull from the overturned building board, and apply new elements to complement the existing frames.

Let's begin with a vertical overview image, where you can see that the hull curve trend is pretty straightforward, with some few exceptions still remediable: with the "Klingon" system some advantages also exists and one of them is that if a course does not fit perfectly or has a bad curve trend, you can easily mask it with the next course, provided it is correctly installed.

01 25022016 P1100465.jpg
y4mLqU3P0XG72vXpdHvwwed-wWixpVyNqXZL6H5Z


A detailed view of the bow area . . here I have not yet fully completed the installation of the last course: it remains to glue the plank on the last three frames and on the stem, but because of the curve that takes up rather strongly, I prefer separate the work in two steps.

02 25022016 P1100466.jpg
y4mfo8Oflu0WgJODwcVJGDZFhHB3y2MQFhPDF69y


An overturned hull view of the midship area . .

03 25022016 P1100477.jpg
y4m9QrSxdu5iyzaIbvZ9n7eOFPJ_YGXOYabZ80GG


Overal view of three-quarters and detail of the stem, where you can watch the significant mess I made with the length of the individual strips; and this happens also at the stern. An issue I'll pursuit when the planking is off . .

04 25022016 P1100464.jpg
y4mP8fOPhrzujFZ1airMayrIQ2Wvvi6qTSF9Tqm7


05 25022016 P1100468.jpg
y4mCPtLY0nErFKQZ6b18EhDtcKWDlYg38stVWVoX


Finally, the stern area, definitely resulting better than the bow . . here the curve trend of the strakes is much better and did'nt create any problem . . instead the bow was, in my case, very different !!

06 25022016 P1100470.jpg
y4mFoeN01L5I4a_YrXUkTDeA2q1LMdp9uUso4zH-


To the next step, Jack.
 
Monday, February 29, 2016

As I already mentioned in a previous post, before continuing with the installation of the last three planks it was necessary to start some new, but preliminary activities.

In the days between my last post and now, I proceeded to perform these following tasks:

1) - Clean up the upper end of the frames from some waste material produced during the task of detaching the hull from its board: the removal had occurred using a mini-drill power tool with a cutting blade; the finishing, instead, was done with abrasive pads.
2) - Installation of new segments on many frames in order to continue with the necessary framing structure for the next planks; in particular this activity, apparently simple, needed to adapt these new parts to shape the correct bevel angle, otherwise they couldn't be applied as suggested by assembly instructions.
3) - Finally, with more in mind the objective to test the goodness of my approach with the colour scheme than for a real need at this stage, I proceeded to stain the interior of the planking and the visible part of the frames. This to make sure that the dye was properly distributing on the wood, also when there are some glue residuals, due to the non-easy task of removing the glue in excess during the planking. To achieve this goal, I modified the dye, prepared some time ago, by adding a good amount of alcohol to the mordant: this trick has meant that the soaking ability is now higher and, above all, it also worked in the presence of underlying glue. From the proposed pictures below, it seems to work perfectly . . .

01 29022016 P1100480.jpg
y4mHHCmfcNZWI3t0ALjpLzByWHycSaMdyO6bk1zn


02 29022016 P1100481.jpg
y4mqxkz5JXCBqSGCbkt_gPCVpg1mqL0VbVa31o5R


03 29022016 P1100478.jpg
y4mMgJE19NnVz6G4WtKlXAfocVyg7-t6u5Pkx9n0


04 29022016 P1100482.jpg
y4mktDV3D-92bpQJbKCI3igdJKApr0Iv57V_E67c


05 29022016 P1100479.jpg
y4mDyW40LtpU-JnvkNE7a3NSwM4ou98JiHMyK6qU


Obviously this mordant fluid, that should primarily simulate the caulking that was run all over the hull by the Vikings by using tar, is no doubt dark, but it was so made, so it's right . .
One last point: this really dark colour helps very much in hiding any defect of construction. I believe that once I'll apply some coats of transparent paint, rigidly opaque, everything will seem perfect and also the gloss and opaque areas that can now be observed, especially in the last picture shown, will disappear completely. Although I'm wondering if the realism rules would suggest to keep partially gloss/opaque as I don't think tar produces an nice and clean effect . . probably the opposite . .

At this point I should be able to continue with the installation of the last planks . .

Regards, Jack.
 
Friday, March 11, 2016

I finally finished the planking laid down with the "Klingon" method.


I have to admit it was a really great experience, from which I learned many things: first to proceed slowly. From the three-four strakes per side that typically I can apply during a working session with the "carvel method"", with the "clinker" it was a success when I was able to apply one strake per side every two days. Probably, if a strake should be made with a single strip rather than by two probably I would have needed half the time I spent. A possible idea for an improvement to the author of this kit.
However it was a considerable good exercise for my patience, property I think to own a lot.
In addition, as I proceeded away from the keel, the initial errors grew, so I had to spend time and efforts to fix some things . . if you watch closely the attached images you will see some frames where I had to insert some wood to get a proper curvature, without "valleys or hills".

Now that the laying of the planks is over, a phase of arrangement of the whole complex begins, starting from the two hull ends but also from the reconstruction of the modified frames where I had to add wood. But all these tasks worries me much less than what I have done until now. However the shape of this boat is spectacular . .

Now that I came out from the "Klingon planking" tunnel I plan to keep my diary updated regularly. See you next time, Jack.

01 11032016 P1100483.jpg
y4mSXUQOjB8VZ75LasHX2nN7xhABE4VTKT5nVuW2


02 11032016 P1100489.jpg
y4m416EMiOcmrqZ_il-8GWQWEPHvC5unlDZ4rDsn


03 11032016 P1100484.jpg
y4mJwJABBMo8O0jnCiDx3DFLa7DL4857ku-LMwnj


04 11032016 P1100487.jpg
y4m7sKcwW_NsP23mO2pOp5xKNYDp3cXvkng9bwou


05 11032016 P1100490.jpg
y4m4nAeWyPhGsS82glVbyOyDzDZg6-DcttGgLvrM


06 11032016 P1100485.jpg
y4mo30_FRQYoWbf3xoFZtE4ndg4FbhwqjicvD1yF


07 11032016 P1100488.jpg
y4mhQ_rV-M73FWTMY6tcWS_B8f1VutIzYC7dvKYy
 
Friday, March 18, 2016

First I worked a little inside the boat: I added an element not present in the kit, but I found listed in the Nicolaysen monograph, the archaeologist who in 1882 discovered this ship. It is a reinforcement on the last strake which also implements a small gunwale. On the model it is, in practice some 1x3 strip clips inserted inside, between a frame and the other.

01 20160318_141156.jpg
y4mzpe4xjEK5OUvEXrckrmNLROrXNN44I4zyL5QL


Finally I filled with a mixture of glue and wood dust the inside of the bow and stern, in proximity of the keel, to provide a greater reinforcement to the strips bonding in this area. Then, to better hide this I applied an "ad hoc strip" of veneer that hides everything. .

02 20160318_141205.jpg
y4mJpd-yOkRhSk9rspbL0jrLBamRF3__GDPhQRYU


03 20160318_141202_HDR.jpg
y4mHPjJvO4cGv3nadBYzQH1zOhJv38k9yKevjU-G


Then I worked to refine the exterior of the keel area, particularly at the bow and at the stern, where I made a little mess during the planking. Here too I used veneer that allowed me to settle for good the areas subject to the treatment. Don't care about different types of timber used because you will not see any difference when it will be dyed. .

04 20160318_141117.jpg
y4mhtY_28BBRHCWVGD5oR56JNSsjs3OTnHuboFCJ


05 20160318_141020.jpg
y4mZ8M7uWH3PDnmTIdKKRNQYToUEn3J_WUMKdw4X

06 20160318_141048.jpg
y4mrf4uWdlsVPbX8lQ3sirEctsQ6DGM1DlBizhMJ


It may seem little thing, but it took me four 1.5-2 hours working sessions each to come here.

I also planned and I am now preparing a further building slip, more practical of the first I built, for the continuing of this build. But this is not yet finished.

A friendly greeting, Jack.Aubrey.
 
Many thanks to all of your for the likes.

As I wrote sometime ago this is a new, challenging experience in planking and I'm happy of the result, being it my first attempt. Here below some add'l pics of prow and poop details, were I made the bigger work.

01 20160318_141140.jpg
y4mMiXPPl16mxP7-S-GV9PHfOO9Zp9U4oKNEizHU


02 20160318_141121.jpg
y4mEzUwEp5EQS1AmLXlxPNkrcTcBQb_URgakJXs4

03 20160318_141128.jpg
y4mUTHBlqpMOYgb5dW8CJJeykUB4VtyYc7SWzm1n

04 20160318_141136.jpg
y4mdVlx4uSAjCwch2iyVekVGAkUx4_2IDuNiCjRy


Regards, Jack.

PS: At the time I purchased this kit I bought also another kit, the Viking Knarr, 1:35 scale, that isn't a warship but a merchant ship. But the planking is always clinker (or klingon as i named it) and i'll make use of this first experience.
 
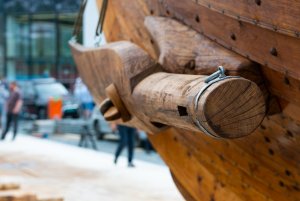
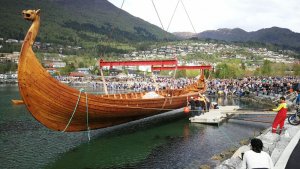
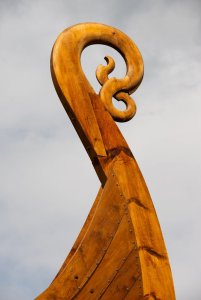
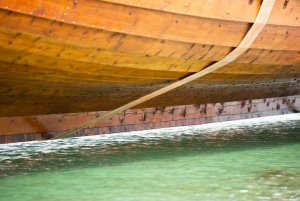
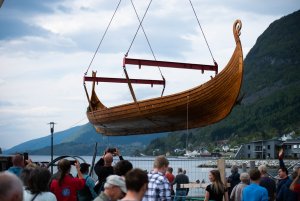
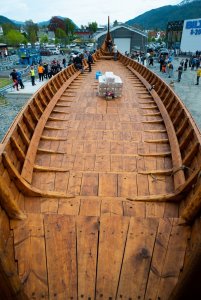
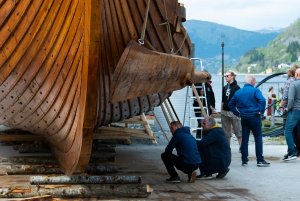
Jack. recently a reconstruction of the Viking ship (Myklebustskipet) was launched here in norway.
The ship is 30 meters long and 7 meters wide, 14 tons.
myklebustskipet.nrk.no
Opportunity these pictures may be of interest!
myklebust skipet (1).jpgmyklebust skipet (2).jpgmyklebust skipet (3).jpgmyklebust skipet (4).jpgmyklebust skipet (5).jpgmyklebust skipet (6).jpgmyklebust skipet (7).jpgmyklebust skipet (8).jpgmyklebust skipet (9).jpgmyklebust skipet (10).jpgmyklebust skipet (11).jpgmyklebust skipet (12).jpgmyklebust skipet (13).jpgmyklebust skipet (14).jpgmyklebust skipet (15).jpgmyklebust skipet (16).jpgmyklebust skipet (17).jpgmyklebust skipet (18).jpg
 
I am not sure, it is at least big if you search this address - myklebustskipet.nrk.no
There is very much information of interest there.
Greeting-
 
Saturday, March 19, 2016

Apart from changing the color of the carpet, from green to orange, there is nothing different from the pictures of my previous message unless the new (and third in the series) building board which will accompany me in the coming weeks (or months) until completion of this model.

Taking advantage of the fact that the protruding sides of the hull keel are quite high, I thought at a solution of building board able to clamp firmly it. It is also much more light and easy to handle compared with the first version.

Simple but effective, I believe that from now on it will be very useful and functional.

01 20160320_102923.jpg
y4mGxFuGWFZkOuOHWvflDSghlIbBIqzx7BWQykrA


Below the new pictures with the model clamped by the new building board.

Enjoy the show, Jack.

02 20160320_102755.jpg
y4m2p6OFU9N-KZpkNJ8uZB_SFL0m5C1l4Th0OZlo


03 20160320_102823.jpg
y4mSHQEn_zXAhrFPaCKDlw2c5HHVZkLjr4SESZfc


04 20160320_102739.jpg
y4msc-guv4soaL0e0P8wIVKfqv2XwbeqnpiIzzmO


05 20160320_102811.jpg
y4mR27Hi0N62KorqHSrYqyRwmBdGmdgJ46mpM3W2


06 20160320_102802.jpg
y4mbvfOgLFMeHh107NM4VviNf7ZDFDzs0F3Smerp
 
Tuesday, March 22, 2016

Today I have finished the shell and the ribs inside the hull. I rounded the tips of the ribs after having levelled them to the upper edge of the hull. At the end of the session I applied the "special" color prepared some time ago to simulate the tar finishing.

The main fact to point out is that, despite having made many efforts to clean up the glue in excess during planking, it is still somewhere present and, there, the appearance of the stained wood is semi-gloss, while when the glue is absent it is rather opaque. This means than one or two coats of matt transparent will be, at the very end, mandatory to achieve an uniform finishing effect.

Now it is time to work outside the hull, to complete the refinement of the external side and apply the same painting scheme. Next steps . .

PS: I found serious difficulties to take pictures in which seeing something interesting in these very dark hull sides, result of the treatment with dye; for this reason I had to modify the original images with Adobe Photoshop to highlight details otherwise invisible. I humbly apologize for this manipulation.

See you soon, Jack.

01 20160322_161618.jpg
y4mZXLzeCFHtagfq4DSPHSmRWw5Eca0C49Wbza-R


02 P1100494.jpg
y4m8es-MoD1QzxGqWHzRGym8msb6fAhqeJJYGX6V


03 P1100495.jpg
y4mTEuTxK2PuqUcawOd9SRkttJaiLOXpeowT-FJr
 
Thursday, March 24, 2016

Today I finished the outside of the hull: sanding, individually made on each strake, followed by a coat of the same stain I used for the interior.

To highlight: although to a lesser extent, the same problem facing the inside emerged also here, due to the excesses of glue that I wasn't able to clean completely. Also because this glue excess was simply completely invisible before applying the stain. It worked, in this case, as a highlighter.

So again one or two coats of matt transparent paint will be needed to obtain a uniform background.

Regards, Jack.

01 20160325_094013.jpg
y4m6JKpls5RseWY13t_hzugTQpEX7mU_MfS3UzLR


02 20160325_094024.jpg
y4mVQ6uuE7gnXy9EQ4F9aXYgpwZPjWHfaVDhwhVM


03 20160325_093805.jpg
y4mxBiGQlTGp8Ax73uUDGBQdP50ILwnlQF6dOiWX


04 20160325_093823.jpg
y4mutFx1Ov51sEFm4bKkE1MfdD4bMxZ5ARJrKgdV


05 20160325_093757.jpg
y4mxKP1H4HgEitv7Kc8Tj2C0xTAoQqfJPs-Oj94I
 
Many thanks to all of you for the likes and positive appreciations of my work. Thanks again, Jack.

Tuesday, March 29, 2016


Having finished the hull, at least regarding the general appearance, I started the covering of the deck. Task without any particular difficulty, requiring only patience and precision.

Below the images of the model when I reached one half of the deck planking task. Enjoy them, Jack.

01 20160330_103606.jpg
y4mHtrjKJlYMItJdEX1AFJhdP-bJFm7nk4CkeLem


02 20160330_103556.jpg
y4mFilrmqrAMm_FWQey9dpwnBPkrXYEg5sNK5Gzw
 
Saturday, April 2, 2016

I finished to cover the deck with veneer, I think with pearwood or cherrywood, without facing any particular problem. I'm attaching some images of the work done.


Anyway this deck finishing seems to me a little too "perfect" and "clean" to be realistic on a ship of this type. I do not think Vikings kept him like a pearwood "parquet". Now I need to imagine, think and implement a proper ageing process . . but it is a task I do not believe I can perform here in Pisa, for lack of suitable materials and equipments in my local workshop.

However, it is not a task to be performed now . . I can wait more.

Cheers, Jack.

01 20160403_095554.jpg
y4m8ms6lQZiQuULxZKa8YaTGDC543msbWNQPmjF6


02 20160403_095547.jpg
y4mzFEV_rKlZtxJBErRLn_kIc29pYyWF1joZ1OfS


03 20160403_095614.jpg
y4mASU1PTiXxDdbArMwzCv8iLNhIQknSeu5B3pJh


04 20160403_095623.jpg
y4mzXDzTorB75P2A7weGXocZoV4D0QSIEbTkiSg4


05 20160403_095602.jpg
y4m8uWBkQPz4De2qkoJkHlFpypvKr8tIn3_B6l9o


06 20160403_095607.jpg
y4m7zGwBSeHTsF-AFWWEDnNi7ba2wf_uXo8e8ehO
 
Jack, Really interested in the use of your building board. I have used various types of keel/frame stands ect in the past, but nothing like it for planking. Something along your lines will be a must on my next build ( 1:30 PT boat) where there is little margin for error when getting the shape right. The original Dumas plans calls for gluing the frame to the board, something I’m not keen on. But will cross that bridge when the time comes. Again, really like the way your build is coming along.

MOG
 
Thursday, April 7, 2015

I started the building of the shields.
64 in total and luckily, thanks to Mr. Dusek, they are laser precut otherwise should be a great pain to make all of them so perfectly rounded and equal to each other.
The background color is golden yellow, while only the shield side facing the outside of the hull will receive a second color: I'm thinking to dark red.
To achieve this kind of task should be perfect the usage of a airbrush: I have it but it is in my main workshop, 350km far from me . . To facilitate this painting task, I fixed the shields of an adhesive "bed". In this way I'm working quietly and easily.
Regards, Jack.

01 20160407_162553.jpg
y4mg8cq2ygg91FnTDJDijgfAfvYB-O_itOuudIqM


02 20160407_162559.jpg
y4mUCbh4kRk59ABSYZ3c248bePvNr_iXymeFakjF


Monday, April 11, 2016

Going forward with the shields . .

01 20160411_162901.jpg
y4mlG07XEYjfH16Gdk8ajS-RK-hbsL3tHxF-QsaW


Wednesday, April 13, 2016

It seems it has been months since I had inhalations of cyanoacrylate glue as now !!!

I feel a bit dazed but now the shields are almost finished, lacking only a coat of matt transparent paint to hide the small but inevitable glue smudges.

01 20160413_111636.jpg
y4mHPE4n6Q5VqsNc2YsdHYlnPETJCQWymnlTXXdy


Kind regards, see you soon, Jack.
 
Saturday, April 16, 2016

As the ingredients necessary for the kind of weathering suggested by my friend Andrea (Vass) does not require special ingredients or alchemy, I decided to proceed immediately to a field test and, if positive, to proceed without delay to weather the Viking ship deck.

Below the properly prepared solution, and now I've just to wait long enough to get the appropriate color to proceed with the tests.

01 20160416_113430.jpg
y4mWCmgAfuuS3I2p3OQ-ye3i8efMMb6w-QgoAico


However, I surfed a bit on the internet to learn more about this weathering method and I discovered that it is a very common practice to produce an antique furniture, often adopted by many restorers. I found a good explanation on http://www.wikihow.com/Age-Wood-With-Vinegar-and-Steel-Woolsite that I propose below in detail. Happy reading, Jack.

Part 1: Preparing to Make Your Stain

1) Gather your materials. This is a fairly simple process that requires minimal supplies. You may already have them at home. If not, you should be able to find everything you need at a dollar store, grocery store, or somewhere like Target or Walmart.
White distilled vinegar. Any brand will do.
Steel wool. Fine graded is ideal because it disintegrates best, but any grade will work.
A container of some sort. This can be a bucket, a jar, a pot, a bowl, or whatever else you have on hand. If you dislike the smell of vinegar you may want to opt for a container you can close while the mixture sits, particularly if you want it to get quite dark, as this will involve letting it sit for a while.
Rubber gloves. These are optional, but a good idea if you are concerned about cutting your fingers on the steel wool, or if you plan on making a particularly dark solution that might stain your fingers.
A strainer. This is also optional, as you can apply the stain straight from whatever container you made it in. This will come in handy if you want to transfer the liquid to another container to store and use again later.
A paintbrush.

2) Make sure you are staining an appropriate kind of wood. Some woods will work better than others. You don’t want to go to the trouble of making a stain only to discover that it won’t stain.
Wood with bifurcated grains is best, particularly where the wood grain is layered in hard/soft layers, so the soft layers are affected by the process but the hard layers are not, causing the wood to look old.
Softwoods are easier to work with than hardwoods. Southern yellow pine, western cedar, and fir are excellent candidates for aging. Red oak, maple, or other slow-growing, tightly grained woods are not.
Hardwoods with a distinct grain, such as hickory, white oak, elm, or ash, can also work well.
This method is not appropriate for laminate flooring, as the vinegar will likely cause the glue holding the layers together to fall apart.

3) Decide how you want your wood to look. Stains made with steel wool and vinegar range from a reddish, rusty brown, to a very dark, burnt brown. They also range in intensity from very subtle, to very intense. These factors are influenced by the ratio of steel wool to vinegar, and by how long you let the mixture sit. Before you begin, decide approximately color stain you want to create, and plan accordingly.
The color of the stain is determined by how long it sits. Stain soaked for just a couple days will have a dark, burnt tone. The longer it sits, the rustier in color it will become.
The intensity of the stain is determined both by how many steel wool pads you use, and how long you let the mixture sit. 1-3 steel wool pads to a half-gallon of vinegar should work for most projects. If you want your stain to darken faster, try adding another steel wool pad. If it becomes too dark, simply dilute it with water.

Part 2: Making Your Stain

1) Break up your steel wool. This step is not strictly required, but it will help the disintegration process and speed things up. You will want to wear plastic gloves to avoid cutting your fingers. Break apart the steel wool pads, and put the pieces in the container you are mixing your stain in.

2) Combine your materials. This is pretty straightforward. Just pour the vinegar over the steel wool. Give it a good mix, and put the cover on.

3) Let it sit. You can create a very subtle stain in just 15 minutes or so, but you will probably want to wait longer. 2-4 days will make a stain suitable for most projects, but you can let the mixture steep for months at a time to create a more dramatic effect.

4) Strain the stain. This is an optional step, and is more important if you plan on storing the stain for later use. When it reaches the color you want, you can pour the mixture through a colander and into a new, sealable container. You can also use it straight from whatever container it is in.


Part 3: Applying Your Stain

1) Stain a test surface. Without knowing what your stain looks like when applied, you might not want to brush it onto your furniture just yet. Brush some onto a scrap piece of the same sort of wood, or a part of whatever you are staining that is not usually visible, and wait an hour. If you don’t like the color you end up with, make adjustments to your mixture; add more steel wool or wait longer if you want it to be darker, wait longer if you want it to be redder, or dilute it with water if you want it to be subtler.

2) Sand the wood. Sanding your wood down before painting it can give it an even more dramatically weathered look. This step is optional, and your stain should look good with or without it. It’s just a matter of what effect you want to achieve.

3) Brush the stain onto the wood. There is no particular technique necessary for this. Brush in the direction of the grain, coating it evenly, and let it sit to allow the stain to penetrate the wood. Then just let it dry, and sit back and admire your work.

4) Wax the wood. You can choose whether or not to do this based on how you want the final product to look. For a polished sheen, wait for the wood to dry completely, brush on the wax, let it dry for an hour, and polish it with a towel. If you want a more natural, weather-beaten look, skip this step.
 
Sunday, April 17, 2016

While waiting for the weathering vinegar solution becomes ready . . . I think it will take some days, here are some elements of the superstructure completed and positioned (but not yet fixed) on the deck . .
The model begins to take its beautiful original form . .

Cheers, Jack.Aubrey.

01 20160416_110156.jpg
y4mt_guDWf2wQc0FlB272NEWRlARduxOSH6p3O1n


02 20160416_110144.jpg
y4m-Whq7oP5iPU4yFqnFdB4C3CYEEZyRIFMRPvXm


03 20160416_110123.jpg
y4mHJV0TV26nURwraX78XcjPkVIfv4Sv-m1k9Sme


04 20160416_110116.jpg
y4m8o83k4r8snDkbDLW5FuVLHIJEnwTfHPawUqDB


05 20160416_110035.jpg
y4mnx-bbYsQ-i7Rj0da_oXSA1Tj6H4BeP-y_b7-A


06 20160416_110127.jpg
y4mRjxti4ql10s_eS5VrQpNAJySD3PpWnSbjSZyE


07 20160416_110136.jpg
y4mvAe2jRfoffNsEFQu8kLe-FEjnOS-sjRZzCcLl
 
Back
Top