H.M.S. Prince c.1670 -Completing The Airfix Trilogy

Joined
Sep 9, 2018
Messages
60
Points
103

Location
Albany, New York
Part One

With two months remaining on this current build of the vintage kit HMS Prince, I've decided to post a few images to show how beautiful plastic kits can be with a little patience and the correct mindset of evaluation.

Airfix was one of those early companies that introduced some of the best selling ship models of its time. Many of us veteran builders spent countless hours studying their plans and learned nautical terms in the process. We spent our 'allowances' on the latest paint, brushes, sandpaper, etc. -and whatever other supplies was needed to finish the work. In all honesty, it was time well spent and some of us moved on to become professionals in our field(s) because of this.

Some 41 years ago I purchased my first Airfix kit of SAINT LOUIS C.1626 and decided to modify the contents so that the model appeared as wood and replaced the mast with wood and the plastic sails with actual linen. The kit itself was so detailed that museum curators who came to view my steamboat models were awed with the Saint Louis to the point of purchase. That event brought about the idea of producing a trilogy of these kits which would include the ROYAL SOVEREIGN (Sovereign of the Seas) and HMS PRINCE...The year was 1980.

Unfortunately, that never came to pass and those unfinished kits were lost and the SAINT LOUIS was sold. However, I didn't give up and learned more about the maritime and build better models over a four decade period; acquiring important references to assist with the trilogy. As a result, I was able to produce the Airfix WASA (Vasa) and the ROYAL SOVEREIGN (Sovereign of the Seas). Now, I have this current project before me of the HMS PRINCE.

I'm posting these work in progress photos to show a partial result of the completion. Within two months I anticipate completion and feel good that a vision that occurred four decades ago is finally becoming a reality 'today'. Much of the model has been modified to meet the historical standards of the period...based upon extensive research.

If time allow I will post more, but I do have a blog that give a playbook on my approach of this fantastic kit.
I know some of you have PRINCE. As one builder to another, I kindly say; "Make it your own signature."View attachment 218515View attachment 218516View attachment 218518View attachment 218519View attachment 218521View attachment 218523View attachment 218524View attachment 218525View attachment 218526View attachment 218528View attachment 218531View attachment 218534View attachment 218535
 
Rex has always been a true gentleman. It's so good to see his work, done to very high standards. His skill should be an education for all, to see what can be achieved with these humble kits which were designed many decades ago to part kids with their money and take over the kitchen tables around the world.
Rex, you have my respect.
I have to admire you for what you just stated...You're right -and RIGHT AGAIN...LOL!! Those models "were designed many decades ago to part kids with their money and take over kitchen tables around the world." I guess that's what inspired me to grab three paper routes, so I didn't lose any money in kits.

But that being said, I'm humbled and can respect any builder (past and present) who had these encounters of yesteryear. Thanks for the comment!
 
I also at 12 did have a paper route, and that was the first time I made some money. I also remember going to my local 10 Cents store and buying my first model.
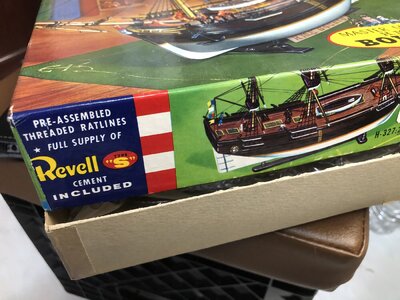
Revell’s Constitution.
BCF8C2CF-4918-4CDB-AB61-8C509DF46558.png

But I still have my HMS Bounty originally on its own plastic blister.
77B085B8-E6CF-4E22-8E8C-11FBF592E23D.jpeg6BEBDE36-81E7-4638-93CB-688081D15693.jpeg8A7D40D5-6E48-4EE8-AA65-10355C8BCC96.jpeg
 
Part Two

Since featuring this recent build last month, I came across new discoveries concerning the progress that I thought I would address. The features were the extra spars the kit provided and the extra anchors.

Many Prince models only featured a pair; but from historical documents the ship carried a set on each side of the fore channels. The first anchor partially stowed on the channel and attached to the cathead tackle and the second, behind the first and partially off the channel. This was a complicated feat to have them not clash with the cannon nozzles.

To address this, I had to rearrange the deadeyes with the correct spacing so to properly lash the anchors (as shown in the supporting images). The next assignment were the two spars... These were long and took up much of the main deck. It didn't make sense that these were part of the kit until I researched my other plans. I realized those plans had on the the quarter deck the word 'spar deck'. So it was true that the engineers/designers of the kit were correct about this detail. Their flaw was making them too long and too large. I used my custom scale to shorten the length so that these would hang over the bulkhead rails (with a three foot overhang) for belaying to the forecastle and spar decks.

Also in these images I show the masts which will be partially rigged within the week. The focus there will be the stays and relieving tackles before the shrouds are fitted.

Although I enjoy scratchbuilding my own pieces; I also find some pleasure taking a plastic kit and bringing it to another level such as this. Prince is a beautiful model, despite the common flaws these items have. I just find when a kit is worked to its core, results come in ways that is most satisfying.

Thanks for viewing!

View attachment 225369View attachment 225370
View attachment 225371
View attachment 225372
View attachment 225373View attachment 225375View attachment 225376
View attachment 225377View attachment 225378
View attachment 225379

View attachment 225374
 
Beautiful work, as always, Rex! Are those stu’nsail booms attached to the main channels? Also, do you replace everything from the topmasts, on up, with wood, or are you able to rig the kit spars without distorting them?
The only part of the mast system I keep are the caps, tops and crosstrees. Everything else are substituted with wood. And yes, there are stunsail booms at the main channels only...and will be featured on the main yard as well. These were existant before 1625 when the Treatise on Rigging was written/published. The Establishment of Stores (1686) list them for both the fore and main topsails and courses; yet, another list of stores mention these from ships returning back from Jamaica in 1655. Therefore, with those findings it's safe to place this feature on Prince.
 
Part Three

The process regarding the rigging is a slow and tedious one. There are many factors at play because much of the research involves re-establishing rigging lines that were formally misrepresented by contemporary builders. Of course this is no insult to them; it's just a valid observation that supports my skill for sound research.

In truth, I could apply my findings to any Prince model, wood or plastic; as I've created both. However, to date, I decided to challenge my abilities to place this research in a small, but detailed Airfix kit that many have taken for granted due to its plastic content. As a result, I honor it by not calling it a 'bash' project; but one of modification. To this end, I present images to show how the rigging stage is progressing.

I have used materials that no longer exist, or hard to come by... I have saved many adhesives, stains and paints from my early years (which I learned to keep pristine with the advice I received from curators of that day). This, in part, is why my colors are nicely balanced. There is no watering down of pigment and/or paint. The pencils that I use are not graphite, but actual fine lead that is treated when applied to the hull and sails. That, too, helped to bring life to this model.

The toothpicks of that period were of fine quality which I stored away because they served as miniature blocks for a model such as this 'today'. The toothpicks of 'today' doesn't measure up to the firmness of those produced in the 1980s. So now, with that being said, I move on to present these images of a progressive rigging on the H.M.S. Prince.

Also note that this rigging is more accurate and updated from the rigged model at the Kensington Science Museum in England. Builders and historians have flawed in suggesting that it was rigged at the time the model was built. That is false. The model was purchased by the Museum in 1895 at which time it was unrigged. The rigging was done in 1898 but wasn't found satisfactory and was subsequently redone correctly some years later. So, in essence, there will never be an accurately rigged Prince. However, we can all strive to make it one step better with the right research...such as what I'm doing with mine.

I humbly part on this note until the next post.

View attachment 229559


View attachment 229561

View attachment 229562

View attachment 229563

View attachment 229564

View attachment 229565

View attachment 229566

View attachment 229567

View attachment 229568
 
Part Four

It's been over a month since the last post on this unique classic from Airfix. There is so much I have discovered in this build, coupled with the fanfare and support behind it.

There is not much more I can add to what I've written in past posts except that it's a kit worth pursuing -given the fact that it's plastic; and, given the fact that it can exceed above and beyond the genre with a skilled hand to modify.

My area now is centered on both the sails and rigging. In both, it is a taxing affair -being that much detail is applied in those areas. There is not much more to express except that I leave the viewer, novice and professional, with these work-in-progress images. Hoping that you can get the most out of these kits (and enjoy them).

For me, my enjoyment is the research, build and sell them. Nothing more.

So on this note, I leave you with these current images until the next post which will be the finale.

View attachment 237040View attachment 237041View attachment 237042View attachment 237043View attachment 237047View attachment 237048View attachment 237049View attachment 237050View attachment 237051
 
My, my! Who's been a busy chap!
It's a privilege to see and share your skill and wisdom.
So looking forward to your next post, Rex.

Looking like your completion estimate went out the window, hope your customer is patient.
 
Last edited:
Back
Top