HMS Ajax 38 gun frigate. Euromodel [COMPLETED BUILD]

Hello Everyone. Here we go again so thanks for your likes. The posts are coming fairly quickly in an attempt to catch up as I’m building almost as fast as I’m posting. I’m enjoying the build so much that I can’t leave it alone, I don’t know why that should be as it’s not the perfect kit, maybe it’s the involvement that it demands makes it more personal.

I’m glad that Peter is now with us on this forum as his knowledge and willingness to help is a great asset. I know Peter from my time with MSW and my building of the Royal William, I mentioned earlier that I had a lot of assistance without which I wouldn’t have got very far without. He is a retired teacher and he just does his helpline as a hobby.

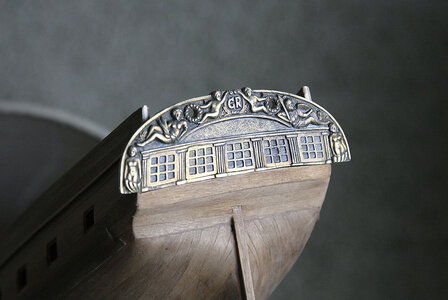
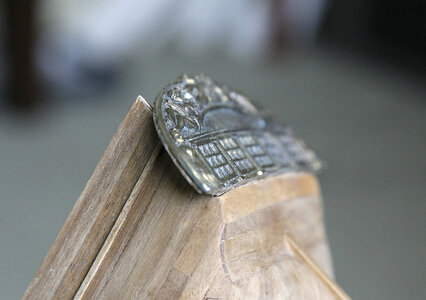
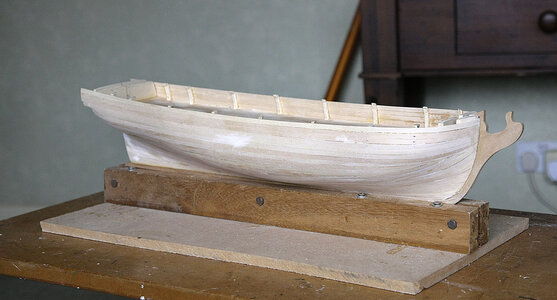
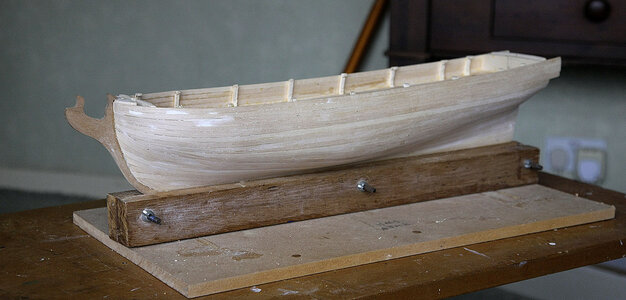
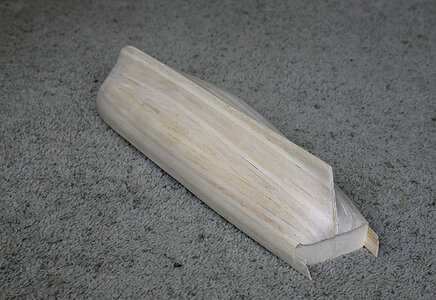
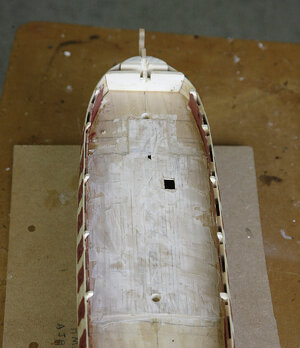
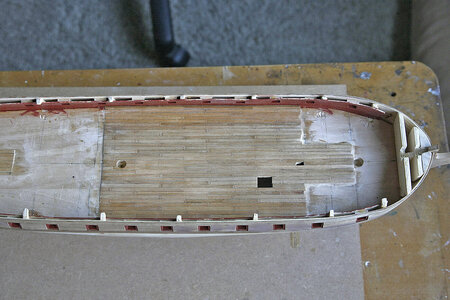
The detailed explanation that he gave was interesting, I thought though that it was tricky, not easy to make and overcomplicated for a kit but it was at least method. I like to keep things as simple as possible provided that I get the right outcome. In this respect I think that my idea was much easier, it turned out to be more accurate than I could have made it joining all those pieces together and it took less than an hour to do including the planking. I’ve jumped ahead with my pictures to show you the nearly finished result. The casting is only resting in place and all the detailing still needs to be done but you’ll get the idea.

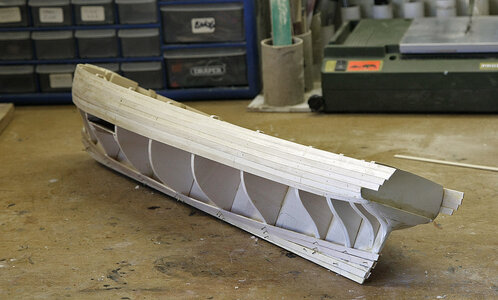
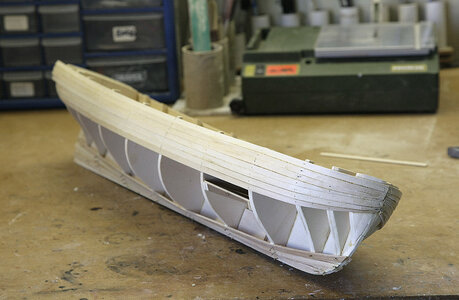
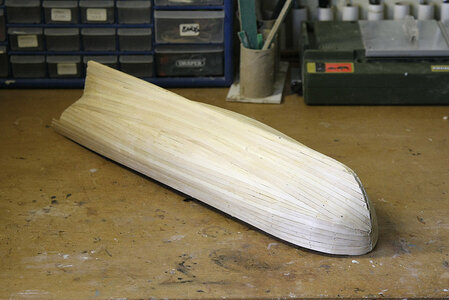
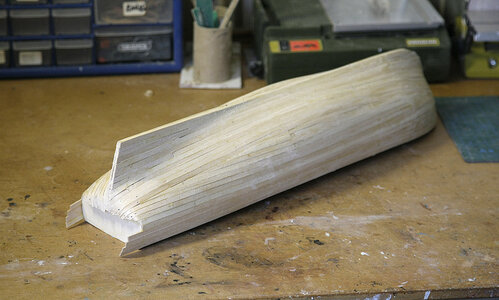
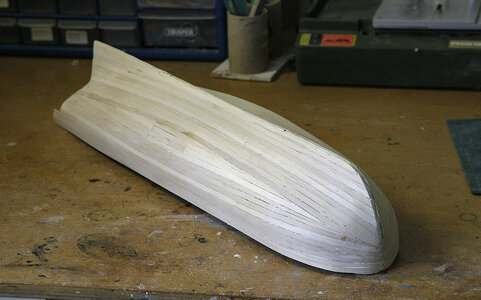
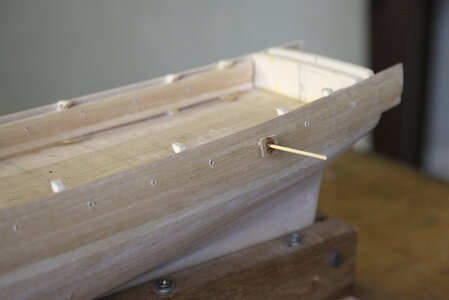
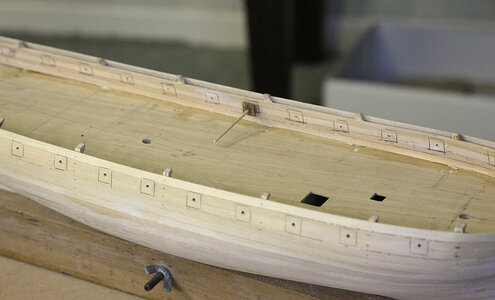
I have finished the initial stage of the first planking, it went ok with no issues and I think it turned out reasonable, it now needs a good sanding.

048.jpg

049.jpg


032.jpg

033.jpg

035.jpg

036.jpg
 
Hello Everyone. Here we go again so thanks for your likes. The posts are coming fairly quickly in an attempt to catch up as I’m building almost as fast as I’m posting. I’m enjoying the build so much that I can’t leave it alone, I don’t know why that should be as it’s not the perfect kit, maybe it’s the involvement that it demands makes it more personal.

I’m glad that Peter is now with us on this forum as his knowledge and willingness to help is a great asset. I know Peter from my time with MSW and my building of the Royal William, I mentioned earlier that I had a lot of assistance without which I wouldn’t have got very far without. He is a retired teacher and he just does his helpline as a hobby.

The detailed explanation that he gave was interesting, I thought though that it was tricky, not easy to make and overcomplicated for a kit but it was at least method. I like to keep things as simple as possible provided that I get the right outcome. In this respect I think that my idea was much easier, it turned out to be more accurate than I could have made it joining all those pieces together and it took less than an hour to do including the planking. I’ve jumped ahead with my pictures to show you the nearly finished result. The casting is only resting in place and all the detailing still needs to be done but you’ll get the idea.

I have finished the initial stage of the first planking, it went ok with no issues and I think it turned out reasonable, it now needs a good sanding.

View attachment 213820

View attachment 213821


View attachment 213826

View attachment 213823

View attachment 213824

View attachment 213825
Looks fantastic. Not very much if any filler needed.
 
  • Like
Reactions: Ken
Looks fantastic. Not very much if any filler needed.
Hi Jeff. Thanks for noticing, I always try and get a good surface on my first planking it gives a feel for the flow of the hull for the second planking. It will need just a little filler before sanding, not to correct the shape but there are some small gaps, it will look much better after a good sanding.
 
Hi Jeff. Thanks for noticing, I always try and get a good surface on my first planking it gives a feel for the flow of the hull for the second planking. It will need just a little filler before sanding, not to correct the shape but there are some small gaps, it will look much better after a good sanding.
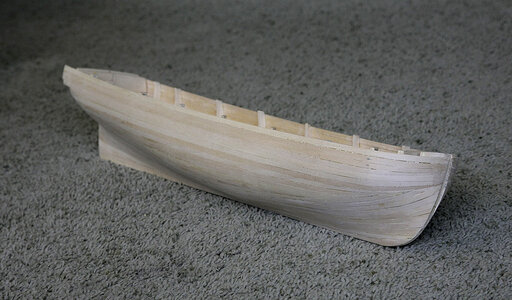
From the first pictures of the stern, it looks like you have already completed the second planking!
 
From the first pictures of the stern, it looks like you have already completed the second planking!
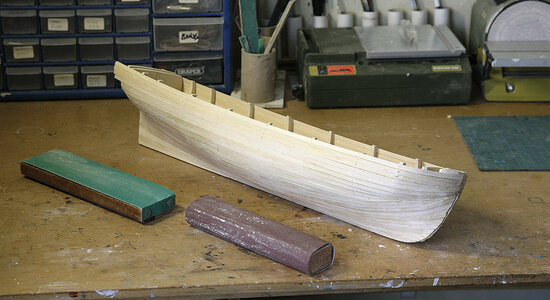
Hi Dean. Yes the second planking is done, I took that picture yesterday as I wanted to show how the stern had come out. As I said I started to build Ajax almost as soon as I got the kit, I hadn’t really intended to but it just happened, as it does. I hadn’t finished the Riva by then and didn’t want to be doing two builds and two logs at the same time so I left doing the Ajax log until later thinking that it would be easy to catch up, I’m usually a fast builder especially when I enjoy the project but I hadn’t realised how quickly I would be doing this build, perhaps it is in direct proportion with the amount of pleasure that it’s giving. I’ll hopefully catch up soon unless something else comes up to divert my attention.
 
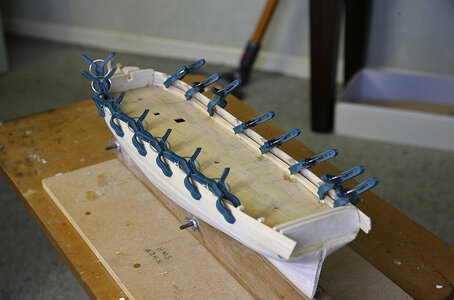
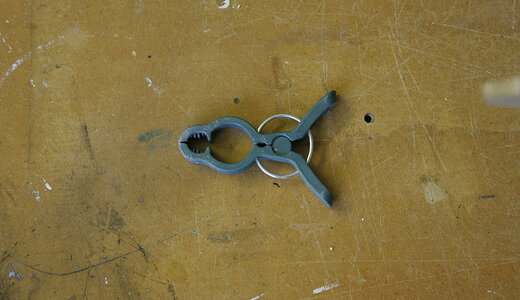
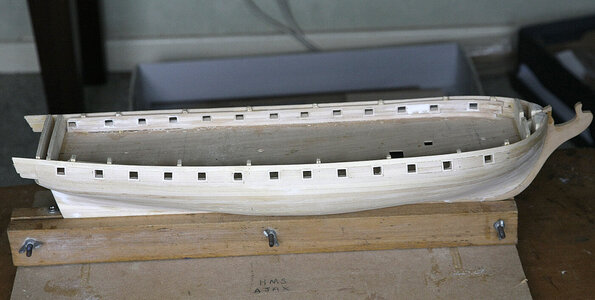
Hello Everyone. Today’s episode is the finishing off the first planking with a good sanding. I hadn’t shown the progress on the first planking as I’m trying to catch up so you only got to see the start and finish, but I’m sure that you’re all familiar with this process and that you have your own techniques. The basic hull ended up pretty good, true with no undulations so a quick sand showed me where to fill and it was only small gaps between some of the planks, These when filled and with a robust sanding saw the hull as perfect as I was ever going to get a first layer. I was only able to do this as the plans supplied for the shaping of the bulkheads must have been perfect, for that I officially forgive Euromodel for the issue with the stern. I started to line the inner wall, none of this will be seen but I needed the depth for the port linings to look right. You’ll see the small clamps that I use, these are the best that I have ever come across, they have a reasonable depth, a very wide throat and a strong spring. I got these from a garden centre, they are for clipping to garden canes, the wide throat is for a flower to pass through. Because it is not for modelling they were very cheap, a large bag full for a couple of pounds. Next post will be the cutting out and lining of the gun ports, see you then
You may notice that the keel and prow are in place, I’d forgotten about doing these at this stage, that’s the problem with doing a post at a later date, the brain doesn’t always follow. I cut a channel for these in the planking to just slot them into, then both nail and glue. I’d checked and shaped the prow early on when I could lay the keel flat so I didn’t expect any problems but with modelling something always comes up and bites your bum. I’d pre drilled the holes for the nails, I glued the parts in then when in place I gave the nails holding the prow one last tap for luck, the prow to my astonishment shattered into about five pieces. Sod’s law, I asked myself why I couldn’t have just left well alone. This was the first time that the age of the kit had had an effect, the wood used for the prow was now dry and brittle, it had broken where the cross grain was at its thinnest, I was able to do a repair without it being noticeable no harm done but I must be more careful. I’ve checked all the other wood and it seems to have been the only piece to have been affected like this.

038.jpg

044.jpg

045.jpg

039.jpg

040.jpg

043.jpg

046.jpg

047.jpg
 
Last edited:
Hi Ken,

See you have a complete ship production site. Love the Euromodel kits, seems they are more detailed then many of the kits of other larger companies.
 
Hi Ken (and to all who read this),

Euromodel is very much in business - in spite of what may have been stated on this website and other websites - and that has been an unfortunate turn of events for their company. Perhaps the moderators of this website could rectify that problem. Euromodel have never stated that comment themselves and let me assure you I am not speaking on their behalf - far from it !

Now, to introduce myself. My name is piratepete and I have been a contributor to MSW and failed to realise the significance of this particular forum ... my loss (up till now). I was placed in the fortunate position of being able to post my Euromodel build logs onto the Euromodel website. This has taken an enormous amount of my time over the past years and have concentrated on ships such as the Royal William, Friederich Wilhelm, La Renommee and the Lyde. For personal reasons, Euromodel gifted me every kit in their range and in return I continue to add postings to their site. However, I have no commercial link with them and receive no reward of any kind for doing this work. I just love editing and publishing and that is my passion in life. Files are freely available for anybody to copy.

Over the years, I have become well versed in all aspects of the Euromodel drawings and am more than happy to make any comments or suggestions should they arise (I can see no mechansim on this website for personal, private messages as well as a following mechanism to receive notifications of added comments but perhaps somebody can enlighten me).

The consequence of doing this work means that some ships, such as the Ajax, have been neglected although some preliminary work has been done on the hull construction and files have been completed in this respect.

So ... back to Ken directly. I have included just one diagram and its explanatory notes from one of my pdf files. If that interests and/or helps you, I am quite happy to talk further.


Fig. 55 shows a number of important features …View attachment 213729
  • the filler blocks 16 &17 (shaded blue)
  • the bottom of the tiller opening in the metal piece is flush with the bottom of the laser-cut hole in Frame 2
  • the maximum thickness of the filler blocks should be 5.3 mm.
  • the metal piece (shaded yellow) sits out slightly from the filler blocks to allow for planking thickness
  • the supplied block 5 x 15 x 140 mm. (shaded green) supports the transom metal casting above it. This will only allow a simple curved to be created. It was decided on following the true intent of the drawing by forming a compound curve and so increased the thickness by 3 mm. behind it.
  • timber packing blocks (shaded brown) were used for a fixing point between Frame 2 and the transom support & lower metal piece – the block positioning looked a little different but the outcome was the same (Fig. 55)
piratepete
Hi Pete,

Can you post pictures of your Euromodel ships in the finished model section? Allways interested as we don't see a lot of Euromodel kits build.
Maybe an idea for Euromodel to be more active on forums like ours, we do have more and more kit manufacturers joining here.
If they are interested they could contact @Donnie or @zoly99sask.
 
Hi Ken,

See you have a complete ship production site. Love the Euromodel kits, seems they are more detailed then many of the kits of other larger companies.
Hi Maarten,
Yet to be discovered by many, I must point out that Euromodel kits are NOT kits in the normal scheme of things. You are correct in commenting on the detailing which comes from their incredible drawings. The 'kits' supply basic material necessary to build a ship model but the outcome depends on how much of the plan detail you choose to incorporate - and also how much extra material you might incorporate. No two ships built from the same plans will ever look the same. You have the freedom to apply your own individual craftsmanship.

Pete
 
Hi Pete,

Can you post pictures of your Euromodel ships in the finished model section? Allways interested as we don't see a lot of Euromodel kits build.
Maybe an idea for Euromodel to be more active on forums like ours, we do have more and more kit manufacturers joining here.
If they are interested they could contact @Donnie or @zoly99sask.
Hi Maarten,
Looks like I am adding too much to Ken's post so will send you a PM.
Pete
 
Ken,
Can you show us/ indicate where the rudder head post will pass through the counter ?

Pete
 
Ken,
On reflection of the above odd question, what I should have said was ... are you just putting the rudder in position and perhaps showing a dummy aft representation of the tiller arm or putting in an actual opening for the tiller arm along with the rudder ? Hope that makes better sense.
Pete
 
Ken,
On reflection of the above odd question, what I should have said was ... are you just putting the rudder in position and perhaps showing a dummy aft representation of the tiller arm or putting in an actual opening for the tiller arm along with the rudder ? Hope that makes better sense.
Pete
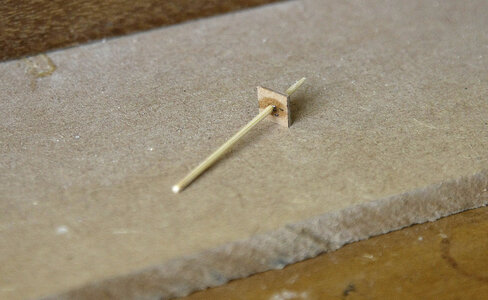
Hi Pete, I’m going to do the full opening and make up the rudder and mount it as per plan, when I get to that point in my log I’ll show a full set of pictures
 
Hello Everyone, Thanks to those that have contributed to my log.

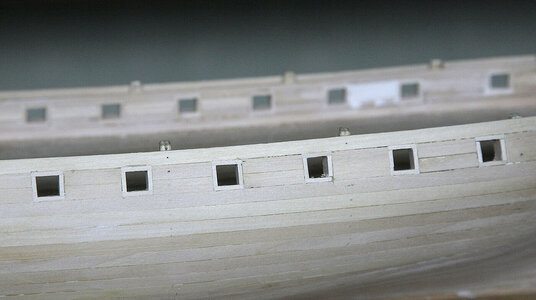
As I previously mentioned today’s post will be the main gun ports. These are measured up and cut out according to the plan. The more recent method introduced by the manufacturers is for ply sides with pre cut ports, this sounds like a good idea that simplifies the process, but reading logs I notice that due to small errors that creep into a build these pre cut ports end up not always being in the right place, or that the canons don’t pass through their centre making the need for corrections to be made that often take longer than making your own ports originally. Having a good accurate plan makes it easy to get them right first time, this is where Euromodel comes into its own with its 1:1 plans, you can also see if the canons are sited correctly and not foul anything.

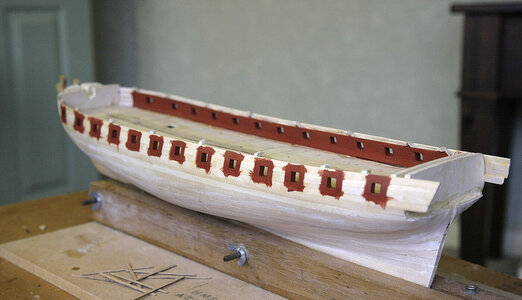
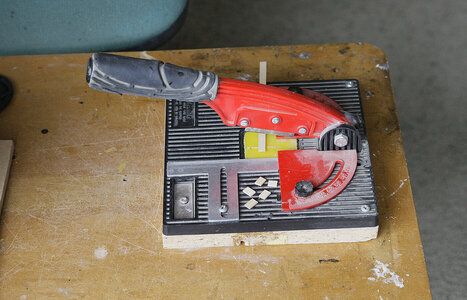
I made up a canon so that I could check my ports for the correct height for the barrels to pass through their centre. Next I made up a simple template for drawing the port size onto the hull, I mark off the positioning of the ports according to the plan, I use the canon to mark where the barrel will pass through and drill a hole through the hull side. I place the template into that hole and draw in the port. I use a scalpel to cut them out, I use a new blade for each side to get a good clean cut, a straight pointy blade for down cutting across the grain and a curved one along the top, a pointy one will tend to follow the grain and it’s difficult to get a straight cut. It only takes about four passes to cut down and one pass will do across, you will end up with a very clean accurate cut. I found that this way was much easier and more precise than drilling around the edges and sanding. I then lined them with 6mm x 1mm lime. As the ports had been cut the same I was able to cut a stack of lining pieces the correct size on my guillotine and have them at hand, I glued them in using white glue. I sanded them flush with the hull and inner walls, I gave them a coat of sanding sealer and painted them using Caldercraft Dull Red. When the second planking is done it will leave a very neat edge with no overpaint.

050.jpg

051.jpg

052.jpg

053.jpg

054.jpg

055.jpg

_M0W3167.JPG
 
Hello Everyone, Thanks to those that have contributed to my log.

As I previously mentioned today’s post will be the main gun ports. These are measured up and cut out according to the plan. The more recent method introduced by the manufacturers is for ply sides with pre cut ports, this sounds like a good idea that simplifies the process, but reading logs I notice that due to small errors that creep into a build these pre cut ports end up not always being in the right place, or that the canons don’t pass through their centre making the need for corrections to be made that often take longer than making your own ports originally. Having a good accurate plan makes it easy to get them right first time, this is where Euromodel comes into its own with its 1:1 plans, you can also see if the canons are sited correctly and not foul anything.

I made up a canon so that I could check my ports for the correct height for the barrels to pass through their centre. Next I made up a simple template for drawing the port size onto the hull, I mark off the positioning of the ports according to the plan, I use the canon to mark where the barrel will pass through and drill a hole through the hull side. I place the template into that hole and draw in the port. I use a scalpel to cut them out, I use a new blade for each side to get a good clean cut, a straight pointy blade for down cutting across the grain and a curved one along the top, a pointy one will tend to follow the grain and it’s difficult to get a straight cut. It only takes about four passes to cut down and one pass will do across, you will end up with a very clean accurate cut. I found that this way was much easier and more precise than drilling around the edges and sanding. I then lined them with 6mm x 1mm lime. As the ports had been cut the same I was able to cut a stack of lining pieces the correct size on my guillotine and have them at hand, I glued them in using white glue. I sanded them flush with the hull and inner walls, I gave them a coat of sanding sealer and painted them using Caldercraft Dull Red. When the second planking is done it will leave a very neat edge with no overpaint.

View attachment 214398

View attachment 214399

View attachment 214400

View attachment 214401

View attachment 214402

View attachment 214403

View attachment 214404
Beautifully accomplished, Ken. I accidently did mine the same way (accidently because I really have no idea what I am doing). That's a first for me! That's a very robust guillotine. Who is the manufacturer?
 
  • Like
Reactions: Ken
Beautifully accomplished, Ken. I accidently did mine the same way (accidently because I really have no idea what I am doing). That's a first for me! That's a very robust guillotine. Who is the manufacturer?
Hi Paul. Thanks for your comment. The guillotine was nothing special, I bought it from eBay ‘Craft Guillotine’ I see that it’s still sold, it is £13 Including postage, I screwed on a wooden base to give it some solidity and heft, I put on an old cycle bar grip for more comfort and the aluminium cutting guide is home made. It cuts cleanly up to 4mm, it’s great for repeat cutting like deck planks, it earns its place on my bench
 
Construction continues to look impressive Ken and there are some great tips for cutting out the ports that I am sure many will adopt, especially re the use of two different knife blade types. Why didn't I think about that ?
 
Hello Everyone. Again thanks for your likes and comments, they add to logs interest.

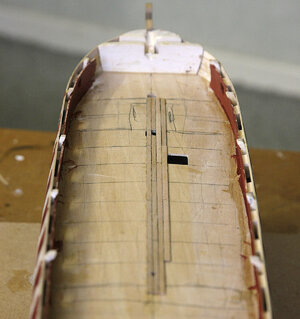
Today’s episode is the planking of the gun deck. The strip provided for this and for the upper deck planking is 4mm x .5 mm dark walnut. I don’t think that this was a suitable colour for the decks, it just looks plain wrong, most every other manufacturer provides a lighter colour wood of sorts which looks better. I’m not a great fan of walnut, I think that it is a dull colour so to build an entire model from it would make a rather drab looking ship, I think that you do need some sort of contrast on a model to bring out the detail so all walnut is a bad move. To include a lighter wood would not cost Euromodel any more to produce the kit and would enhance it.

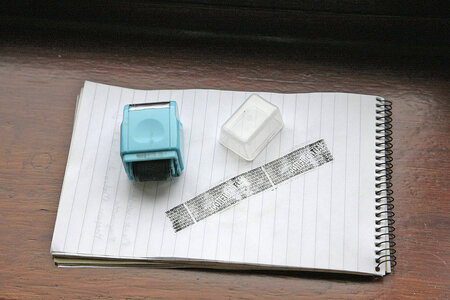
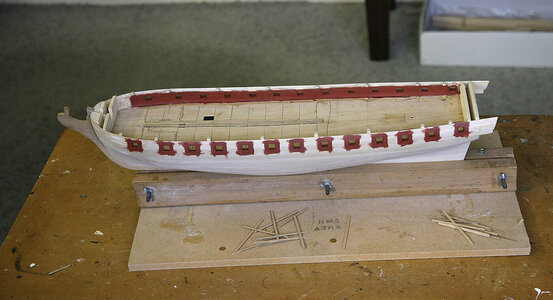
I discarded the walnut strips and raided my spare wood stash. I gathered up all the lighter wood of a suitable size that I had, it was obvious that I didn’t have enough to do the whole of both decks but on checking I saw that if I only planked the area that’s visible I could just about manage with what I had. As these had come from different kits they weren’t a perfect match for size or shade, so I selected enough of the more similar to use for the upper deck as these would be seen, I put these to one side and worked with what was left. To get a good edge and the same width I put them in a sort of jig, (shown) about eight at a time making a sort of solid block and then sanded both edges until they were all the same width. I’ve found a new way of darkening the edges, I’ve tested it and for me it’s the best yet. I bought a sort of small inking roller from a stationary shop which is for inking out parts of a document, it doesn’t put down a solid block of ink but a close knit pattern of black letters, whilst still wedged into the jig I run the roller over the edges of the block of planks and hey presto it’s done. The ink seems to be like that of a rubber stamp, it is thick, not liquidly and doesn’t leech into the wood but leaves a nice film on the surface. The effect shows up better on my upper deck planking as I needed to use light filler on the gun deck.

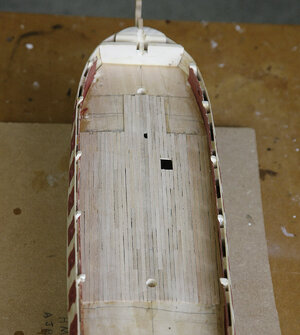
Having decided the area needing to be planked I marked out the deck for a three butt shift, each shift being one inch, so the planks needed to be three inches, I chose this size to keep things simple, I get confused easily, I cut the planks to size using my previously mentioned guillotine. I laid the planks again using white glue.You will see that I had to use different shades of planks, the ones that were really noticeable I put on the outer edges, the upper deck walkway covers this area and the canons will sit there so they won’t be noticed. Because of the differences in the planks I spread a light oak filler over the entire surface then when dry sanded it back, this I think keyed the surface together. As they would hardly be seen I treenailed them as simply as I could, I just pushed my pointed scribe into the planks and rubbed in some coloured wood filler having first sealed them so that they didn’t get stained. A sand and then a matt varnish finished the job. When I tried the upper deck on The shading that it cast made the gundeck look very realistic and put a smile on my face.

046.jpgblack.jpg056.jpg057.jpg058.jpg059.jpg

061.jpg
 
Last edited:
Back
Top