- Home
- Forums
- Ships of Scale Group Builds and Projects
- HMS Alert 1777 1:48 PoF Group Build
- HMS Alert 1777 1:48 Group Build Logs
You are using an out of date browser. It may not display this or other websites correctly.
You should upgrade or use an alternative browser.
You should upgrade or use an alternative browser.
HMS ALERT 1777 cutter POF by shota70 [COMPLETED BUILD]
Great work Shota! Happy holidays!Hello dear friends
I spent the last few hours sanding the ship's hull from the outside.
I first removed the width mounds at the top of the jig and then the cardboard pegs that hold the columns of the corners of the jig to the top lid to which the frames are attached.
View attachment 303213View attachment 303214
I did the sanding work with a variety of manual and electric tools, as you will see in the picture. View attachment 303215View attachment 303216
I would like to mention the sanding pads that are 2 inches in diameter as well as one inch, they do the hard work, I used pads with different densities that start at 80 and end at a thousand and even later I used steel wool.
Only after I was satisfied with the uniformity of the line of the hull and the smoothing of the wood did I smear oil with steel wool. at the moment I have only worked on one side from the outside and the other side is still waiting for me and then the inside of the ship, in short, the road is still long.
Attaches photos from the work and at the end in order to be impressed by the result.
View attachment 303217View attachment 303218View attachment 303219View attachment 303220
Wishing us all a pleasant and enjoyable weekend , as well as a happy Passover/
Spring holiday to the Jewish,
Ramadan Karim to our Muslim cousins, and an Easter to our Christian brothers. we are all human beings and sons to the same family of the human race , Which deserves that we respect and support each other.
- Joined
- Sep 3, 2021
- Messages
- 4,209
- Points
- 688

Happy holidays!Wishing us all a pleasant and enjoyable weekend , as well as a happy Passover/
Spring holiday to the Jewish,
Ramadan Karim to our Muslim cousins, and an Easter to our Christian brothers. we are all human beings and sons to the same family of the human race , Which deserves that we respect and support each other.
- Joined
- Apr 20, 2020
- Messages
- 5,125
- Points
- 738

Blessed Passover my friend.
thank you very much, my dear friend
- Joined
- Apr 20, 2020
- Messages
- 5,125
- Points
- 738

thank you very much, my dear friendHappy holidays!
- Joined
- Apr 20, 2020
- Messages
- 5,125
- Points
- 738

Hello dear friends
First of all thank you all for the compliments and greetings for the holiday. The last day I invested in further sanding and smoothing of the ship from the outside and inside and then I applied a layer of oil that gives a deep and beautiful shade to the wood. Attaching photos of the result and also of the model returned to the jig for the rest of the process.
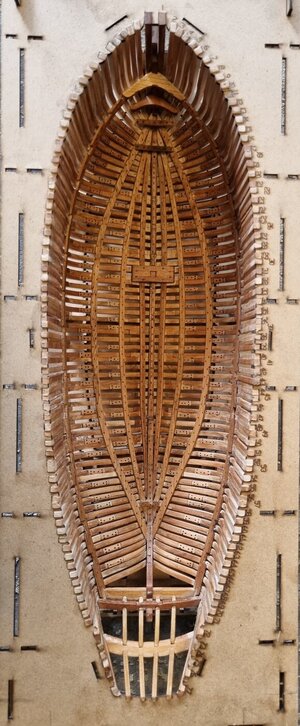
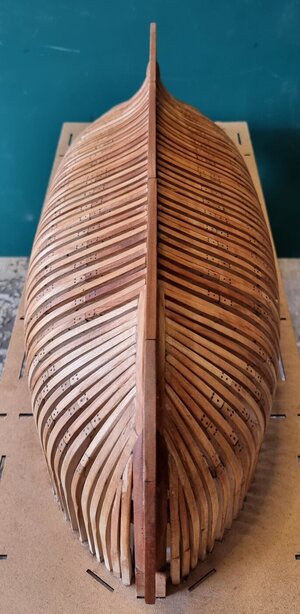
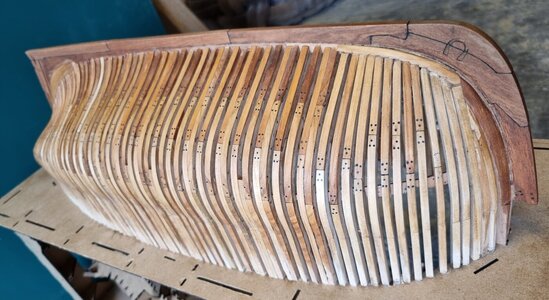
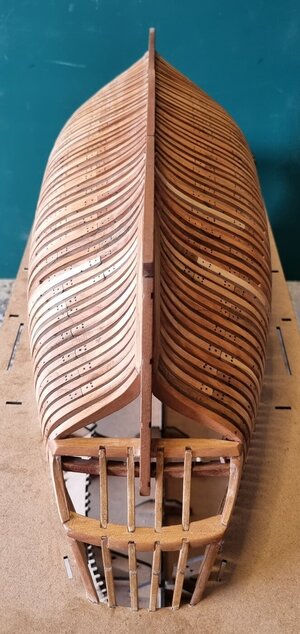
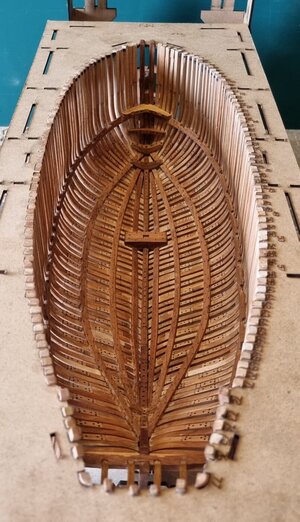
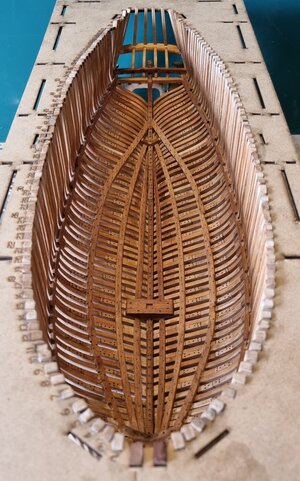
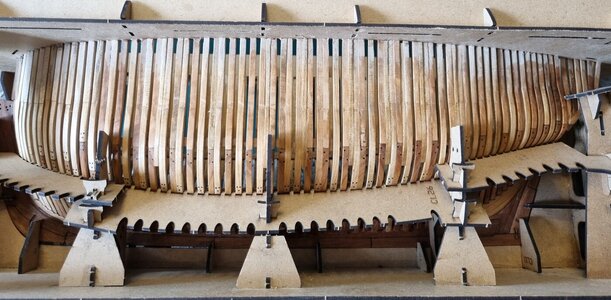
Have a nice weekend and a happy holiday to all
First of all thank you all for the compliments and greetings for the holiday. The last day I invested in further sanding and smoothing of the ship from the outside and inside and then I applied a layer of oil that gives a deep and beautiful shade to the wood. Attaching photos of the result and also of the model returned to the jig for the rest of the process.


Have a nice weekend and a happy holiday to all
- Joined
- Sep 3, 2021
- Messages
- 4,209
- Points
- 688

All those small pieces of wood, masterfully put together, are starting to shape a beautiful model!Hello dear friends
First of all thank you all for the compliments and greetings for the holiday. The last day I invested in further sanding and smoothing of the ship from the outside and inside and then I applied a layer of oil that gives a deep and beautiful shade to the wood. Attaching photos of the result and also of the model returned to the jig for the rest of the process.
View attachment 303519View attachment 303521View attachment 303522View attachment 303523View attachment 303524View attachment 303525View attachment 303526
Have a nice weekend and a happy holiday to all
Beautiful work Shota! 
Very good looking model - great work my friend
and also to you all the best and happy holidays to you and your family
and also to you all the best and happy holidays to you and your family
- Joined
- Apr 20, 2020
- Messages
- 5,125
- Points
- 738

All those small pieces of wood, masterfully put together, are starting to shape a beautiful model!
Beautiful work Shota!
thank you very much, my dear friendsVery good looking model - great work my friend
and also to you all the best and happy holidays to you and your family
happy Easter to all of you
Sameach Pesach Shota.
- Joined
- Apr 20, 2020
- Messages
- 5,125
- Points
- 738

Good afternoon dear friends
I started by preparing the crossbeams on which the decks sit - the bottom and the top.
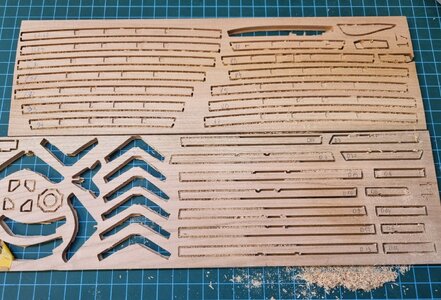
I took them out and cleaned them and tried to plan and adjust their locations.
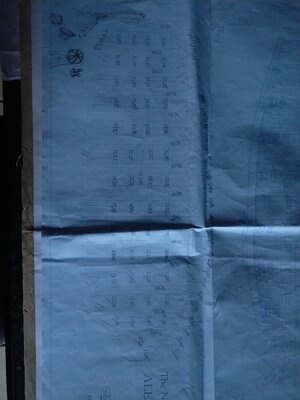
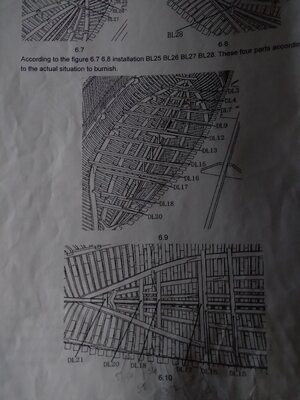
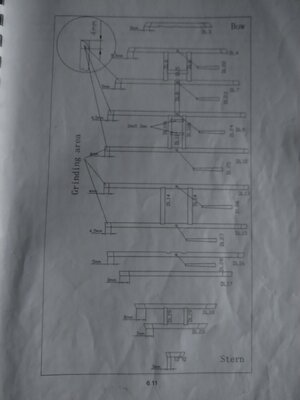
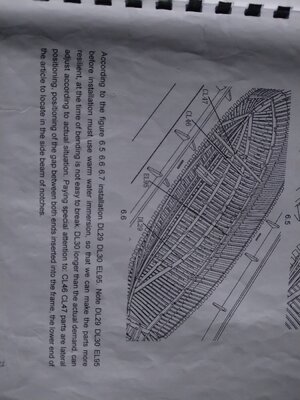
In the last few days I have read a number of your construction logs and learned from them of course that the beams need to be parallel and a number of other challenges and solutions that you have implemented. I have a major problem where I ask for your help, I am missing a drawing / plan / detailed pictures showing all the beams of the two decks (alone and together), in which there is a numbering of the different beams and to which frame it connects at the edges? I ask this, since I understand that the accuracy of this step is critical to all the other components, although I will lay the beams of the upper deck at a later stag.
I want to make sure I do not make mistakes that will be difficult and frustrating to correct later. I would love to have your help
I started by preparing the crossbeams on which the decks sit - the bottom and the top.

I took them out and cleaned them and tried to plan and adjust their locations.
In the last few days I have read a number of your construction logs and learned from them of course that the beams need to be parallel and a number of other challenges and solutions that you have implemented. I have a major problem where I ask for your help, I am missing a drawing / plan / detailed pictures showing all the beams of the two decks (alone and together), in which there is a numbering of the different beams and to which frame it connects at the edges? I ask this, since I understand that the accuracy of this step is critical to all the other components, although I will lay the beams of the upper deck at a later stag.
I want to make sure I do not make mistakes that will be difficult and frustrating to correct later. I would love to have your help
- Joined
- Apr 20, 2020
- Messages
- 5,125
- Points
- 738

me toI trust that our other Alert friends will be able to help you soon!
- Joined
- Apr 20, 2020
- Messages
- 5,125
- Points
- 738

thank you very much, it will help me to get the right resultIs this what you require Shota? If so can try send better pictures. View attachment 304083View attachment 304085View attachment 304084View attachment 304086
- Joined
- Apr 20, 2020
- Messages
- 5,125
- Points
- 738

Hello dear friends
As part of the tests of the position of the width beams of the upper Deck, I would like to check whether the EL54 part shown in chart 6.16 ,
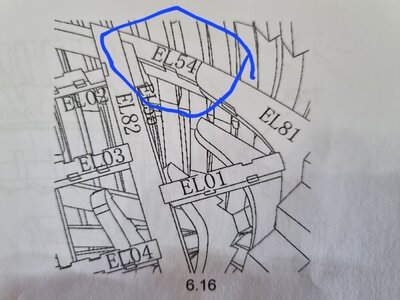
but in the actual wooden boards - Table 20 actually shows part DL54.
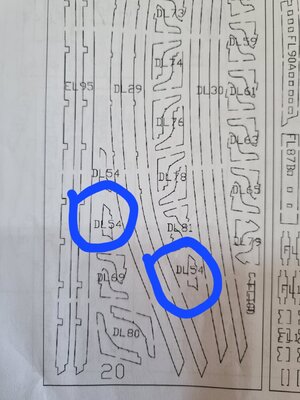
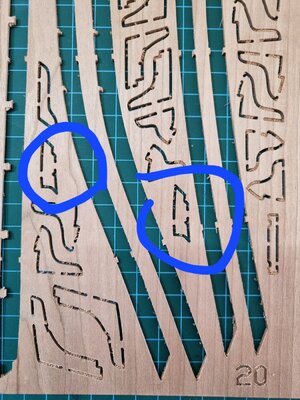
I would be happy to make sure I am not wrong and in fact there is a mistake and shouted in the print in the construction booklet.
As part of the tests of the position of the width beams of the upper Deck, I would like to check whether the EL54 part shown in chart 6.16 ,

but in the actual wooden boards - Table 20 actually shows part DL54.


I would be happy to make sure I am not wrong and in fact there is a mistake and shouted in the print in the construction booklet.
- Joined
- Apr 20, 2020
- Messages
- 5,125
- Points
- 738

After studying the photos and drawings you sent me (in the last few days), the construction logs and other information available to me I came to the conclusion that timber number EL 82 connects to parts DL54 and Frames number 9 in the jig. Attaches a picture of the parts laid out, not glued.
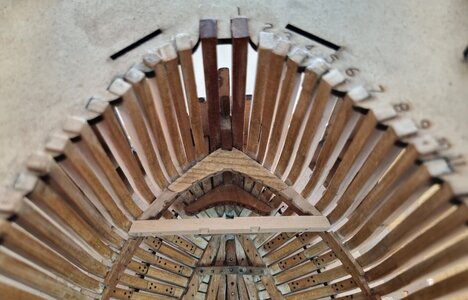
It's a bit funny to ask a question out loud to everyone and not wait for an answer , but find it ourselves.
I will try to keep the documentation detailed for the next members who will reach these stages in a few weeks or months.
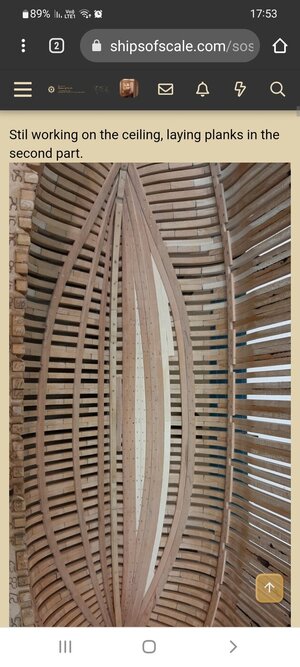
Once the question of the location of the beams has been resolved for the time being, I will move to the installation of planking in the inner and lower part of the deck similar to the beautiful work that our friend Maarten did - I will attach a picture of his work

It's a bit funny to ask a question out loud to everyone and not wait for an answer
I will try to keep the documentation detailed for the next members who will reach these stages in a few weeks or months.
Once the question of the location of the beams has been resolved for the time being, I will move to the installation of planking in the inner and lower part of the deck similar to the beautiful work that our friend Maarten did - I will attach a picture of his work

- Joined
- Sep 3, 2021
- Messages
- 4,209
- Points
- 688

Looking good Shota. You're building yourself a very nice model.After studying the photos and drawings you sent me (in the last few days), the construction logs and other information available to me I came to the conclusion that timber number EL 82 connects to parts DL54 and Frames number 9 in the jig. Attaches a picture of the parts laid out, not glued.
View attachment 304284
It's a bit funny to ask a question out loud to everyone and not wait for an answer, but find it ourselves.
I will try to keep the documentation detailed for the next members who will reach these stages in a few weeks or months.
Once the question of the location of the beams has been resolved for the time being, I will move to the installation of planking in the inner and lower part of the deck similar to the beautiful work that our friend Maarten did - I will attach a picture of his work
View attachment 304285


