- Home
- Forums
- Ships of Scale Group Builds and Projects
- HMS Alert 1777 1:48 PoF Group Build
- HMS Alert 1777 1:48 Group Build Logs
You are using an out of date browser. It may not display this or other websites correctly.
You should upgrade or use an alternative browser.
You should upgrade or use an alternative browser.
Hallo Maarten, extremely impressive, fantastic work, I totally like something like that, the lantern is just beautiful.
Great idea - my friend -> Bravo for this details
Thx gents for all your comments, much appreciated.
Today a brief update on the progress in the hold.
First I made the limber boards only on the PS side, the SB side I leave open.
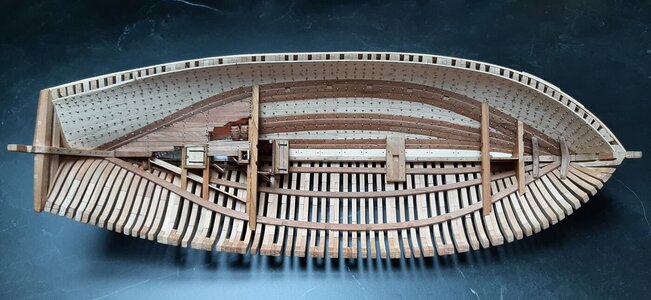
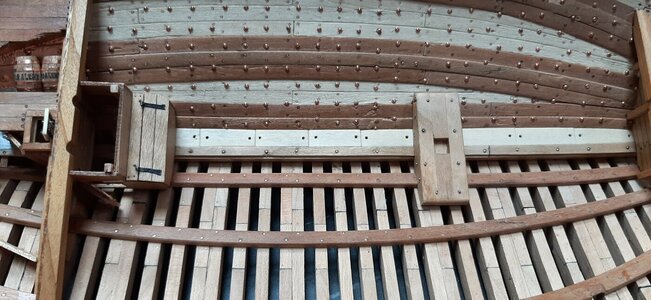
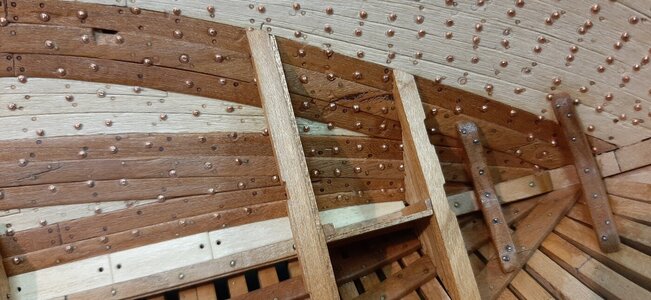
Finally fitted the fwd bulkheads for the fore peak, coal locker and painted the hold with schellack.
As it is an open model the coal locker I fill with coal. My 1:48 coal to scale is...
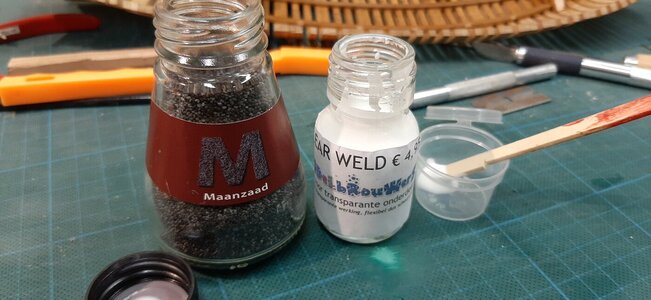
Poppy seed, which we call maanzaad or Mohn for our German readers. I mix it with clear pva glue and glue that on a piece of foam.
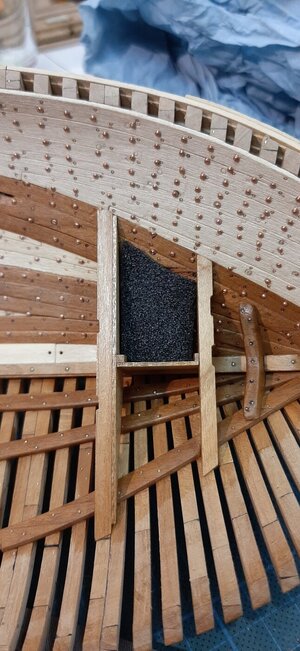
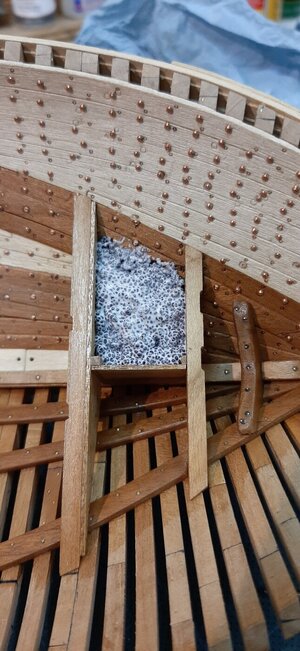
Then sprinkle poppy seed on top and the coal locker is filled.
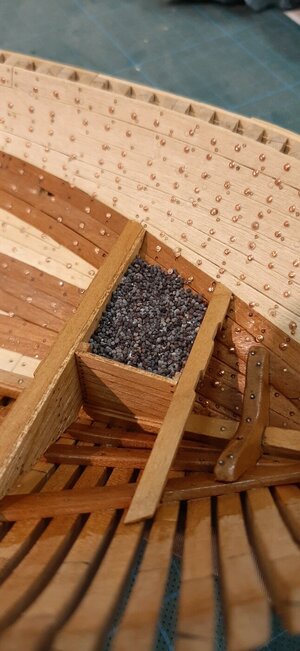
Next time the hold.
Today a brief update on the progress in the hold.
First I made the limber boards only on the PS side, the SB side I leave open.


Finally fitted the fwd bulkheads for the fore peak, coal locker and painted the hold with schellack.

As it is an open model the coal locker I fill with coal. My 1:48 coal to scale is...

Poppy seed, which we call maanzaad or Mohn for our German readers. I mix it with clear pva glue and glue that on a piece of foam.


Then sprinkle poppy seed on top and the coal locker is filled.

Next time the hold.
Very good that you show the status of your complete model with such a bird-eye view - it is really informative to see not only the details you make, but also the complete total appearance of the model
And this photo show to me, how good the opening of the deck planking is looking, In my opinion very attractive way - I will try this also in one of my next builds
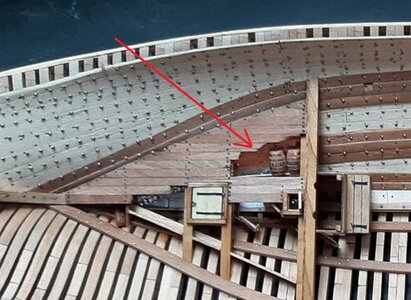
BTW: your "Mohn-coal" is looking very realistic
And this photo show to me, how good the opening of the deck planking is looking, In my opinion very attractive way - I will try this also in one of my next builds

BTW: your "Mohn-coal" is looking very realistic
great work, but I would worry the poppy seeds will attract unwelcome live visitors even if mixed with glueThx gents for all your comments, much appreciated.
Today a brief update on the progress in the hold.
First I made the limber boards only on the PS side, the SB side I leave open.
View attachment 258505
View attachment 258506
Finally fitted the fwd bulkheads for the fore peak, coal locker and painted the hold with schellack.
View attachment 258507
As it is an open model the coal locker I fill with coal. My 1:48 coal to scale is...
View attachment 258508
Poppy seed, which we call maanzaad or Mohn for our German readers. I mix it with clear pva glue and glue that on a piece of foam.
View attachment 258509
View attachment 258510
Then sprinkle poppy seed on top and the coal locker is filled.
View attachment 258511
Next time the hold.
Thx for your comments gents.
@Uwek breaking the planking open for the powder room was a must as otherwise details were lost. In top of it will be some cabins so I will see how to incoorporate that.
@stuglo haha, we will see if mice would visit the ship. I could consider to make it a mice trap, if they eat from the poppy seed the deck wil come down .
.
Luckily we have two cats so no mice in our house.
@Uwek breaking the planking open for the powder room was a must as otherwise details were lost. In top of it will be some cabins so I will see how to incoorporate that.
@stuglo haha, we will see if mice would visit the ship. I could consider to make it a mice trap, if they eat from the poppy seed the deck wil come down
Luckily we have two cats so no mice in our house.
Work on the hold starts.
I have made some burlap bags for the hold.
I cut a center of foam and wrapped it with linnen.
Glued te ends with pva and clamped for a night.
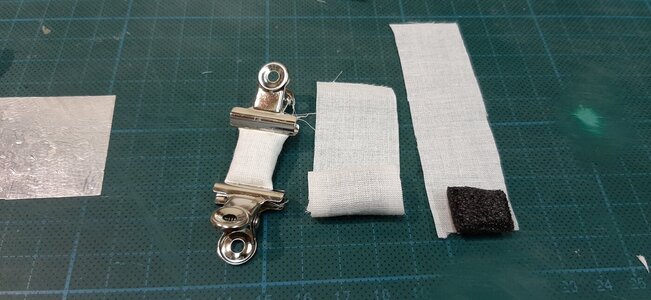
Removed the clamps cut of the ends and coloured with charbonel to get a nice old burlap look and feel.
Dotted some stiching and voila.
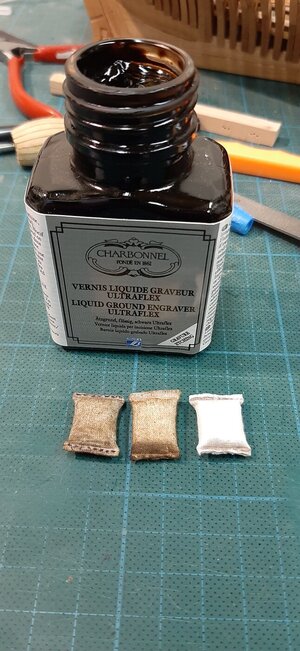
Next will be two water barrels.
I have made some burlap bags for the hold.
I cut a center of foam and wrapped it with linnen.
Glued te ends with pva and clamped for a night.

Removed the clamps cut of the ends and coloured with charbonel to get a nice old burlap look and feel.
Dotted some stiching and voila.

Next will be two water barrels.
As promissed time for some water barrels. In the sos kit version two are provided. Planks based on a rib structure. The top and bottom I planked myself with some veneer strips.
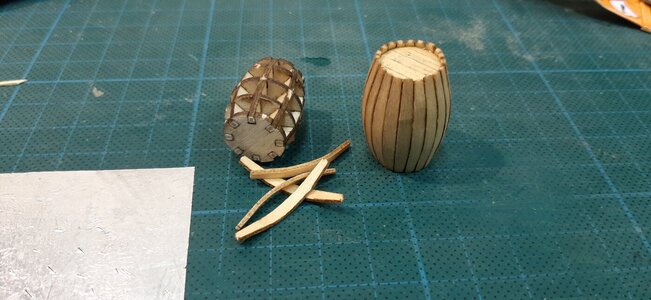
The planks I steamed and bend on a soldering iron before fitting them.
Then glue them with ca to the ribs.
From heat shrink I made barrel hoops, very easy and they give a convincing result.
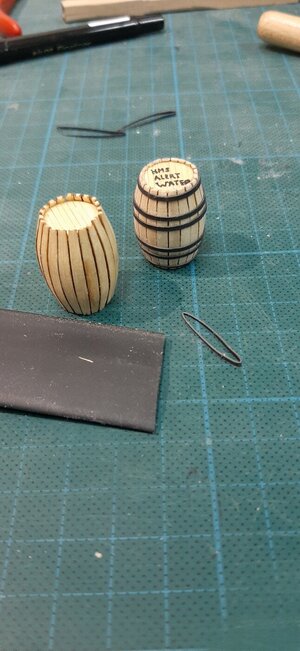
After finishing them with schellack I dry fit them in the hold and added a few kegs to stabilize.
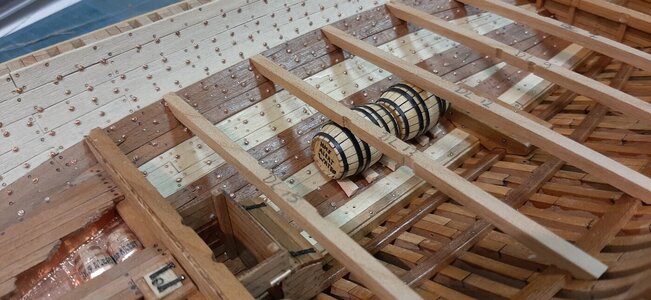
Together with the bags this will be my hold as I want to keep the rest open to see the ceiling and the limber boards etc.

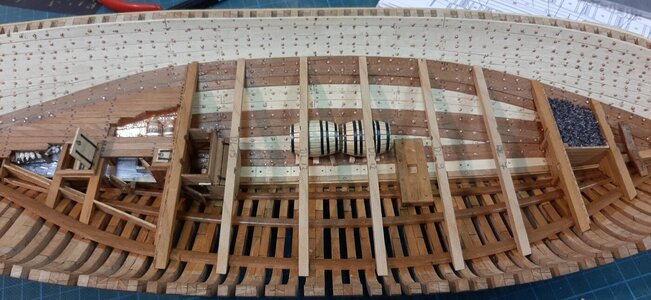
And the overview, deck beams are jusr dry fitted.
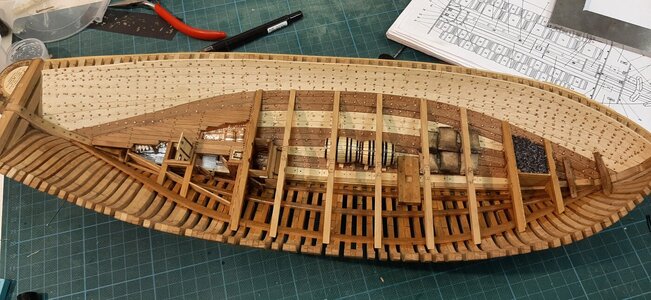
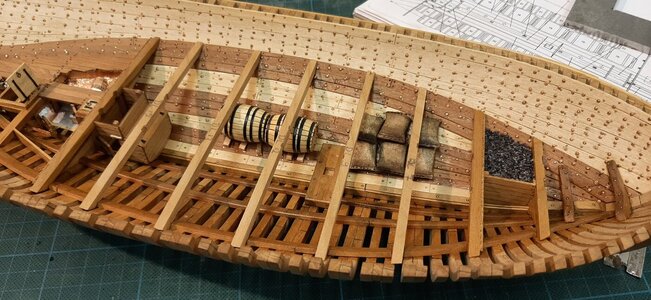
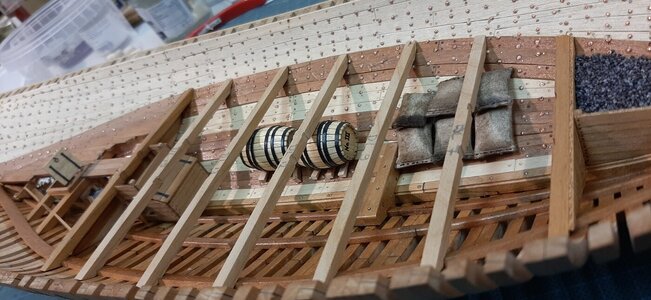
Next time fitting the deck beams.

The planks I steamed and bend on a soldering iron before fitting them.
Then glue them with ca to the ribs.
From heat shrink I made barrel hoops, very easy and they give a convincing result.

After finishing them with schellack I dry fit them in the hold and added a few kegs to stabilize.

Together with the bags this will be my hold as I want to keep the rest open to see the ceiling and the limber boards etc.


And the overview, deck beams are jusr dry fitted.


Next time fitting the deck beams.
Very nice barrels, beautifully made.
Before starting with the rest of the deck and interior I first need a sturdy base for the ship.
I had a nice piece of oak which I used for the purpose, thought just to use it as temporary stand but sofar I like the plain look of it so maybe I decide to leave it like this.
Ok for the stand I have a solid piece of oak and I need two pedestals. For the pedestals I am using two small doorknobs I still had in my workshop.
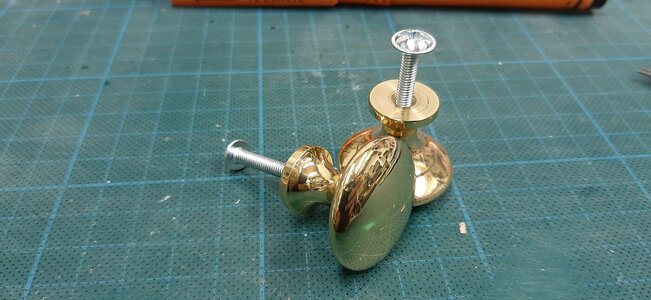
The surface of the knob I turned flat and I drilled a hole all the way through it.
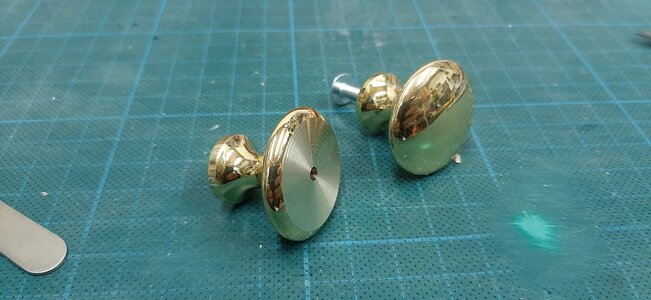
The fwd pedestal is higher then the rear one to create the proper trim for the hull.
I used long screws counter sunk into the oak plank, through the pedestal and approximately 1 cm into the keel.
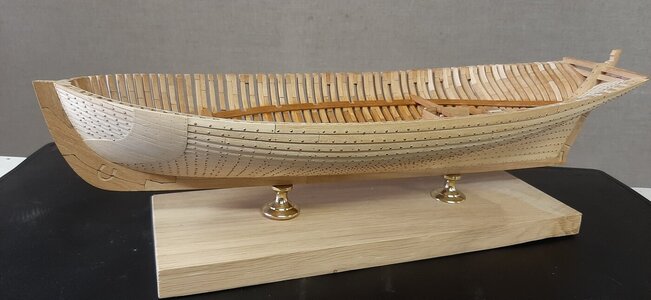
Now I have a proper sturdy working platform to continue on the deck and interior.
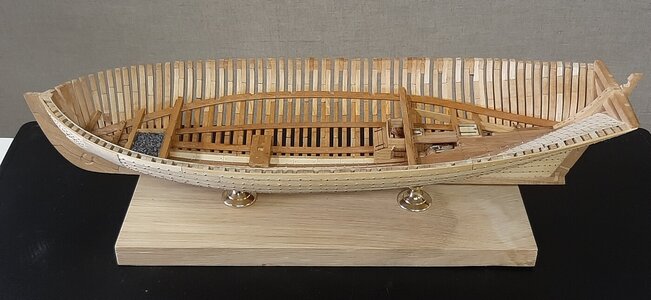
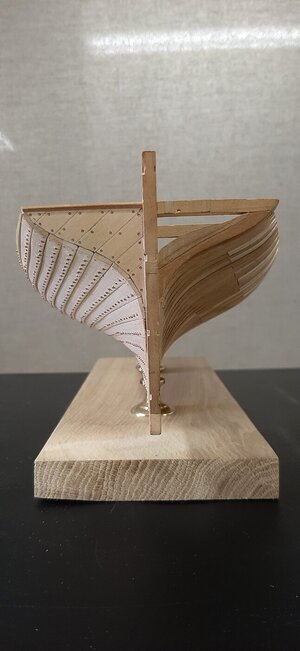
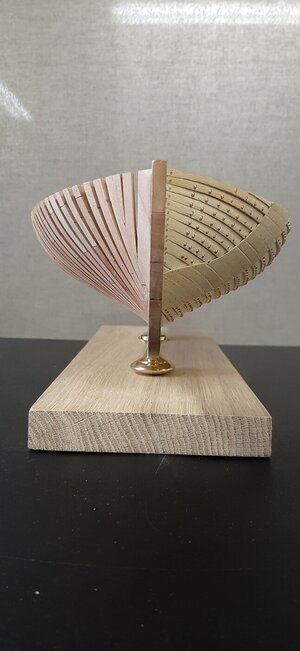
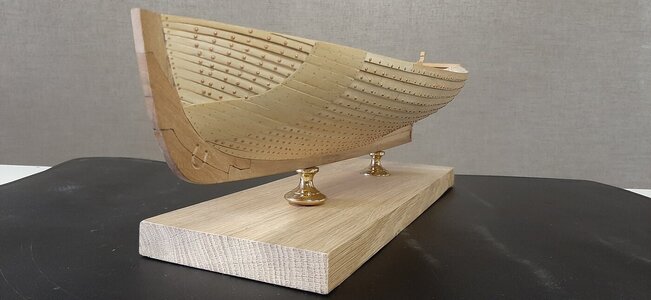
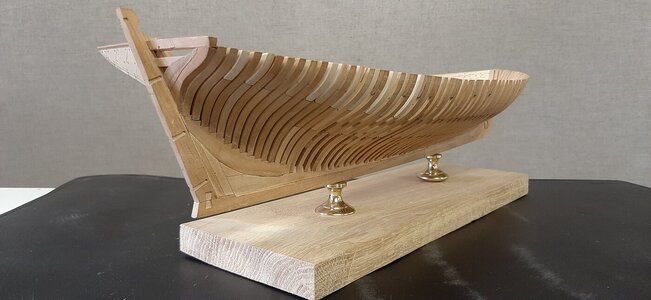
I had a nice piece of oak which I used for the purpose, thought just to use it as temporary stand but sofar I like the plain look of it so maybe I decide to leave it like this.
Ok for the stand I have a solid piece of oak and I need two pedestals. For the pedestals I am using two small doorknobs I still had in my workshop.

The surface of the knob I turned flat and I drilled a hole all the way through it.

The fwd pedestal is higher then the rear one to create the proper trim for the hull.
I used long screws counter sunk into the oak plank, through the pedestal and approximately 1 cm into the keel.

Now I have a proper sturdy working platform to continue on the deck and interior.


Hi Maarten.
I enjoy the 'construction' of the interior with all the added parts. And a nice solution as the hull now stands on the beautiful piece of wood.
Regards, Peter
I enjoy the 'construction' of the interior with all the added parts. And a nice solution as the hull now stands on the beautiful piece of wood.
Regards, Peter
Baby steps, not a lot of time for the hobby at the moment. But some progress made on the hatches on the tween deck.
The hatch coamings I made from 2x2 mm strip in which I milled a rebate form the hatch.
The ends of the coamings I fitted with a half wood joint. Here dry fitting for checking the proper shape.
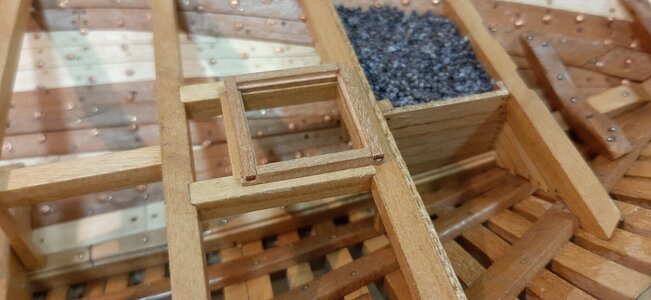
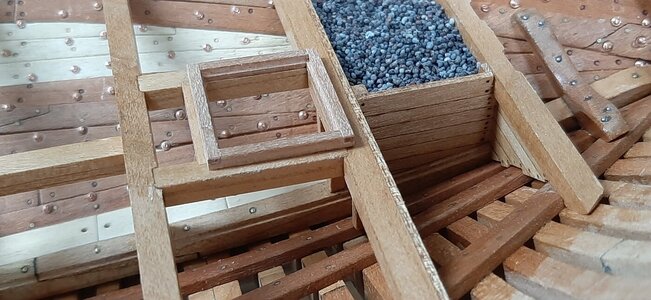
After glueing with CA I sand them to get a perfect finish.
I decided to fit the main hatch with planks.
I marked the planks for fitting very small eye bolts with rings.
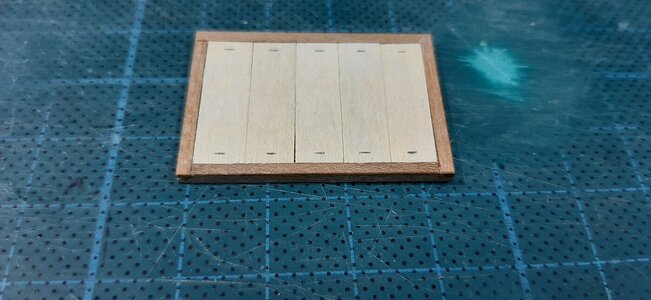
The eye bolts I make from 0,35 mm anealed steel wire. Shaping them around a 0,4 mm drill.
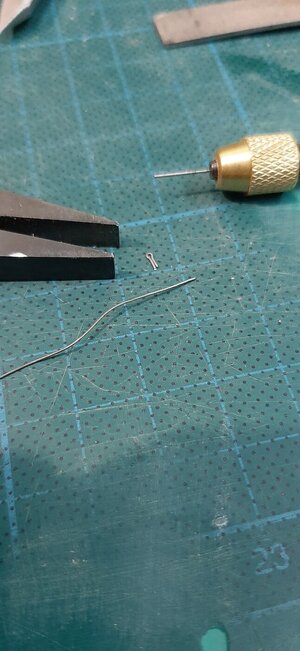
Then I make 0,5 mm rings. Do not sneeze
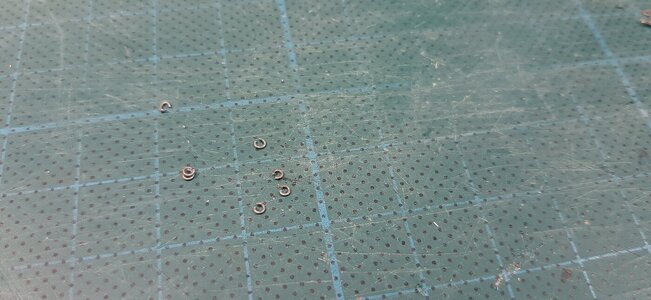
With a 0,7 mm dril I drill the holes for the eye bolts and splice them on the rear end to fix them, no glue is used.
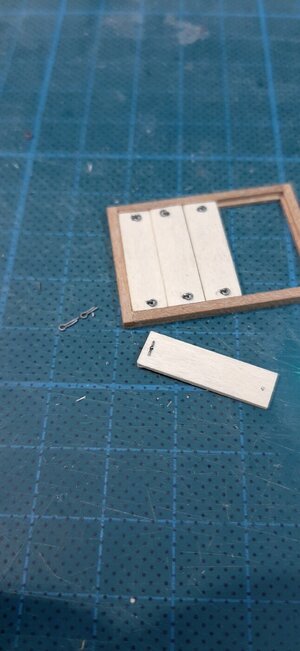
Then I fit the ring and just bend it to close around the eye bolt.
After putting the planks in place the result is below it only needs some shellack to finish.
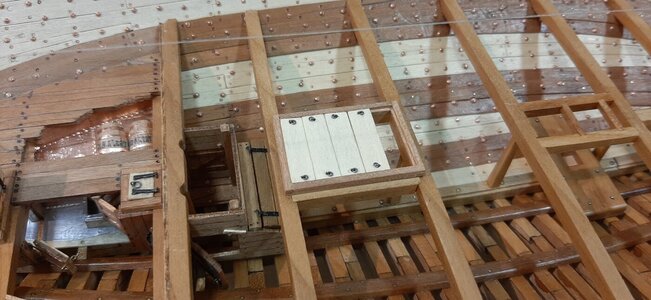
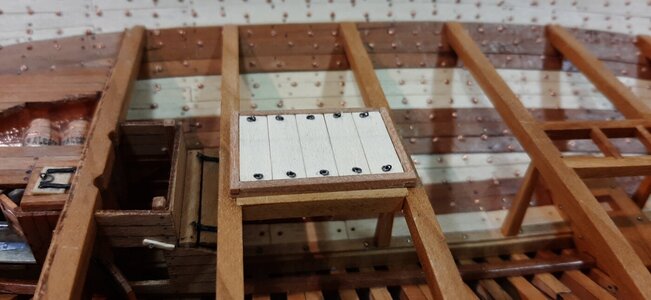
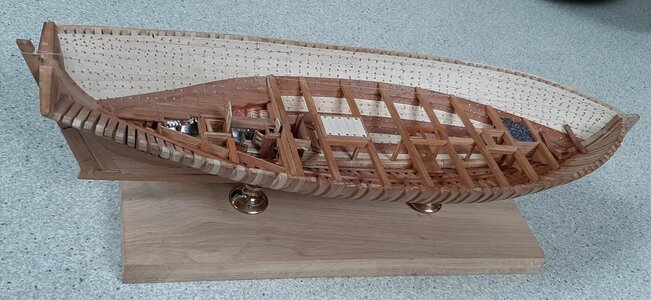
The hatch coamings I made from 2x2 mm strip in which I milled a rebate form the hatch.
The ends of the coamings I fitted with a half wood joint. Here dry fitting for checking the proper shape.

After glueing with CA I sand them to get a perfect finish.

I decided to fit the main hatch with planks.
I marked the planks for fitting very small eye bolts with rings.

The eye bolts I make from 0,35 mm anealed steel wire. Shaping them around a 0,4 mm drill.

Then I make 0,5 mm rings. Do not sneeze

With a 0,7 mm dril I drill the holes for the eye bolts and splice them on the rear end to fix them, no glue is used.

Then I fit the ring and just bend it to close around the eye bolt.
After putting the planks in place the result is below it only needs some shellack to finish.


Wow very nice result
Self-made parts give the most satisfaction. Beautiful hatch with the small rings, Maarten.Baby steps, not a lot of time for the hobby at the moment. But some progress made on the hatches on the tween deck.
The hatch coamings I made from 2x2 mm strip in which I milled a rebate form the hatch.
The ends of the coamings I fitted with a half wood joint. Here dry fitting for checking the proper shape.
View attachment 264569
After glueing with CA I sand them to get a perfect finish.
View attachment 264570
I decided to fit the main hatch with planks.
I marked the planks for fitting very small eye bolts with rings.
View attachment 264575
The eye bolts I make from 0,35 mm anealed steel wire. Shaping them around a 0,4 mm drill.
View attachment 264571
Then I make 0,5 mm rings. Do not sneeze
View attachment 264572
With a 0,7 mm dril I drill the holes for the eye bolts and splice them on the rear end to fix them, no glue is used.
View attachment 264574
Then I fit the ring and just bend it to close around the eye bolt.
After putting the planks in place the result is below it only needs some shellack to finish.
View attachment 264576
View attachment 264577
View attachment 264578
Regards, Peter
I cannot disagree with you, Peter! The scratch build process gives the most joy. But most satisfaction you get when the parts you made are the ones you have desired!Self-made parts give the most satisfaction. Beautiful hatch with the small rings, Maarten.
Regards, Peter
@Maarten you doing a fantastic job, Mon Amie! Your imaginations work ways ahead. It is hard to predict what's next...


