- Home
- Forums
- Ships of Scale Group Builds and Projects
- HMS Alert 1777 1:48 PoF Group Build
- HMS Alert 1777 1:48 Group Build Logs
You are using an out of date browser. It may not display this or other websites correctly.
You should upgrade or use an alternative browser.
You should upgrade or use an alternative browser.
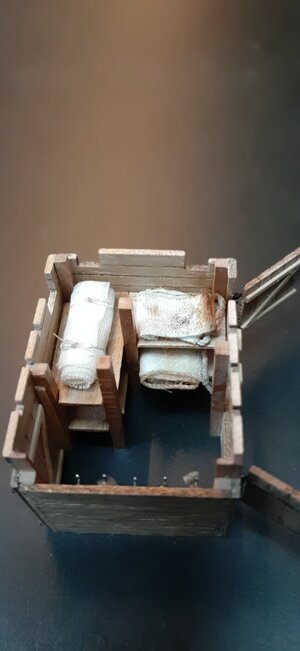
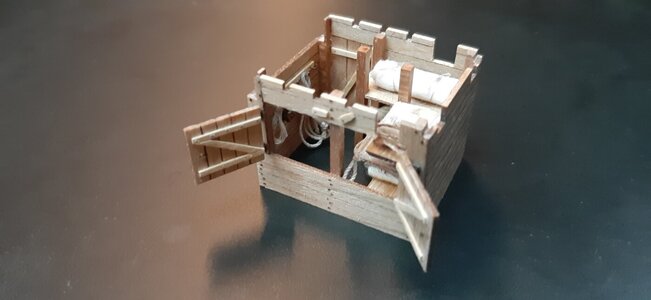
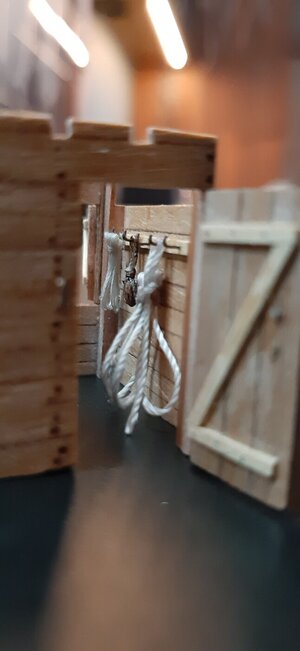
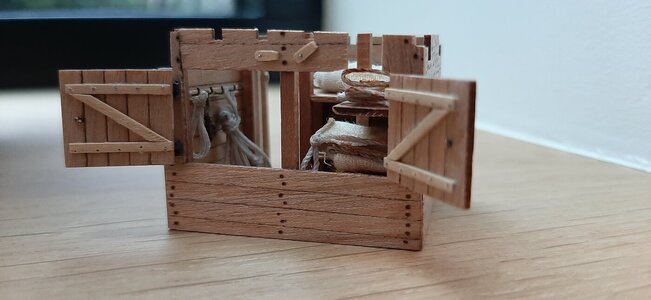
The sail room is finished.
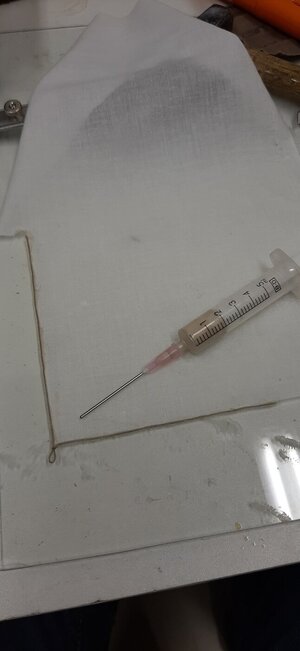
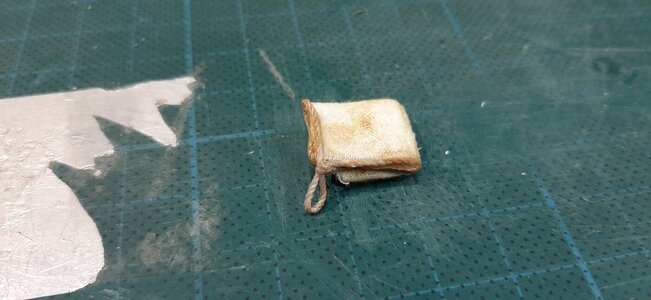
I have prepared some sails to fill the shelfs.
The sails I colored with some dilluted judea butumen.
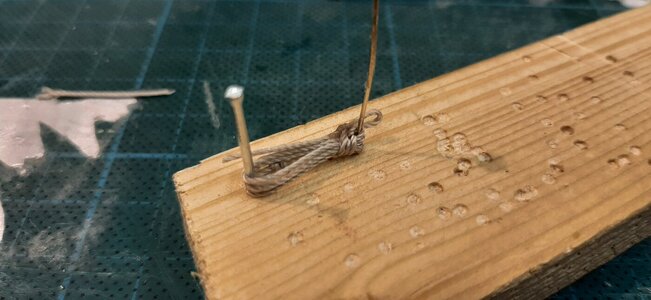
On the other bulkhead I have made a rack.
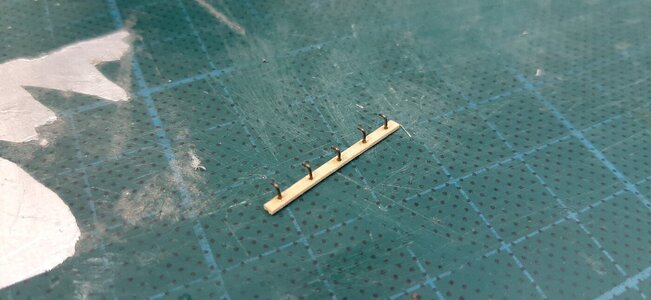
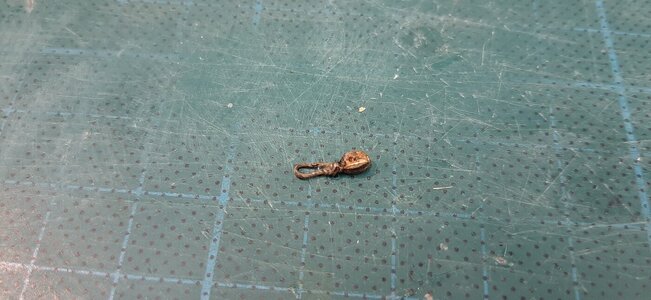
For the rack I have made some ropes and a spare block.
So now the sail room is finished.
Wishing you all a great Christmas and healthy and sawdusty 2022.
I have prepared some sails to fill the shelfs.
The sails I colored with some dilluted judea butumen.


On the other bulkhead I have made a rack.

For the rack I have made some ropes and a spare block.


So now the sail room is finished.


Wishing you all a great Christmas and healthy and sawdusty 2022.
Finally some time to start working on the ice cube.
First I covered the hull with foil as we are going to create a lot of dust . So the whole ship is wrapped and taped with masking tape.
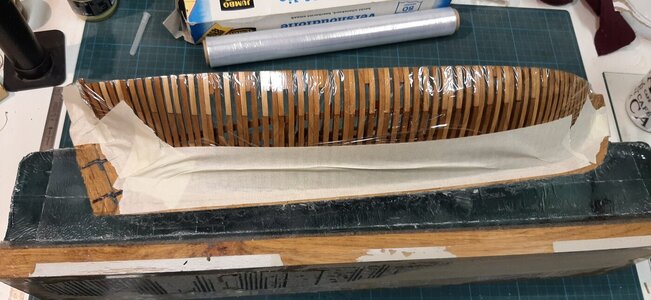
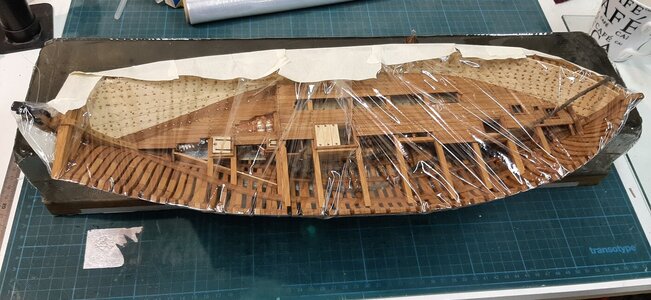
Time to start sanding, and for you kitchen builders this is not something to do in your kitchen or you want to have a divorce.
I start sanding with 40 grit to get the block into shape, followed by 60, 80, 120, 240, 320, 400, 600, 800. Then waterproof 1000, 2000, 3000 and 4000.
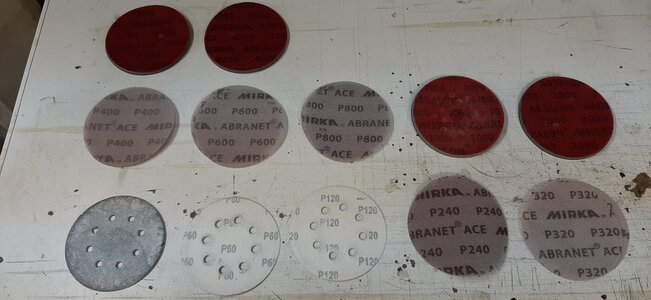
With the course paper 40, 60, 80 and 120 I smoothen the block to remove air pockets etc.
I sand with a excentric sander of 125 mm.
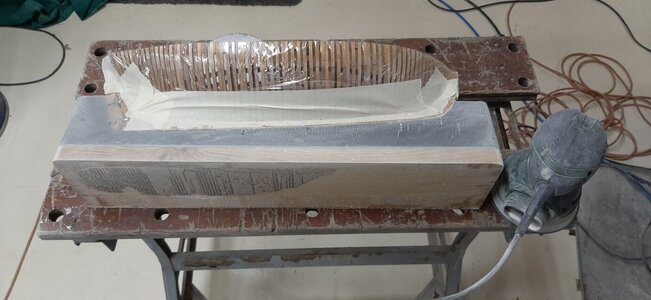
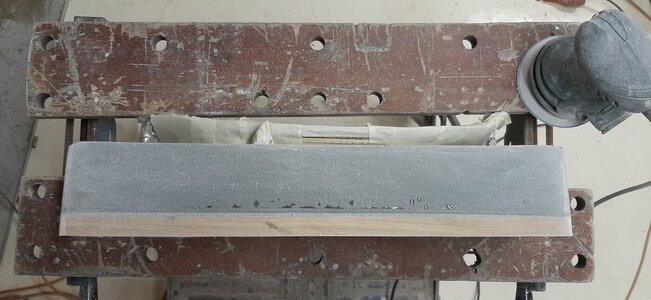
The edges are rounded the top surface I leave as casted which gives a perfect water like surface.
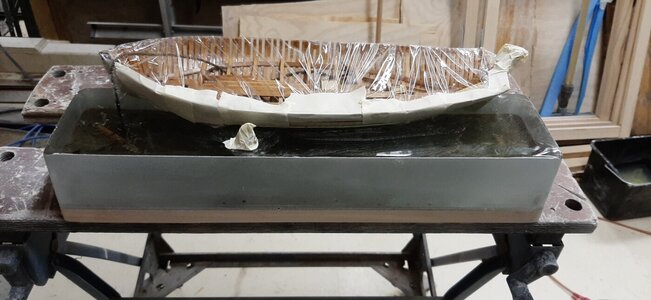
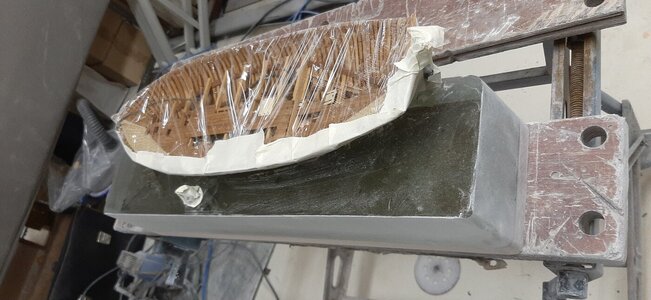
Now on to the finer grits from 220 up to 800.
Between every sanding step I clean with water.
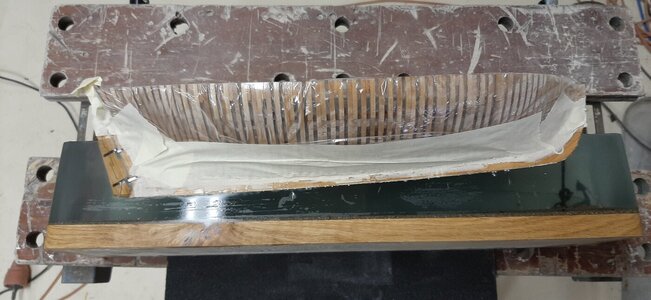
Next the sanding with water and grit 1000 up to 4000. After sanding this is the result.
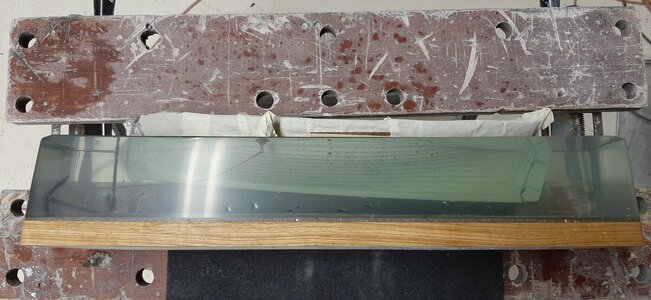
It is still not clear and glass like so the next step is polishing followed by wax.
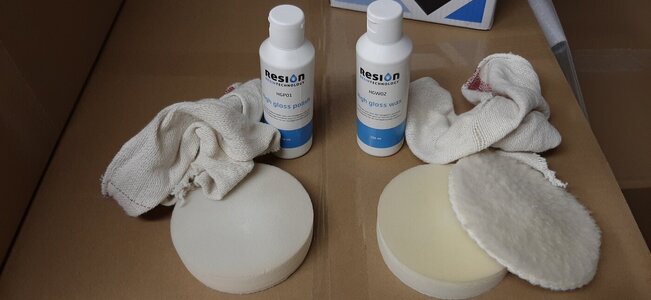
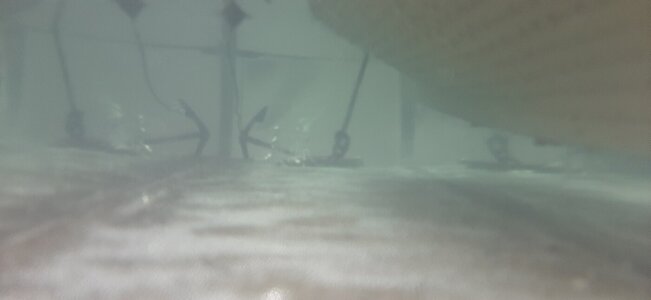
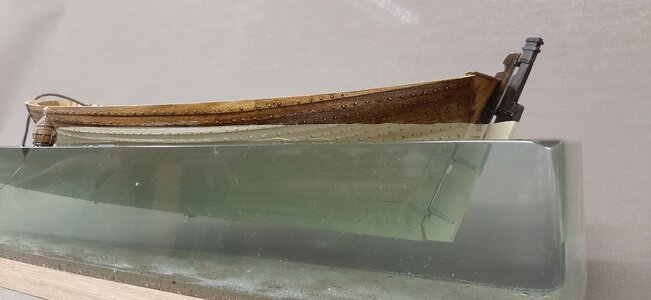
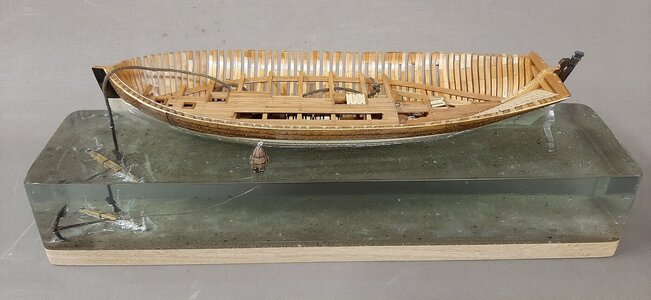
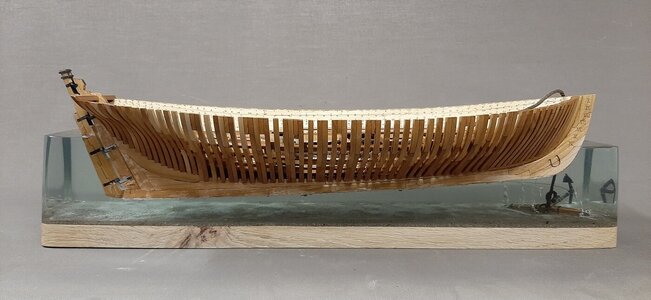
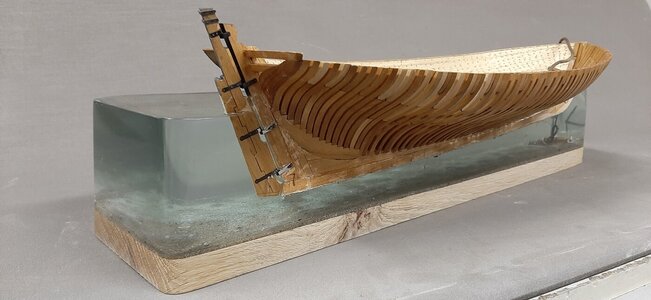
Now the finish is finished and we have a floating hull. For the first time I can dive bolow my own ship.
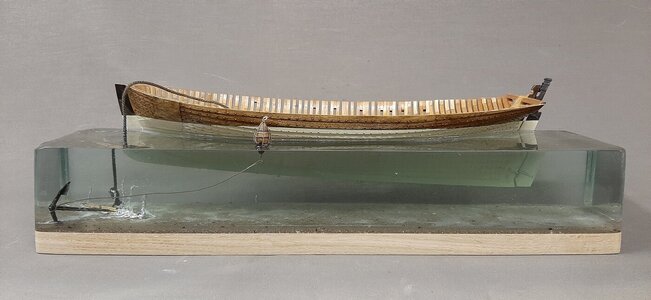
See the finished result, I now need to resand the keel and put on some shellack again.
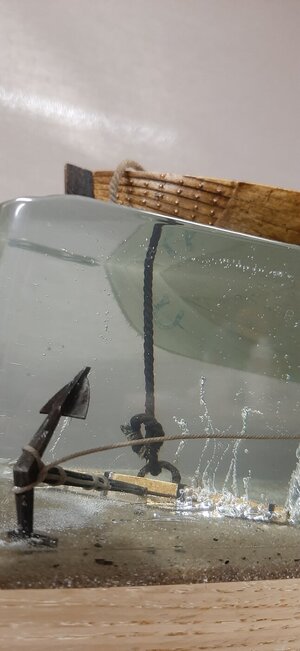
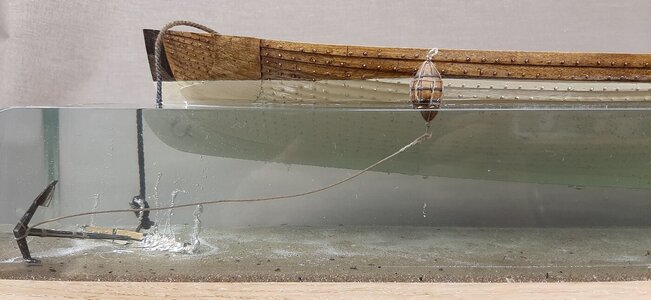
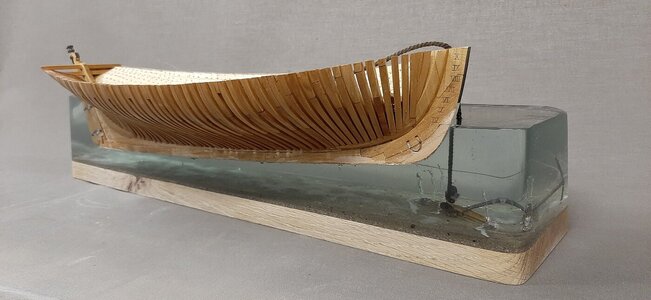
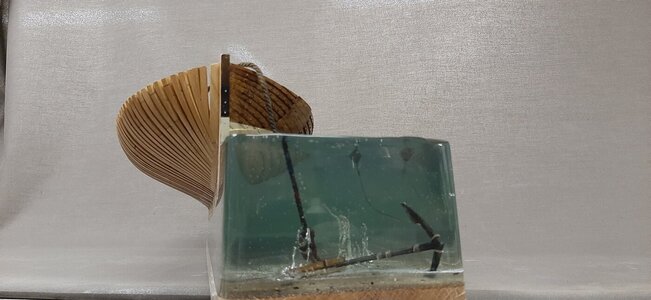
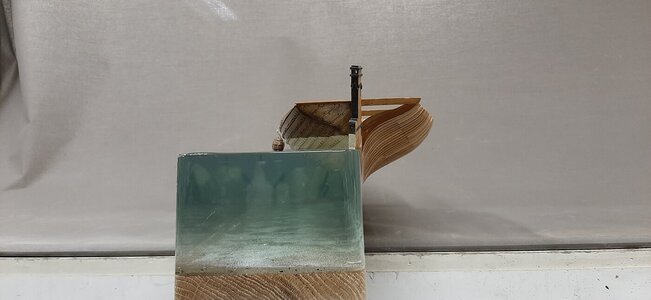
Sorry for spamming you with all those pictures
Wishing you and your loved ones all a prosperous and healthy 2022.
First I covered the hull with foil as we are going to create a lot of dust . So the whole ship is wrapped and taped with masking tape.


Time to start sanding, and for you kitchen builders this is not something to do in your kitchen or you want to have a divorce.
I start sanding with 40 grit to get the block into shape, followed by 60, 80, 120, 240, 320, 400, 600, 800. Then waterproof 1000, 2000, 3000 and 4000.

With the course paper 40, 60, 80 and 120 I smoothen the block to remove air pockets etc.
I sand with a excentric sander of 125 mm.


The edges are rounded the top surface I leave as casted which gives a perfect water like surface.


Now on to the finer grits from 220 up to 800.
Between every sanding step I clean with water.

Next the sanding with water and grit 1000 up to 4000. After sanding this is the result.

It is still not clear and glass like so the next step is polishing followed by wax.

Now the finish is finished and we have a floating hull. For the first time I can dive bolow my own ship.

See the finished result, I now need to resand the keel and put on some shellack again.


Sorry for spamming you with all those pictures
Wishing you and your loved ones all a prosperous and healthy 2022.
Are you kidding me?!? This is AMAZING!
Absolutely amazing! I love it! I also like the bubbles by the anchor, intended or not.Finally some time to start working on the ice cube.
First I covered the hull with foil as we are going to create a lot of dust . So the whole ship is wrapped and taped with masking tape.
View attachment 279393
View attachment 279394
Time to start sanding, and for you kitchen builders this is not something to do in your kitchen or you want to have a divorce.
I start sanding with 40 grit to get the block into shape, followed by 60, 80, 120, 240, 320, 400, 600, 800. Then waterproof 1000, 2000, 3000 and 4000.
View attachment 279395
With the course paper 40, 60, 80 and 120 I smoothen the block to remove air pockets etc.
I sand with a excentric sander of 125 mm.
View attachment 279396
View attachment 279397
The edges are rounded the top surface I leave as casted which gives a perfect water like surface.
View attachment 279398
View attachment 279399
Now on to the finer grits from 220 up to 800.
Between every sanding step I clean with water.
View attachment 279400
Next the sanding with water and grit 1000 up to 4000. After sanding this is the result.
View attachment 279401
It is still not clear and glass like so the next step is polishing followed by wax.
View attachment 279402
Now the finish is finished and we have a floating hull. For the first time I can dive bolow my own ship.
View attachment 279403
See the finished result, I now need to resand the keel and put on some shellack again.
View attachment 279404View attachment 279405View attachment 279406View attachment 279407View attachment 279408View attachment 279409View attachment 279410View attachment 279411View attachment 279412View attachment 279413
Sorry for spamming you with all those pictures
Wishing you and your loved ones all a prosperous and healthy 2022.
- Joined
- Jan 9, 2020
- Messages
- 10,377
- Points
- 938

OH MY WORD!!! I was waiting for this like a kid waiting for a Christmas present! Words fail me. Maarten, please look after yourself and your health so that you can thrill and excite us for many more years to come !!!


Wow! Concluding 2021 with a bang!
Hi Maarten!
Congratulations on the water replica. Pouring the water around the ship model was very risky, up to the total loss of the ship by uncontrolled flow of resin into the ship. In the end everything went well and the final result looks excellent.
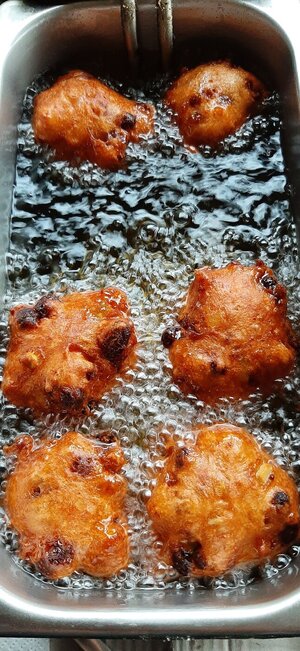
Bon appetite with the doughnuts and I wish you and the familie a happy new year.
Love regards
Thomas
Congratulations on the water replica. Pouring the water around the ship model was very risky, up to the total loss of the ship by uncontrolled flow of resin into the ship. In the end everything went well and the final result looks excellent.
Bon appetite with the doughnuts and I wish you and the familie a happy new year.

Love regards
Thomas
Um...looks yummy and delicious, enjoy eating those aboard your Alert. Happy New Year and best of luck!
The water block is ingenious and unique! That's worth a few oliebollen.
Geniet van dit alles, Maarten.
Up to a nice 2022!
Gr. Peter
Geniet van dit alles, Maarten.
Up to a nice 2022!
Gr. Peter
- Joined
- Oct 26, 2020
- Messages
- 38
- Points
- 78

Hello Maarten, I adore your art of modelling - your half-water/half-nonwater hull (with ingredients) is great and looks astonishing. --
Ik zelf ben "half-dutchman/half-deutschman", geniet de oliebollen - wij noemen ze in Duitsland "Krapfen", in Amsterdam hebben wij vroeger ook wel eens "poffertjes" gehad.
Harteleijke groeten en prettig oud en nieuw (ik hoop, dat dit correct is), Fritz (schiffbaur)
Ik zelf ben "half-dutchman/half-deutschman", geniet de oliebollen - wij noemen ze in Duitsland "Krapfen", in Amsterdam hebben wij vroeger ook wel eens "poffertjes" gehad.
Harteleijke groeten en prettig oud en nieuw (ik hoop, dat dit correct is), Fritz (schiffbaur)
- Joined
- Apr 20, 2020
- Messages
- 5,141
- Points
- 738

Dear MaartenFinally some time to start working on the ice cube.
First I covered the hull with foil as we are going to create a lot of dust . So the whole ship is wrapped and taped with masking tape.
View attachment 279393
View attachment 279394
Time to start sanding, and for you kitchen builders this is not something to do in your kitchen or you want to have a divorce.
I start sanding with 40 grit to get the block into shape, followed by 60, 80, 120, 240, 320, 400, 600, 800. Then waterproof 1000, 2000, 3000 and 4000.
View attachment 279395
With the course paper 40, 60, 80 and 120 I smoothen the block to remove air pockets etc.
I sand with a excentric sander of 125 mm.
View attachment 279396
View attachment 279397
The edges are rounded the top surface I leave as casted which gives a perfect water like surface.
View attachment 279398
View attachment 279399
Now on to the finer grits from 220 up to 800.
Between every sanding step I clean with water.
View attachment 279400
Next the sanding with water and grit 1000 up to 4000. After sanding this is the result.
View attachment 279401
It is still not clear and glass like so the next step is polishing followed by wax.
View attachment 279402
Now the finish is finished and we have a floating hull. For the first time I can dive bolow my own ship.
View attachment 279403
See the finished result, I now need to resand the keel and put on some shellack again.
View attachment 279404View attachment 279405View attachment 279406View attachment 279407View attachment 279408View attachment 279409View attachment 279410View attachment 279411View attachment 279412View attachment 279413
Sorry for spamming you with all those pictures
Wishing you and your loved ones all a prosperous and healthy 2022.
Wow, you are doing amazing things with this model, bon appétit
wish you and your family a happy new year
Thx gents for all your comments.
Fritz @schiffbaur haha you know your Dutch delicacy.
Fritz @schiffbaur haha you know your Dutch delicacy.
Happy New Year! Enjoy!
Your Sail Room is well done and stocked. I emhoy seeing small detailing like this to bring life to a model. Rich (PT-2)The sail room is finished.
I have prepared some sails to fill the shelfs.
The sails I colored with some dilluted judea butumen.
View attachment 277794
View attachment 277795
On the other bulkhead I have made a rack.
View attachment 277796
For the rack I have made some ropes and a spare block.
View attachment 277797
View attachment 277798
So now the sail room is finished.
View attachment 277856
View attachment 277857
View attachment 277858
View attachment 277859
Wishing you all a great Christmas and healthy and sawdusty 2022.
Excellent happy new year
- Joined
- Sep 28, 2020
- Messages
- 278
- Points
- 168

WOW! This is greatFinally some time to start working on the ice cube.
First I covered the hull with foil as we are going to create a lot of dust . So the whole ship is wrapped and taped with masking tape.
View attachment 279393
View attachment 279394
Time to start sanding, and for you kitchen builders this is not something to do in your kitchen or you want to have a divorce.
I start sanding with 40 grit to get the block into shape, followed by 60, 80, 120, 240, 320, 400, 600, 800. Then waterproof 1000, 2000, 3000 and 4000.
View attachment 279395
With the course paper 40, 60, 80 and 120 I smoothen the block to remove air pockets etc.
I sand with a excentric sander of 125 mm.
View attachment 279396
View attachment 279397
The edges are rounded the top surface I leave as casted which gives a perfect water like surface.
View attachment 279398
View attachment 279399
Now on to the finer grits from 220 up to 800.
Between every sanding step I clean with water.
View attachment 279400
Next the sanding with water and grit 1000 up to 4000. After sanding this is the result.
View attachment 279401
It is still not clear and glass like so the next step is polishing followed by wax.
View attachment 279402
Now the finish is finished and we have a floating hull. For the first time I can dive bolow my own ship.
View attachment 279403
See the finished result, I now need to resand the keel and put on some shellack again.
View attachment 279404View attachment 279405View attachment 279406View attachment 279407View attachment 279408View attachment 279409View attachment 279410View attachment 279411View attachment 279412View attachment 279413
Sorry for spamming you with all those pictures
Wishing you and your loved ones all a prosperous and healthy 2022.


