HMS EURYALUS - 36 GUN 1:48 SCALE

Joined
Dec 30, 2021
Messages
278
Points
278

Well how lucky was I. I was offered a partially built model of the EURYALUS in 1:48 scale and the HobbyMill Cherry framing stock package that came with it as the owner is no longer in a position to complete the model.

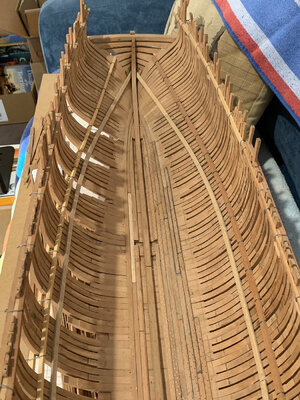
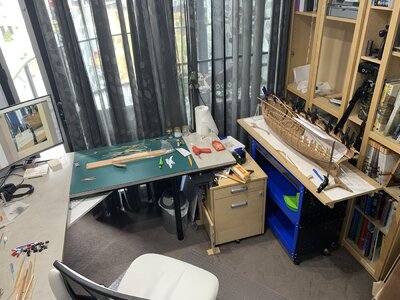
I didn't fully appreciate the size of the model but when I put in in the modelling room. Well you can see what I mean.

The work completed to date is a full set of frames mounted on the keel, keelson and stems and sterns knees installed and a start made on the internal planking (ceiling). The lowest deck clamps have also been installed.

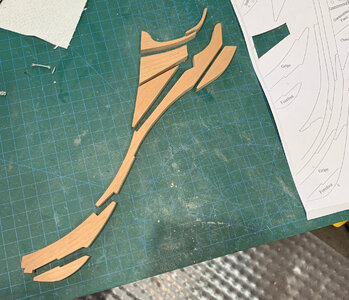
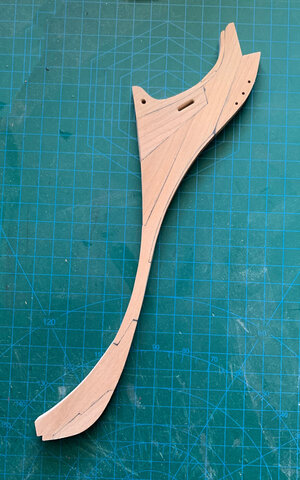
I could not wait to make a start so while still planking BOUNTY and awaiting planking stock for GREYHOUND, I made the bow pieces and assembled it for a trial fit to the stem.

Well things didn't quite go to plan and although my bow piece is correct to the drawing it did not fit the stem. As can be seen in Image 2 there is a sizeable gap but on measuring the frame to stem (and rabbit)I realised the shape of the stem is not quite right so I will shim it then shape to fit the bow pieces.

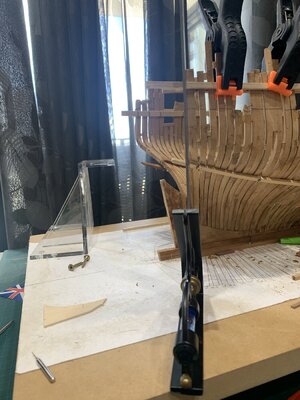
At this time I then noticed that not all the frames sit vertically in the hull. I also noticed that the gunport seemed to be different shapes and not running nicely along the sheer line. While I was going to adjust the gun ports first I realised that I would first need to remedy the verticality of the frames so that is what I am in the process of doing now. To assist, I have milled up some 4x4mm Tasmanian Oak to use as internal and external battens running the full length of the ship. These replaced the short lengths that were there when she arrived.

I have just about finished realigning the middle half of the Starboard side so I will work forward and back to the bow and stern respectively. All the frames are checked off against the framing plan that sits under the ship on the building board.
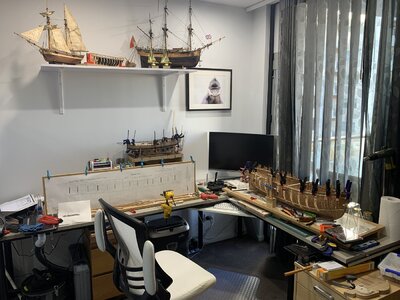
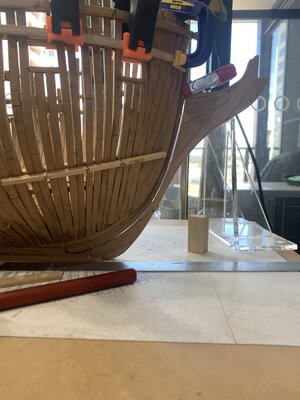
IMG_0484.JPG

IMG_0483 3.JPG

IMG_0474.jpg

IMG_0475.jpg

IMG_0476.jpg
 
I wish you also luck and especially a lot of fun with the model.
What we can see until now -> a very good prepared POF structure - well made and already with a lot of details
 
OK, so after engaging with a couple of the more expert members on another forum, I have chosen to remove the sternsom knee, transoms, fill frames, stern post and Keelson 6. This was simplified in that the original builder had used PVA and I sprayed the joints with Isopropyl Alcohol..
I can now get the STBD fashion piece into a vertical position although it does not quite line up with the Frame plan on the building board - particularly at the keel.
Having marked the sheer line when I though all was vertical, you an see how much difference there is when the aft frames have been straightened by looking at the discontinuity in the pencil line around the two rear gun ports.
It appears that the model has rested untouched for several years and with the recent very hot dry summers and cold wet winters there has been much movement I the timbers. The only way to remedy is to partially dismantle and in some case remake parts (as not all parts came out unscathed).

IMG_0490.JPG
 
OK, further update.
Examining the rear end of EURYALUS with transom removed gave me a good perspective of the potential issues I might have completing this model.

It is apparent that there has been a good amount of timber movement since the original owner ceased working on the model. It is clear that not only are the frames not vertical in elevation around the bow and stern of the vessel, the frames are not symmetrical around the longitudinal axis. The latter has either happened before, during or after the original owners first fairing to commence internal planking.

So, the Plan: I will dismantle the complete model frame by frame using Isopropyl Alcohol then clean up all the. parts and check them off against the drawings. Those that are correct size and shape (or oversize) will be re-used. Those not the right shape or undersized will be replaced.

Now some might say why not just start over. Well this model was gifted to me by the original builder on the basis that I would complete his model. So I plan to use as many of his parts as possible. This will be like a "Tally Ho" rebuild.

To date I have removed the SternPost, Transoms, Sternsom Knee, Keelson 6, Port Fashion pieces F and A, Port F31A and Port F31F. Of all these pieces removed, only the Fashion Piece F is reusable and I have already cleaned it up and marked it up for morticing and added the reference line.

Will keep you all posted while I continue with BOUNTY, GREYHOUND and NORFOLK.
 
Well EURYALUS is mostly dismantled. Unfortunately There are only a few frame sections that can be reused as the majority of floors and futtocks were not constructed per the drawings. The Stem too was undersize and I suspect that copies of drawings made as templates may have not been full sized. Oh well.

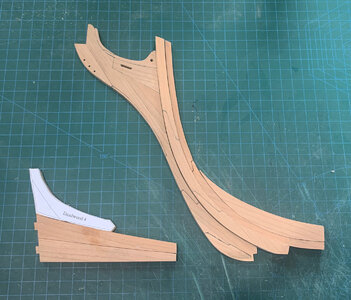
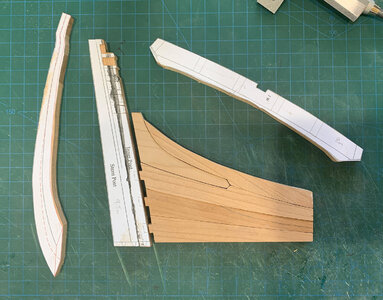
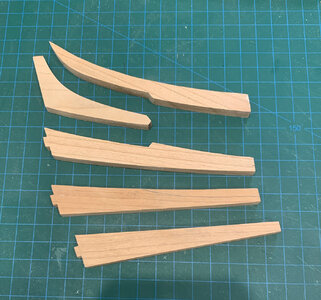
I have made a start on the new stem and stern deadwoods. I realise now that my Dremel attachments are not up to the task for such which stock so I have purchased a portable oscillating spindle sander to assist in the shaping of internal curves. Happy with what I managed to achieve today. Once the parts are glued up the apron halves with the deadwood I can then finish the tapering/shaping of the stem pieces and cut in the rabbet. I still have to taper the bow pieces and fit the apron laminations for the bearding line.

IMG_0499.jpg
 
Managed to re-saw one of the Cherry planks that a local modelshipbuilder/furniture maker graciously milled up for me so I could get going on the new keel.
Keel 1 and Keel 2 ready to go; 4 more sections to go. I just love working with wood. I am using a junior hacksaw, a 4mm chisel, a 10in flat file and a piece of 19 x 65mm radiate pine with some 120grit glued to one face.
I'm using Veritas mini set to see these mini chisels sharp.

IMG_0500 3.38.45 pm.jpg

IMG_0501.jpg
 
Hello Peter, I think it is fantastic how you are approaching the restoration of the Euraylus. I hope that you and Frank Horsching have been able to exchange ideas and that you can order the wood from him, according to Frank you have now been able to establish contact. I will definitely stay tuned, I also have the monograph and one day I will also build it.
 
Some more progress on EURYALUS.

Stern deadwoods cut and shaped. They still need shaping to keel and bearding line to rabbet.

I have also made a start of the stern post/inner post and cut a bollard piece and the top transom to test my bevelling skills.

I also dismantled and then reassembled the building board to set the two support ends perpendicular and on the centreline of the plan. I am almost ready to start placing components not he building board.

IMG_0507.jpg

IMG_0508.jpg
 
Last edited:
Stern post shaped and fitted with partially shaped transom pieces

Sternsom knee also cut and shaped. Final fitting to be undertaken once the transom have been internally shaped.

All the keels have been made. Time to turn to the false keel components
IMG_0512.JPG
IMG_0513.JPG
 
Couldn't wait. Had to do a preliminary fitting tonight otherwise I wouldn't sleep.

First dry fit. Someminor shaping to do to fit the knee then test deadwood 4 and 5 elements to make sure everything will go together before I start gluing up.

Waiting for some info back from Allan Y regarding the extent of copper between the false keel and the keel. Does it extend forward and under the gripe?
IMG_0514.JPG
 
OK so its glue up day.

Have started assembling the deadwood components and the transoms to the stern post (the sternsom knee is simply dry fitted under the clamps and ensuring the complete alignment of the transoms so there will be no nasty surprises later).

I have also notched out the mortices for the deadwood tenon joints. This is where 1 and 2mm wide chisels really come to the fore.

Finally got around to getting the replacement 1200 x 600mm replacement plans and elevation drawings to the printers so I can get on with fixing everything down on the building board. in the meantime I have been using photoshop to create font and back templates for the ribs on label paper.
IMG_0516.JPG
 
Almost ready to lay the keel and install stern post and stem. False keel has been cut, scarfed, glue and placed. Just waiting on some copper foil to lay between the false keel and keel.

Seen post/transoms.deadwood all glued up and dry fitted to keel. The first recycled part from Russells build is dry fitted too: port aft fashion piece. I had to cut the mortices as Russel only but fitted these joints. The fit was pretty good so everything is going by the drawings.

I chose what I thought was the simpler option of sanding the aft deadwoods and forward aprons and fitting a 3" thick (scale) piece to set up the beading line. IN hind sight this was far more difficult as establishing the right thickness for the joints was something I should have done after glue up so some cherry sawdust filler was needed to level out the joints.

This is a good reminder to make sure I do not cut the frame pieces to the line. Get it all glued up the do some pre-fairing and leave the main fairing until all the frames are securely in place.
IMG_0517.JPG
 
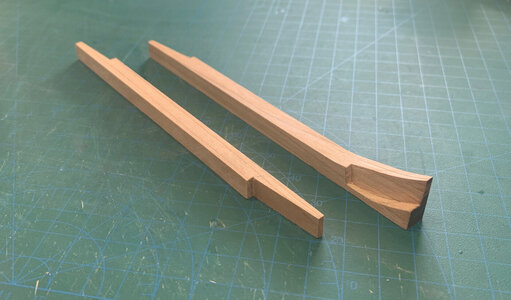
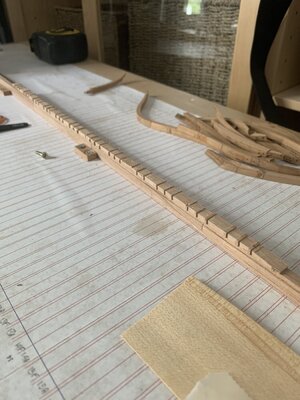
I have to admit that the rising woods are not the easiest pieces to make. Not sure which cut of wood would work best as I seem to be losing corners on the narrow webs.

Perhaps it's the fact that the cherry is dry and brittle? or just my lack os skill to stop knocking off the bits when filing.

IMG_0520.JPG
 
I have to admit that the rising woods are not the easiest pieces to make. Not sure which cut of wood would work best as I seem to be losing corners on the narrow webs.

Perhaps it's the fact that the cherry is dry and brittle? or just my lack os skill to stop knocking off the bits when filing.

View attachment 352372
How did you make it? Cutting notches and add afterwards the plates?
If yes in which direction is the grain of the plates oriented?
 
The grain runs lengthwise 1/4 sawn.
There are 5 rising woods scarfed together each were made from one piece of wood which was marked up, razor sawed across the grain then the notches were chiselled out using a 4mm wide chisel then finally filed with miniature 11 and 8mm flat diamond files.
I still have rising wood 5 to make and the scarps joint to finish on the end of #4 (closest to camera). #1 is made and now fitted at the far end (not shown. on camera).
 
A little more headway on EURYALUS this weekend. While waiting for the rising wood assembly to glue to the keel, I decided to go off course a little and steered toward making the rudder.
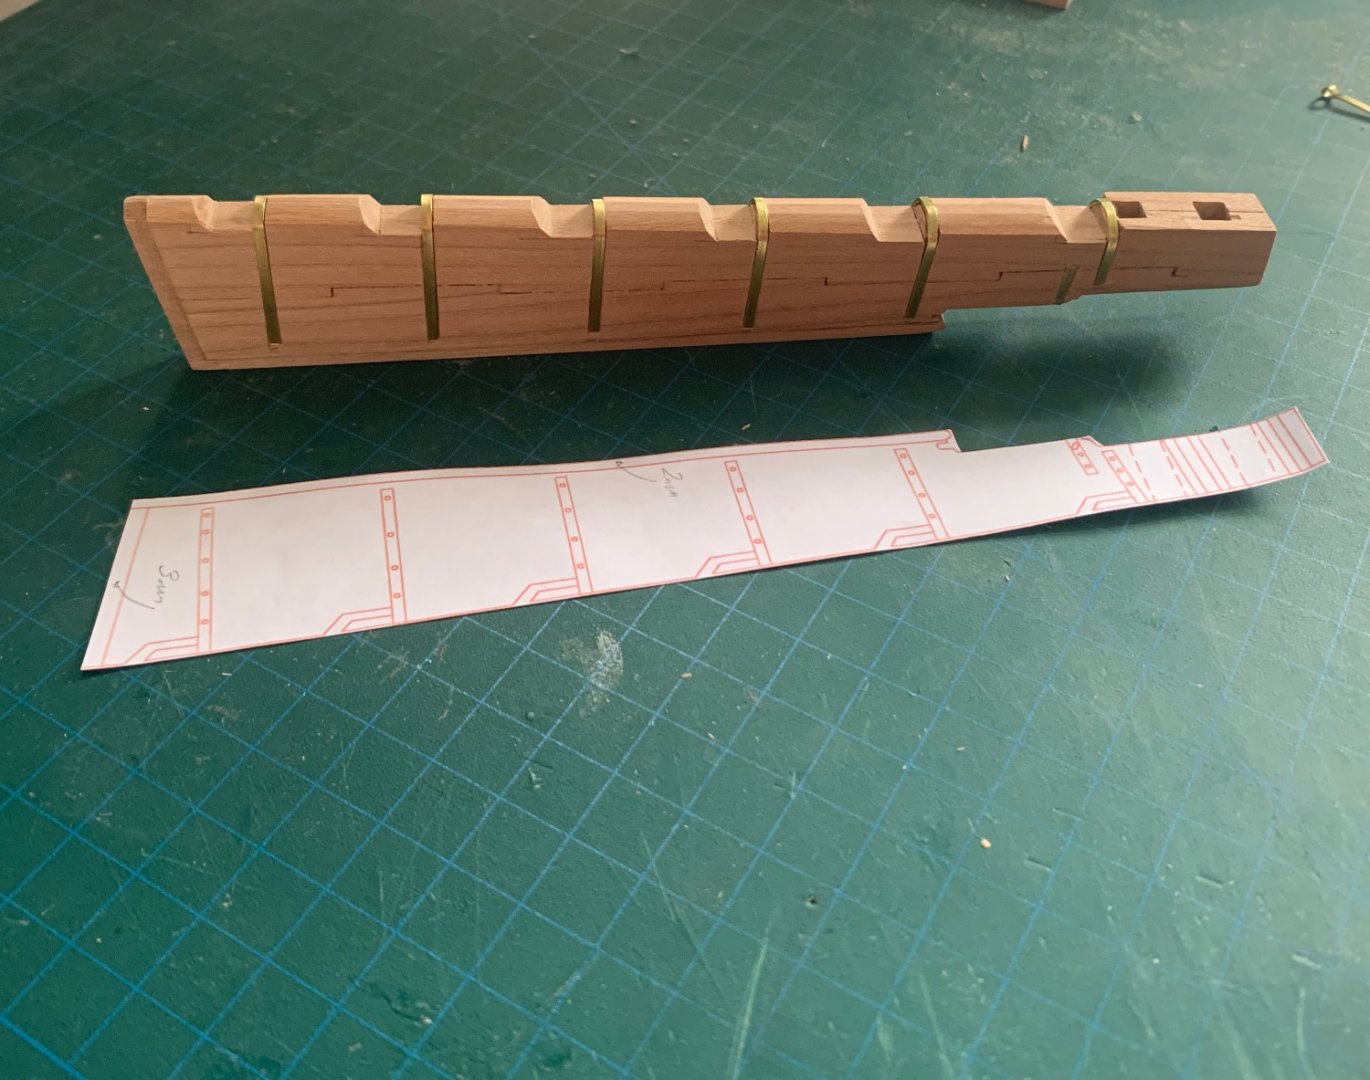
Nothing unusually difficult in this and a nice mixed wood/brass component. Tapering the rudder stock was done with a nice wooden 1/2" finger plane. I also chose to bevel 60º rather than round the edge adjoining the stern post.
I have the brass straps all made and dry fitted; just need to silver solder in the pintels, then drill for nails, clean and blacken the brainwork before final assembly. I still have the four head straps to make up
IMG_0522.jpg
 
Back
Top