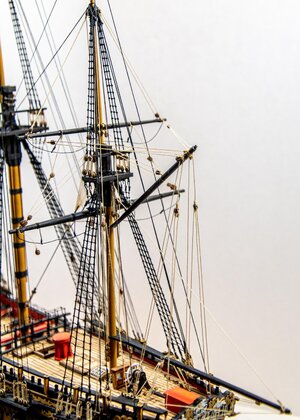
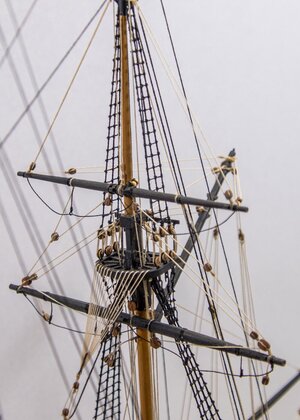
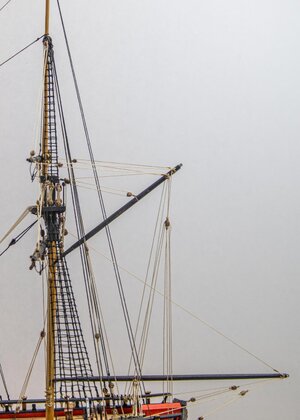
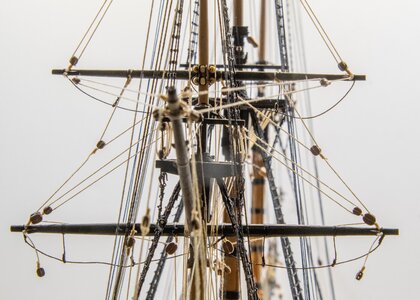
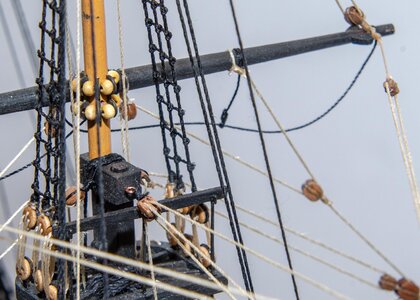
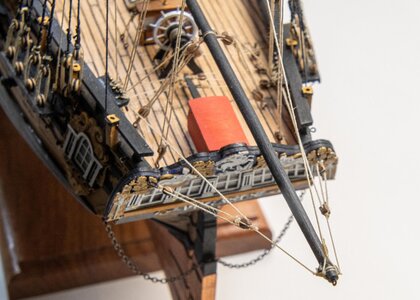
She's looking very majestic!
You are using an out of date browser. It may not display this or other websites correctly.
You should upgrade or use an alternative browser.
You should upgrade or use an alternative browser.
Everyone knows the rule, few of us follow it.The old "measure twice cut once" rule. Looking closer at what I'm doing from now on.

One would think we would learn from past experience. NOPE!Everyone knows the rule, few of us follow it.

No, we get all cocky and sure of ourselves until...BAM...Murphy’s Law gets us! Too many rules and laws. 

An article by Admiral James Gracey, U.S. Coast Guard retired, in my Naval History Magazine, was an account of his tour on the Danish training ship Danmark as a cadet in the 1940’s. I’m now working on footropes so thought you might like an account of what it was like going aloft and how I modified my Pegasus to coincide with his account.
“When you first want to board the Danmark you had to climb up to the top of the mast and down the other side. The ship had nice solid cable stays. Stretched between them were really flimsy looking pieces of rope called ratlines. They were there for your weight when you went aloft. The warning was “don't hang on to the ratlines, hang on to the stays” because the ratlines break.”
“We were using heavy canvas sails and the only way to get them up was to lean over the yardarm, and then In Sync with the others out there you had to put it under your belly. Then, altogether, you would do it again, and again, and again. When you leaned over your feet were on what was called a footrope. It would go right out straight behind you. So, you were hanging there on your heels really, and your belly. When you pull the sail up, the foot rope would swing back under you.”
On my Pegasus, part #296 are etched footrope stirrups. If you follow the plans, this makes the stirrups hang directly under the yard which, from the article, would not be appropriate. So, as I do my stirrups, I’ll hang them down from the rear of the yard which makes more sense.
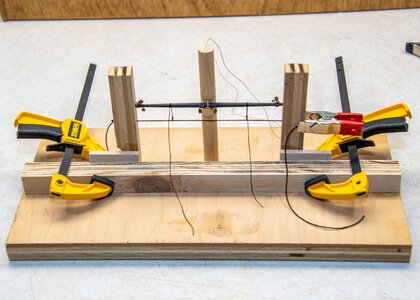
I also made an adjustable jig to hold my yards while I add the blocks, footropes, etc. Using a technique from Bob’s compendium, I added a pin between the yard and mast to hold things in place while doing the rigging. Glued into the yard but not the mast to allow for some movement while adjusting the running rigging. So far, a really big help.

Thanks for the stirrup tipAn article by Admiral James Gracey, U.S. Coast Guard retired, in my Naval History Magazine, was an account of his tour on the Danish training ship Danmark as a cadet in the 1940’s. I’m now working on footropes so thought you might like an account of what it was like going aloft and how I modified my Pegasus to coincide with his account.
“When you first want to board the Danmark you had to climb up to the top of the mast and down the other side. The ship had nice solid cable stays. Stretched between them were really flimsy looking pieces of rope called ratlines. They were there for your weight when you went aloft. The warning was “don't hang on to the ratlines, hang on to the stays” because the ratlines break.”
“We were using heavy canvas sails and the only way to get them up was to lean over the yardarm, and then In Sync with the others out there you had to put it under your belly. Then, altogether, you would do it again, and again, and again. When you leaned over your feet were on what was called a footrope. It would go right out straight behind you. So, you were hanging there on your heels really, and your belly. When you pull the sail up, the foot rope would swing back under you.”
On my Pegasus, part #296 are etched footrope stirrups. If you follow the plans, this makes the stirrups hang directly under the yard which, from the article, would not be appropriate. So, as I do my stirrups, I’ll hang them down from the rear of the yard which makes more sense.
I also made an adjustable jig to hold my yards while I add the blocks, footropes, etc. Using a technique from Bob’s compendium, I added a pin between the yard and mast to hold things in place while doing the rigging. Glued into the yard but not the mast to allow for some movement while adjusting the running rigging. So far, a really big help.
View attachment 207183
I really like the yard jig. You have convinced me to use pin trick to help hold the yard in place during installation.
Thanks again Charlie.
Thanks again Charlie.
That pin saved a lot of frustration. Had big problems with my Rattlesnake trying to hold things together while doing the rigging. Have to remember to drill the holes in the masts before you install them or you won't be able to do it after the standing rigging is in place.I really like the yard jig. You have convinced me to use pin trick to help hold the yard in place during installation.
Thanks again Charlie.
Oh boy, this could be a problem. I've installed the crows feet on all mast but will attempt anyway. Maybe with a hand held drill. I'll let you know how it comes out.
I think in a worst case I could spot glue then use a saddle tie to hold it until its rigged up then just break the spot glue bond. Fortunately I can still get to the upper mast sections.
I think in a worst case I could spot glue then use a saddle tie to hold it until its rigged up then just break the spot glue bond. Fortunately I can still get to the upper mast sections.
Very good idea with this jig for installation the blocks at the yard arms - very good idea
Brilliant idea. Thanks for sharing. Thumbs up.An article by Admiral James Gracey, U.S. Coast Guard retired, in my Naval History Magazine, was an account of his tour on the Danish training ship Danmark as a cadet in the 1940’s. I’m now working on footropes so thought you might like an account of what it was like going aloft and how I modified my Pegasus to coincide with his account.
“When you first want to board the Danmark you had to climb up to the top of the mast and down the other side. The ship had nice solid cable stays. Stretched between them were really flimsy looking pieces of rope called ratlines. They were there for your weight when you went aloft. The warning was “don't hang on to the ratlines, hang on to the stays” because the ratlines break.”
“We were using heavy canvas sails and the only way to get them up was to lean over the yardarm, and then In Sync with the others out there you had to put it under your belly. Then, altogether, you would do it again, and again, and again. When you leaned over your feet were on what was called a footrope. It would go right out straight behind you. So, you were hanging there on your heels really, and your belly. When you pull the sail up, the foot rope would swing back under you.”
On my Pegasus, part #296 are etched footrope stirrups. If you follow the plans, this makes the stirrups hang directly under the yard which, from the article, would not be appropriate. So, as I do my stirrups, I’ll hang them down from the rear of the yard which makes more sense.
I also made an adjustable jig to hold my yards while I add the blocks, footropes, etc. Using a technique from Bob’s compendium, I added a pin between the yard and mast to hold things in place while doing the rigging. Glued into the yard but not the mast to allow for some movement while adjusting the running rigging. So far, a really big help.
View attachment 207183
Ran into another nasty problem. After I had built the masts and attacked the blocks everything look good. When I started doing the rigging it turned out certain blocks needed a loop on one end which was not in the mast building diagrams. Lucky for me I had a workaround because I only use third party blocks which have two holes per shelve instead of the supplied blocks which have one. I was able to use the other hole instead of the loop to attach the line. I will check a little closer as I move forward.
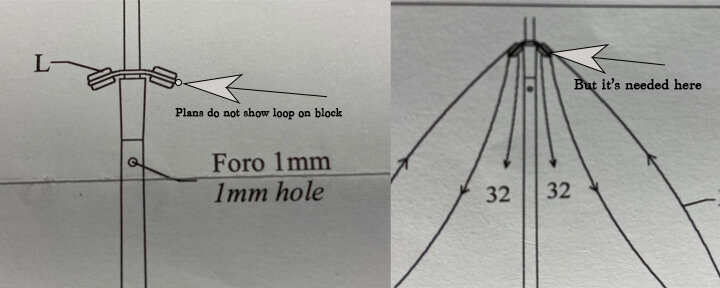

Yet another great heads up Charlie! I'm just beginning the standing rigging so I shall study ahead and make changes now on my upper blocks for the running rigging.
Hey Dan - Maybe I should slow down and let you get ahead of me then I could learn from your mistakes.Yet another great heads up Charlie! I'm just beginning the standing rigging so I shall study ahead and make changes now on my upper blocks for the running rigging.
Ha! I don't about that Charlie. You know what they say "always walk second through the woods". I've had to redo several things because of getting ahead of myself or just not paying attention.Hey Dan - Maybe I should slow down and let you get ahead of me then I could learn from your mistakes.Ran out of 3.5 mm blocks. Shipment should be in Monday or Tuesday. Will work on main mast yards until then. Will post photos of mizzen rigging later today.
Great! Doing it that way was a great help to me trying to align the yards.
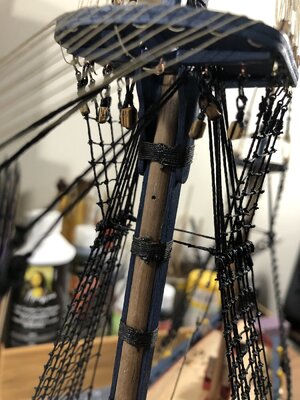
I like to work aft forward and top down. At this point I'm on the main topsail yard. I mounted a pair of blocks to low on the aft main shroud so one pair of lines is rubbing against another. Will have to remove that set of blocks and move them higher up so everything is in the clear. Hate having to rip stuff out but this isn't too bad a job. Not real happy with the supplied tan thread. It's really fuzzy even after running it through bees wax. Should have used my Hobby lobby nylon thread but to late in the game to change. (1402 Tan Extra Strong Bonded Nylon Upholstery Thread). I still use it for seizing because it slides into position nice and easy. I use the black for most of my standing rigging. Also found some .1mm black thread on Esty MYSLOWTIME that is perfect for foot-ropes on shrouds. More to scale and you get like 2000 yards for 7 bucks. I'll never run out. Things are getting a little confusing now and I spend more time studying the plans than working on the rigging and still make a mistake now on then.
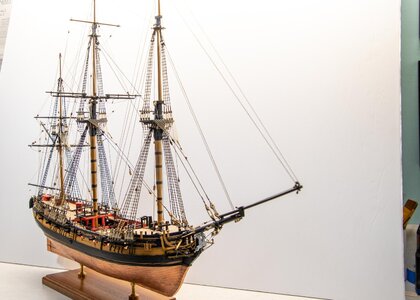
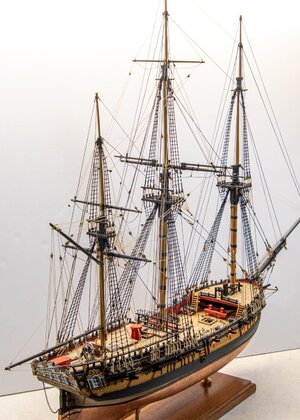
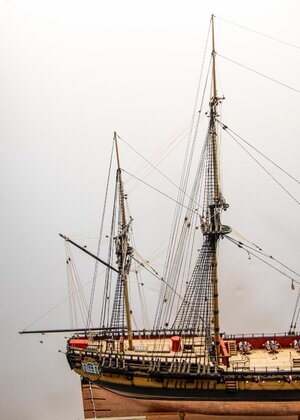
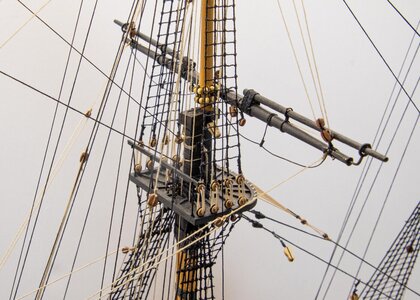
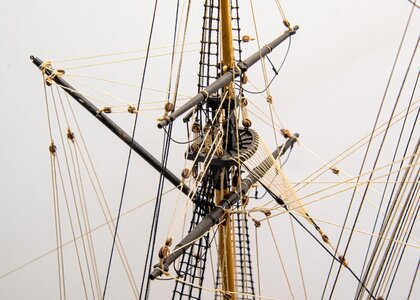


Wow, that looks awesome, very nice indeed.
Jan
Jan


