This is excellent, Lawrence! We have discussed 'making gratings' using the table-saw techniques but have not put our hands on actually show. if you don't mind, can you tell us a bit more abut your jig? How it used? I think a lot of members wanted to know. Many thanks in advance.
You are using an out of date browser. It may not display this or other websites correctly.
You should upgrade or use an alternative browser.
You should upgrade or use an alternative browser.
Oliver Cromwell, POF ,Scale 1:48 by Lawrence [COMPLETED BUILD]
The result is looking very good - did you sand the top a little bit down? Most of the gratings had a slight curve, slightly smaller radius than the curve of the deck....Hello Ship Mates
View attachment 104793View attachment 104794View attachment 104795View attachment 104796View attachment 104797View attachment 104798Well we did have some Laser Grating on ordered but it has not come as yet, and we did want to start closing up the Lower Deck. So to make a story short the little fellows and I set up the Byrne’s table saw and made a simple jig to cut the Gratings on. We then assembled the Grating for the Mane Hatch and built a Hatch Coaming for it. We now have to do the same for the Forward Hatch and also for the little Hatch in front of the Aft Pantry, ENJOY.
Regards Lawrence
Canoe21
Lawrence
Hi JimThis is excellent, Lawrence! We have discussed 'making gratings' using the table-saw techniques but have not put our hands on actually show. if you don't mind, can you tell us a bit more abut your jig? How it used? I think a lot of members wanted to know. Many thanks in advance.
My Grating Jig consist of a little piece of plywood 5/32" thick, this is what I had on hand. The width of my Bryon Table and long enough to set up against the fence at it's furthest distance from the blade with just a bit of slack for adjustment. I then cut a grove across the plywood around .050" deep and around .45" wide to hold the rail that I glued in with white glue. This can be seen on my 5431 picture above. I then put a spacer of around .050"between my plywood and the saw fence, using 2 little clamps to secure it to the table of the saw. I then with the blade lowered install a .047 Ker blade that cuts .051" for me and slowly rise the blade up trough through the plywood. I used cherry wood that is about .159" thick x 1.80" wide and 3.5" long. I lay my wood up against the wood fence that I have installed in my plywood and run it trough the saw cutting with the grain, put the newly cut grove over the wooden fence and repeat till you have cut the full with of your wood.
I then with my thin strip cutting jig attached to my saw and set for approxamly .50"and with the wood lightly held against the saw fence and with a very sharp thin blade and with the smooth side of my weed up I run it trough the saw, bring up my fence after every cut. Clean up your grating pices and assemble, paint the assembled grating with a thinned down white glue and when fully dry fit the new Grating. This all is very easy to do, just saw slowly at a even pace and you can achieve some very nice results, ENJOY.
Regards Lawrence
PS - I did saw a grove in my plywood for my saw miter gauge bar to hold the wood straight and to help push it trough the saw blade.
Canoe21
Lawrence
Hello Uwe, yes I did add a bit of curvature to the top of the completed grating, ENJOY.
Regards Lawrence
Regards Lawrence
Canoe21
Lawrence
Hello Ship Mates
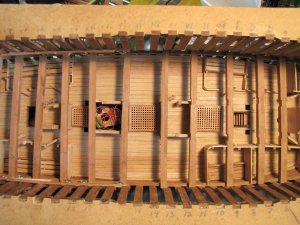
Well the little fellows and I have finally completed the 3 Gratings for the Lower Deck and we did install them last night. My Admiral has not as yet sewed up the 8 required mattress pads for this deck as she is all tied up with crouching a baby blanket for our soon to arrive Great Grand Child, but these can be installed at a later date and before the Mane deck is planked. We found the Gratings a rather fun thing to build but a bit finicky, ENJOY.
Regards Lawrence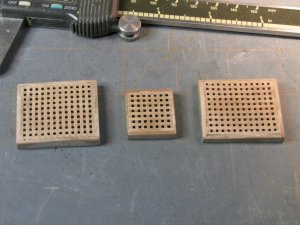


Canoe21
Lawrence
Thank you KNUT, The gratings were a bit of a challenge, almost a little build in them self, ENJOY.Lawrence, great way to make gratings, this should be tried, thank you.
Regards Lawrence
Canoe21
Lawrence
Hello Ship Mates
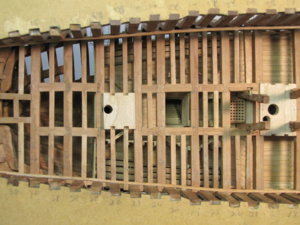
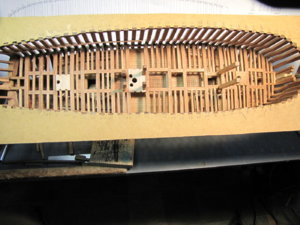
The little fellows and I have spent the last week and a half working on and installing the Beams, Ledges and the Carlings that support the Mane Deck. These are all installed except for the Ledges around the Riding Pins and those around the ships well as these give us access to the Led Lighting that will be installed on the Lower Deck, this will be our next task, Enjoy.
Regards Lawrence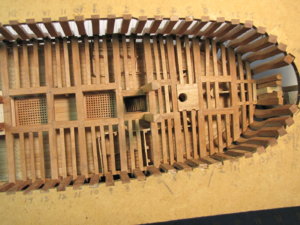


Canoe21
Lawrence
Hello Janos, Yes the table saw will make gratings, just a bit finicky. I believe that I will now add the Led Lighting to the Lower Deck and also the two sets of stairs, ENJOY.Great work, Lawrence!
I also have a very similar method for making gratings on my (Proxxon) circular saw. It works for me OK!
Janos
Regards Lawrence
Canoe21
Lawrence
Hello Knut, I am pleased that you find my build log helpful and I know for sure you will enjoy your Rattlesnake build, ENJOY.Good progress Lawrence, I'm following closely since I'm also going to build the Rattlesnake in the same way, (Harold M. Hahn).
Regards Lawrence
Canoe21
Lawrence
 Hello Ship Mates
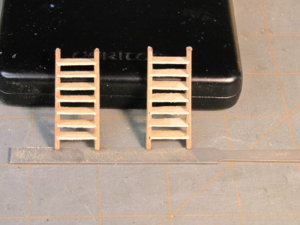
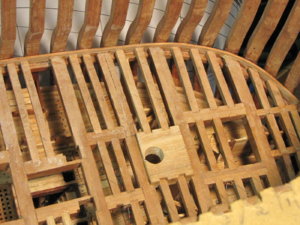
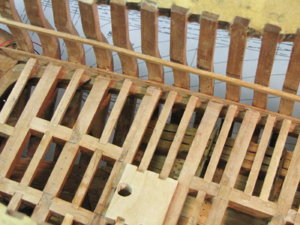
It has been a rather busy week for the little fellows and I in the Old Ship Yare. We installed our Led Lamps on the lower deck and cleaned up that mess of wires in the ships Well area. We also installed a backer outer plank on the Main Deck as with the up and coming Cut Outs the staggered Deck Beams surely would have been an eye sour. We also at this time gave the Lower deck area a couple of coats of Tung Oil, it sure dose spruce up the wood. To top up our week we built a couple of sets of Stairs to be give access to the Lower Deck area, ENJOY.
Regards Lawrence
Canoe21
Lawrence
Hello Ship Mates
A little update today, the little fellows and I have started laying the Main Deck. We did have Maple on order for this but it has not come. So in looking over our wood supply we came across a piece of Pear that we ran trough our 10” table saw, then trough our surface planer and then to the Byrnes Table saw and cut a bunch of 1/16” x 1/8”, we still have to cut another batch that is for sure.
We also built and dry fitted the Bitts for the Bow Sprite. We also cut down and fitted the two Riding Bits along with the Bitt cross piece. We have installed the two sets of stairs that lead to the Lower Deck, these we stacked over the two lower sets. We also dry fitted the Main Topsail Bitts along with the two Main Jeer Bitts. And to finish our day we did test the Led Lights, the full effects will come after the cut outs are installed, ENJOY.
Regards Lawrence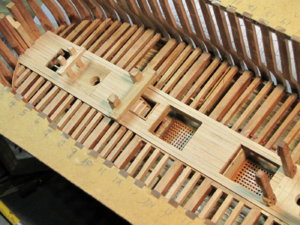
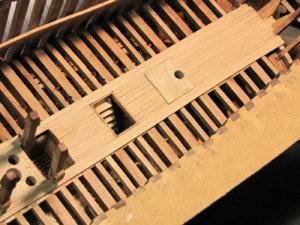
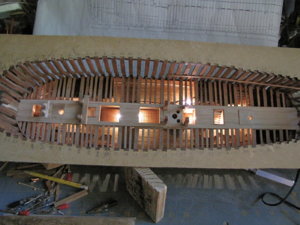
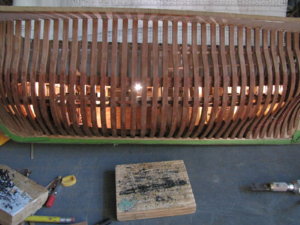


WOW THE LIGHTS ARE REALLY BEAUTIFUL, GREAT JOB. Don
Canoe21
Lawrence
Hello Donfarr, Thank you very much for your very kind comments. I think the lights are nice and they also make a nice night lamp, ENJOY.WOW THE LIGHTS ARE REALLY BEAUTIFUL, GREAT JOB. Don
Regards Lawrence
Canoe21
Lawrence
Hello Ship Mates
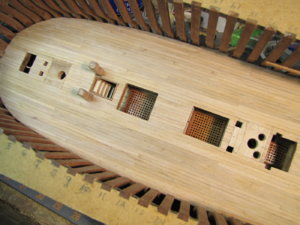
Work continues on our little ship, but at a rather slow paste. This week the little fellows and I have completed the Main Deck in pear wood. We feel that it should make it just a bit more interesting to look at.
Well fall is fast approaching and My Admiral our dog and I will be again for a couple of weeks of R & R vacation at the Byers Lodge on the French River at the end of Aug.
We will try to get in another update in before that but just in case we do not you all will know the reason why,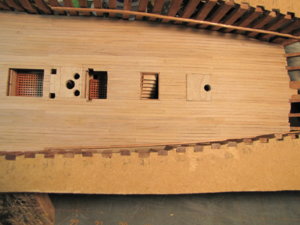
 ENJOY.
Regards Lawrence
Work continues on our little ship, but at a rather slow paste. This week the little fellows and I have completed the Main Deck in pear wood. We feel that it should make it just a bit more interesting to look at.
Well fall is fast approaching and My Admiral our dog and I will be again for a couple of weeks of R & R vacation at the Byers Lodge on the French River at the end of Aug.
We will try to get in another update in before that but just in case we do not you all will know the reason why,

 ENJOY.
Regards Lawrence
Canoe21
Lawrence
Hello Knut, I do thank you very much for your very kind words, ENJOY.Looks good Lawrence.
Regards Lawrence
Canoe21
Lawrence
 Hello Ship Mates
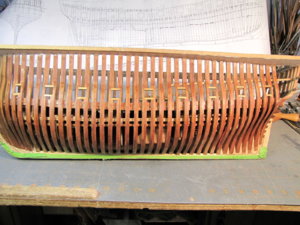
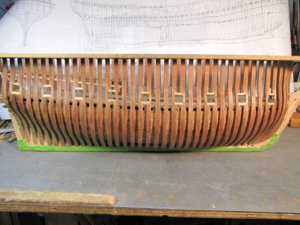
 Just a little update today as the little fellows and I have sawn out all of the Gun Ports on the Main deck and added the upper and lower Gun Port Sills. We kind of figured that this would that task would be a bit complicated but to our surprise all went well and we did clean up the outsides but left the inside until after we install those Rowing Ports, ENJOY.
Regards Lawrence


